Archive for the 'DIY Tutorial' Category


Quick Craft: Pumpkin Pie Sculpture

Inspired by Wayne Thiebaud’s scrumptious pie paintings, I whipped up a little DIY activity for young art lovers to make their own pumpkin pie art (no baking required!).

Materials needed:

  • One paper plate
  • Orange tissue paper
  • Cotton balls
  • Glue stick (Elmer’s glue also works, but is a bit messier!)
  • Scissors

WP_20151125_11_29_27_Pro

Step 1:

Cut your plate into 6 pie slices.

WP_20151125_11_31_46_Pro

Step 2:

Cut tissue paper into small squares.

WP_20151125_11_34_28_Pro

Step 3:

Glue tissue paper pieces down to paper plate slice. Overlap your tissue paper pieces until the flat part of the plate is covered, leaving the edge of the “crust” white.

WP_20151125_11_35_33_Pro

Step 4:

Glue a cotton ball to the center of your pie slice for a dollop of whipped cream.

WP_20151125_11_39_02_Pro

Tah-Dah! Experiment with using different colors of tissue paper to create other flavors of pie.

You can see some of Wayne Thiebaud’s delicious artwork in the exhibition International Pop, on view at the DMA until January 17, 2016.

Happy Thanksgiving!

Emily Wiskera
McDermott Graduate Intern for Family and Access Teaching


Art to Go Family Totes at Home: DIY Story Dice

Whether you’re seeking sunburn-free, sweat-free fun this summer or new experiences to share with your family, the DMA has what you’re looking for! As usual, the Art Spot in the Center for Creative Connections is open every day for art-making and exploration, and our Family Guides are always available at the front entrance for exploring the galleries. Weekdays and Saturdays through June and July will also offer different (air-conditioned!) activities as part of the DMA’s Summer Family Fun. These activities include the Pop-Up Art Spot, story time and family tours, and our wonderful Art to Go Family Totes.

A family using the Color Art to Go Family Tote and story dice in Between Action and the Unknown: Shiraga/Motonaga.

A family using the Color Art to Go Family Tote and story dice in Between Action and the Unknown: Shiraga/Motonaga.

An important thing to note is that the Art to Go Family Totes are only available this summer on Tuesdays between 11:00 a.m. and 1:00 p.m.! In June, we’ll have them out for use in Between Action and the Unknown: The Art of Kazuo Shiraga and Sadamasa Motonaga, and in July you can find them up on Level 4 in Formed/Unformed: Design from 1960 to the Present.

If you can’t wait to make it to the Museum to try out our Totes, or have already enjoyed them and wished you could have the Art to Go experience at home, here’s a quick and easy DIY to help you recreate one of the activities from our Color Tote.

DIY Story Dice

Art to Go Family Tote - Color, Writing Activity

Color Art to Go Family Tote – Writing Activity: Once Upon a Time

The Art to Go Family Totes include activities to MAKE, PLAY, TALK, and WRITE. This “Once Upon a Time” writing activity is one of our favorites and includes two ‘story dice’ to inspire a story written with a piece of artwork as its setting. Our dice are pretty simple–images of possible main characters and colors are pasted on the sides of two cube-shaped cardboard boxes (small ones that fold down for easy storing).

Color Art to Go Family Tote - Writing Activity Story Dice

Color Art to Go Family Tote – Writing Activity Story Dice

To make your own story dice at home, you could use boxes like we have here (big or small – play with proportions!). Other options include small wooden craft blocks or making your own paper cubes. If you’re feeling ambitious, you could even put together this twelve-sided paper dodecahedron to use instead of the traditional six-sided dice shape!

Once you have the base for your die, all that’s left is to decide which theme you’re going to assign to it, pick out images or words to convey different ideas for each side, and attach your images. The possibilities are absolutely endless. To get you started, here are a few ideas for combinations of themes:

  • Attach images of family members on one die and parts of an adventure on others: settings for the adventure, modes of transportation, treasures to hunt, etc.
  • Fill one die with superhero images and another with giant monsters to face off in an epic battle!
  • Make murder mystery themed dice (for older storytellers) with possible murder weapons, locations of the murder, and prime suspects.
  • Have entirely artwork-based dice: cover one with your favorite portraits, one with landscapes, and one with still lifes or ancient artifacts–or anything else you might think of.

With a little imagination and teamwork, any kind of story dice you create can lead to a GREAT story and a serious brain workout! You can even re-purpose your story dice. Maybe on a day when you’re feeling more like an illustrator and less like an author, just give your dice a roll and voilà! Your story ideas work just as well for creating a new piece of artwork. Have a go at it and let us know in the comments how your efforts turn out. And don’t forget to stop by the Museum to check out the rest of our Art to Go Family Tote activities and other Summer Family Fun experiences!

Jennifer Sheppard
McDermott Intern for Family and Access Teaching

Make This: Sound Prints

Have you ever wondered what a painting might sound like if you could listen to it? With conductive ink, a Makey Makey, and some basic software, you can add a new level of interactivity to your artwork through the use of sound! In this guide, I’ll show you how to make a print that will make sounds when you touch it. These sounds are completely reprogrammable and can be changed on the fly, giving you lots of possibilities for what you can create.

A Makey Makey is an interface that connects to your computer which allows you to create your own tactile inputs that will take the place of certain keys on your keyboard.

IMG_2684

The Makey Makey can be connected to different conductive materials to replace your keyboard’s arrow keys, space bar, mouse button, and more

For the purpose of this project, you’ll be using conductive ink to create three interactive areas on your work of art that will be hooked up to the Makey Makey and act in place of the arrow keys on your computer. We’ll then use Soundplant to map different sounds to those keys, which will allow those areas to play a sound when touched.

Supplies:

  • Copy paper for making a stencil
  • Exacto knife
  • Cutting mat
  • Conductive ink
  • Screen printing screen
  • Squeegee
  • Heavy printing paper
  • Copper tape (optional)
  • Makey Makey kit ($45; MakeyMakey.com)
  • Soundplant software
  • Computer

Step 1: Screen print your image with the conductive ink. 

I like the paper stencil method, but use whatever technique you like best. For help on printmaking with stencils, check out my past post on screen printing. Let your print dry fully before proceeding. IMG_2673 IMG_2674 IMG_2676

Step 2: Connect your print to the Makey Makey. 

Again, for the purpose of this post, I’m choosing three areas on my print that will activate the Makey Makey when they are touched. You can connect them directly to the device using alligator clips (included in the kit). Remember to connect the clips to the proper inputs on the Makey Makey–in this case, the left, right, and up arrows.

IMG_2686

Step 3: Upload some sounds. 

I found a bunch of sounds for this project using free online sound libraries and saved them as mp3 flies on my computer. The Soundplant site has some good suggestions for libraries to use. I tried to look for sounds that would complement my print in a weird or unexpected way.

Screen Shot 2015-03-12 at 6.06.10 PM

Step 4: Map your sounds to the keyboard using Soundplant.

Open up Soundplant and assign one sound file to each of the left, right, and up arrow keys by dragging the file onto the software’s virtual keyboard. Soundplant even offers some basic editing tools, allowing you to adjust the length of your sound clip, add various effects, and more!

Screen Shot 2015-03-12 at 6.11.02 PM

Step 5: Connect the Makey Makey to the computer and play!

Plug the Makey Makey into your computer’s USB port. Be sure to also connect an extra alligator clip and wire to the space marked “Earth” at the bottom of the board. Hold the metal part of the alligator clip at the other end of the wire between your fingers and touch the interactive areas of your print with your other hand. Your computer should play the sounds you mapped to the different areas! You should also see the playback of your clip on the computer. If you’re having trouble getting it to work, make sure the volume is up on your computer, that all your connections are correct, and most importantly, that you are connected to the Makey Makey as well.

IMG_2687

The fun part of this project is that the sounds you choose can totally change the way people experience your artwork. A set of funny, quirky sounds will provoke a very different response from the viewer versus ones that are dark and foreboding. And because the Makey Makey will work with most conductive materials, you can create interactive sculptures, installations, and more! Additional project ideas can be found on the Makey Makey website.

JC Bigornia
C3 Program Coordinator

Paper Peonies and Tissue Tulips: Build Your Own Beautiful Bouquet!

With last week’s opening of Bouquets: French Still-Life Painting from Chardin to Matisse, you might say we’re all abuzz with excitement here at the Museum. Although fall is just arriving, all we can think of are these beautiful blooms!

It’s easier than you might think to recreate some of your floral favorites at home. Try modeling your bouquet after one you might have seen or put together the posy of your wildest dreams. I took my inspiration from the DMA’s own Bouquet of Flowers in a Blue Porcelain Vase.

Bouquet of Flowers in a Blue Porcelain Vase (1776), Anne Vallayer-Coster

Anne Vallayer-Coster, Bouquet of Flowers in a Blue Porcelain Vase, 1776, Dallas Museum of Art, Foundation for the Arts Collection, Mrs. John B. O’Hara Fund and gift of Michael L. Rosenberg

There are some great tutorials online for making your own paper flowers. Martha Stewart Weddings can show you how to make some really lovely, delicate flowers here, and the Rust and Sunshine blog (here) has easy to follow instructions to make a variety of blooms with a little bit of inventive folding. With the help of these tutorials, I made carnations, roses, and star lilies. I couldn’t find a tutorial I liked for making irises, so I designed my own! You can print off this template and follow the directions below to make them too.

A quick note before we get started: for some flowers (particularly irises and lilies, whose petals you want to stand up a little bit), you might find that a sturdier paper works better for you. This is the perfect time and place to experiment! I liked the unified look of having all my flowers made out of tissue paper, but it’s your bouquet, so you’re the boss.

What you’ll need to make irises:

  • Tissue paper in a variety of colors – blue, purple, and yellow are pretty common for irises, though they come in a number of other colors as well
  • Pipe cleaners or art wire (for the stems)
  • Scissors
  • Clear tape
  • Optional: paint, glitter, glue, markers, colored tape, vase

If you opted to use something like card stock instead of tissue paper, cut out only one each of Iris A and Iris B and skip ahead to Step 4. If you’re using tissue paper like me, you’ll need to take an extra step or two to give the petals a little structure, so start here.

1. Trace and cut out two each of Iris A and Iris B in your tissue paper of choice. Double-layering the tissue paper will help beef up the flower.

2. Roll six pieces of tape – one for each pair of petals – in on themselves, sticky side out. Lay one tape roll lengthwise along each petal of one set of Iris A and Iris B. Make sure you don’t cover up the very center of Iris B! This will make Step 4 a little easier.

3. Match up the second set of Iris A and Iris B with the first and press down, sandwiching the rolls of tape between the two layers of tissue paper.

4. With the point of a pen or pencil, poke a small hole right through the center of your Iris B cutout or tissue paper and tape sandwich. This is why you didn’t want to block the very middle with tape in Step 2! Be careful not to press too strongly – you don’t want to accidentally rip your flower base in half.

5. Make an L-shaped bend in the end of your wire or pipe cleaner and thread it through the hole you just made in Iris B. Adjust so that the bend end lies flat on Iris B and the remaining wire/pipe cleaner extends downwards in a straight line. Secure with tape.

6. Using three narrow pieces of tape, attach the bases of Iris A’s petals to the spots marked in the template with dashed lines. I suggest doing this so the tape pieces end up on the interior of the flowerand aren’t visible.

7. Finally, embellish with whatever extras strike your fancy – paint, markers, glitter, you name it – and arrange your completed iris with your other flower creations in a vase.

Bouquet of (Paper!) Flowers in a Blue Vase (2014), Jennifer Sheppard

Jennifer Sheppard, Bouquet of Paper Flowers in a Blue Vase, 2014

Voila! You now have a beautiful bouquet that needs no water…in fact, you probably shouldn’t have water anywhere near your nice new paper flowers, unless soggy is the look you’re going for! So skip that annoying watering step and enjoy these low maintenance blooms — and our blooming exhibition!

Jennifer Sheppard
McDermott Intern for Family and Access Teaching

Make This: Printing T-shirts with Inkodye

tshirt2

I love screen printing–there’s something so satisfying about creating a design and wearing it proudly for everyone to see. I also love learning new printing techniques, so when I ran across a product called Inkodye about a year ago, I knew I had to give it a try. Produced by a company called Lumi, Inkodye is a photosensitive dye that allows you to print an image onto fabric using only a photo negative. When exposed to sunlight, the ink develops and binds permanently with the fibers of the fabric. You can even use Inkodye to create shadow prints!

tumblr_mi2tbcppku1s3h59no1_1280 I’m going to take you through the basic process of creating a print using Inkodye and a photo negative. Keep in mind that while the examples on Lumi’s website look perfect and make it seem easy to do, it will probably take several tries to get it to turn out the way you want.

What You’ll Need:

  • T-shirt to print on
  •  Inkodye
  • Transparency film for copiers (at least two sheets)
  • Copier/printer
  • Computer
  • Foam brush or sponge
  • Two large sheets of cardboard
  • Masking tape (optional)
  • Laundry detergent

2

Step 1: Create your design

I wanted to create an example for the teen t-shirt design class and contest that the DMA is offering, so I created a drawing on my iPad that was inspired by a work of art at the Museum:

77804457407173_original (1)

Eccentric flint depicting a crocodile canoe with passengers, Pre-Columbian, 600 – 900 A.D., Dallas Museum of Art, The Eugene and Margaret McDermott Art Fund, Inc., in honor of Mrs. Alex Spence

flint1I then manipulated the image using Microsoft Word, but any basic editing program would do–even better, Photoshop, if you have it:

tshirt2

Leaving my image as above will create a reverse, or negative print on my shirt–the white space around the faces will be black and the faces themselves will be white. If you want to make a positive-image print, you’ll have to create a negative of your design (Photoshop allows you to do this, or you can use Lumi’s handy app to make one):

lumi-negative

Step 2: Print two copies of your image on transparency film

Lumi says that it’s important to use two copies so that they can be stacked on top of each other during the printing process. This will make the dark areas of your image block out more light, increasing the contrast of your print and giving you a better end product.

FullSizeRender

3. Prep your t-shirt for printing

Insert one of your sheets of cardboard into your shirt to prevent the ink from soaking through. The cardboard should be big enough that it stretches the fabric of your t-shirt and gives you a good printing surface. Choose the area of your shirt where your image will be printed. If you want, you can mask the area off with tape to give your design a clean edge.

1

4. Spread the Inkodye onto your shirt

This is one of the trickiest steps. Flip off the lights for this–since Inkodye is photosensitive, you don’t want it to start developing yet. Working in the darkened room (but with enough light to see what you’re doing!),  cover the printing area with a thin, even layer of dye–don’t get it too wet! Use your sponge or brush to blot the fabric. Cover your t-shirt with the second sheet of cardboard and take it and your design outside!

5. Print your shirt

Find a nice sunny spot to lay your t-shirt down. Uncover it and position your transparencies on top of the printing area. Leave everything undisturbed for the sunlight to do its magic. In about 10-15 minutes (depending on how cloudy it is) your print should be developed! When you’re satisfied with how it looks, cover your shirt back up to prevent overexposure and take it back inside.

FullSizeRender (7)

FullSizeRender (8)

This is what my design looks like after 10 minutes in late afternoon sun–as you can see, the edges are starting to fully develop and turn black.

6. Wash

Remove the masking tape from your t-shirt as well as the cardboard insert. Throw the shirt into the wash by itself with a little detergent and run it using a hot cycle. Lumi suggests washing it twice for full color-fastness; washing also removes all excess or undeveloped dye.

7. Wear!

I’d suggest practicing with a scrap piece of fabric before printing on your t-shirt. If your print is a little blotchy, it probably means that the Inkodye wasn’t spread evenly enough. For lots of great project ideas and in-depth tutorials, visit Lumi’s website! And if you have a teen who’s interested in participating in the t-shirt design class or submitting something for the design contest, feel free to email me for more information.

JC Bigornia
C3 Program Coordinator

Stick to It!: Five Ways to Use Contact Paper for Art-making

As August heats up, you might find yourself retreating to cooler climes, and you can only spend so long at the pool before the kids shrivel up! Beat the heat and keep the kids busy with creative art-making using one of my most favorite unconventional art materials—contact paper.

Contact paper is most often used to line shelves in the kitchen, but take it into the art studio, and you can create some art magic. Here are some of my go-to projects using this surprisingly versatile material.

Texture Collage

Use a piece of contact paper (sticky side up) as the collage base, and encourage your child to create using a variety of collage materials—cotton balls, feathers, sandpaper, tissue paper, sequins, felt, and more. This project works really well for toddlers because they don’t have to worry about managing glue in order to get their materials to stick to the paper. Older children might want to use some glue if they build up layers of materials on top of one another. The finished product is a touchable work of art!

Beach scene created with sand paper, tissue paper, cotton balls, and foam shapes

Beach scene created with sand paper, tissue paper, cotton balls, and foam shapes

Stained Glass “Windows”

One of my favorite art projects to do with kids here at the Museum is inspired by the Tiffany stained glass windows. We use clear contact paper and tissue paper or transparency film to create a stained glass window-effect. Cut two squares of contact paper and arrange pieces of colored tissue paper or transparency film on one contact paper square, sticky side up. The tissue paper and transparency film can be layered to create a variety of colors; tissue paper can also be crinkled and squished to add dimension and texture. When your window is complete, carefully stick the second contact paper square on top, sealing the materials in. Hang in a window to allow light to shine through.

Make Your Own Stickers

Contact paper comes in a variety of designs, making it the perfect medium for creating your own stickers. A few months ago in the Arturo’s Art & Me class, children made up their own imaginary creatures. They used permanent marker to draw the different parts of their animals on different kinds of contact paper. These pieces were then cut out, the paper backing removed, and the newly created stickers were stuck to a landscape drawn on wood. Contact paper stickers will stick to paper, wood, and glass.

Sand Paintings

Try your hand at “painting” with sand! Use a piece of contact paper as the base for the painting, sticky side up. Sprinkle colored sand onto the contact paper to make interesting designs and shapes. For more control over the sand, use small funnels. You can also draw directly in the sand using a dull pencil. Shake your painting around, and watch how the design shifts and changes. You can also add a piece of colored paper as a backing to add even more color.

Dry Erase Drawings

Contact paper can turn any printed image into a re-usable drawing board. Print out images of landscapes, faces, or objects on cardstock and then cover the image with clear contact paper. Give your child dry-erase markers and challenge them to add to the picture. They could add figures to a landscape, add accessories to faces, and transform everyday objects into crazy characters. Use a damp paper towel to erase the drawings and use again and again!

Find even more ways to use contact paper here and here!

Leah Hanson
Manager of Early Learning Programs


Surreal Play: Group Exploration with Surrealist Games

1982_28_FASurrealism is typically regarded as an art movement dedicated to personal exploration by tapping into a person’s subconscious. This was certainly an important component, but Surrealism was also focused on group activity, ranging from the creation of Surrealist journals, to collectively written statements, to unfettered discovery through group play and games.

Many of the games the Surrealists played together were derived from the types of parlor games they learned as children or still enjoyed as leisure.  Such activities, while fun, were also meant to spur creativity and subvert the psychological conditioning of society. Sometimes these games resulted in finished works of Surrealist art and writing.  As the movement’s self-proclaimed leader, André Breton, described their game playing in 1954: “Although as a defensive measure we sometimes described such activity as ‘experimental’ we were looking to it primarily for entertainment, and those rewarding discoveries it yielded in relation to knowledge only came later. […] It is clear that to shut oneself off from game-playing […] is to undermine the best of one’s own humanity.”  (Brotchie and Gooding, 1991, 137-138)

Perhaps one of the greatest benefits for educators using Surrealist games in the classroom is how the activities offer a set of tools to get learners conceptualizing critically and playing with images, words, and ideas where the purpose is surprise, delight, and creativity. For the Surrealists, the fact that games had rules or instructions that mandated how they were played, but the end-goal was itself unstructured, illogical, and messy, was representative of their own world-view.

Let’s briefly explore two games the Surrealists used in group settings that might be fun to apply to classrooms and museum teaching. My descriptions of these games has been adapted from Alastair Brotchie and Mel Gooding’s delightful Book of Surrealist Games (Shambhala Redstone Editions, 1995).


The Exquisite Corpse
Perhaps the best known Surrealist drawing game, the Exquisite Corpse was actually born out of a writing activity. Surrealism’s roots are in writing and poetry; its earliest practitioners and founders were all writers.  Games like the Exquisite Corpse (the name is taken from the poetic results of the first game played) were later modified into a visual variant.

Exquisite Corpse by Breton-Knutson-Hugo


Group size: Typically three-to-four players, or any size up to how easily one sheet of paper can be folded.

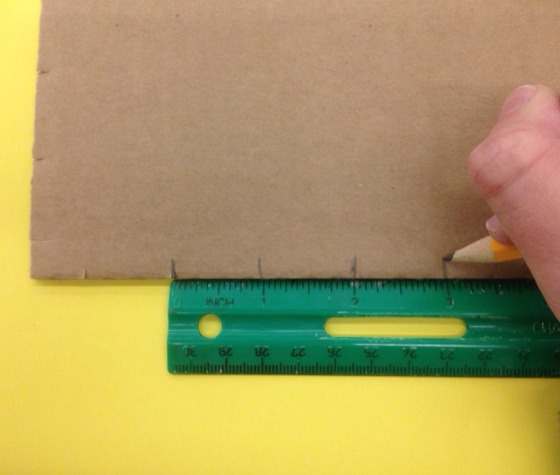
Instructions: A piece of paper is folded so that the number of creased sections matches the number of players, usually horizontally or in quarters for four players.

The first player takes the folded paper with the top fold exposed and draws anything that comes to mind. (Note: In it’s purest incarnation, as a reference to the name of the game, the players are to base their portions of the drawing on the portions of a human body, but this is by no means a hard-and-fast rule!)

She then extends some of her drawn lines across the fold into the next blank section, and refolds the paper so only the second section is exposed, and the next player cannot see what she drew in the first section.

The re-folded sheet is passed to the second player, who bases his drawing on the few exposed lines provided. After completing his section, he also extends a few of the bottom-most lines across the fold, refolds to hide his portion and expose the next, and passes to the next player.

This process continues until all players have a turn to draw a section, when it is unveiled and unplanned, group-designed drawing is revealed. An added variation involves the last player handing the folded drawing to the first player again, who must conceive of a title before the full drawing is shown.

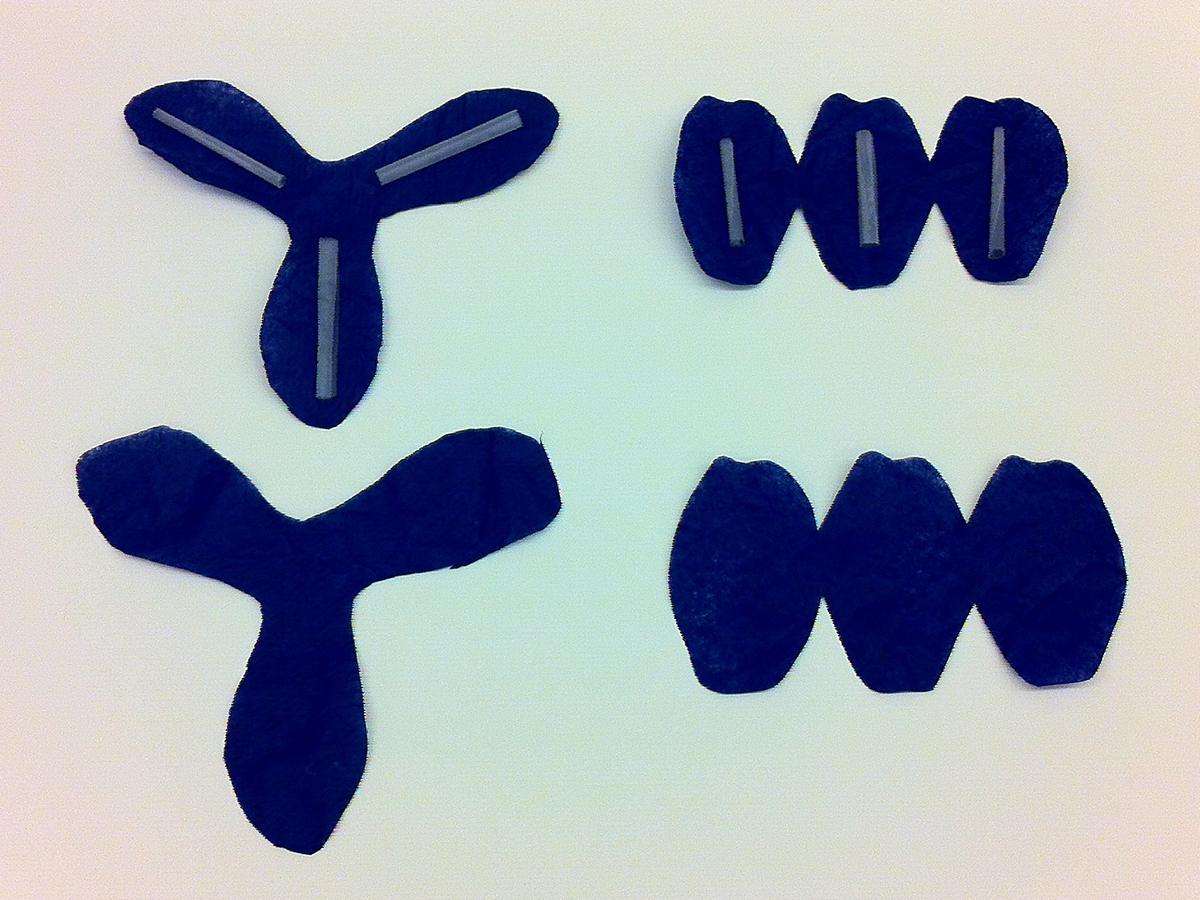
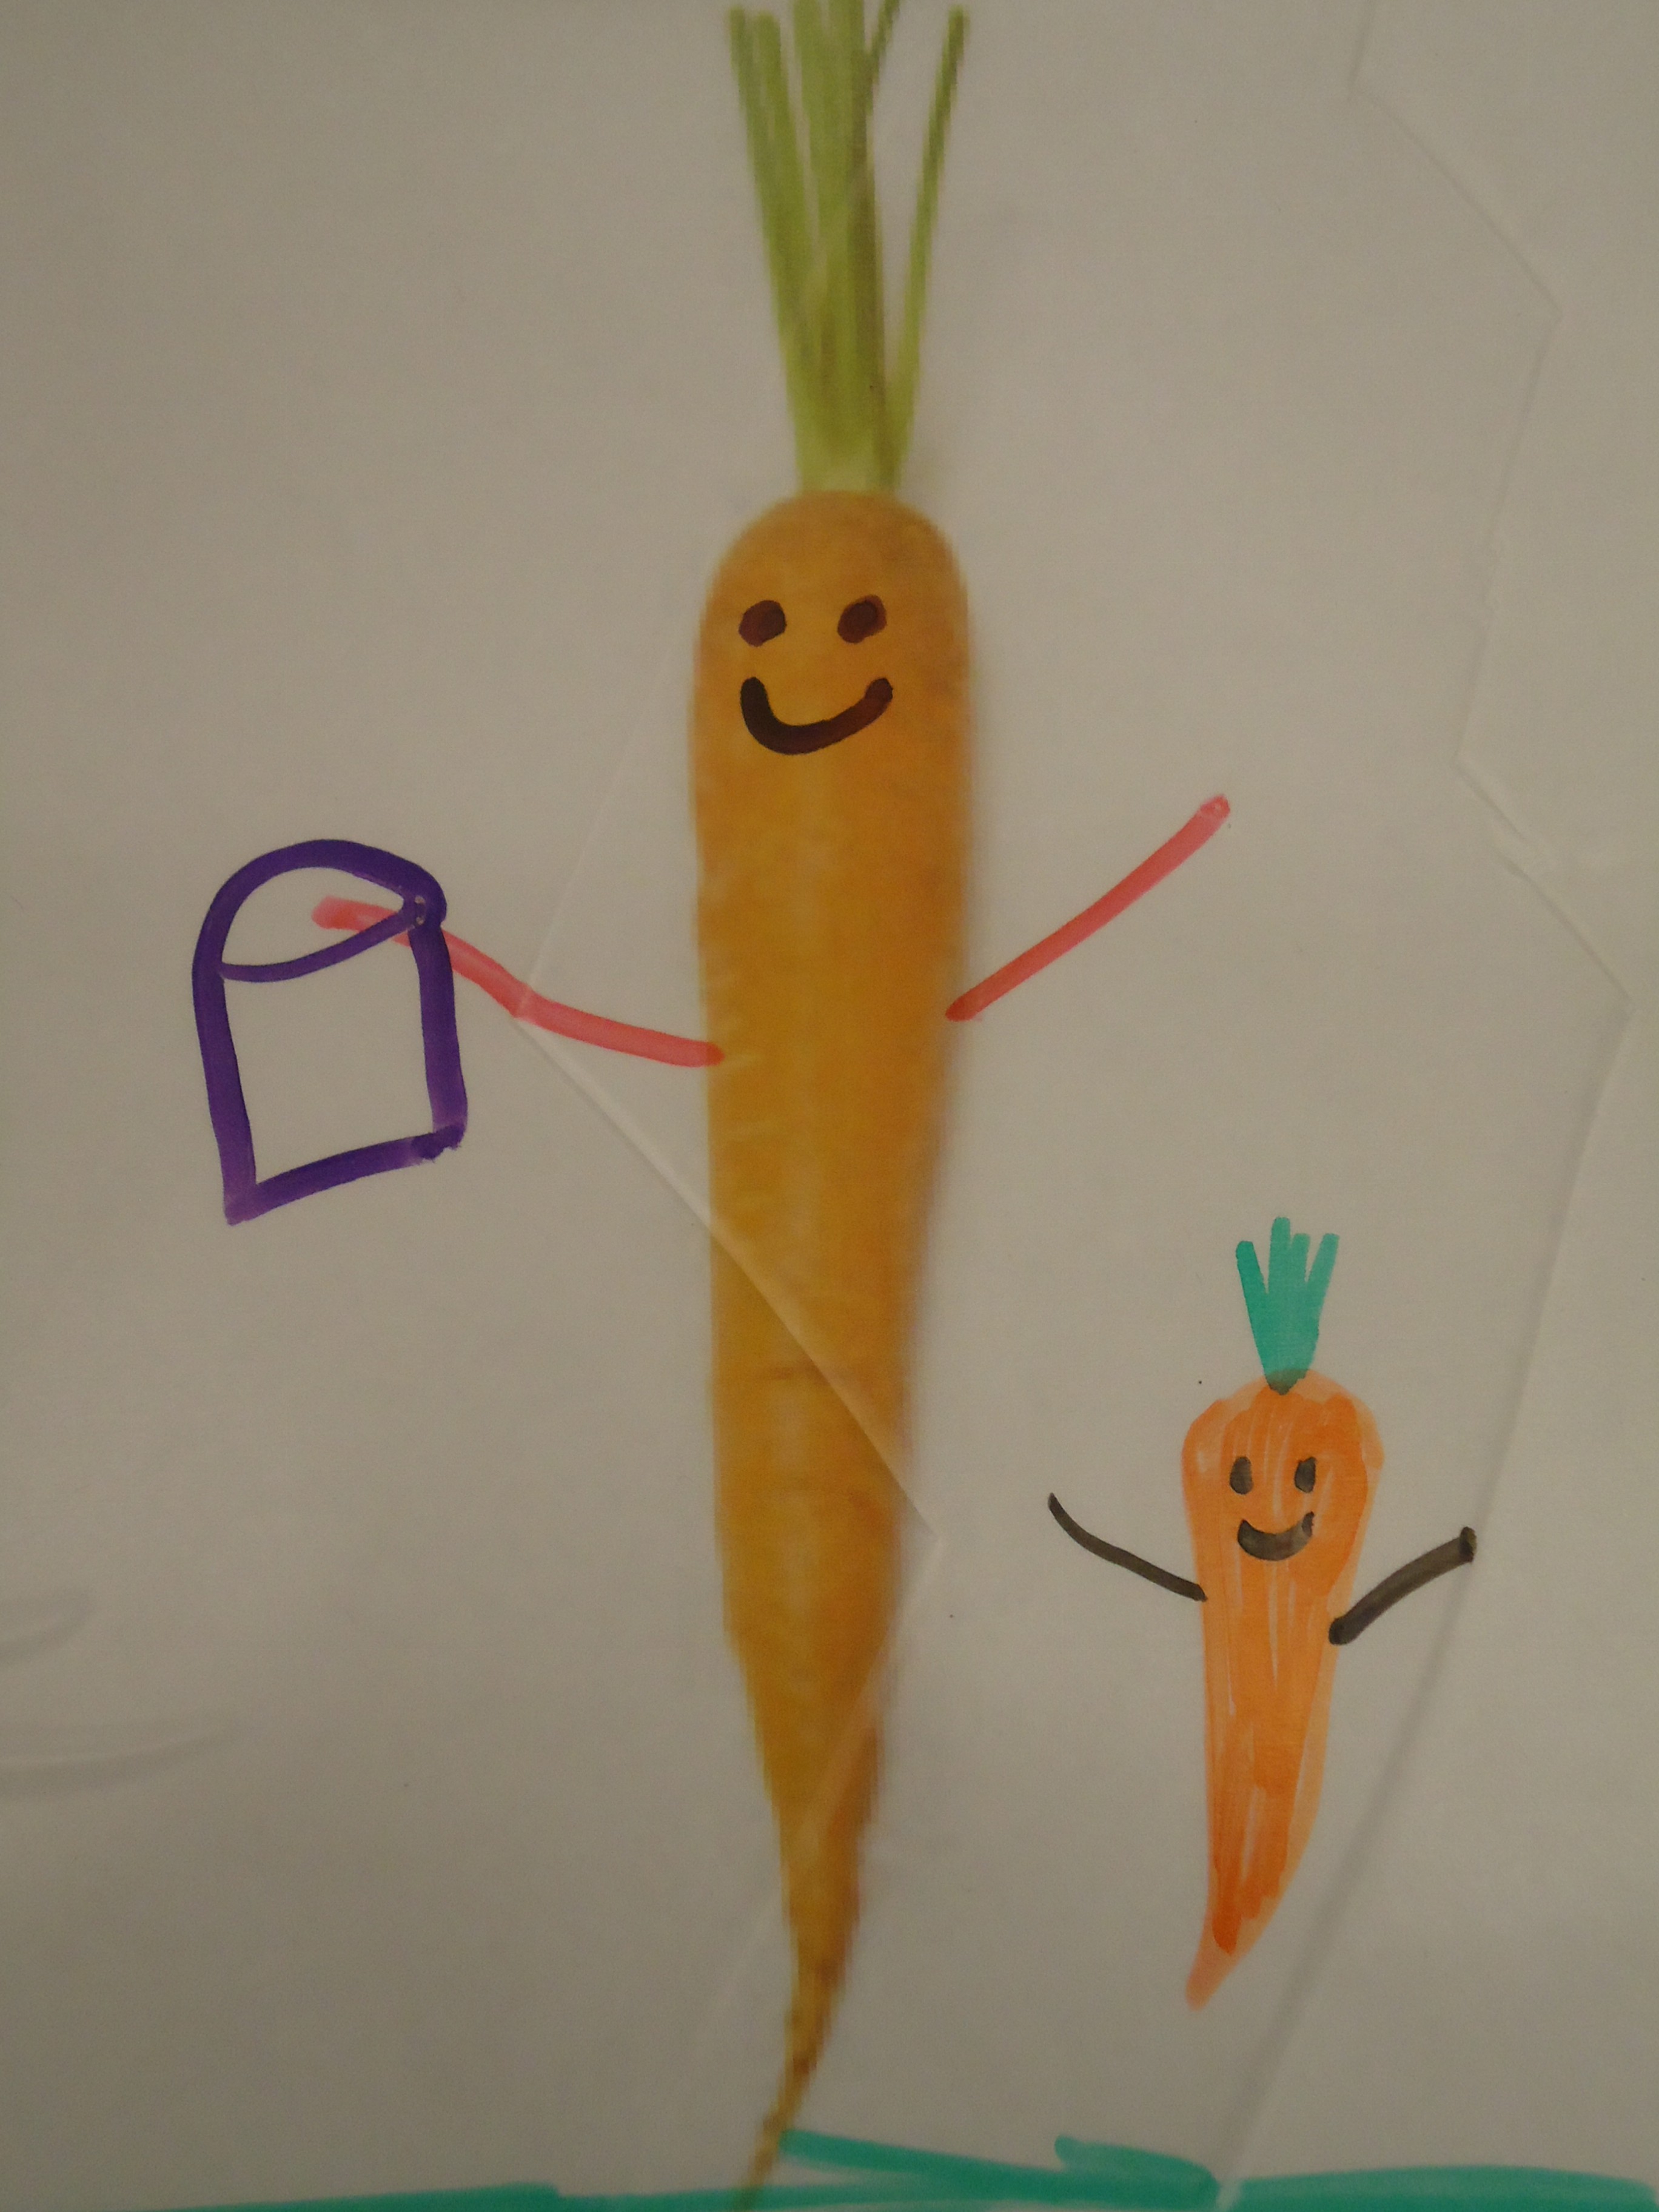
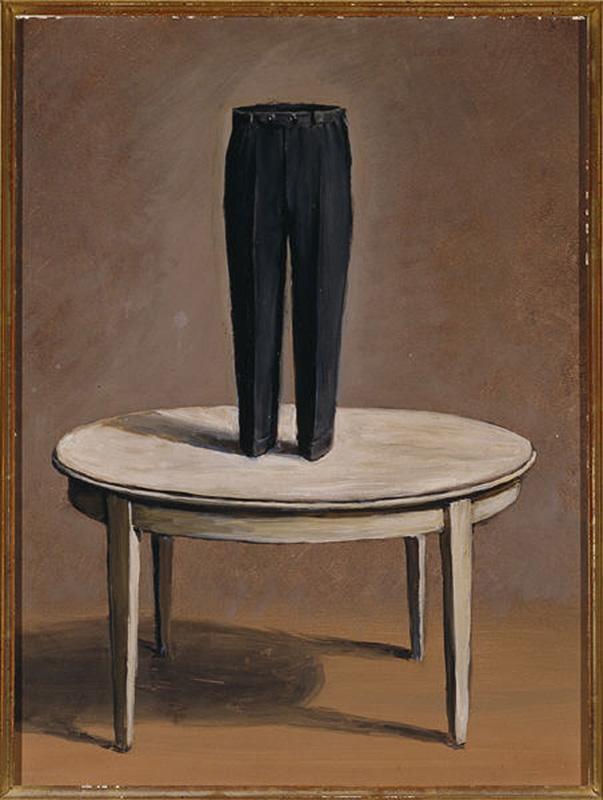
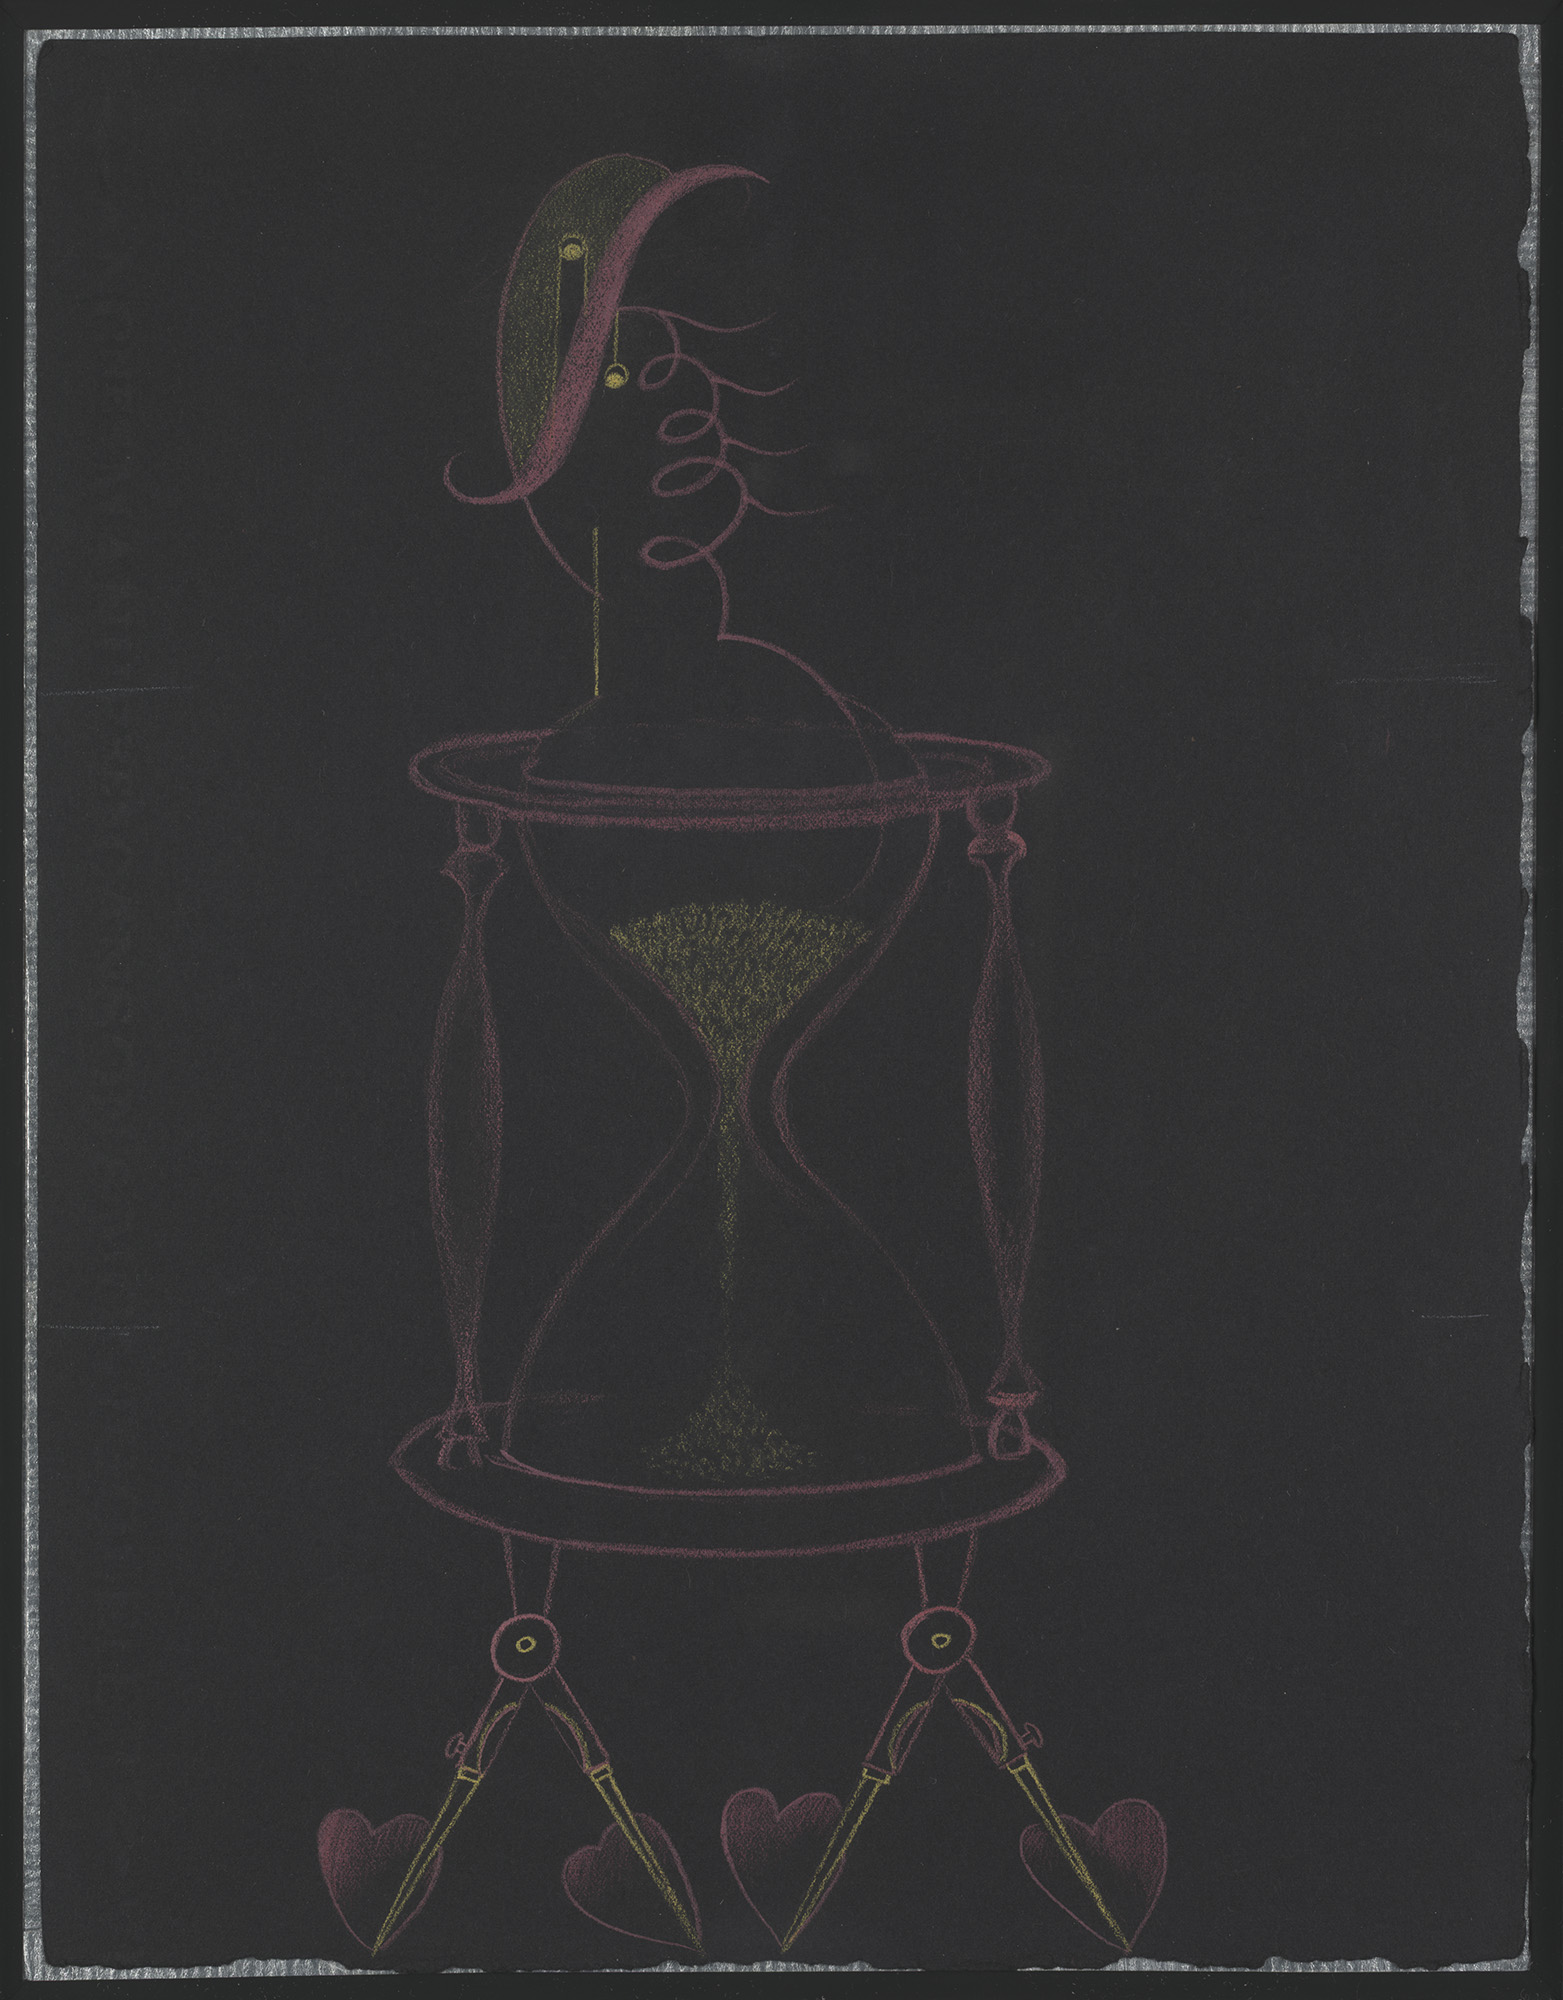
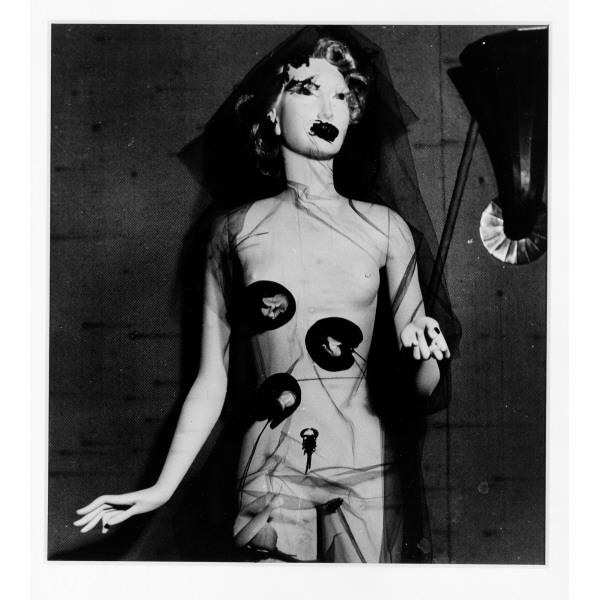
Outcome: An example of an Exquisite Corpse can be seen above, created by André Breton, Greta Knutson, and Valentine Hugo, where the “head” is a florid, calligraphic design, the “torso” is an hourglass, and the “legs” are heart-footed compasses. The surprising and seemingly unnatural conjunctions of objects in these drawings are similar to the visual juxtapositions presented in many Surrealists’ work.  Examples include the René Magritte’s Persian Letters, and Surrealist objects, such the one below by Sonia Mossé, both in the DMA’s collection.

Magritte - Persian Letters - 1958

Gaston Paris - Photograph of Sonia Mosse mannequin from International Surrealist Exhibition - 1938


The Game of Variants

This is essentially the traditional “whisper” game of Telephone. The group sits in a circle, and the first person conceives of a phrase, then whispers it to her neighbor. The second person whispers the same sentence to his neighbor, and so on, through the entire group. By the end, the beginning and ending phrases are compared.

An example:
Starting Phrase: “You must dye blue the pink bags fathomed by orange parapets.”
Ending Phrase: “At all costs forget the fifth paragraph of ‘Paradise Lost’.”

While not practiced by the Surrealists, I have used a fun visual variant of this game in teaching.

Group Size: Best suited for groups between ten and thirty players.

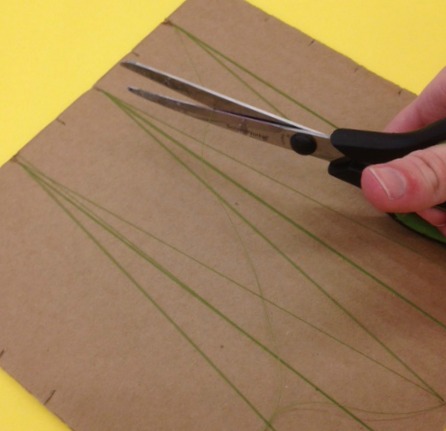
Instructions: Take a piece of paper and fold it horizontally then vertically in an accordion-style (front-over-back) into quadrants that add up to the number of players. (So, with twenty-five players, fold a typical sheet of paper four times horizontally, then four times vertically.)

Present the folded up paper so only one folded quadrant is visible, then have the first player draw a small simple, linear image.

She then presents the drawing to the next player, who looks at it, folds the paper over to the next blank quadrant, then redraws the image from memory. He then passes his version of the drawing on, and the process is repeated until the last player finishes her drawing.

Once finished, unfold the entire sheet, and marvel at the evolution of the image as it transforms from one recognizable thing into something else altogether!

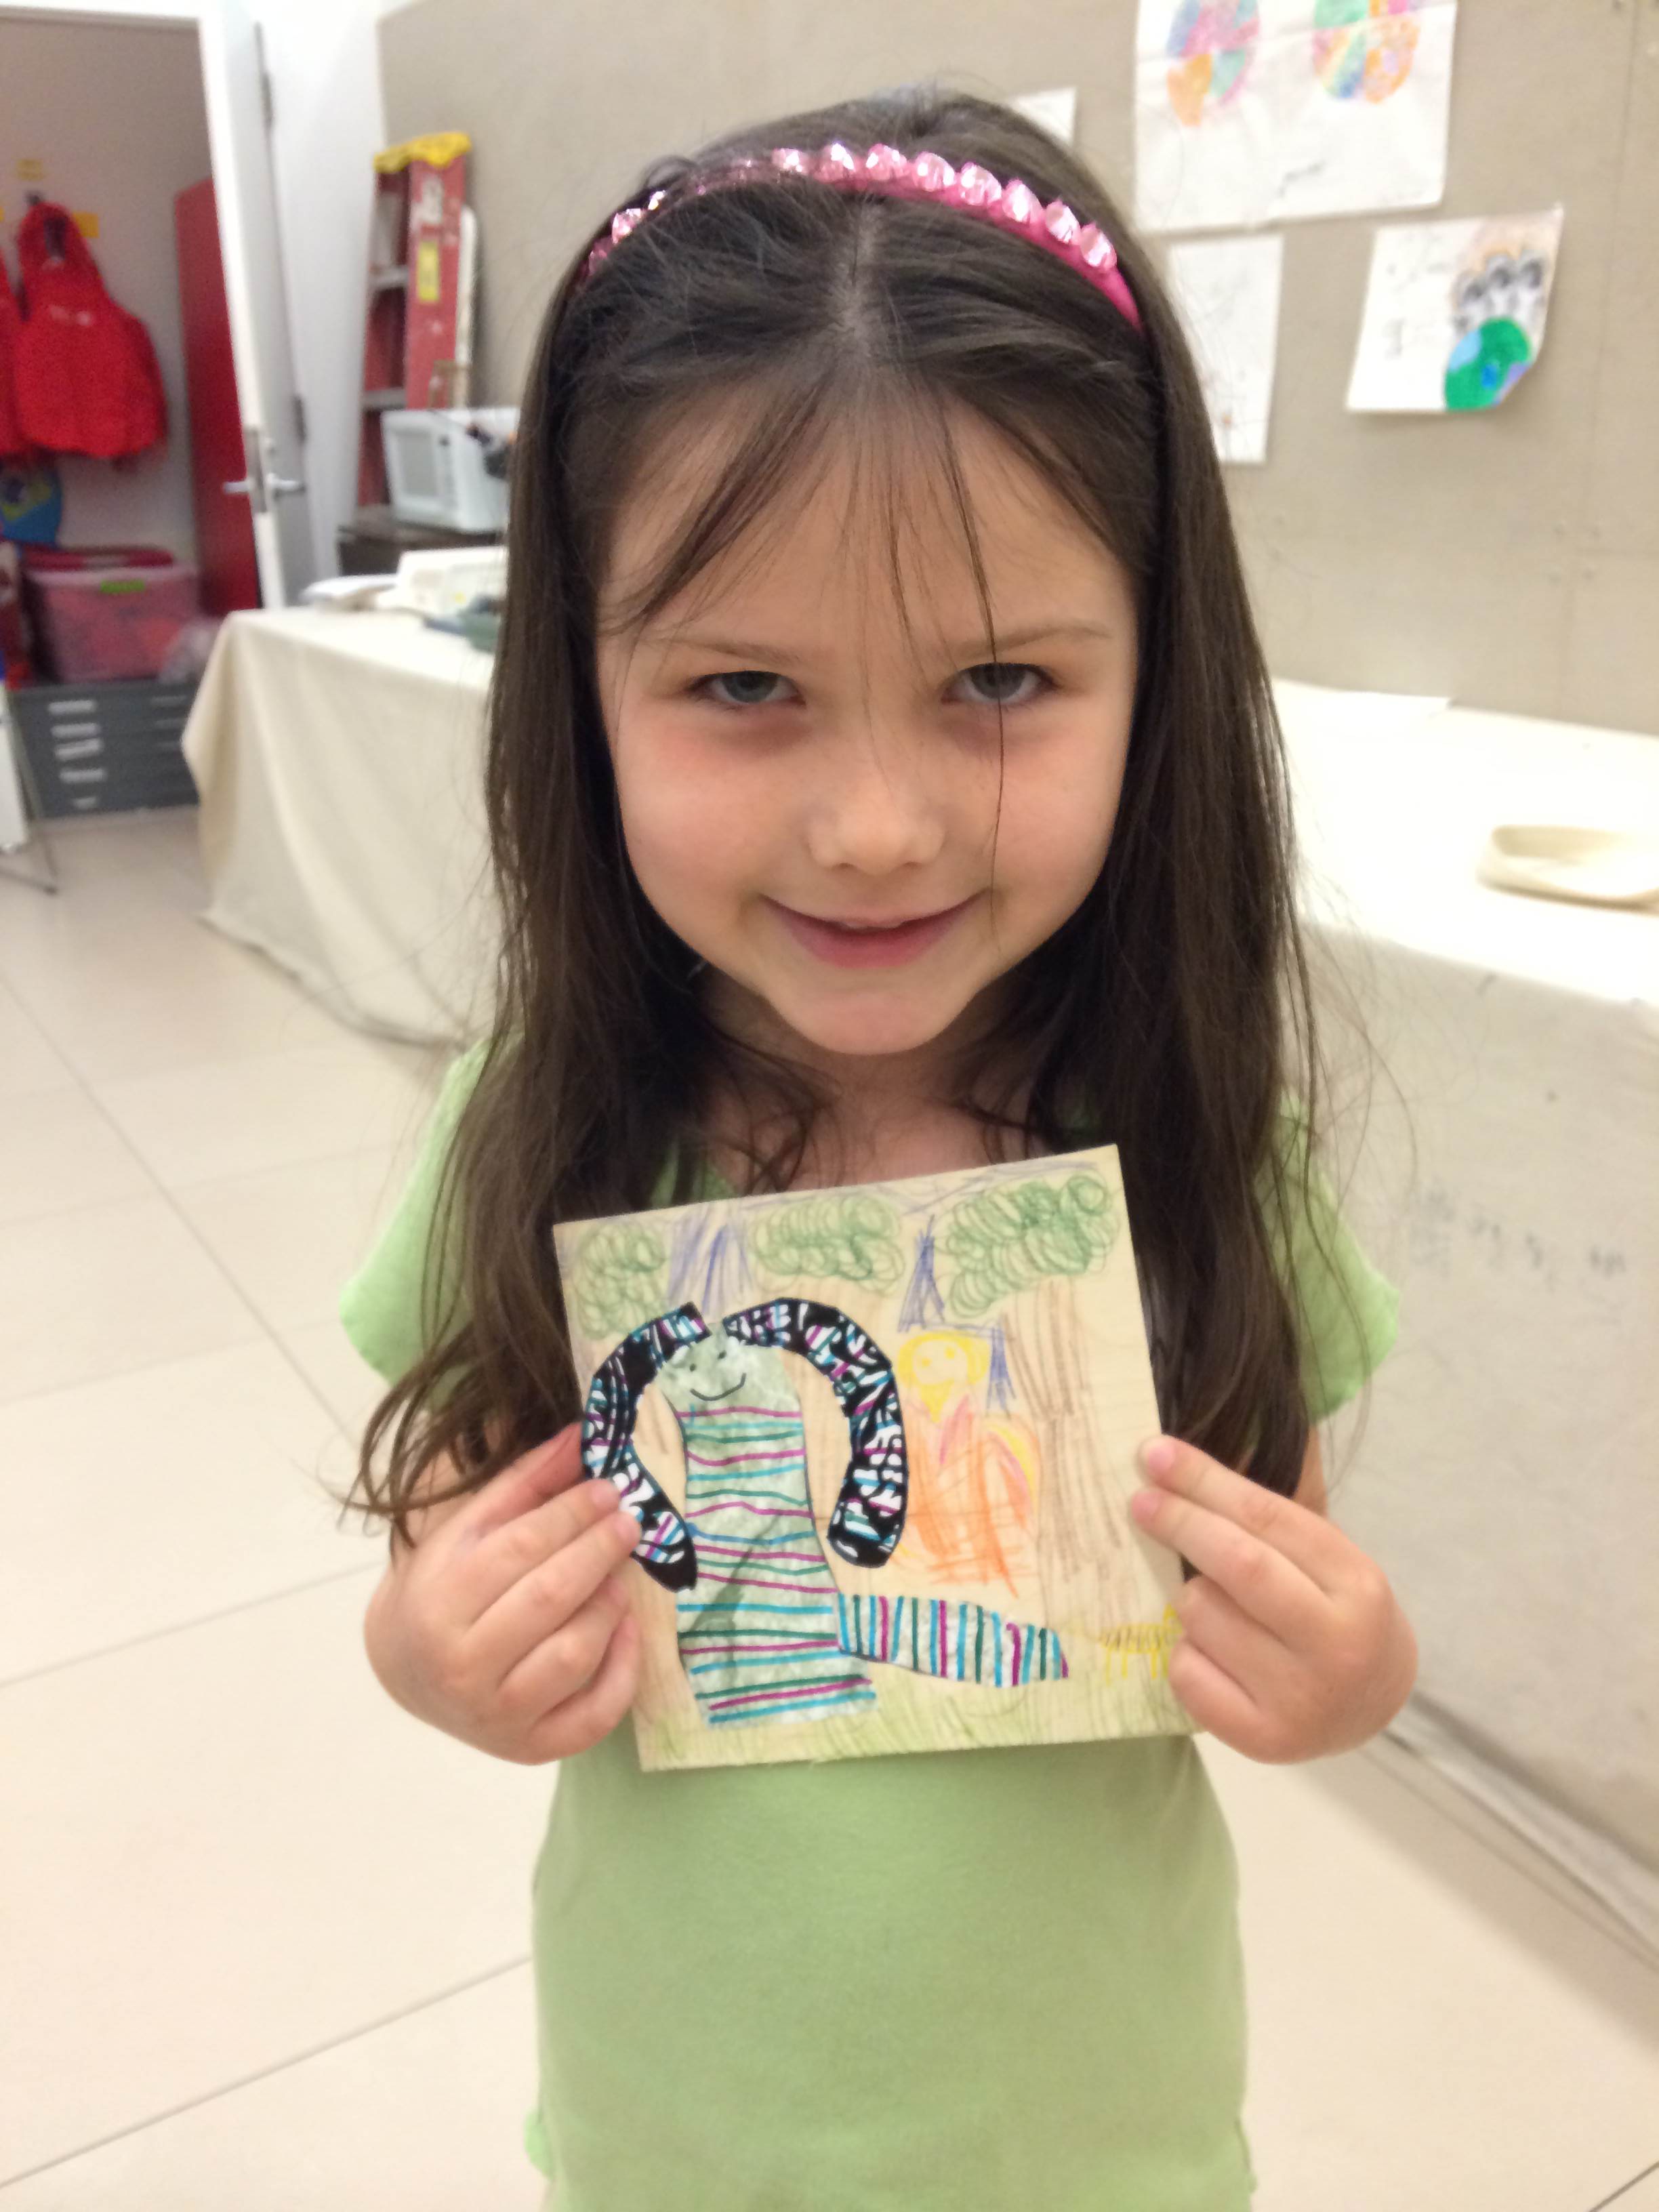
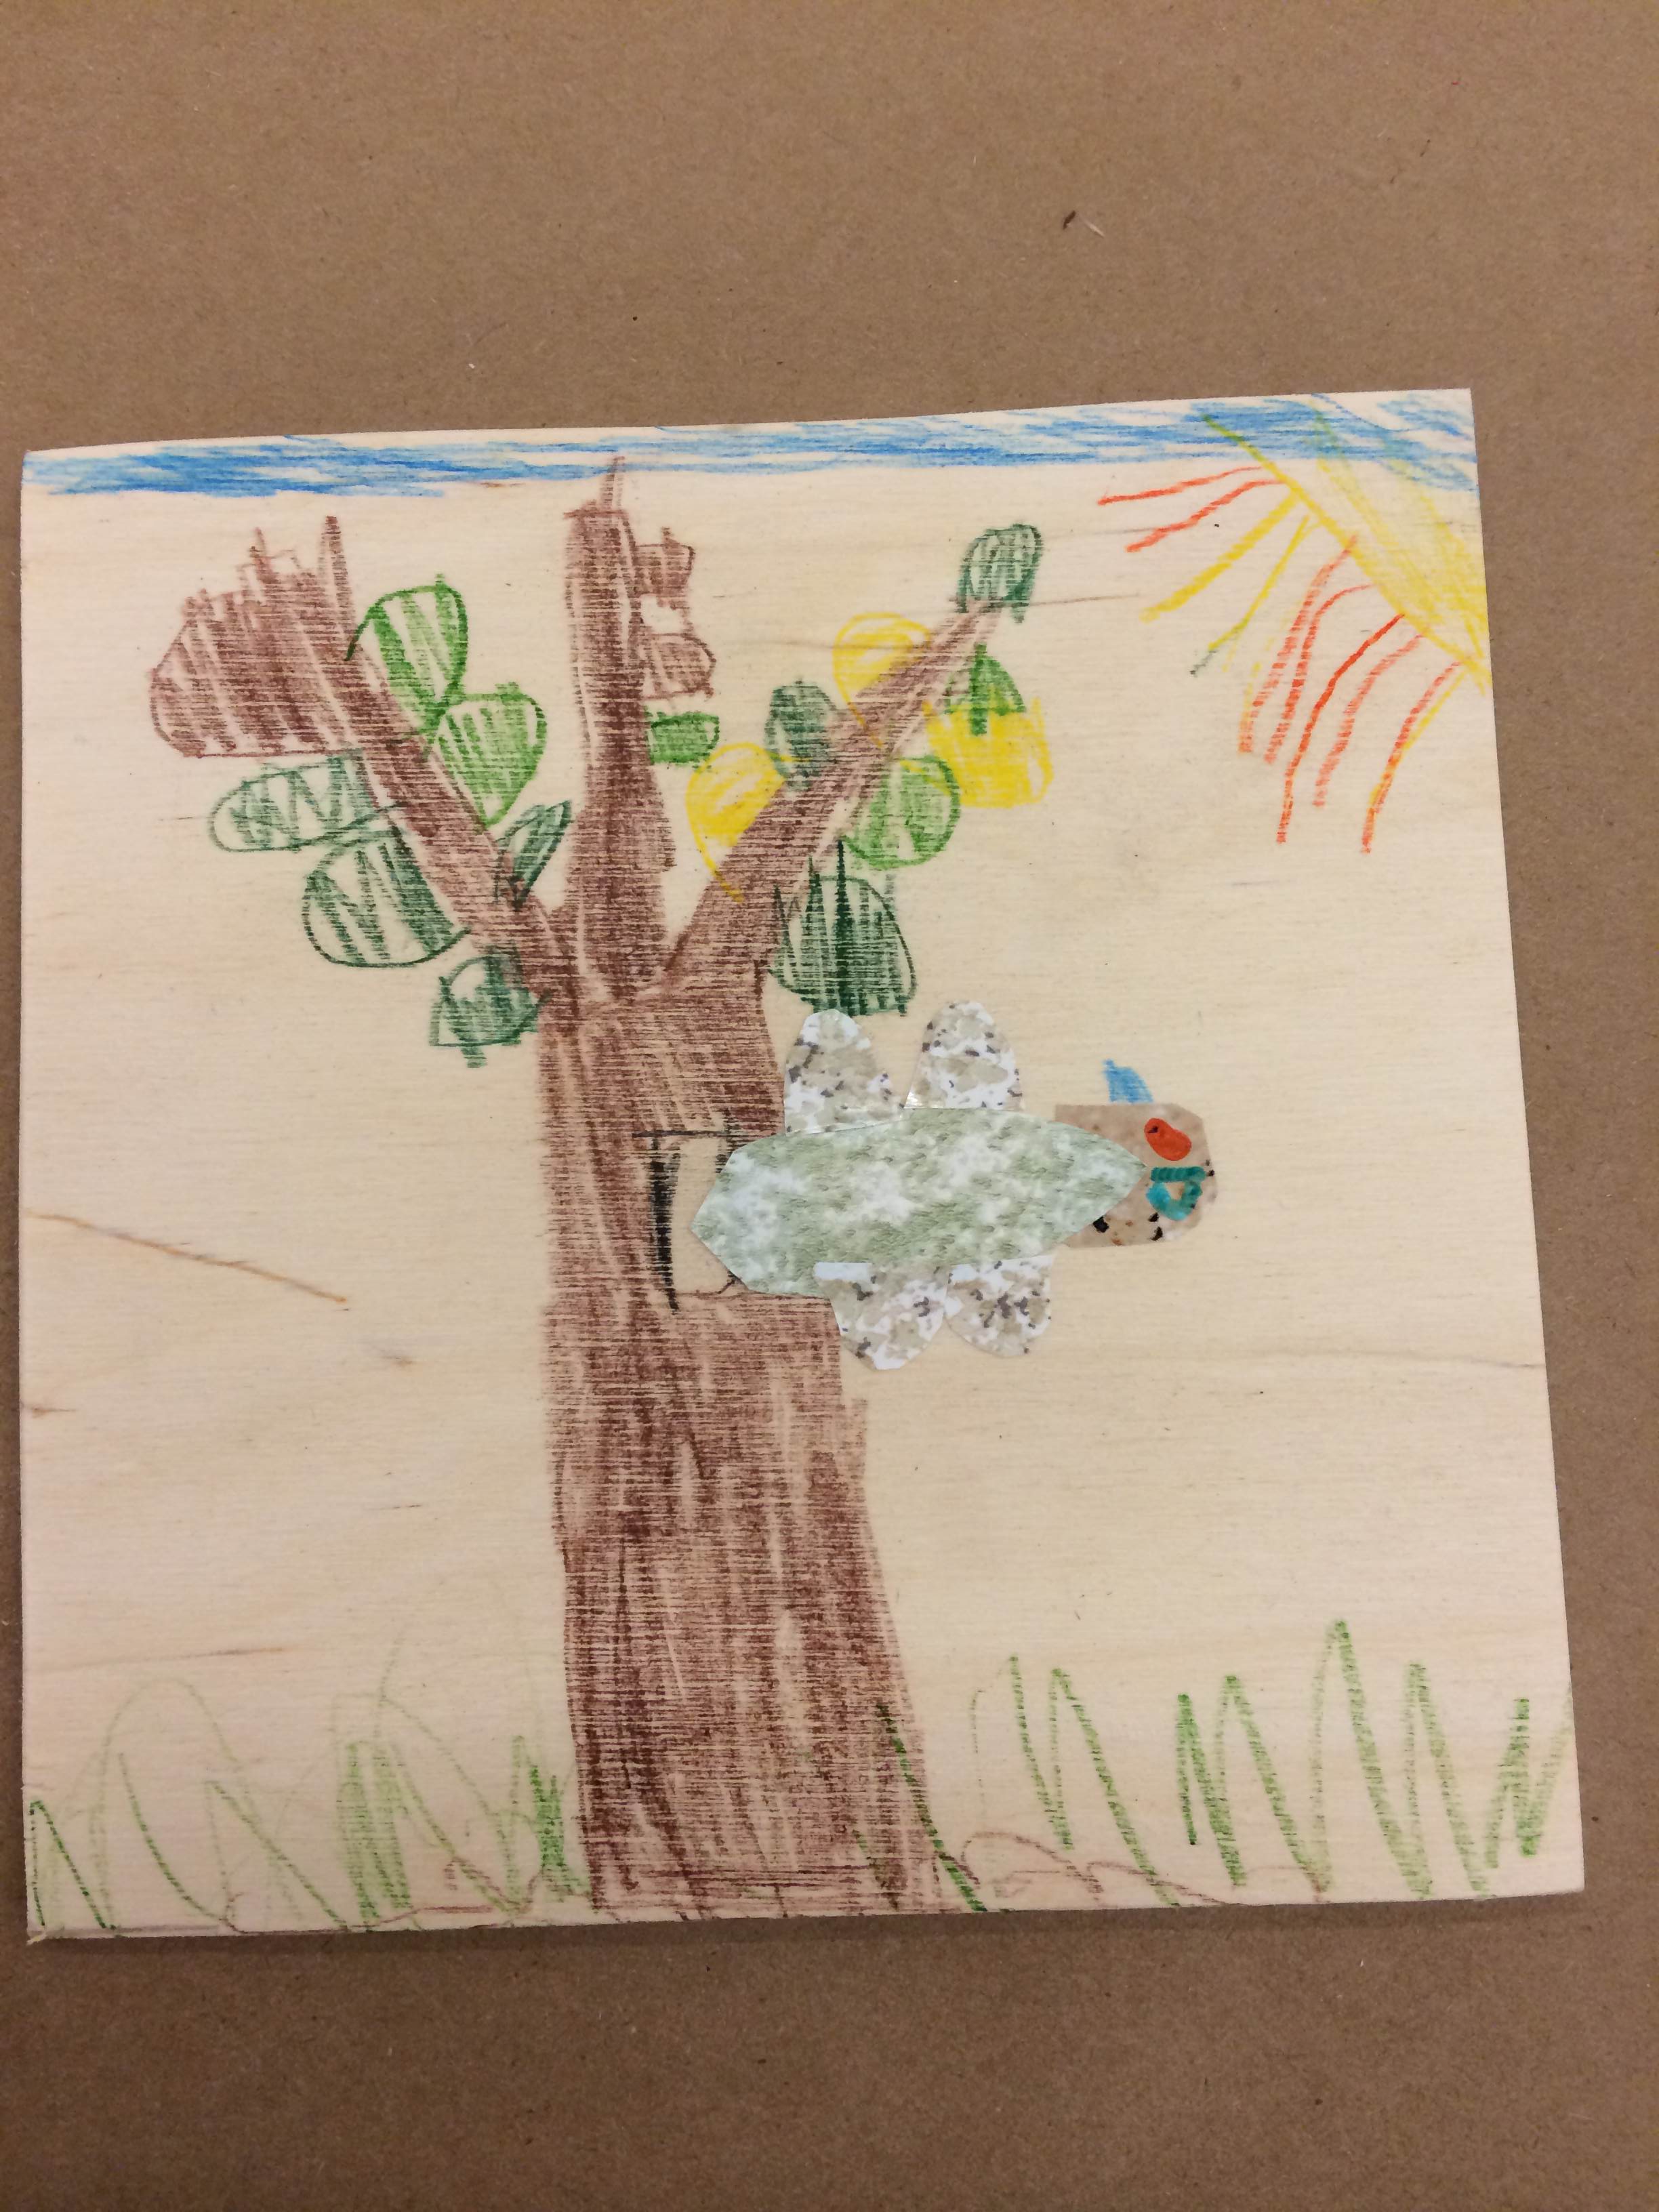
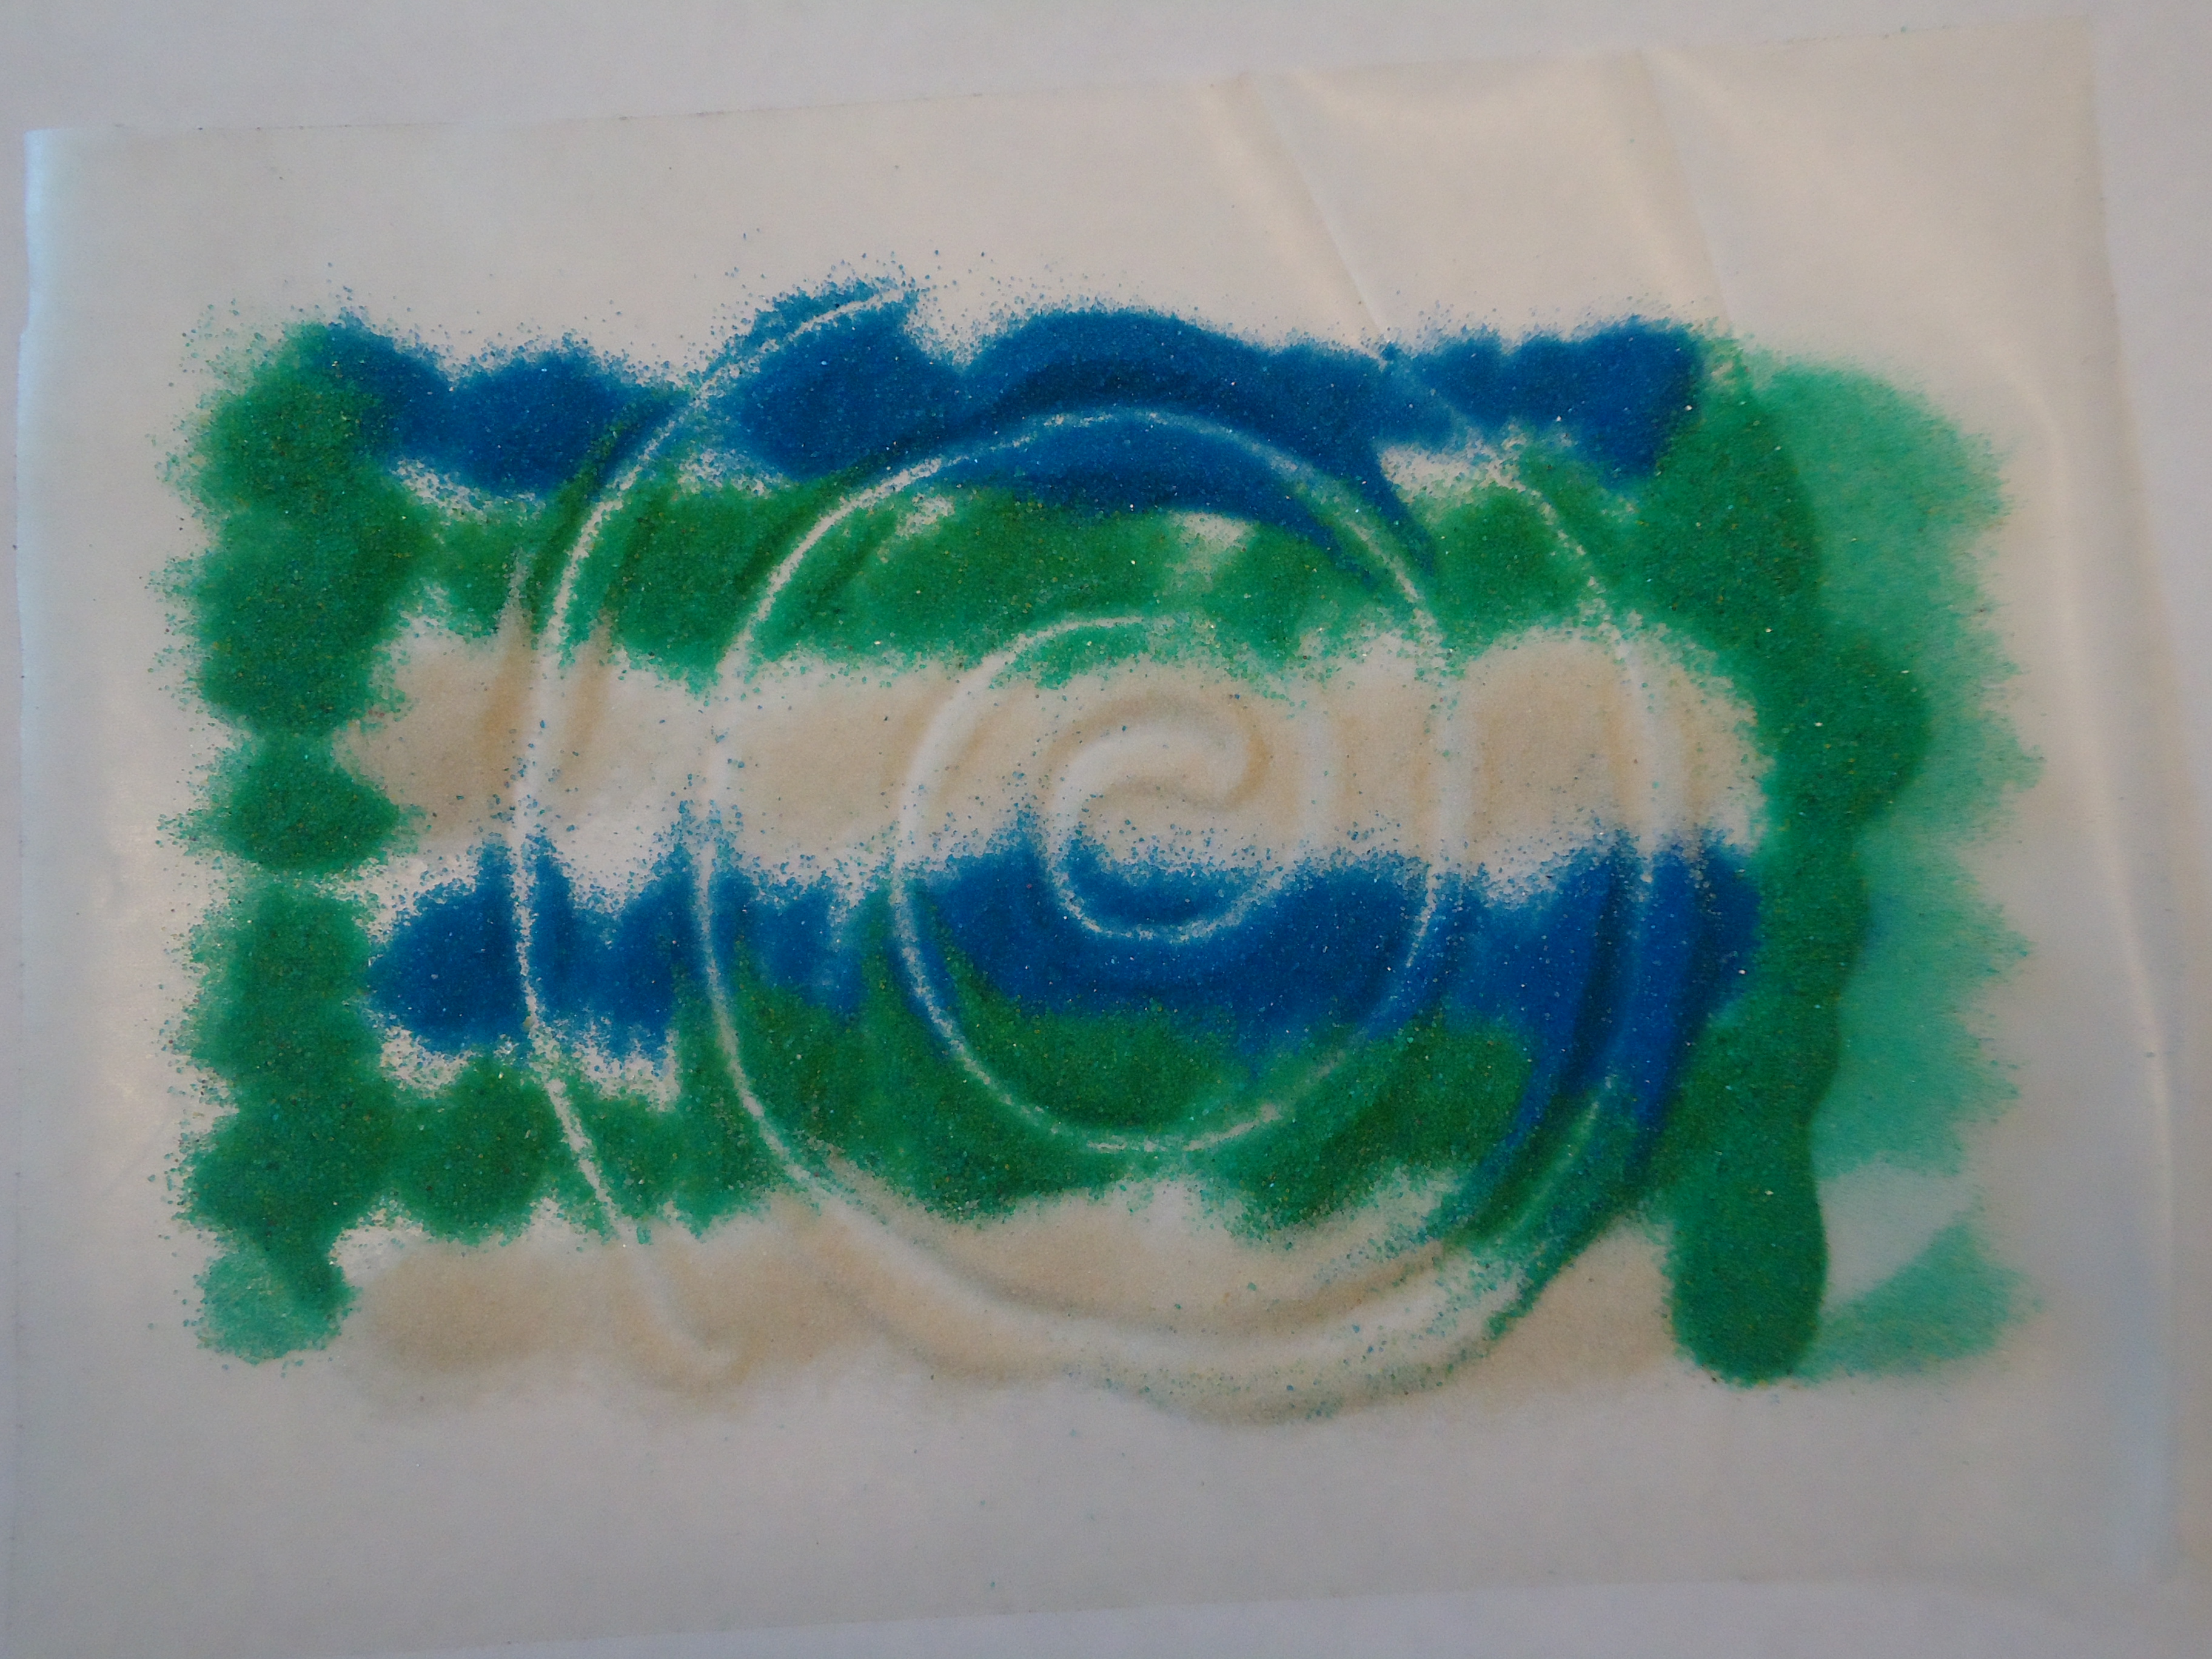
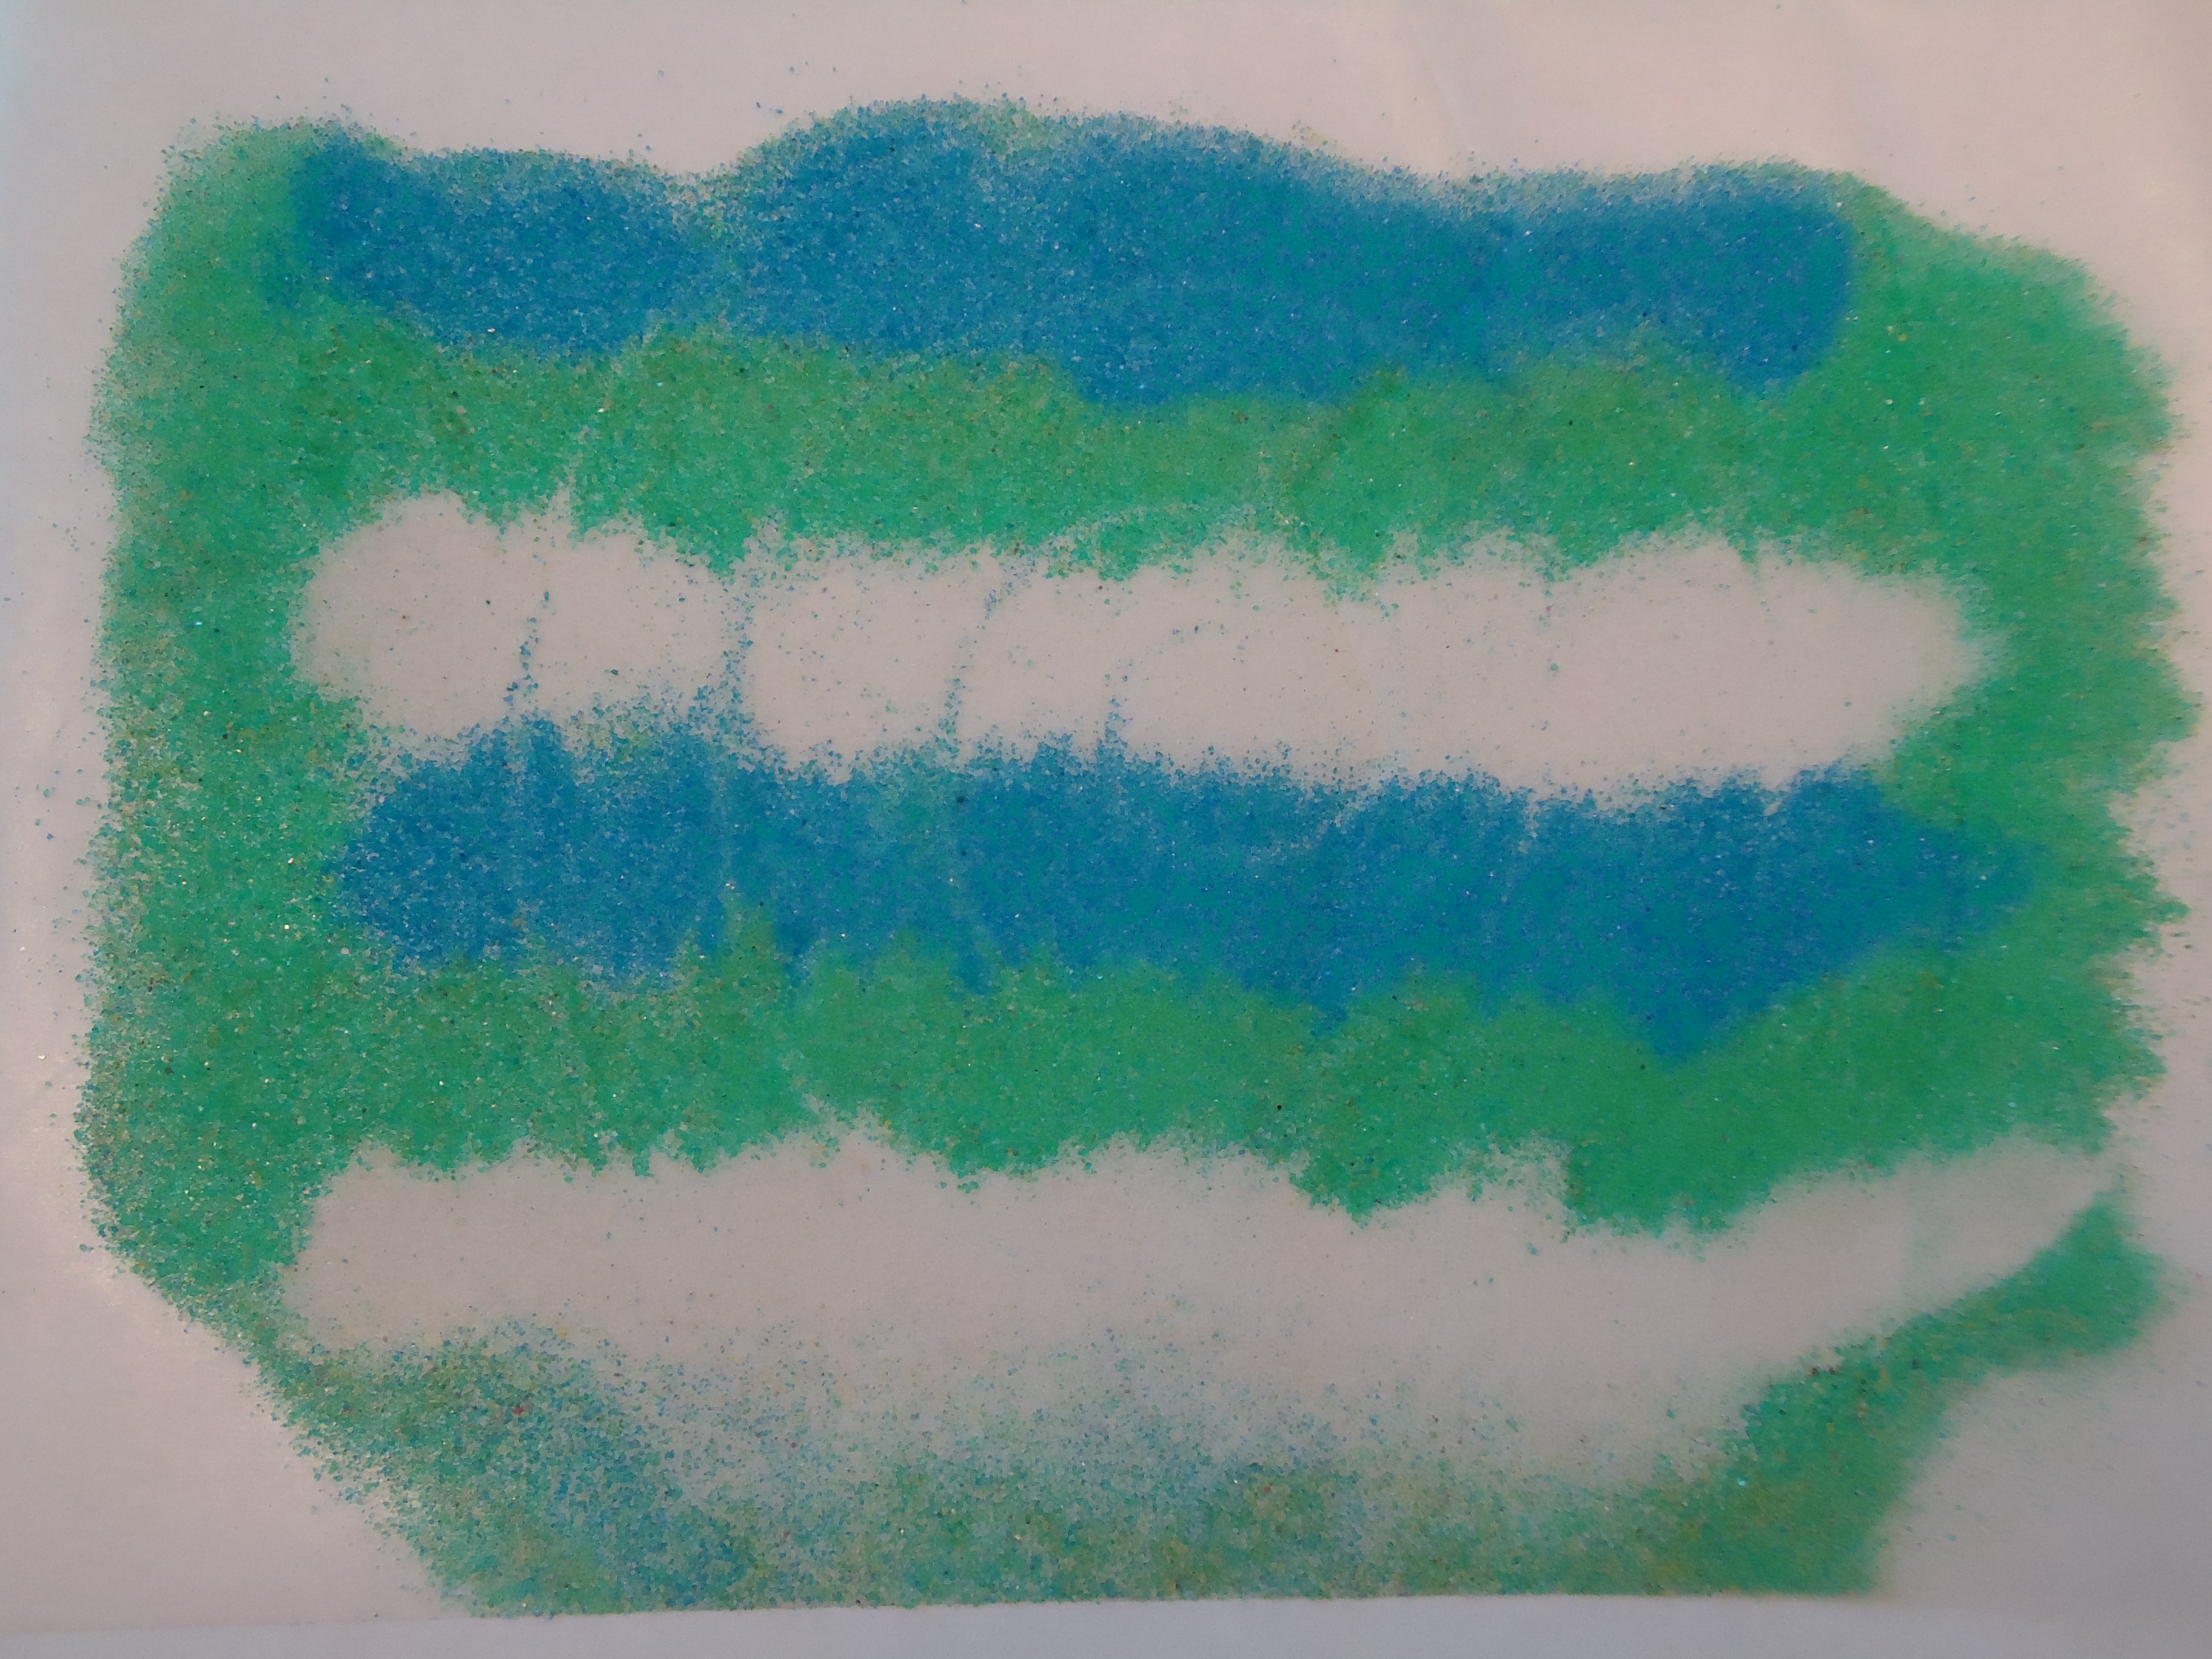
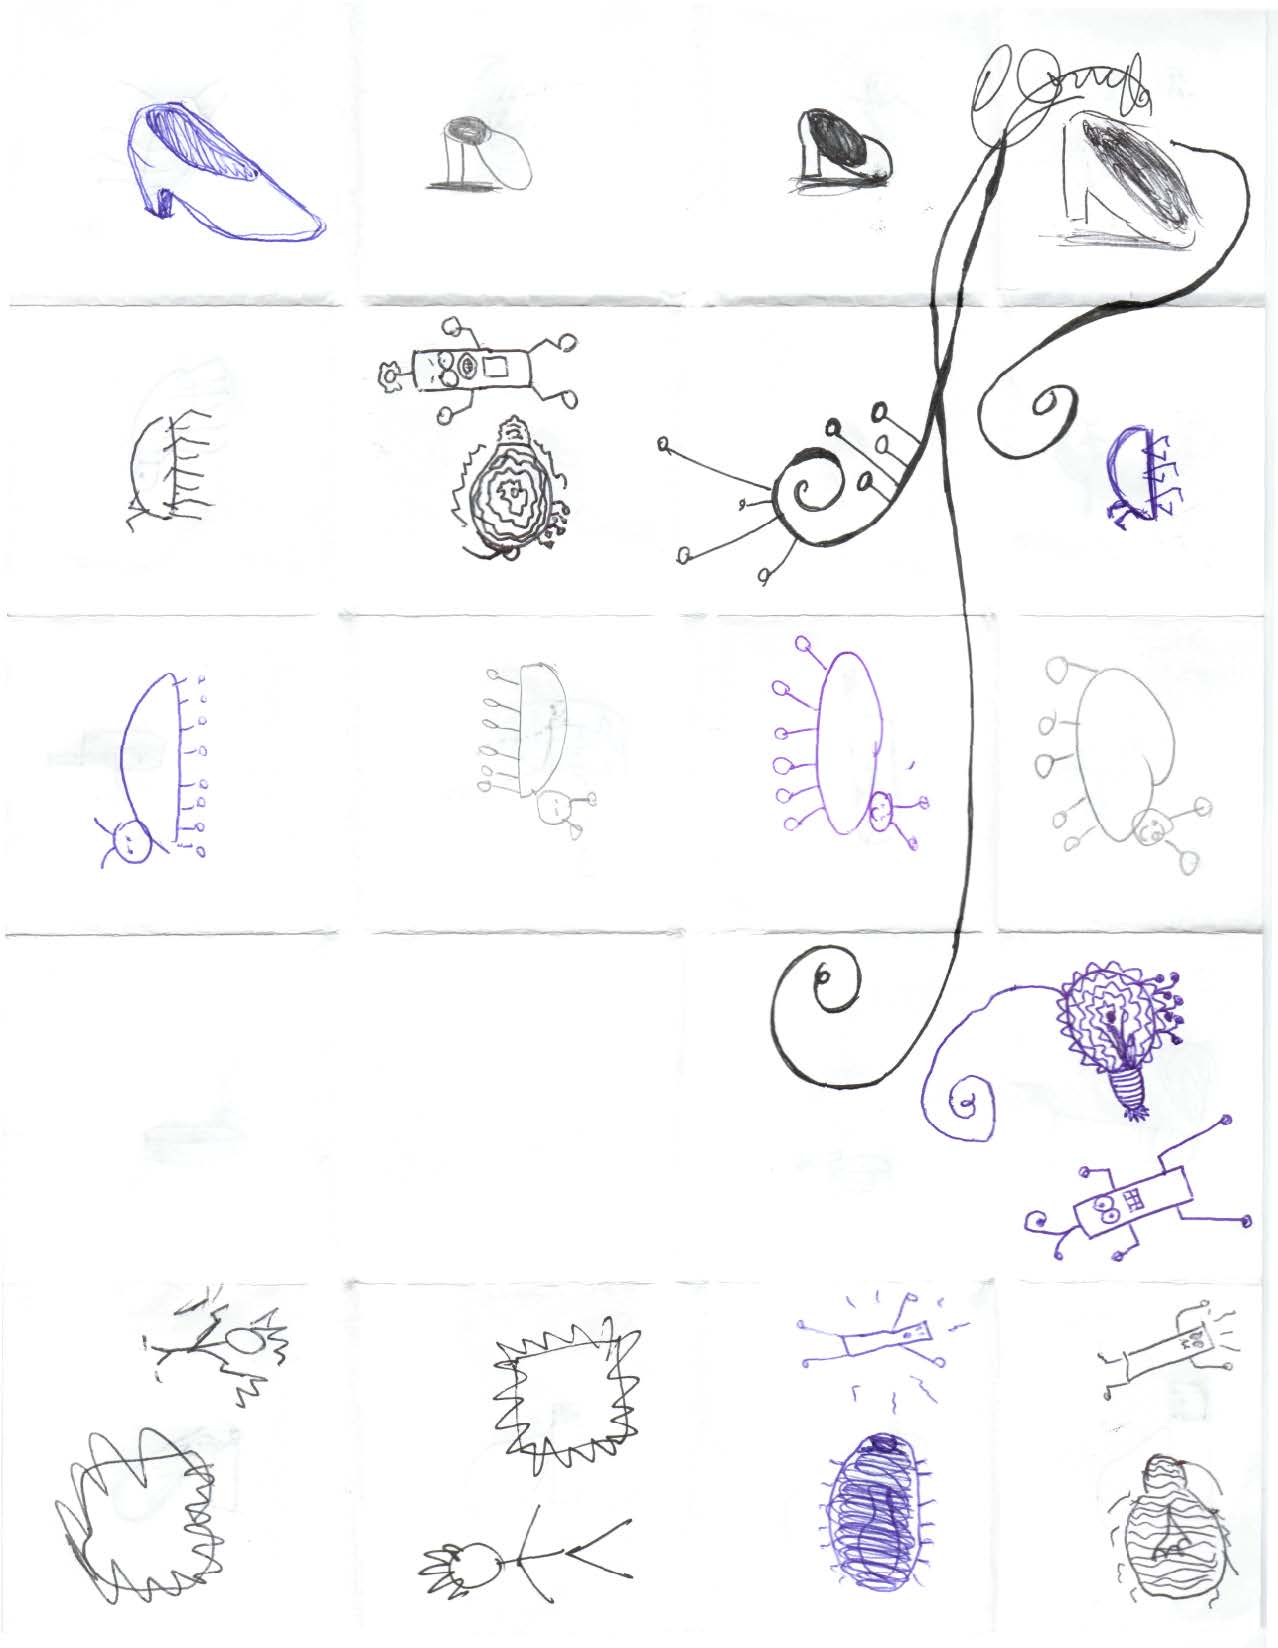
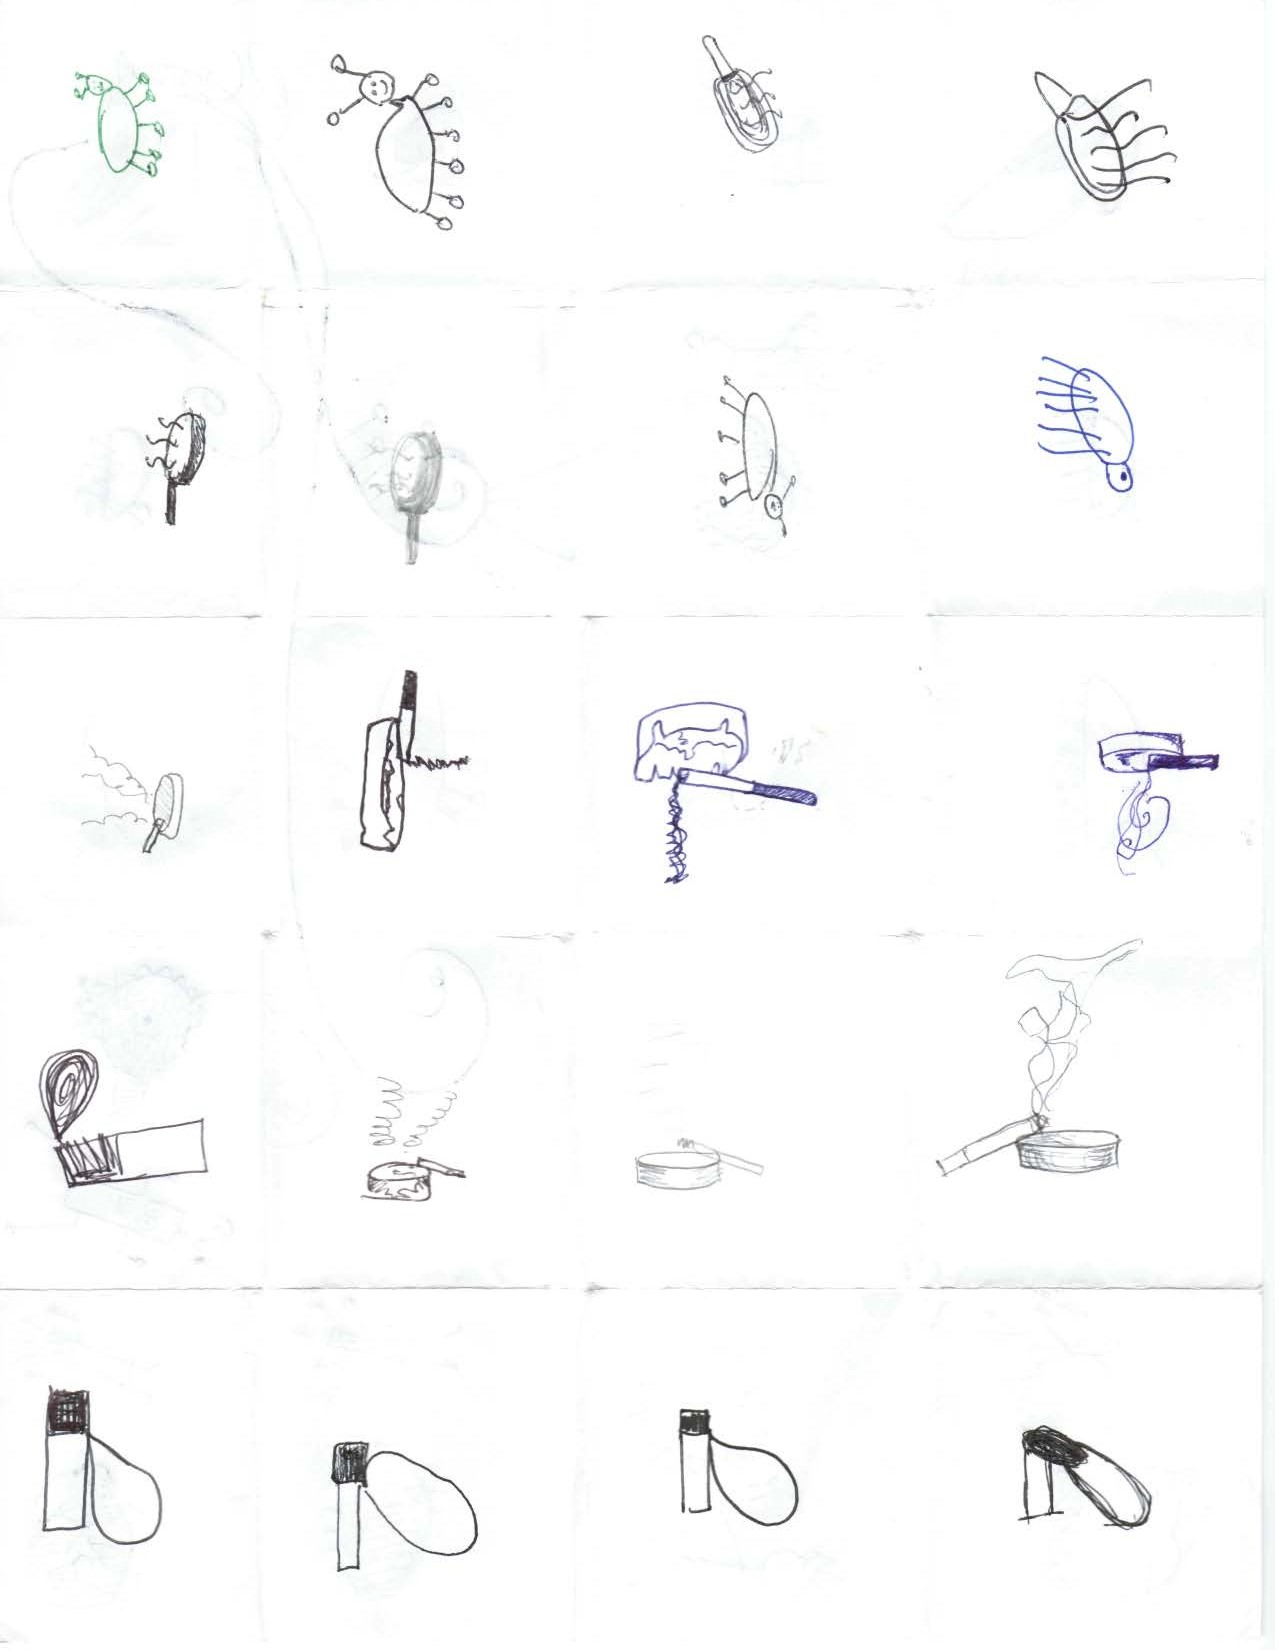
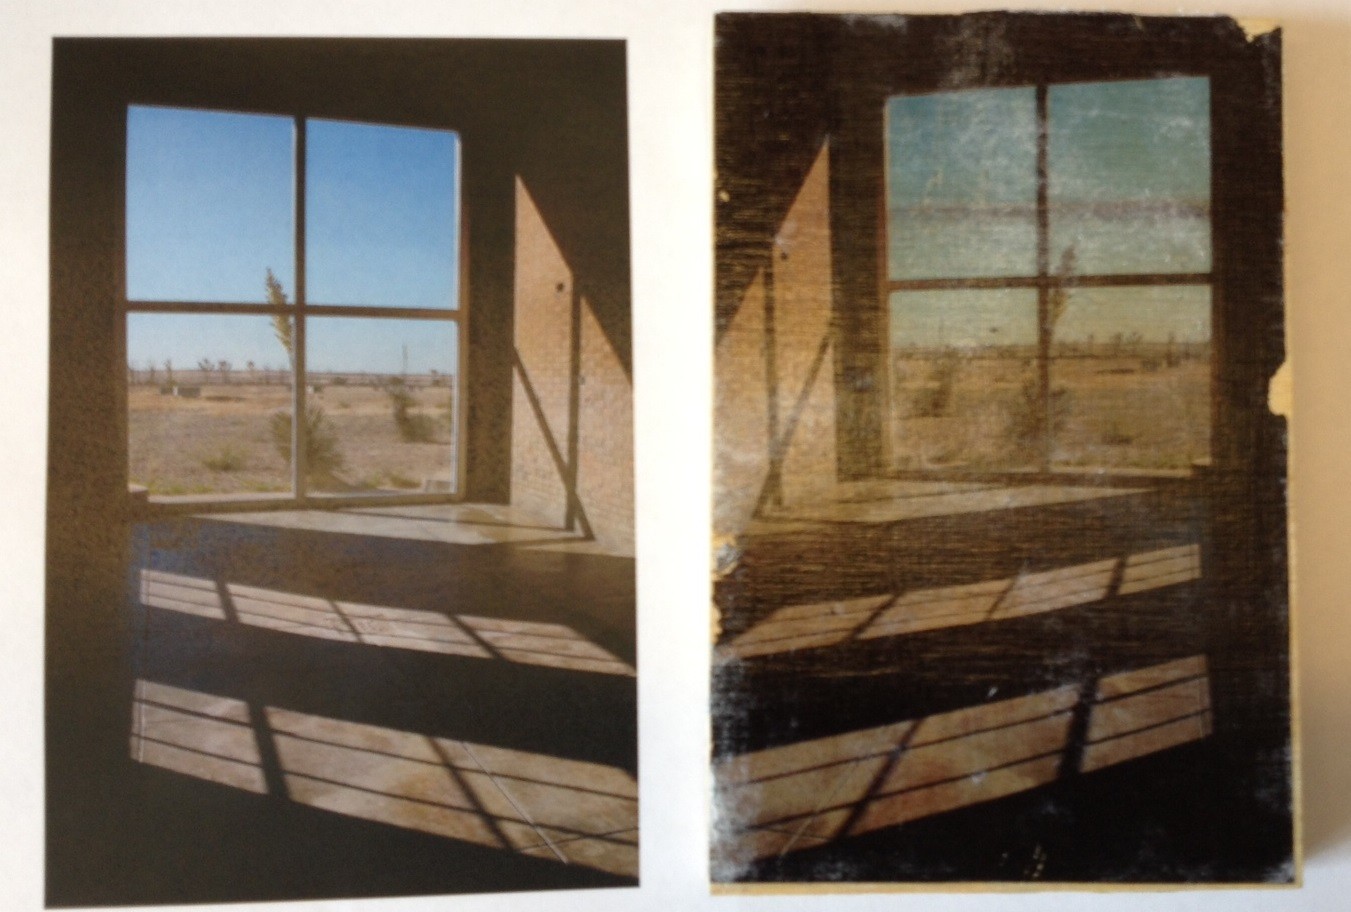
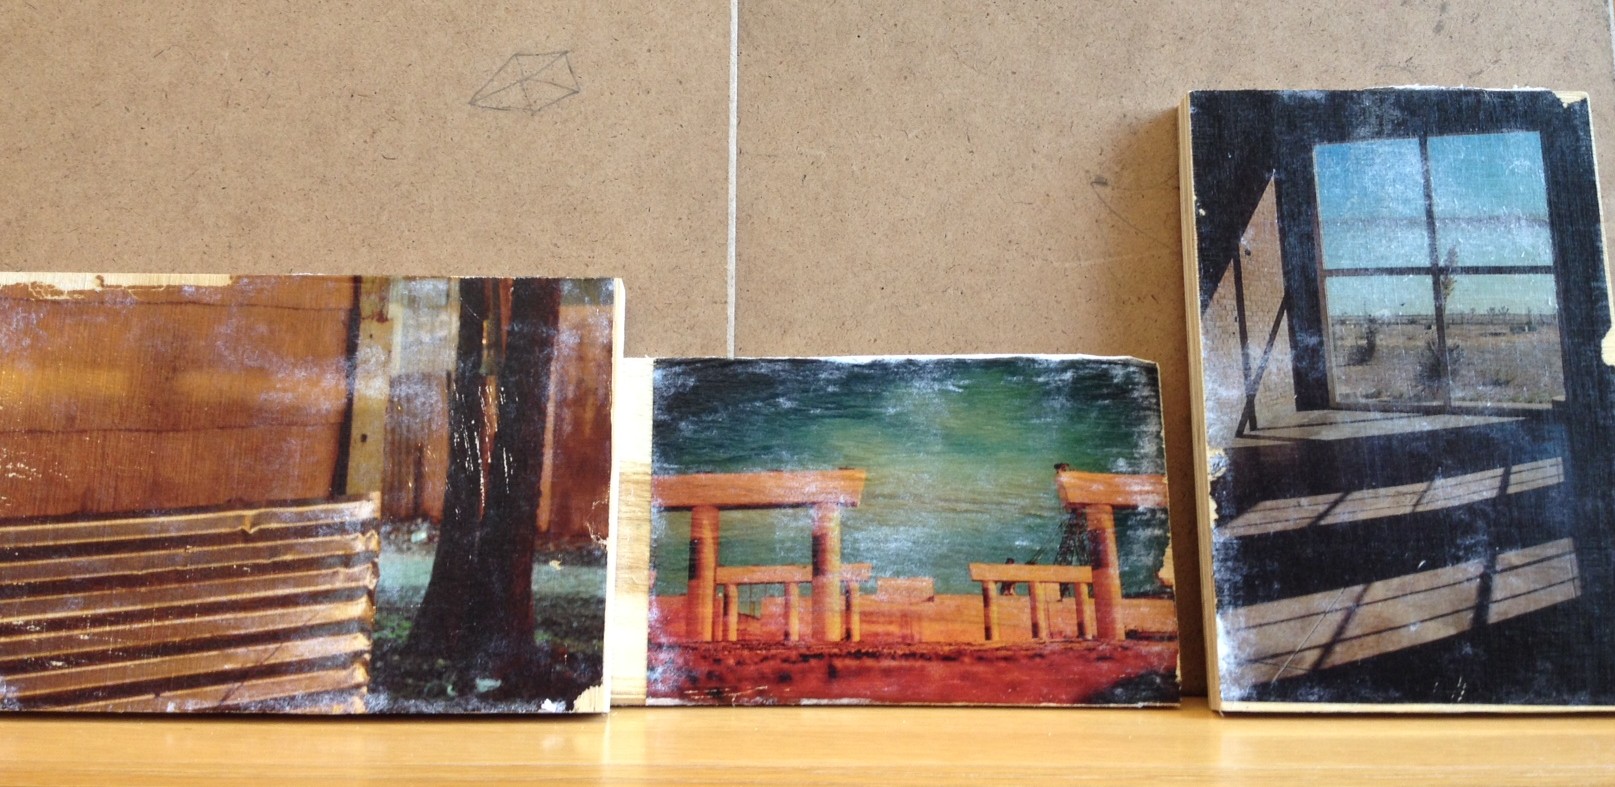
Outcome: Just as the results of the Telephone game are remarkable for the dissimilarity between starting and ending phrases, the results of this visual variant are similarly startling, but the sheet also becomes a visual record of the transformation of starting image into something else entirely.  In the example below completed during a class I taught in 2009, the starting image of a shoe transforms multiple times, into a cigarette and ashtray, a frying pan, a robot, and a bug.

Successive Drawing In-Class_Page_1_2009

Game of Variants Drawing (recto), 2009

Successive Drawing In-Class_Page_2_2009

Game of Variants (verso), 2009


Have you tried using Surrealist games like these in your teaching or for fun?  Please leave your experiences and ideas in the comments below!


Artworks shown:

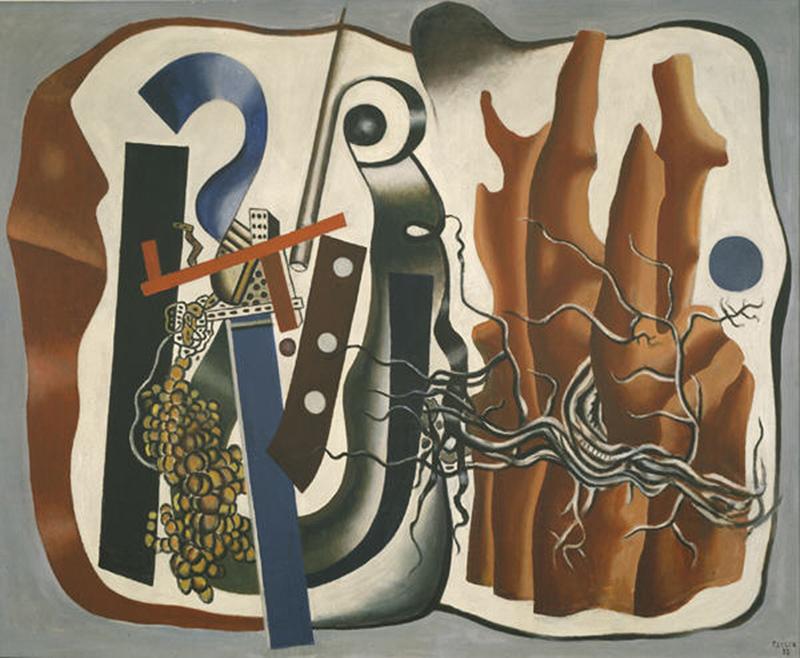
  • Ferdinand Léger, Composition with Tree Trunks, oil on canvas, 1933, Dallas Museum of Art, Foundation for the Arts Collection, gift of the James H. and Lillian Clark Foundation.
  • André Breton, Greta Knutson, Valentine Hugo, Untitled (Exquisite Corpse), Colored pencil on black paper, c. 1929, Private Collection.
  • René Magritte, Persian Letters, oil on canvas, 1958, Dallas Museum of Art, gift of J.B. Adoue, III.
  • Gaston Paris, Untitled (Mannequin by Sonia Mossé), Gelatin silver print, 1938, Dallas Museum of Art, gift of the Junior Associates and an anonymous donor.

Sources:

Brotchie, Alastair and Mel Gooding.  A Book of Surrealist Games.  Boston & London: Shambhala Redstone Editions, 1995.


Josh Rose
Manager of Docent and Teacher Programs

Make This: Etching with Cola

Coke Etching

Example of a “coke” etching

Printmaking is one of my favorite mediums. There’s something satisfying and magical about transferring an image you created onto another surface. Plus, there are so many fun and experimental ways to do it that make learning new techniques a joy and not a chore. I especially love finding alternative methods to techniques that may otherwise be cost-prohibitive for the at-home printmaker–namely, intaglio and lithography.

This idea of alternative processes was the basis of April’s Urban Armor workshop for teens. One of the techniques I taught was a version of lithography appropriately dubbed “kitchen lithography” because most of the supplies can be found in your pantry. Popularized by Emilie Aizier, there are lots of tutorials on how to do it on various internet sites. Finding a perfect guide is hard because the process is finicky and everyone does it in a slightly different way. It’s definitely something to experiment with on your own, but I’ll share what gave me the most consistent results.

If you’ve never tried lithography before, it basically consists of creating a master image on a plate (usually metal or stone); in this case, cola is used to etch the image into aluminum foil (it contains phosphoric acid–yum!). Printing from the plate works on the principle that water and oil repel each other: the plate is first coated with water, which doesn’t stick to the etched image because of the gum arabic in the cola. Oil-based ink is then rolled onto the plate, which sticks to the image but is repelled everywhere else by the water.

Several months back, the DMA hosted the wonderful exhibition Posters of Paris: Toulouse-Lautrec and His Contemporaries that not only featured fantastic lithograph posters from the late 1800s, but highlighted many of the tools and steps involved in lithography.

What you need:

  • Small sheet of plexiglas
  • Heavy duty aluminum foil
  • Tape
  • Sharpie permanent marker
  • Scrubber pad/steel wool
  • Vegetable oil
  • White vinegar
  • Cola (I used Coke)
  • Sponge and bowl of water
  • Lithography ink (NOT water-based)
  • Latex gloves
  • Printing brayer
  • Printing baren or large spoon
  • Heavy drawing paper
  • Spray bottle
  • LOTS of paper towels

Steps:

Prepare your plate

  • Cut a piece of foil slightly larger than your sheet of plexi. Carefully smooth it down so it’s nice and flat; try to avoid creating any folds or wrinkles.
  • Fold the edges of the foil around the plexiglas and tape them down to the back.
  • Use your sponge to wet the surface of the foil with a little water, then sand it lightly with your scrubber until it’s dull and no longer super shiny.
  • Wipe the surface down with white vinegar to clean off the plate.
???????????????????????????????

Sharpie image on plate

Draw and etch your image

  • When the surface of your plate is dry, draw an image on it with a Sharpie permanent marker. If you are adding text, remember to write backwards (your print will be a mirror image of your plate).
  • After you’re finished with your drawing, make a cola bath for your plate: fill a shallow pan (big enough to accommodate the plate) with about 1/4″ of soda. Then place your plate in the cola drawing-side down.
  • Let your plate soak in the cola bath for 10 minutes or longer.
  • Remove the plate and rinse it in the sink, gently trying to remove as much of the Sharpie drawing as you can.
  • Dry off your plate, then buff the surface using a small amount of vegetable oil and a paper towel. This should help remove the last bits of marker. Even though you may not be able to “see” your drawing any more, don’t panic!  The cola should have etched it into the foil, creating a “ghost” image.

Ink your plate and print

  • Load your brayer with ink: spread a small amount of ink on a paper plate, then roll it out with your brayer until the entire surface is coated evenly with ink. Set the brayer aside.
  • Set your plate face-up on the counter. Wipe down the entire surface with a wet sponge.
???????????????????????????????

Inking

  • Roll the brayer across your plate. You should notice the ink start to stick to your ghost drawing. It may take a few passes of alternating between wiping your plate with water and inking it to ink the entire plate.
  • Spray your drawing paper evenly with water and place it on top of your plate. Rub the back of your paper with a baren or the back of a spoon. If you have access to a printing press, that would be ideal.
  • Carefully peel back the paper and leave it to dry.
???????????????????????????????

Printing

???????????????????????????????

Printing

Coke Etching 2

DSC01836

Finished print side-by-side with original plate

As I said earlier, there are many variations on this technique that you can experiment with. People have drawn their image into the foil with grease/litho crayons, touche, even Murphy’s Oil Soap! Each of these options would be fun to try out and should give you different results.

To me, the trickiest part is inking the plate–I ruined the first two that I tried to print during that stage. I found that I didn’t use enough water when I was wetting my plate and the ink ended up sticking to everything instead of just my drawing. The nice thing is that it’s really easy to make a new one–just crumple up the old one and try again!

JC Bigornia
C3 Program Coordinator

DIY String Art Tutorial

Last weekend, the Dallas Museum of Art teamed up with the Perot Museum of Nature and Science for our Art + Science Festival. Visitors enjoyed activities ranging from light graffiti to digital microscope observations to a film about artists and scientists who devote their lives to origami.

If you ventured to the DMA’s Fleischner Courtyard during the festival, you probably noticed a colorful creation of string being woven through the trees. That’s because guest artist Amie Adelman was leading a workshop which involved visitors helping her create a sculpture of geometric lines and angles using just the courtyard’s trees and string as supplies.

026

Although it may be difficult to create a work of art on your own as immense as the one that graced the DMA’s courtyard last weekend, there’s a simple way to create your own string art with supplies that you can find in your own home:

What you need:

  • Cardboard square (our example is 8″ X 8″)
  • Pencil
  • Ruler
  • Exacto knife
  • Scissors
  • Thread

Step 1

Using a ruler as a guide, make small marks with a pencil on all four sides of your cardboard square that are one inch apart from each other.

stringart1

Step 2

Once you have drawn marks on all four sides of your cardboard square, score the marks all the way through the cardboard with an exacto knife.

stringart2

Step 3

After all pencil marks are scored, wrap your cardboard square with thread. Make sure that the thread is wrapped tight enough through the scored marks that they do not easily slip out. This will also keep you from having to knot the thread when you’re finished creating your design.

Think about the different geometric designs that you want to make with the thread. The more layers of thread that you add to your cardboard, the thicker and more visible it will appear when you’re finished.

stringart4

Step 4

Once you’re through using your thread of choice, cut the thread on the back of your string art creation.

stringart5

Step 5

Optional: Keep adding more colors of thread to your design. If you choose to add more colors, repeat steps 3 and 4 for each color of thread that you add.

stringart6

There are a lot of different geometric designs that you can create with string art! Share what colors and designs you decide to incorporate into your own string art creation in the comments!

stringart8

Amy Elms
McDermott Intern for Visitor Engagement

DIY Photo Transfer

Spring is (finally) here, which means that many of us in the education department are gearing up for Summer Art Camps! The best part of teaching a summer camp is getting to experiment and explore with materials to devise fun and engaging art projects. Jessica Fuentes and I are teaching a summer photography camp for 6-8 year olds, called Developing an Eye for Art. In this camp we are going above and beyond the simple point and shoot aspect of photography, and urging our students to explore this artistic medium through many different avenues. A favorite exploratory activity of mine is photo transfer, because it is a fairly straightforward project that invites loads of experimentation.

5

What you need:

  • Photograph to transfer (higher contrast photos are best)
  • Light colored piece of wood (5×7″ is what I used)
  • Matte gel medium (found in the acrylic paints section of art & craft stores)
  • Scissors
  • Paint brush (can be foam or bristle)
  • Mod Podge (I used matte finish)
  • Access to a laser printer or copy machine

Step 1

Print your chosen photograph from a laser printer, or make a copy of the image on a photocopier. Do not use an ink jet printer, as it will smudge the image. Make sure the printed or copied image is the same size (or smaller) than your piece of wood.photo (5)

Step 2

Cut out the laser print-out of your image, making sure you do not leave a border around the image.

scissors

Step 3

Use a foam or bristle brush to place a thin layer of matte gel medium directly onto your image, which will make the image opaque white.

Brush gel medium directly onto image.

Step 4

Before the gel medium dries, place your image face down on your piece of wood. Be careful with placement as you will not be able to move the photograph once it dries.

Once your image is in place, smooth out and flatten any air bubbles underneath your photo. You can use your fingers or anything with a stiff edge (like a ruler) to smooth out any bumpy places. Make sure not to push too hard and rip your image.sandwich

Step 5

Let your photo transfer sit and dry for at least 8 hours.

Step 6

After your photo transfer has dried, get a wet rag and lay it on top of the image, making sure to get the paper nice and soaked. Next, use your fingers or a rag to carefully rub off the fuzzy white paper fibers, revealing your lovely photo underneath.

It is best to let the transfer dry in-between paper rubbings, to make sure that all the bits of paper are removed. This make take time and multiple drying and re-wetting sessions. Be patient 🙂

smush

Step 7

Once your photo transfer is dry and to your liking, brush a layer (or two) of Mod Podge on top of the image to seal the work.

That’s it! Your photo transfer is done and ready to be shown off! This simple project can be modified to give a more or less distressed look to the finished work, experiment and see what you can do!

Finished transfers.

Finished transfers.

Danielle Schulz
Teaching Specialist


Archives

Flickr Photo Stream

Categories