Posts Tagged 'Printmaking'

Printmaking: A Process

Modern technology makes creating multiples easy. With a click of a button, we can print full-color images and entire articles of text in seconds. Making copies wasn’t always so quick and simple—entire books were scribed by hand, and artists and their studios would labor over multiple versions of a painting or sculpture for their clientele.

Today’s electronic printers can trace their origins to the early printmaking innovators in East Asia. In China, engraved blocks of wood were used to create copies of written text as early as the 8th century. Korean printmakers took woodblock printing a step further by creating the earliest form of metal movable type in the early 13th century, nearly two centuries before Gutenberg brought movable type to Europe.

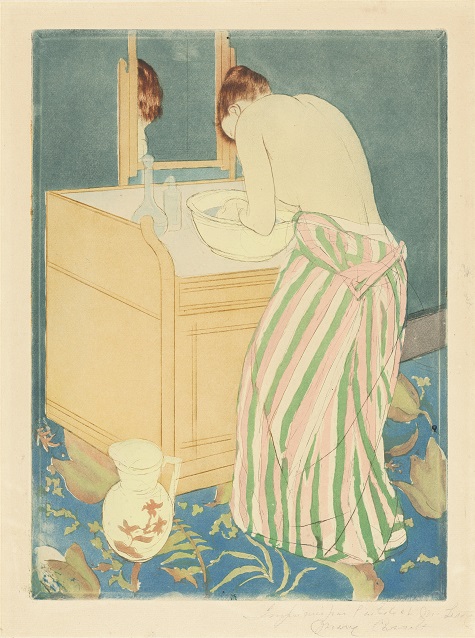
While printmaking facilitated a wider distribution of text and knowledge, how did it impact artwork and images? Innovations in the 17th century gave artists the ability to create multicolored prints on a single sheet. Engravers would create multiple carved blocks for a design, with each block carrying a different color. Previously, an outline had been printed in one color, and artists would hand paint in the rest of the design.

Utagawa Hiroshige, Hara: Mount Fuji in the Morning, 1834, woodblock print, Dallas Museum of Art, gift of Mr. and Mrs. Stanley Marcus, 1984.202.14

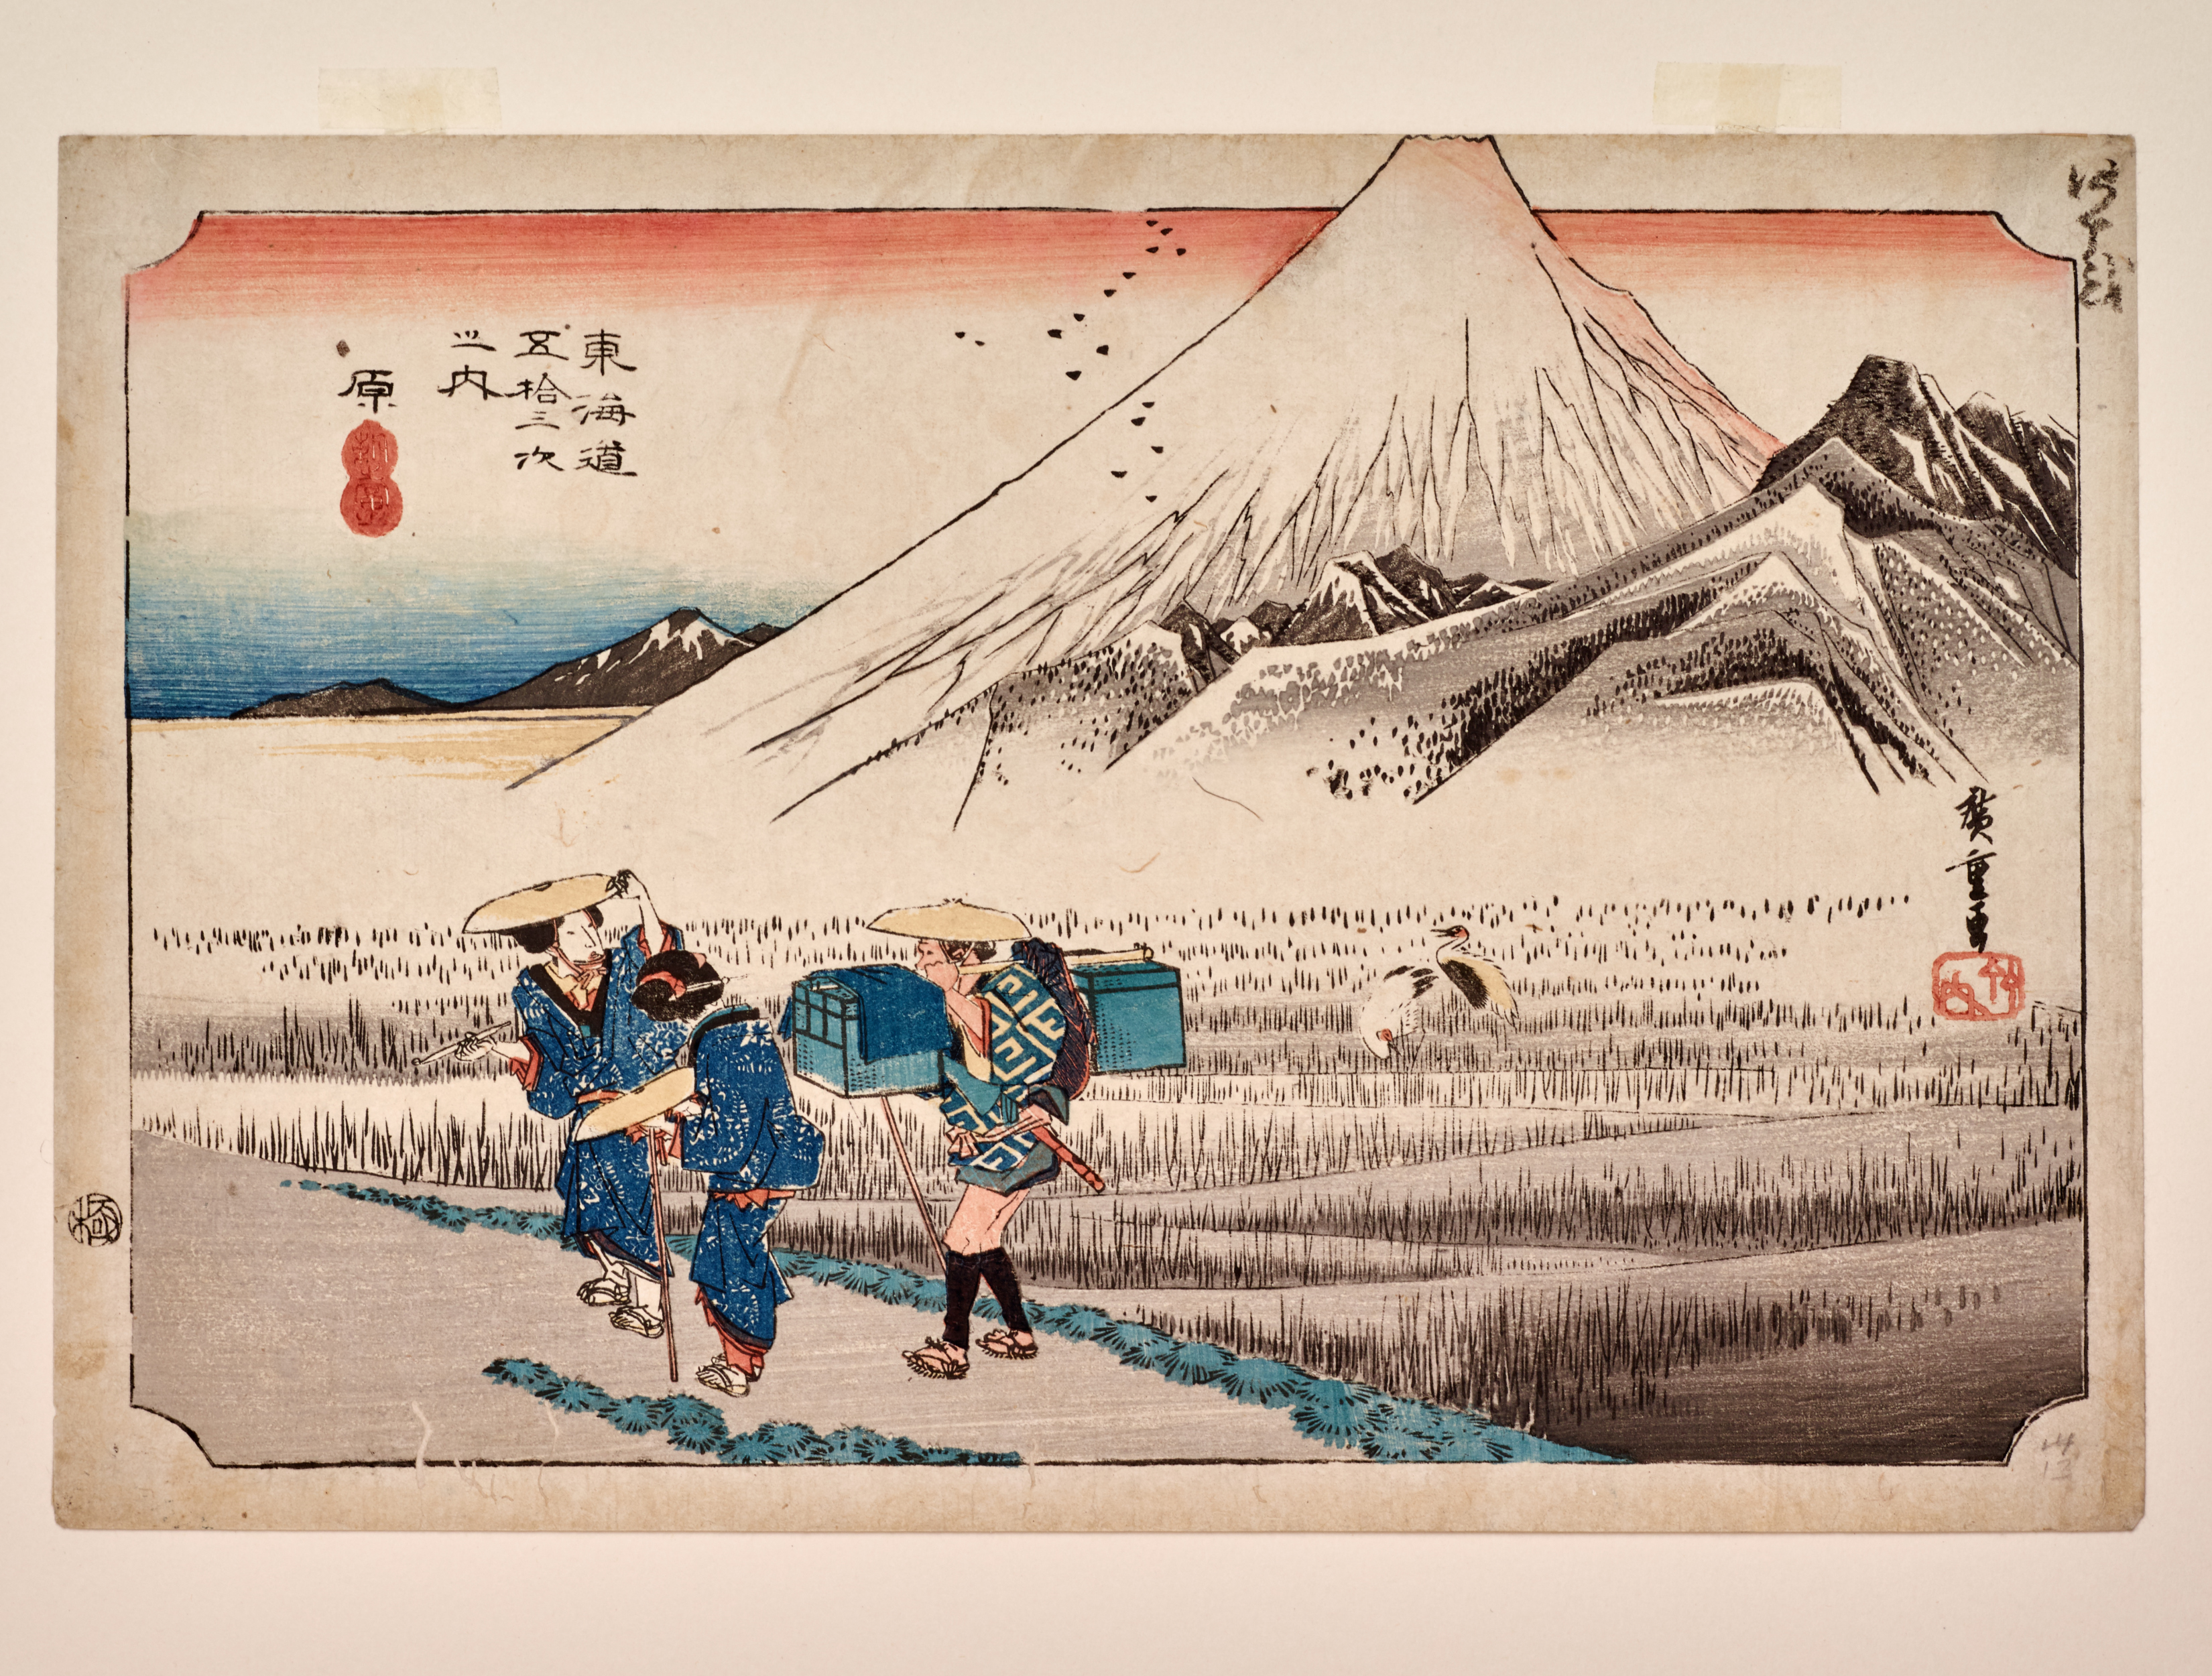
The addition of multiple blocks in the printing process meant that artists and publishers could speed up production, to the great benefit of everyday people. In Japan, Utagawa Hiroshige produced a series of 53 prints representing the stops along the Tokaido Road, which linked Edo and Tokyo. Hiroshige’s series was extremely popular; it was printed thousands of times and sold as a souvenir or keepsake for display in homes, indicating that prints were priced cheaply enough to make them accessible to travelers for purchase.

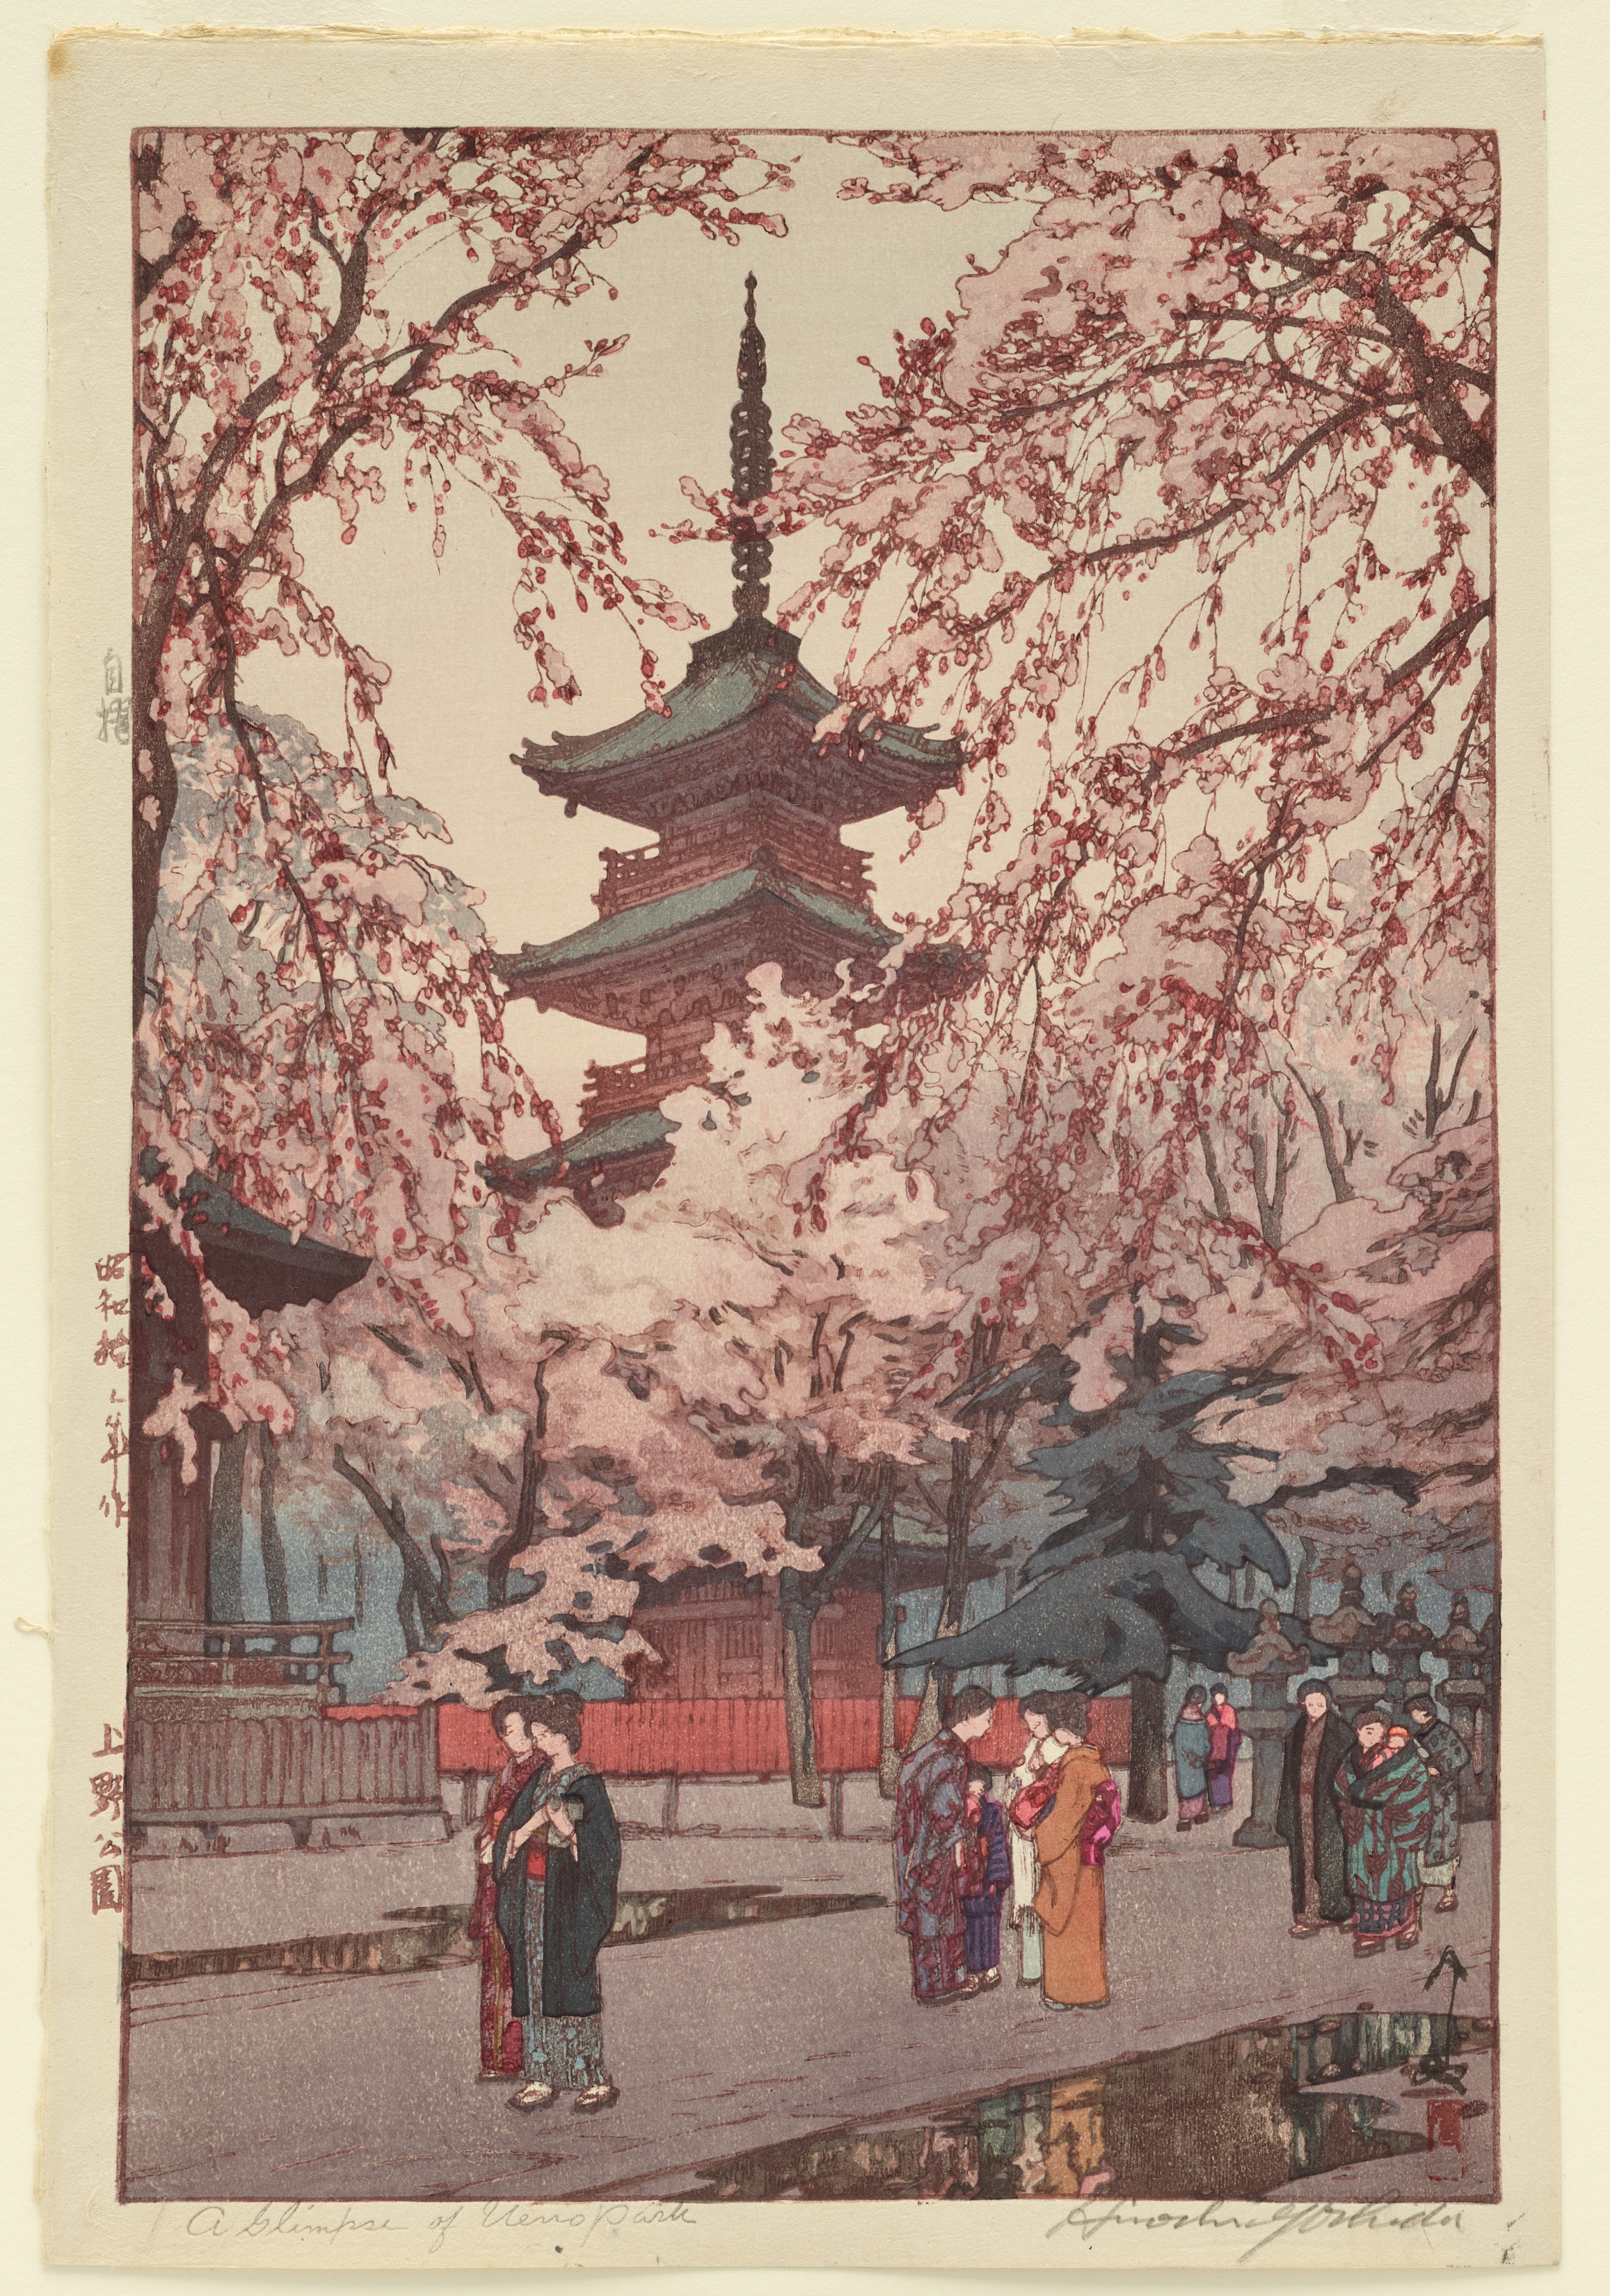
After spending time with Japanese woodblock prints, it’s easy to understand their popularity. In Hiroshige’s Tokaido Road series, as well as later works created by Hiroshi Yoshida, prints transport the viewer to new places and captured with spectacular detail and color how people interacted with their environments .

Hiroshi Yoshida, A Glimpse of Ueno Park, 1935, polychrome woodblock print, Dallas Museum of Art, the Abram C. Joseph and Ruth F. Ring Collection, gift of Miss Ruth F. Ring, 1985.44

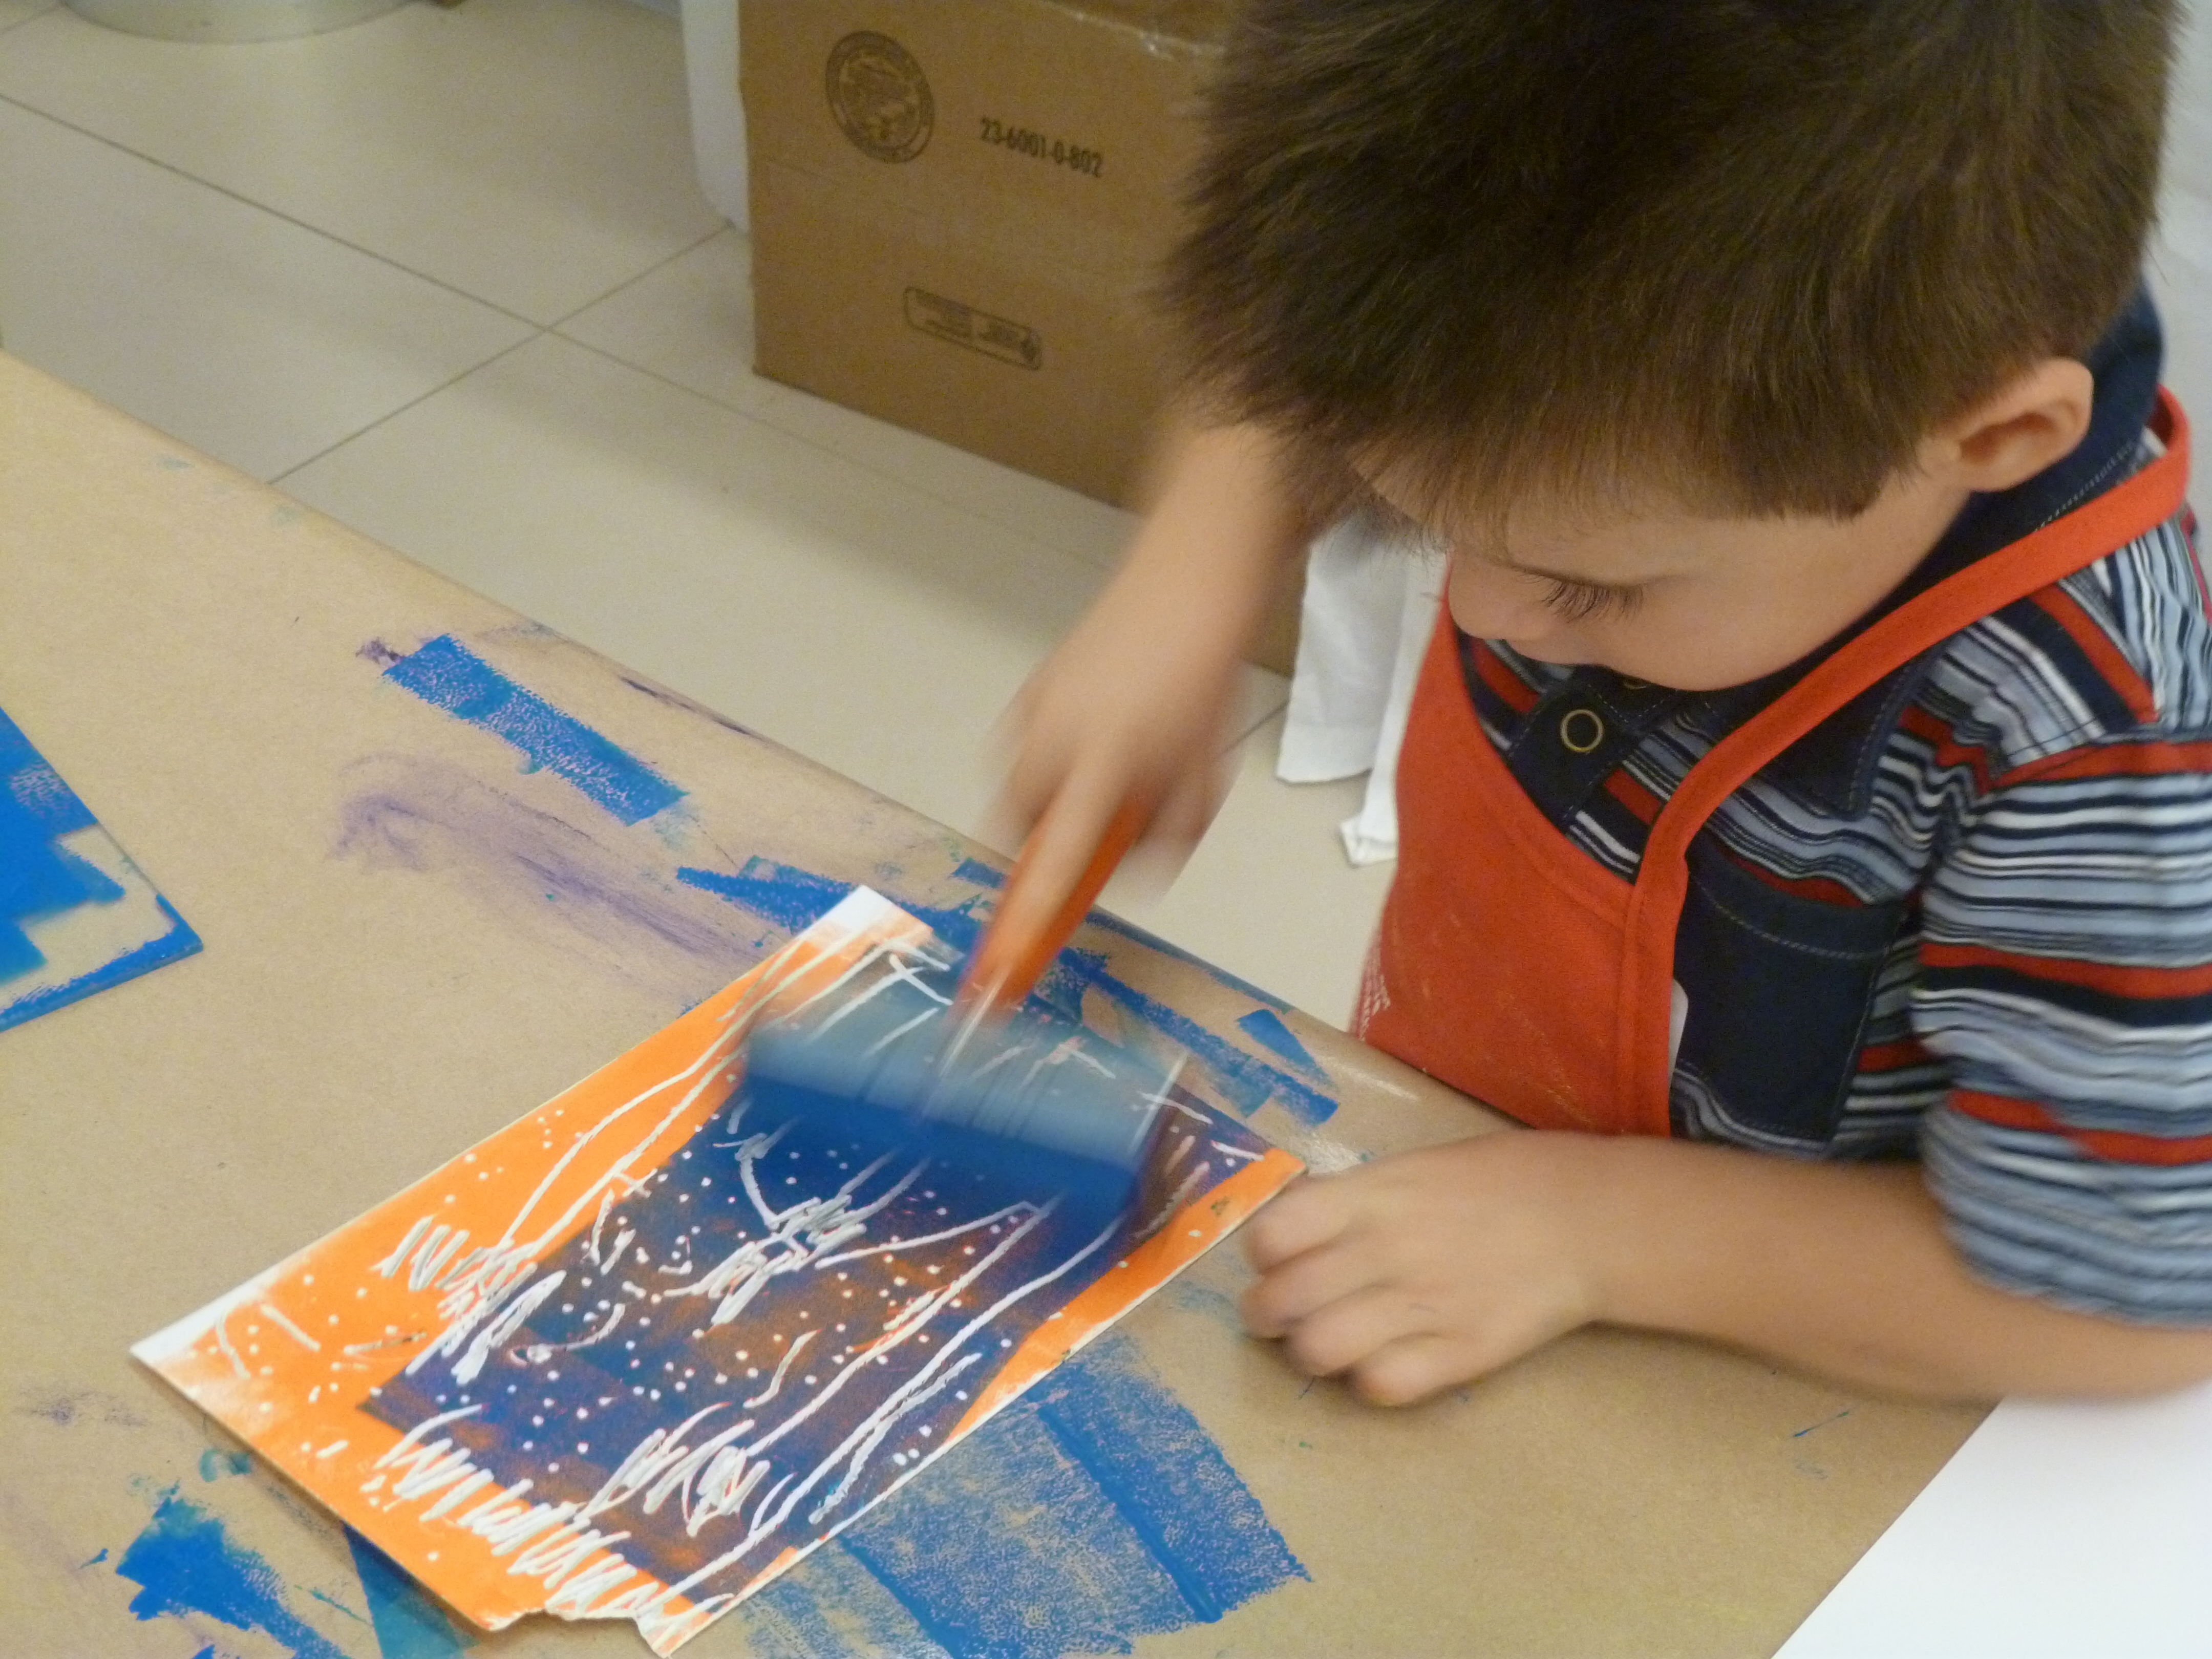
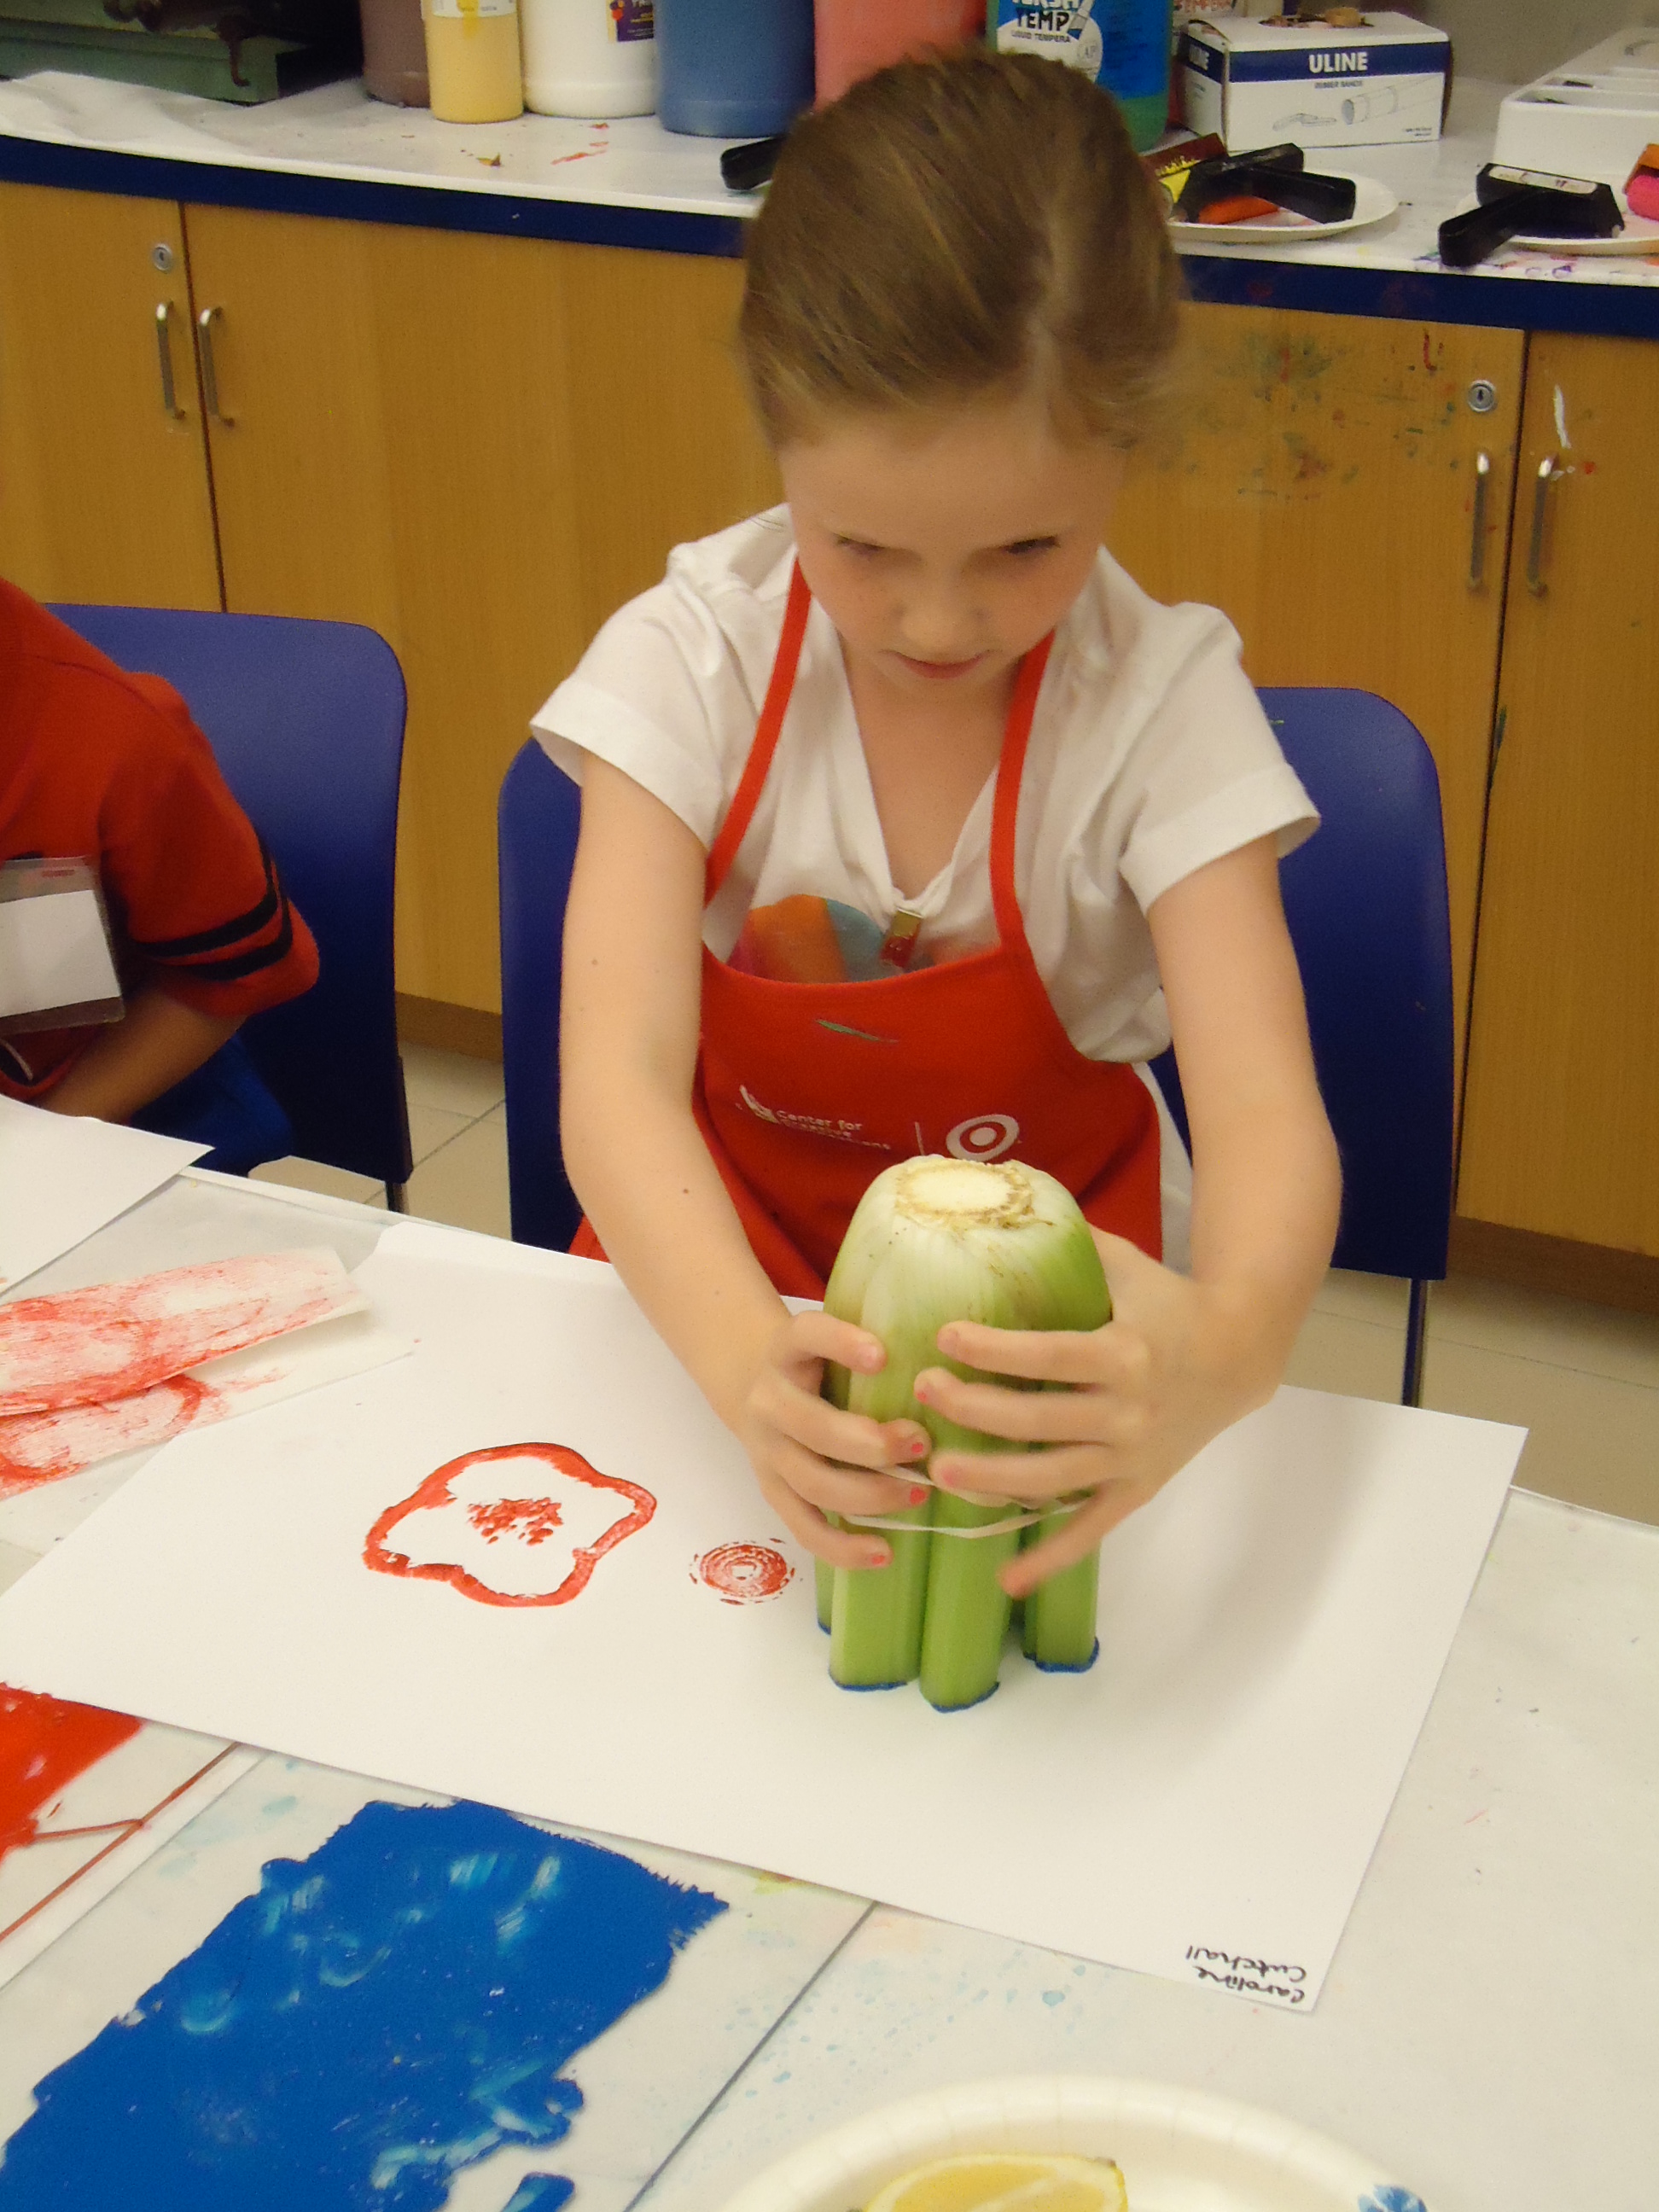
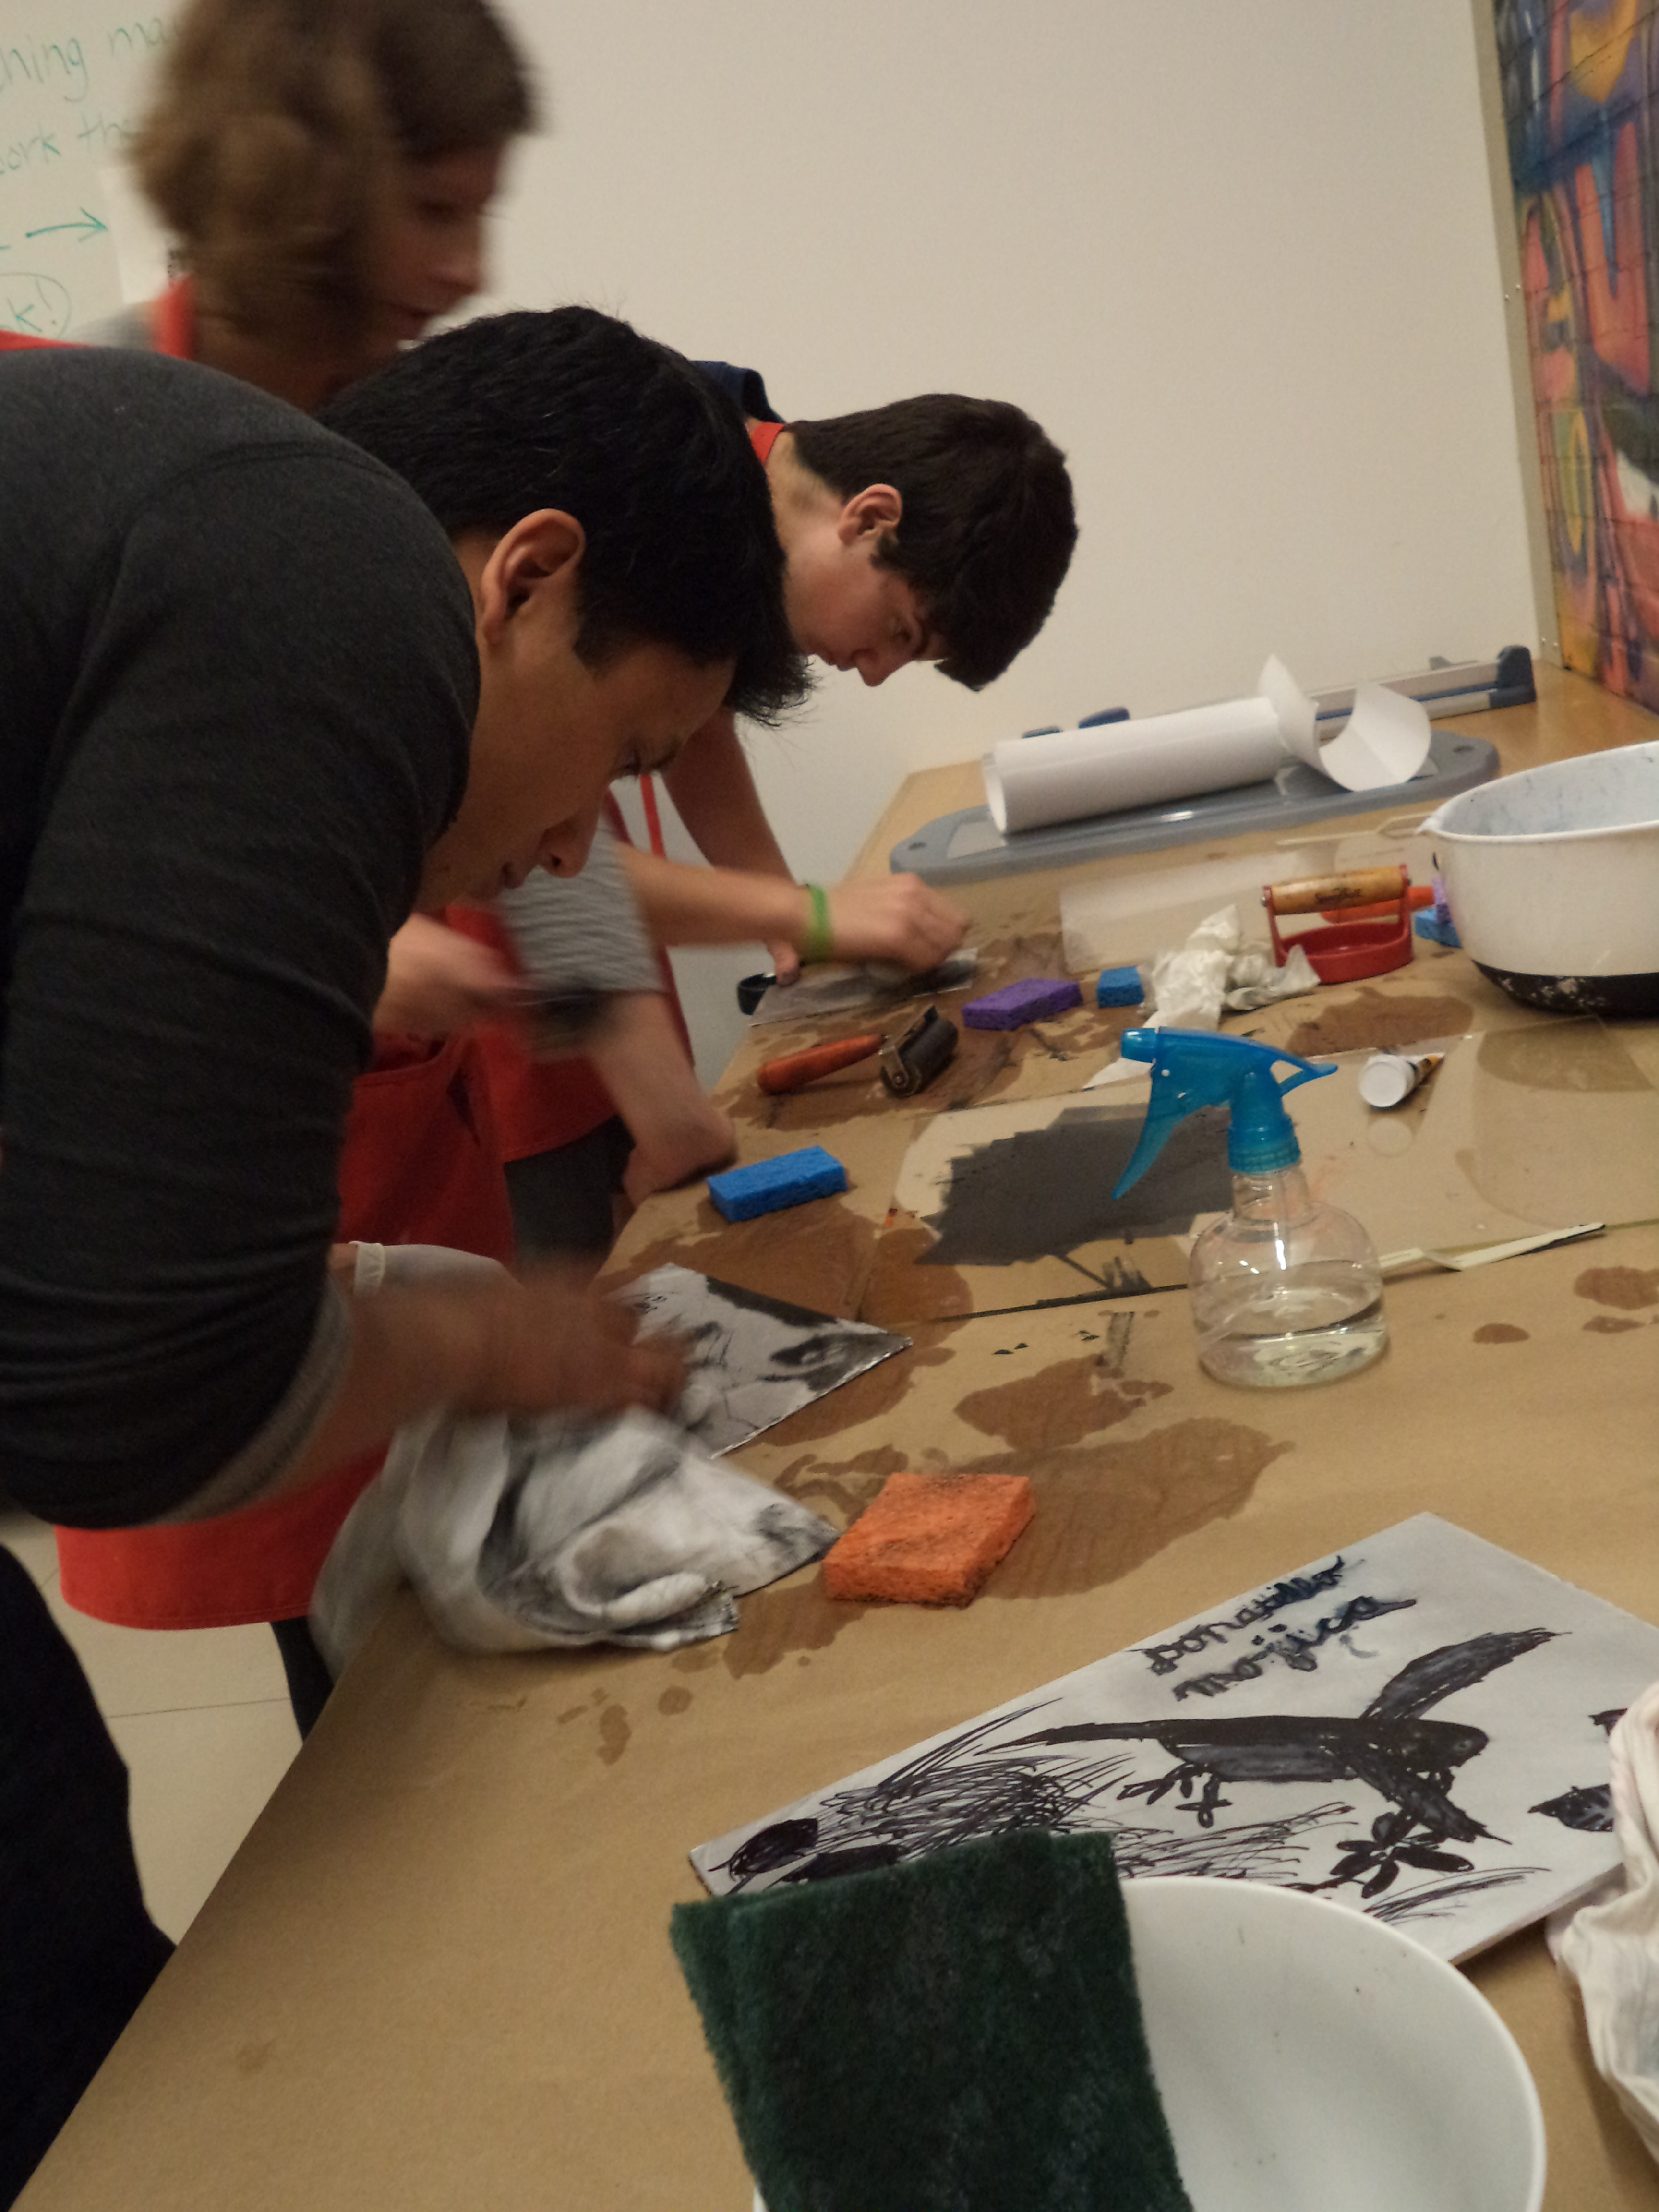
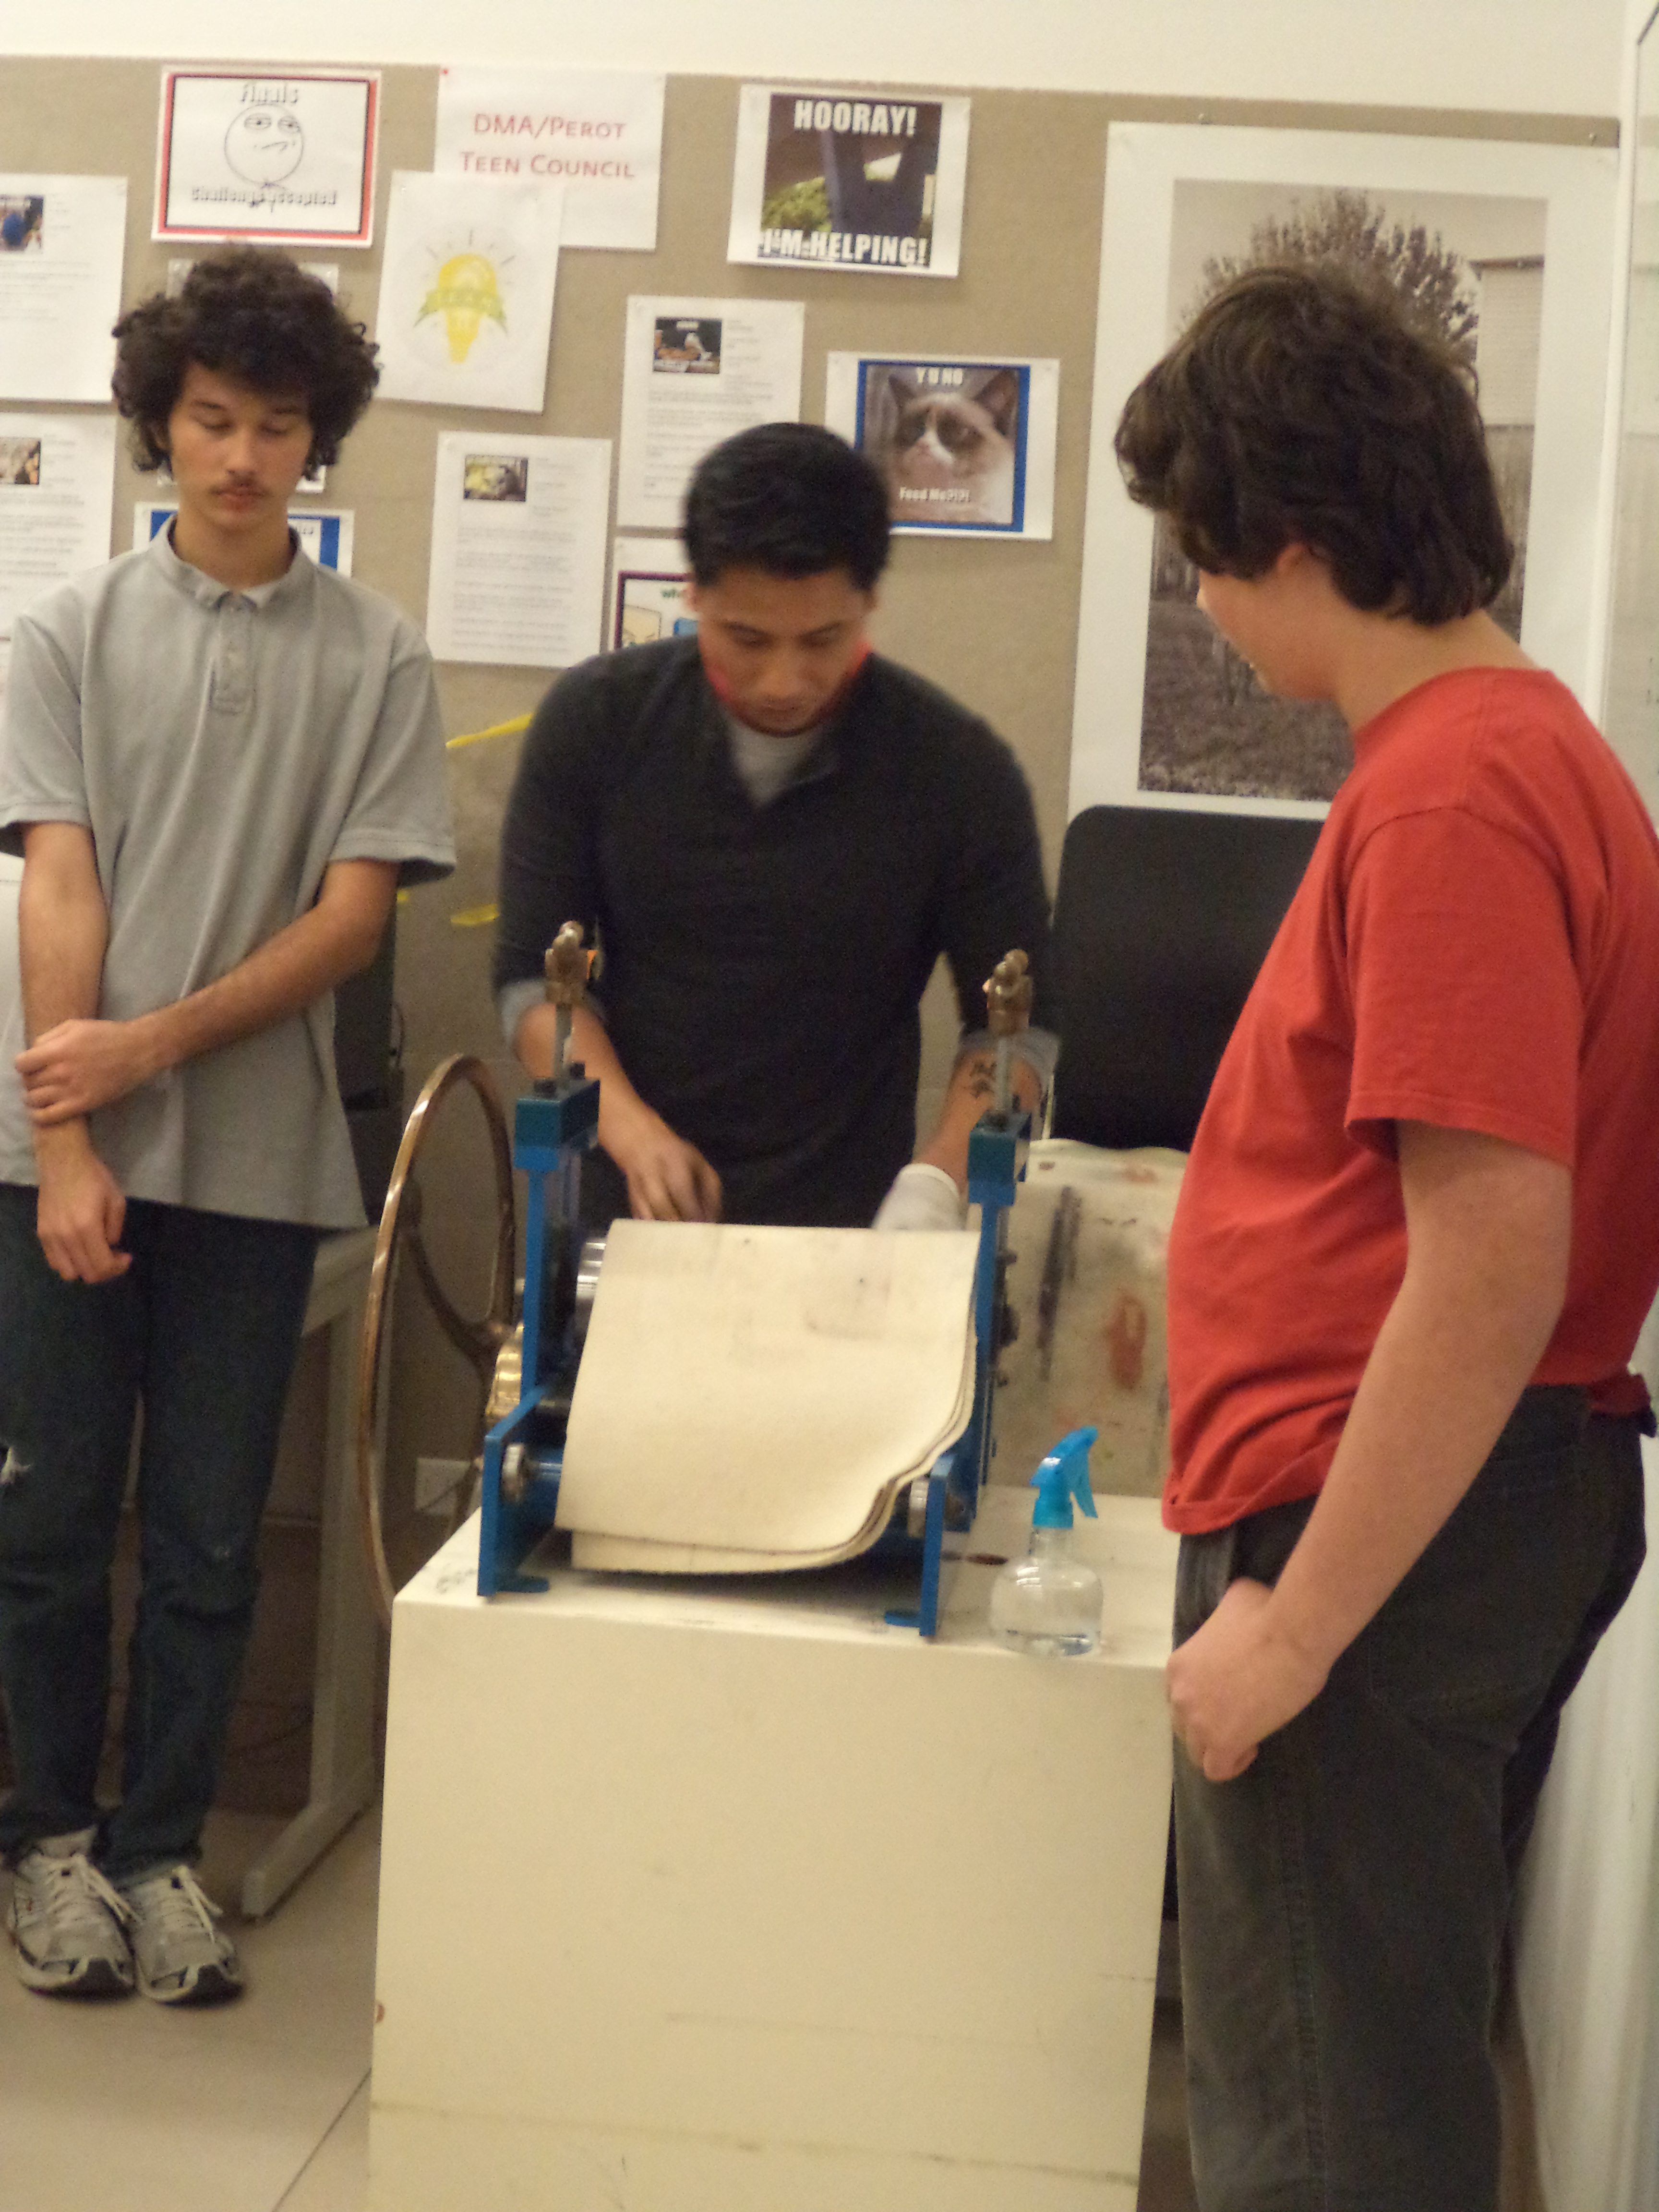
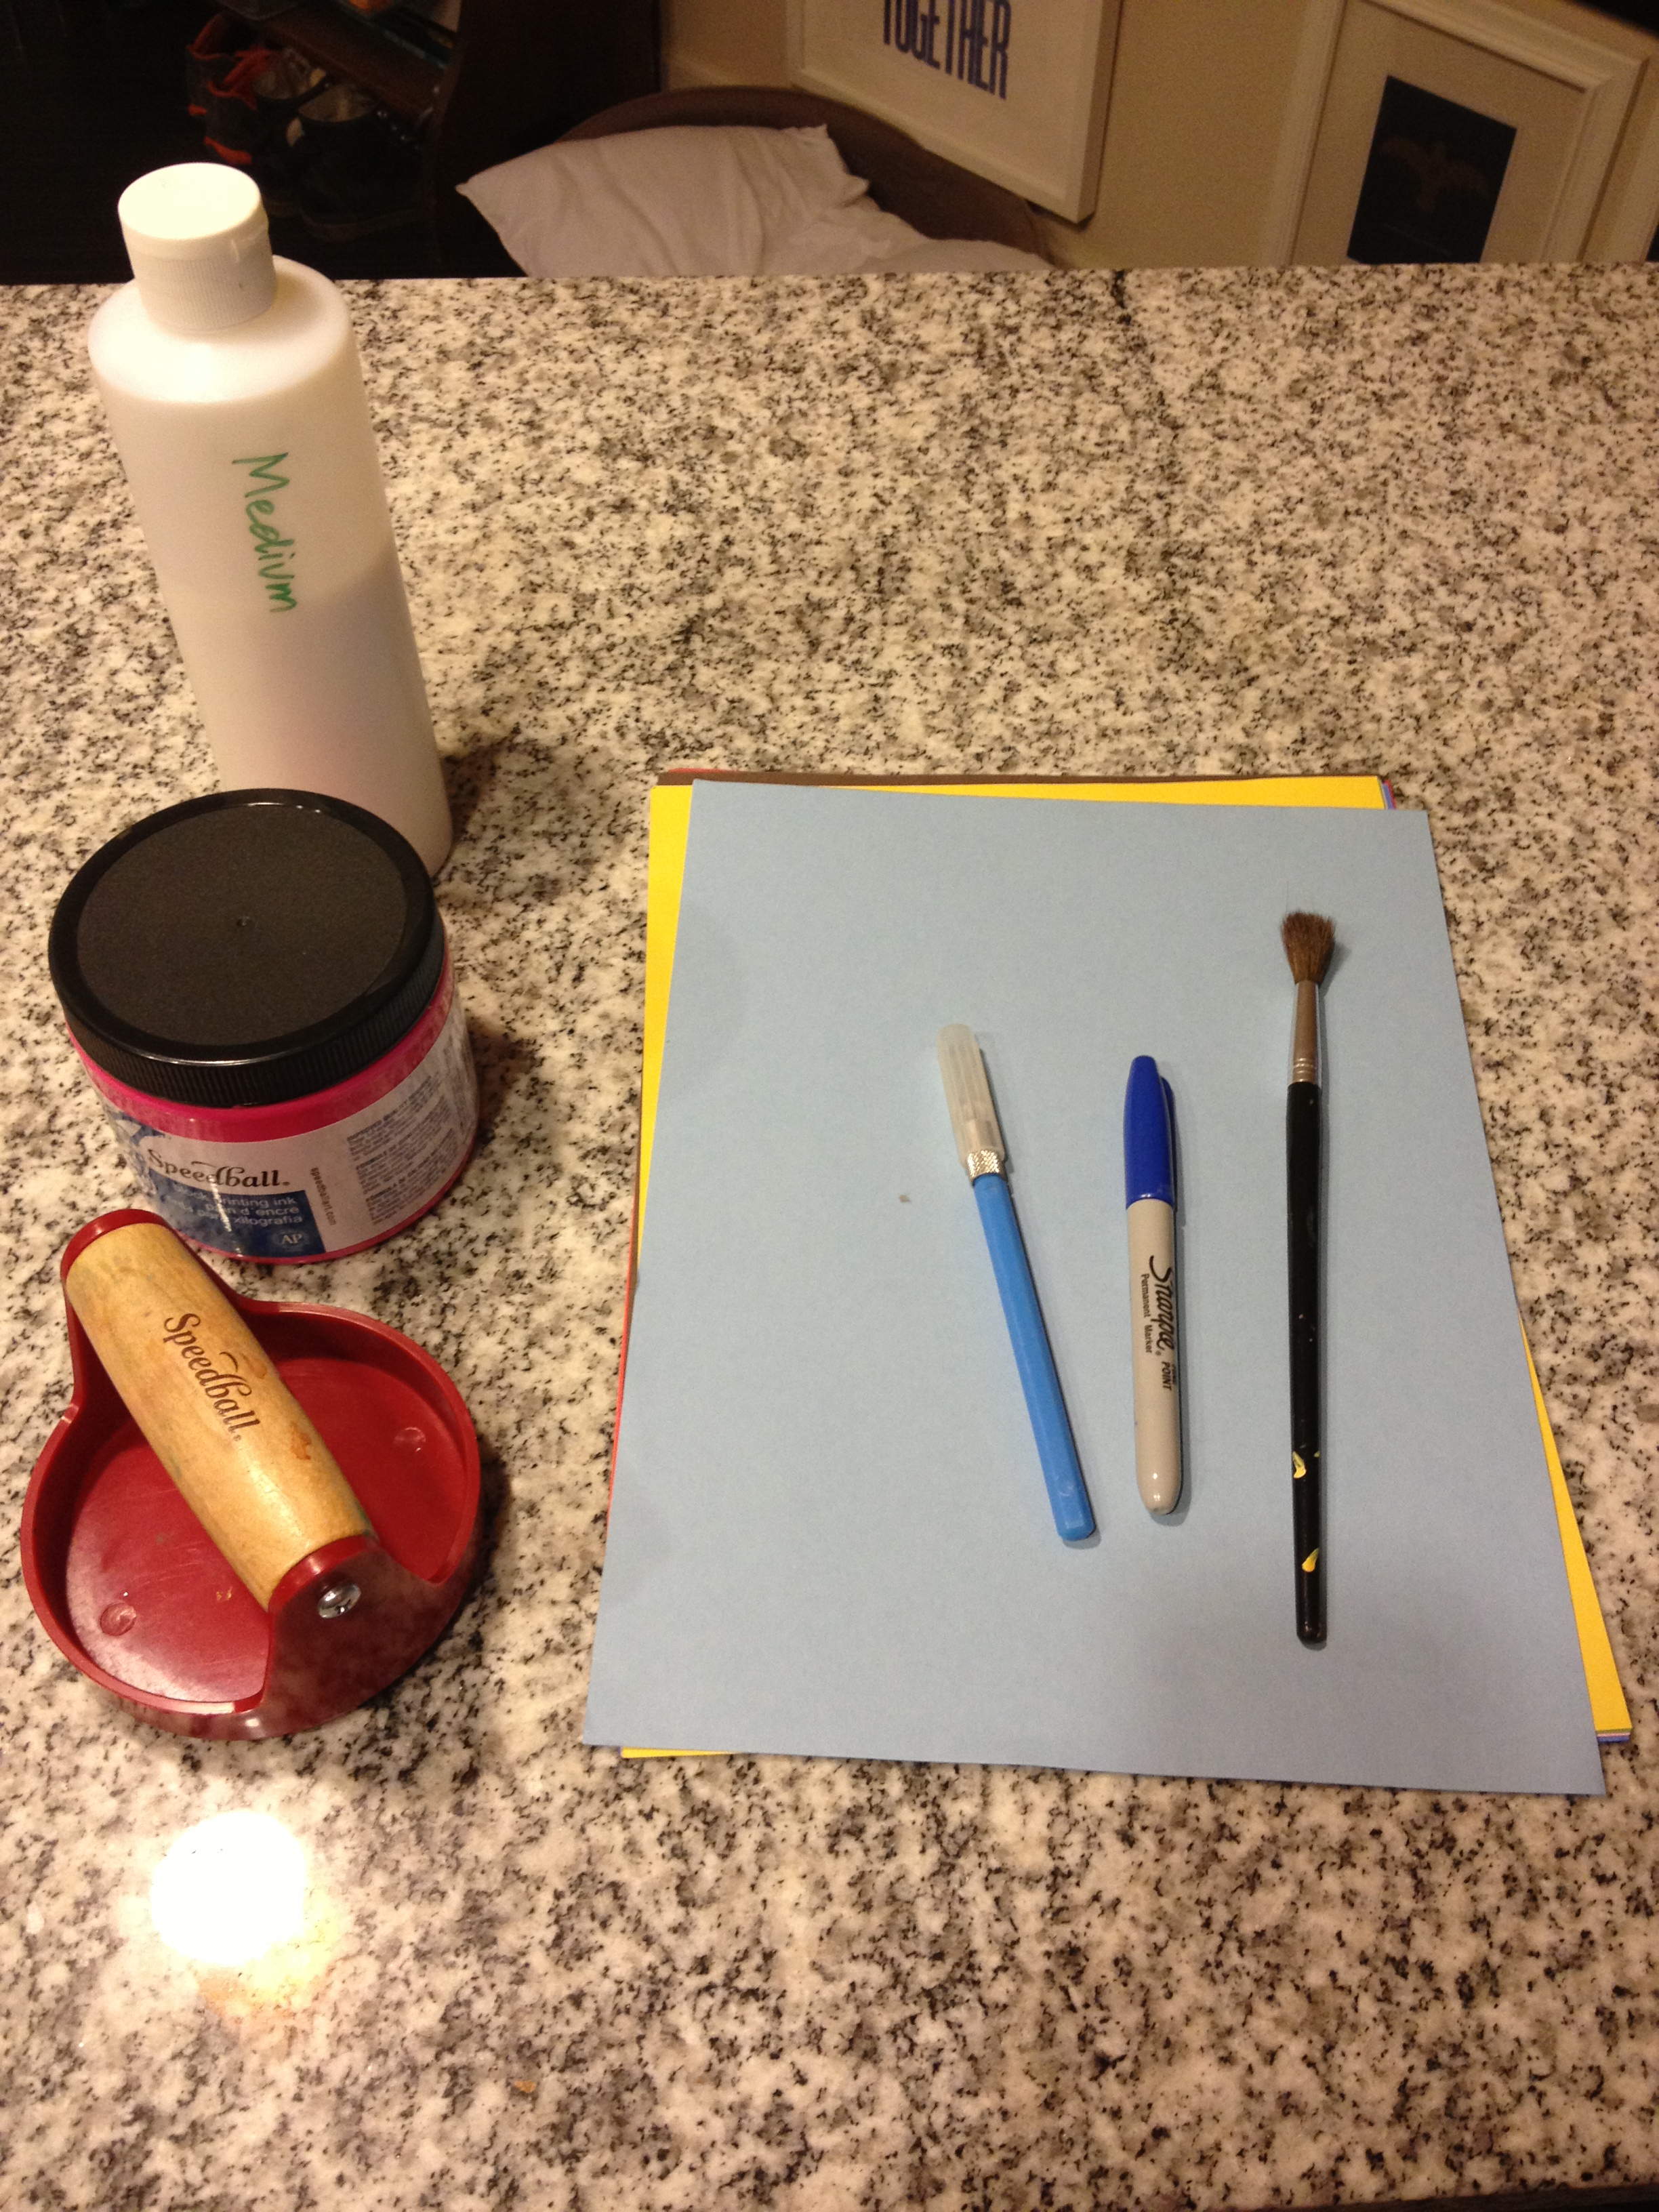
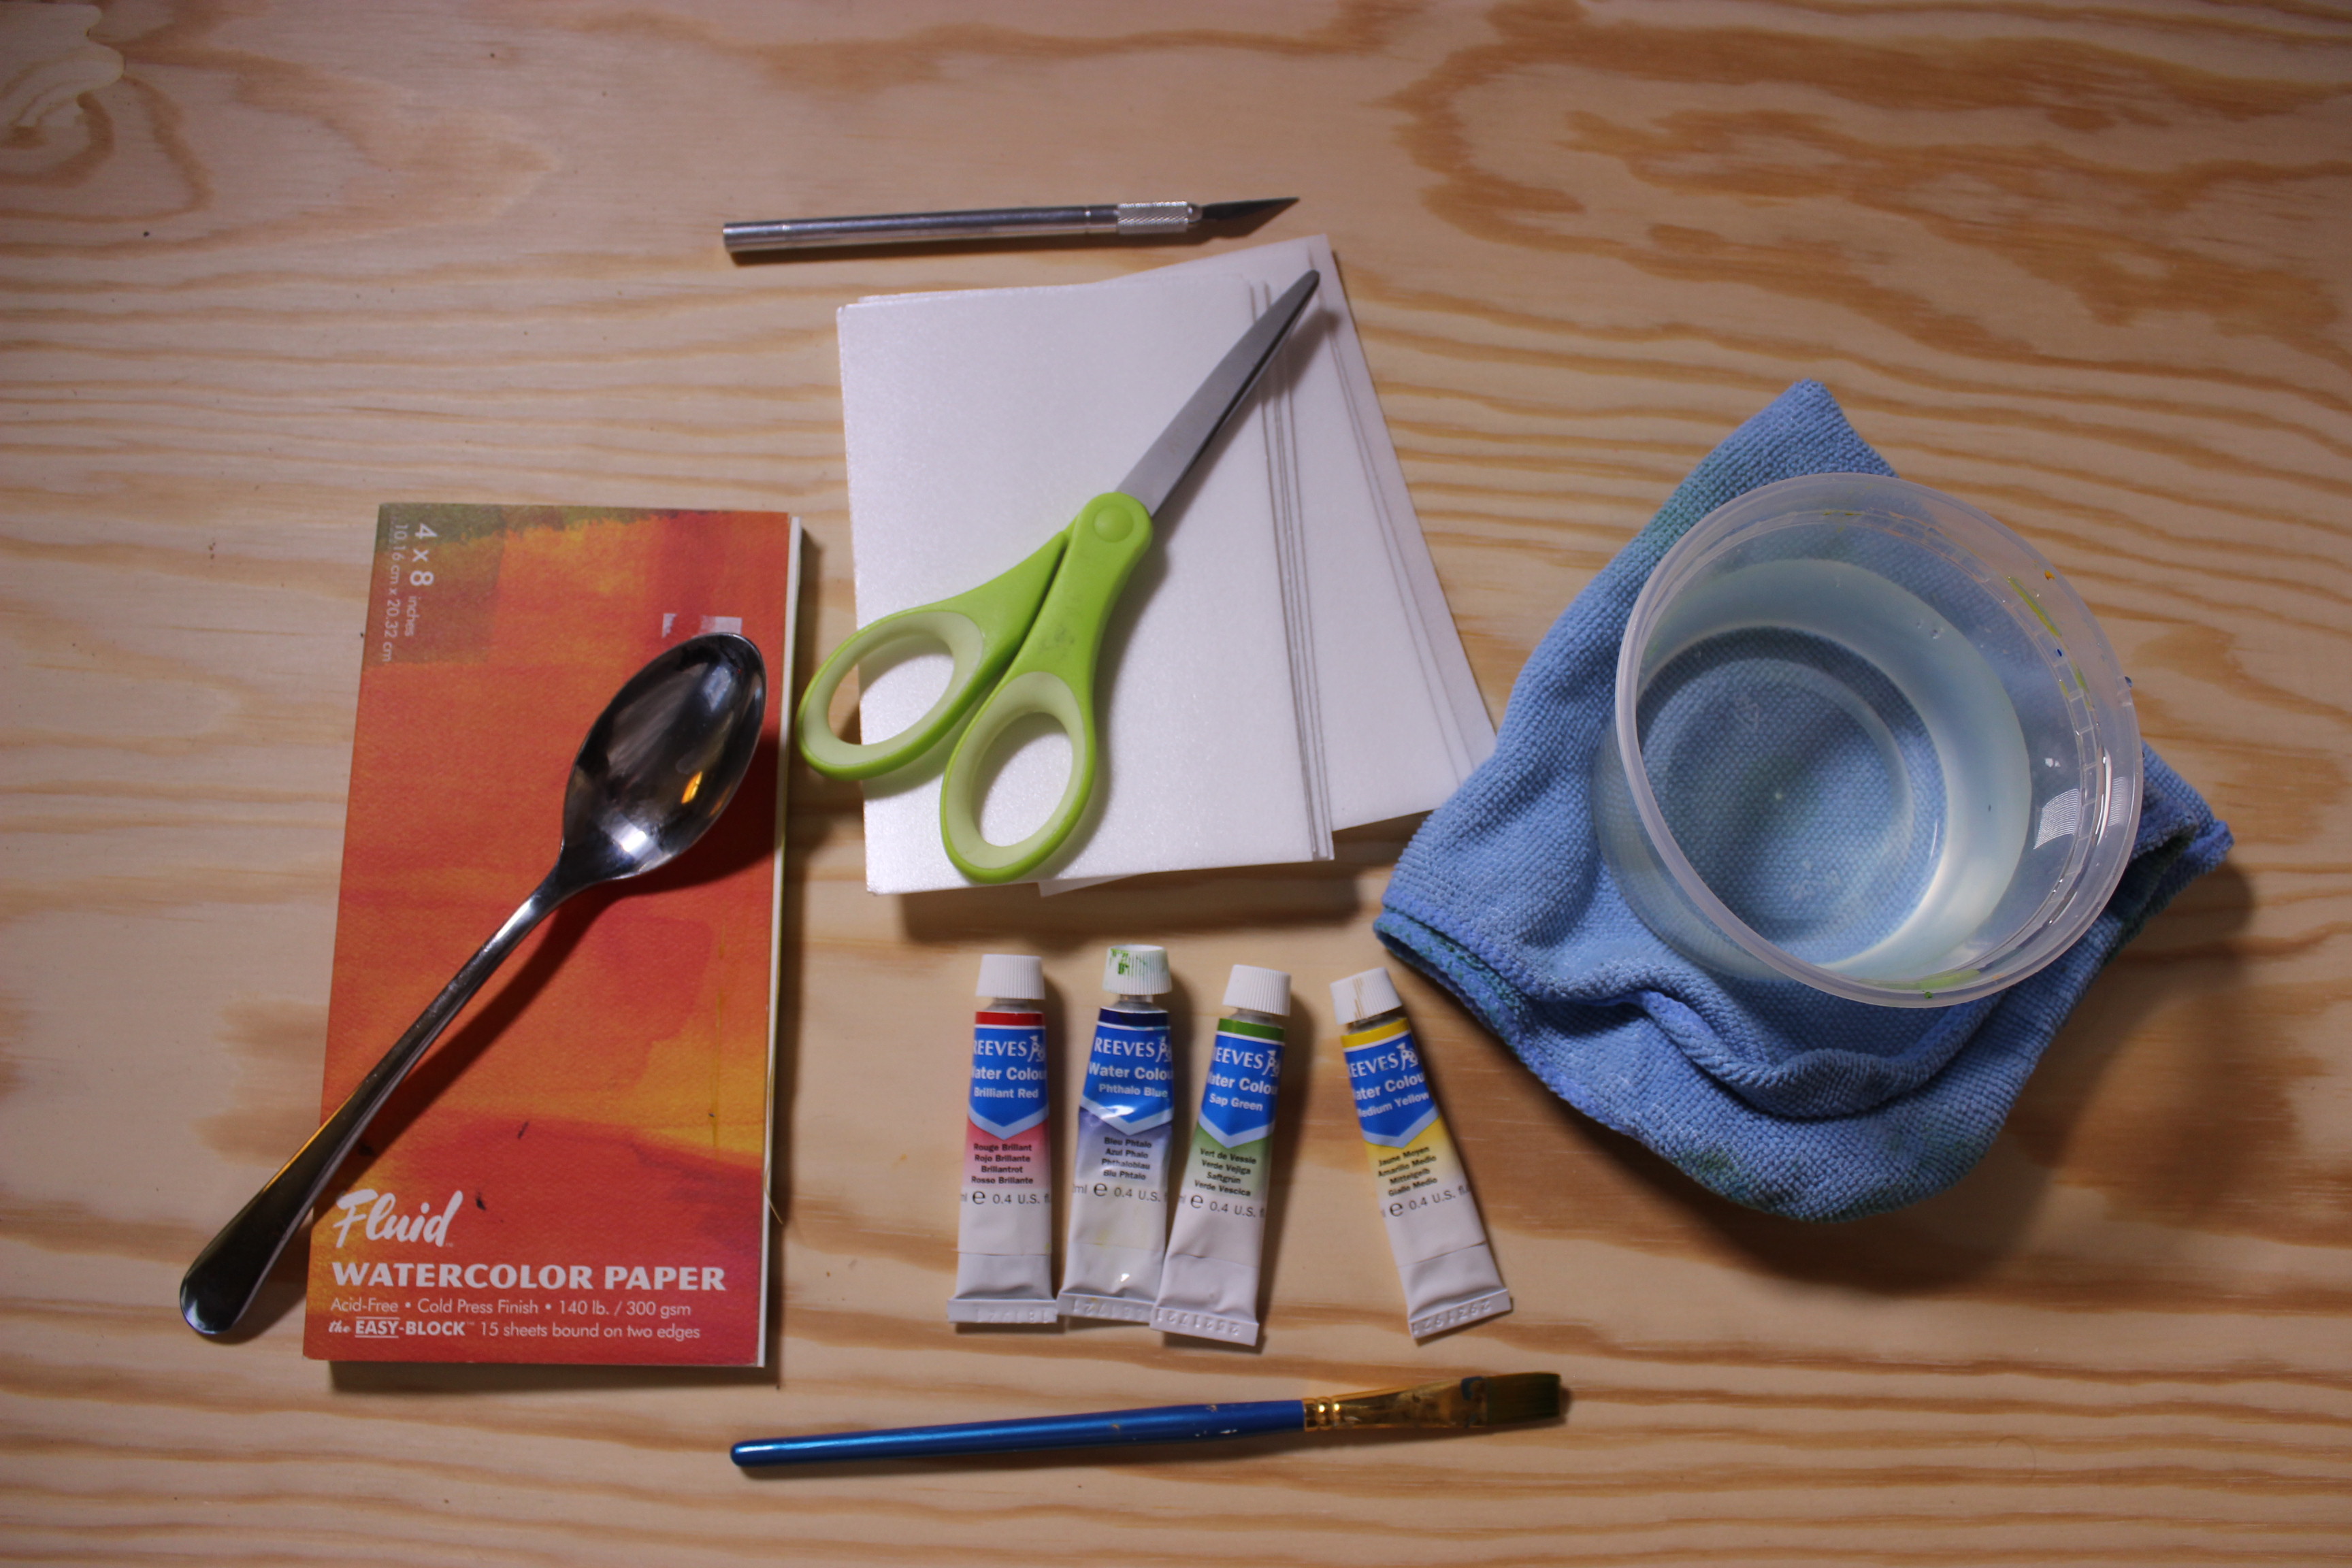
Curious about what it takes to make a print? While woodblock printing does require some special equipment, you can get a taste of the process using everyday materials you might already have at home. Here’s what you need:

  • 1–2 flat sheets of styrofoam, cut from a take-out container or paper plate 
  • Scissors or exacto knife  
  • Flat paintbrush 
  • Watercolor or acrylic paint 
  • Cup of water 
  • Rag or small towel  
  • A large metal spoon  
  • Watercolor paper 

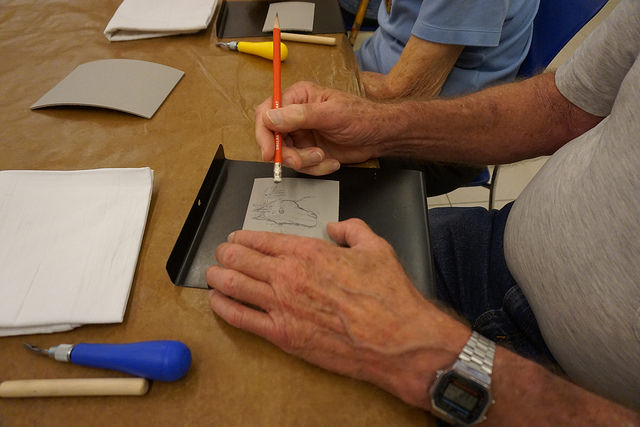
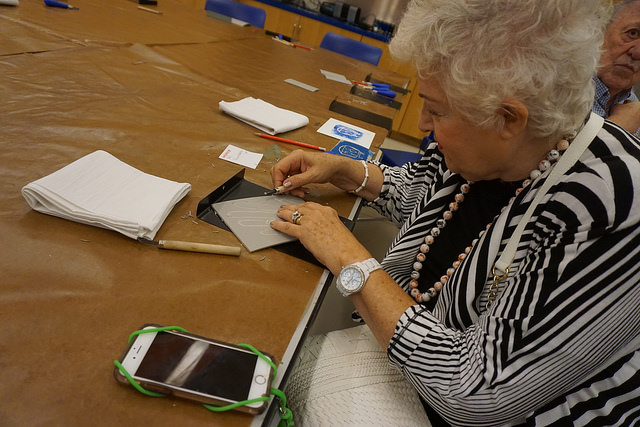
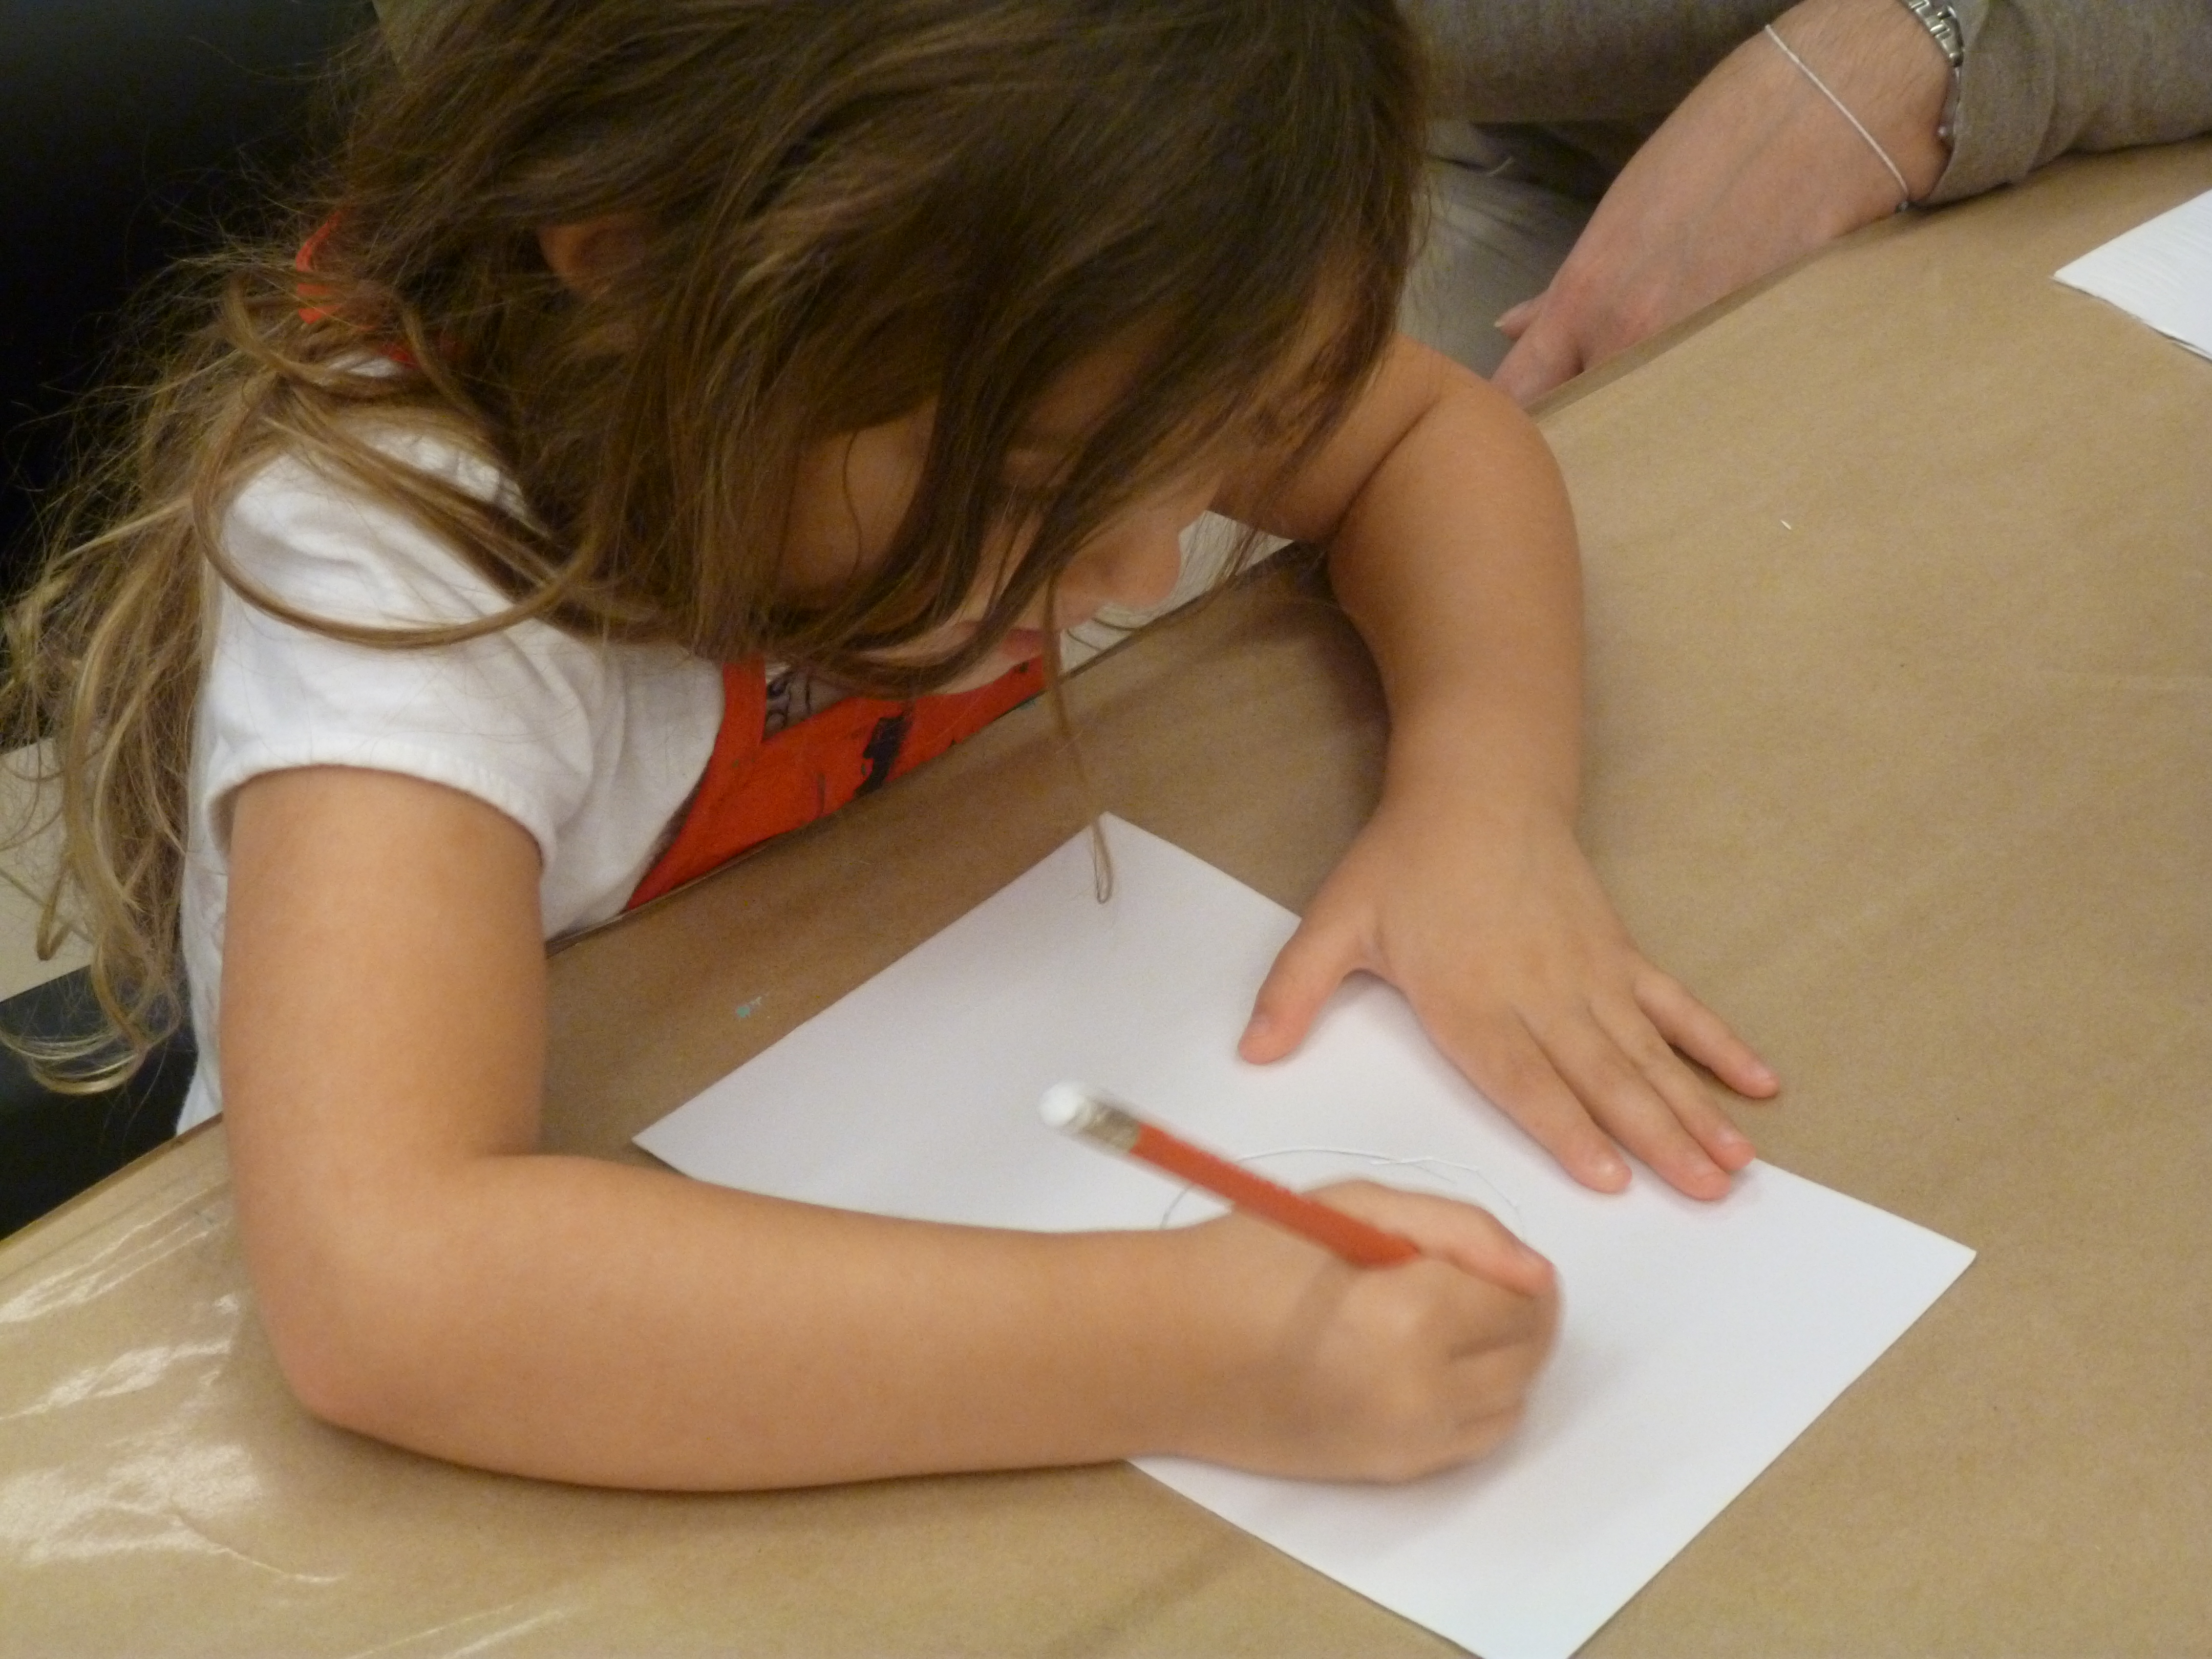
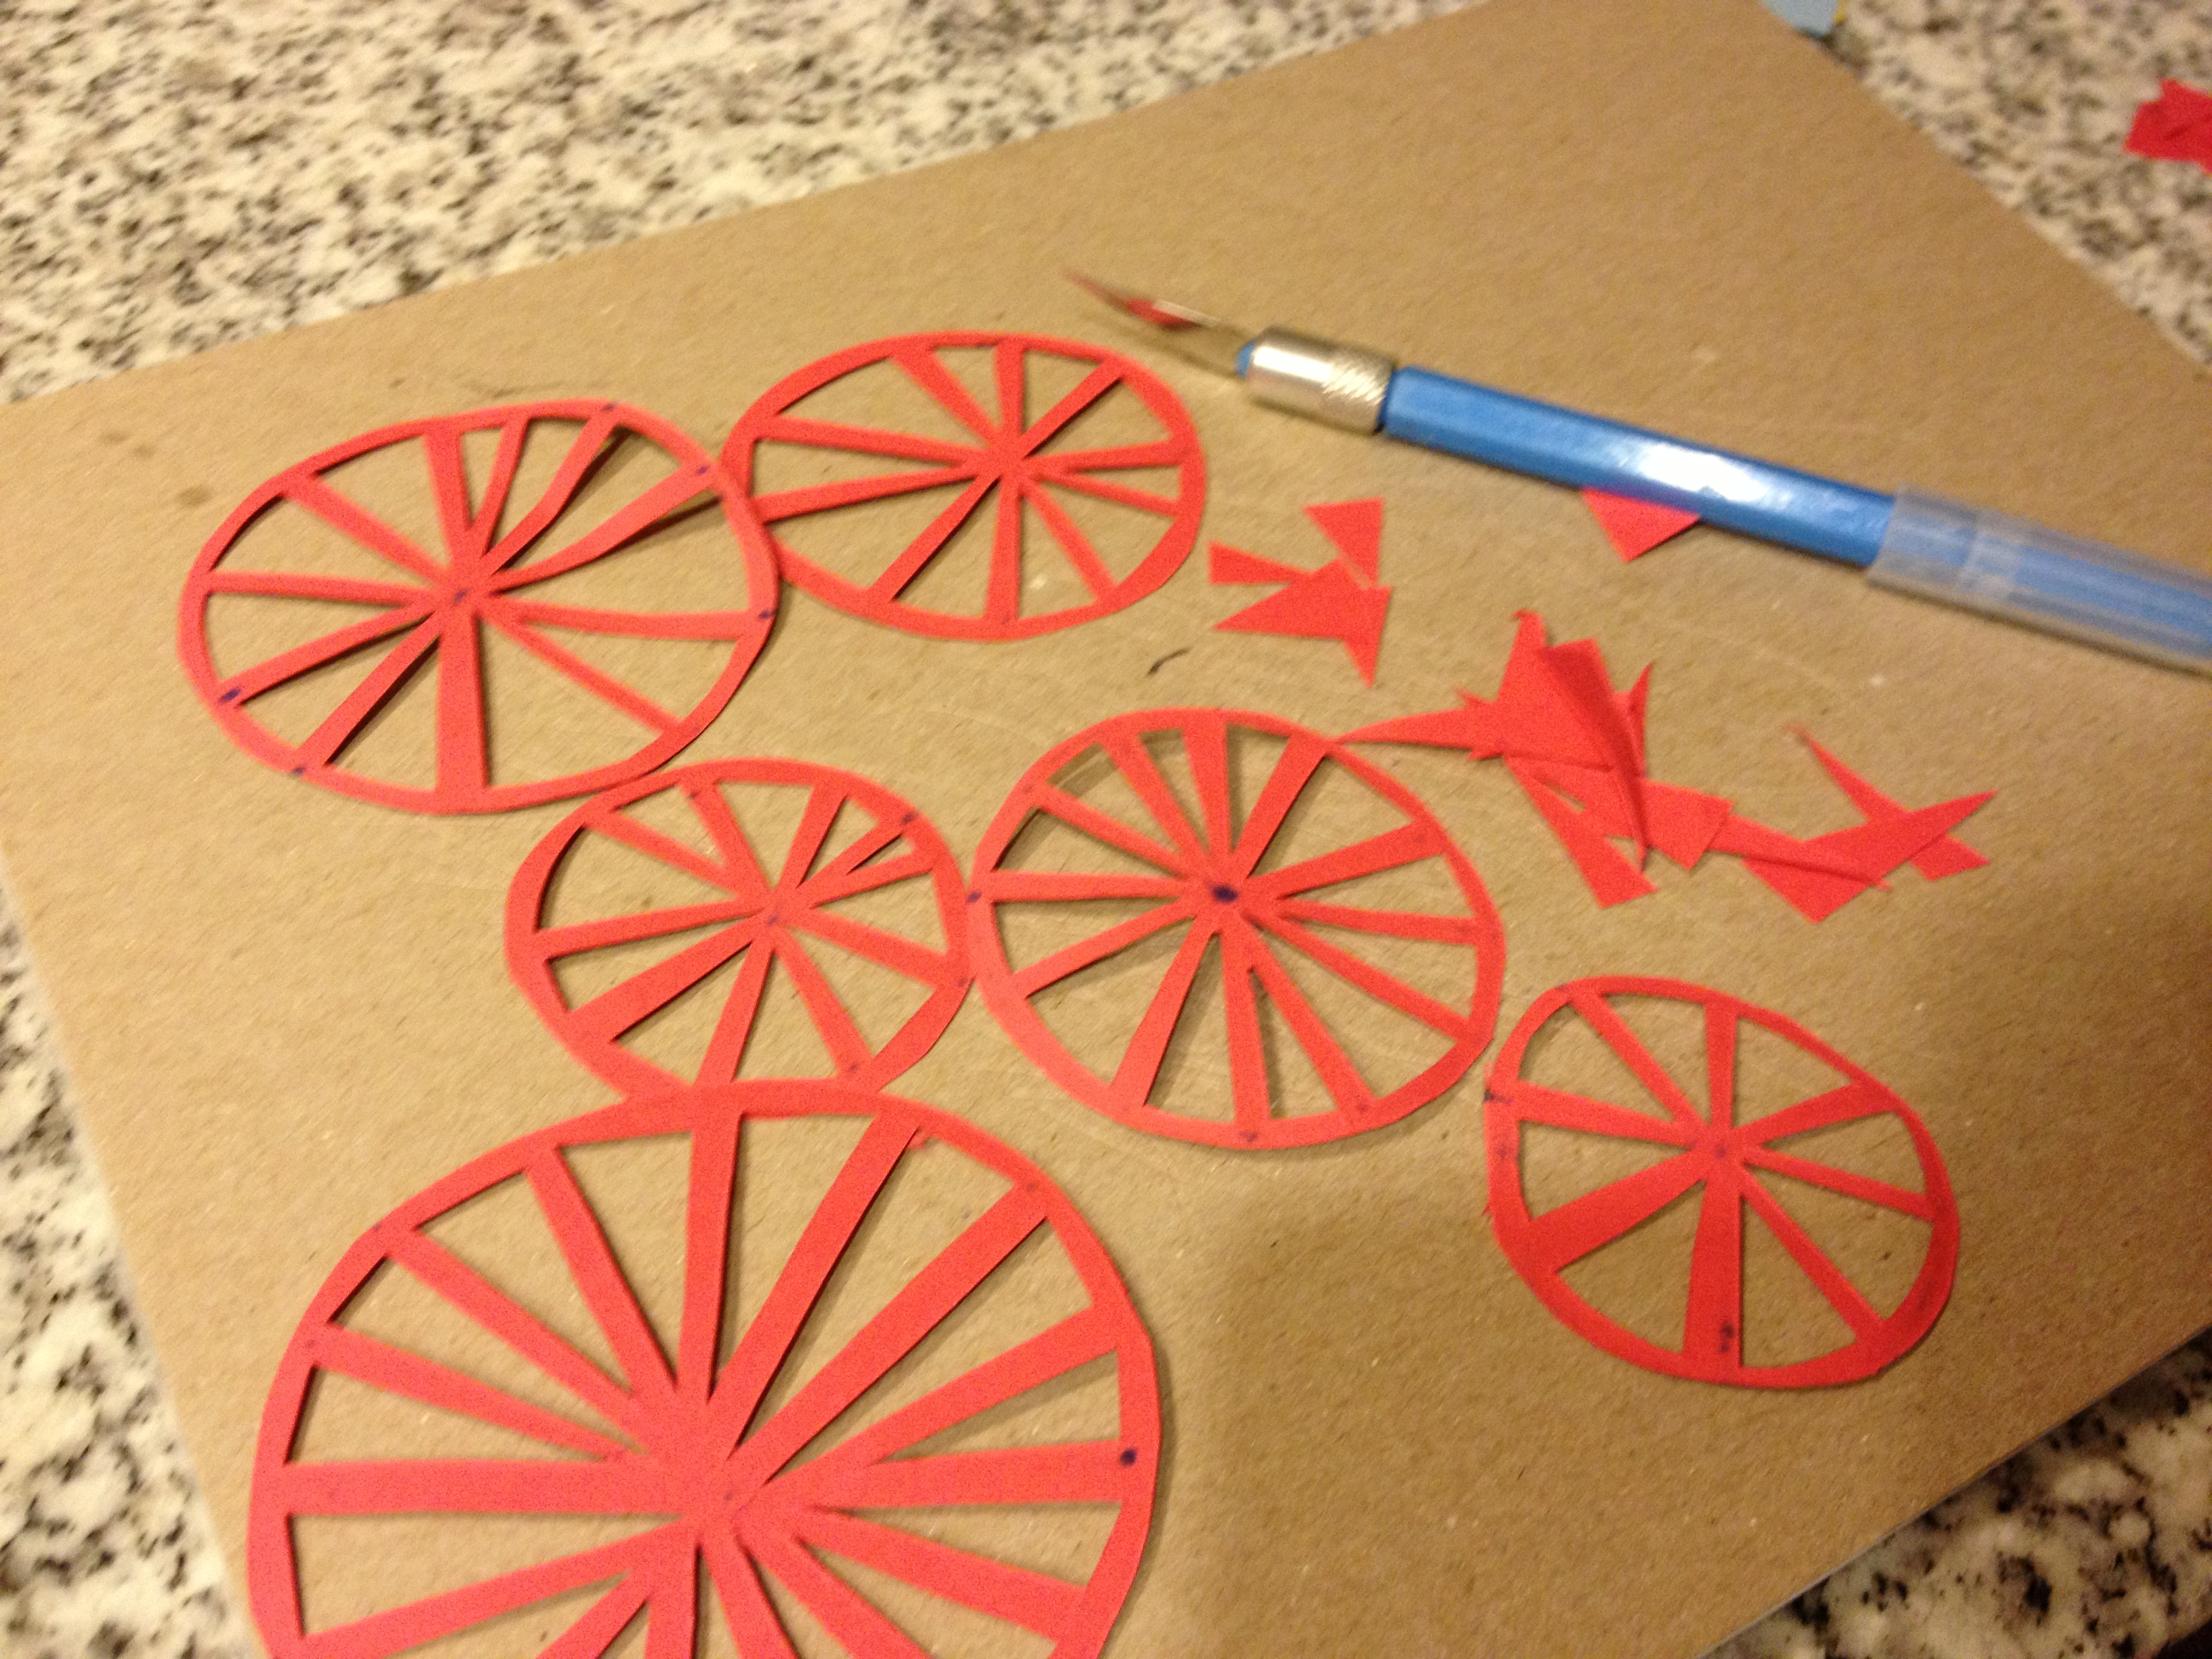
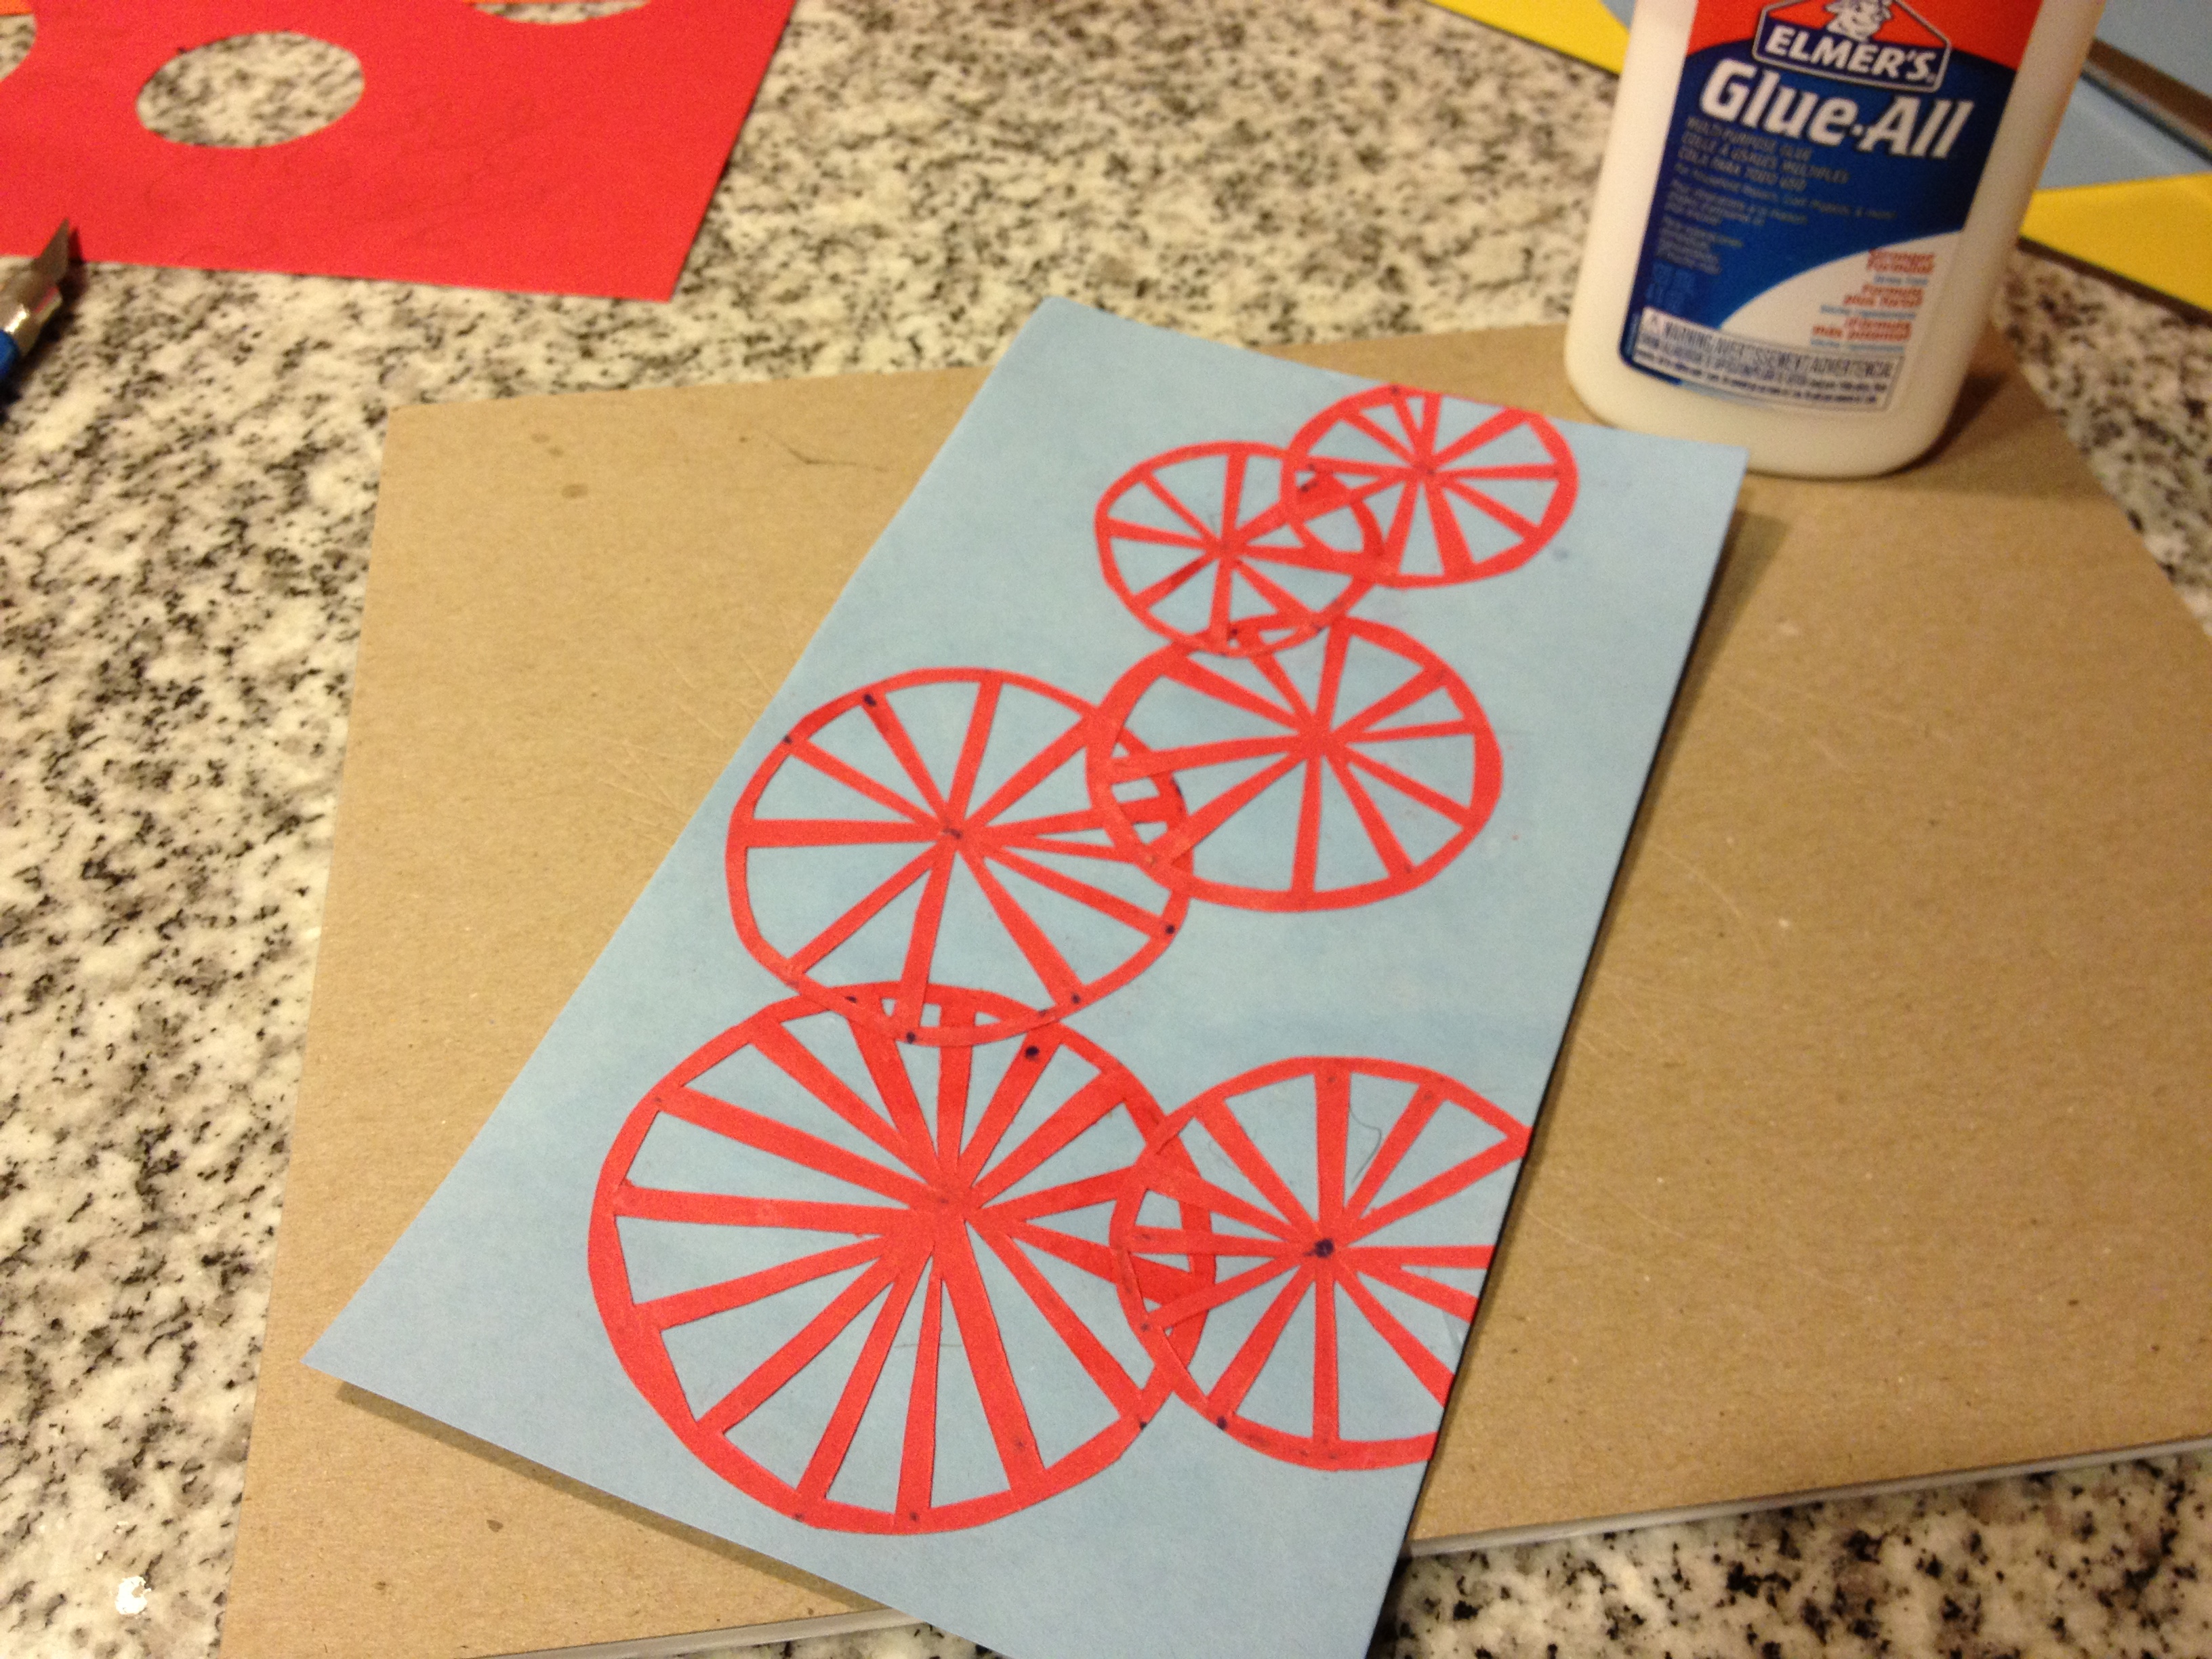
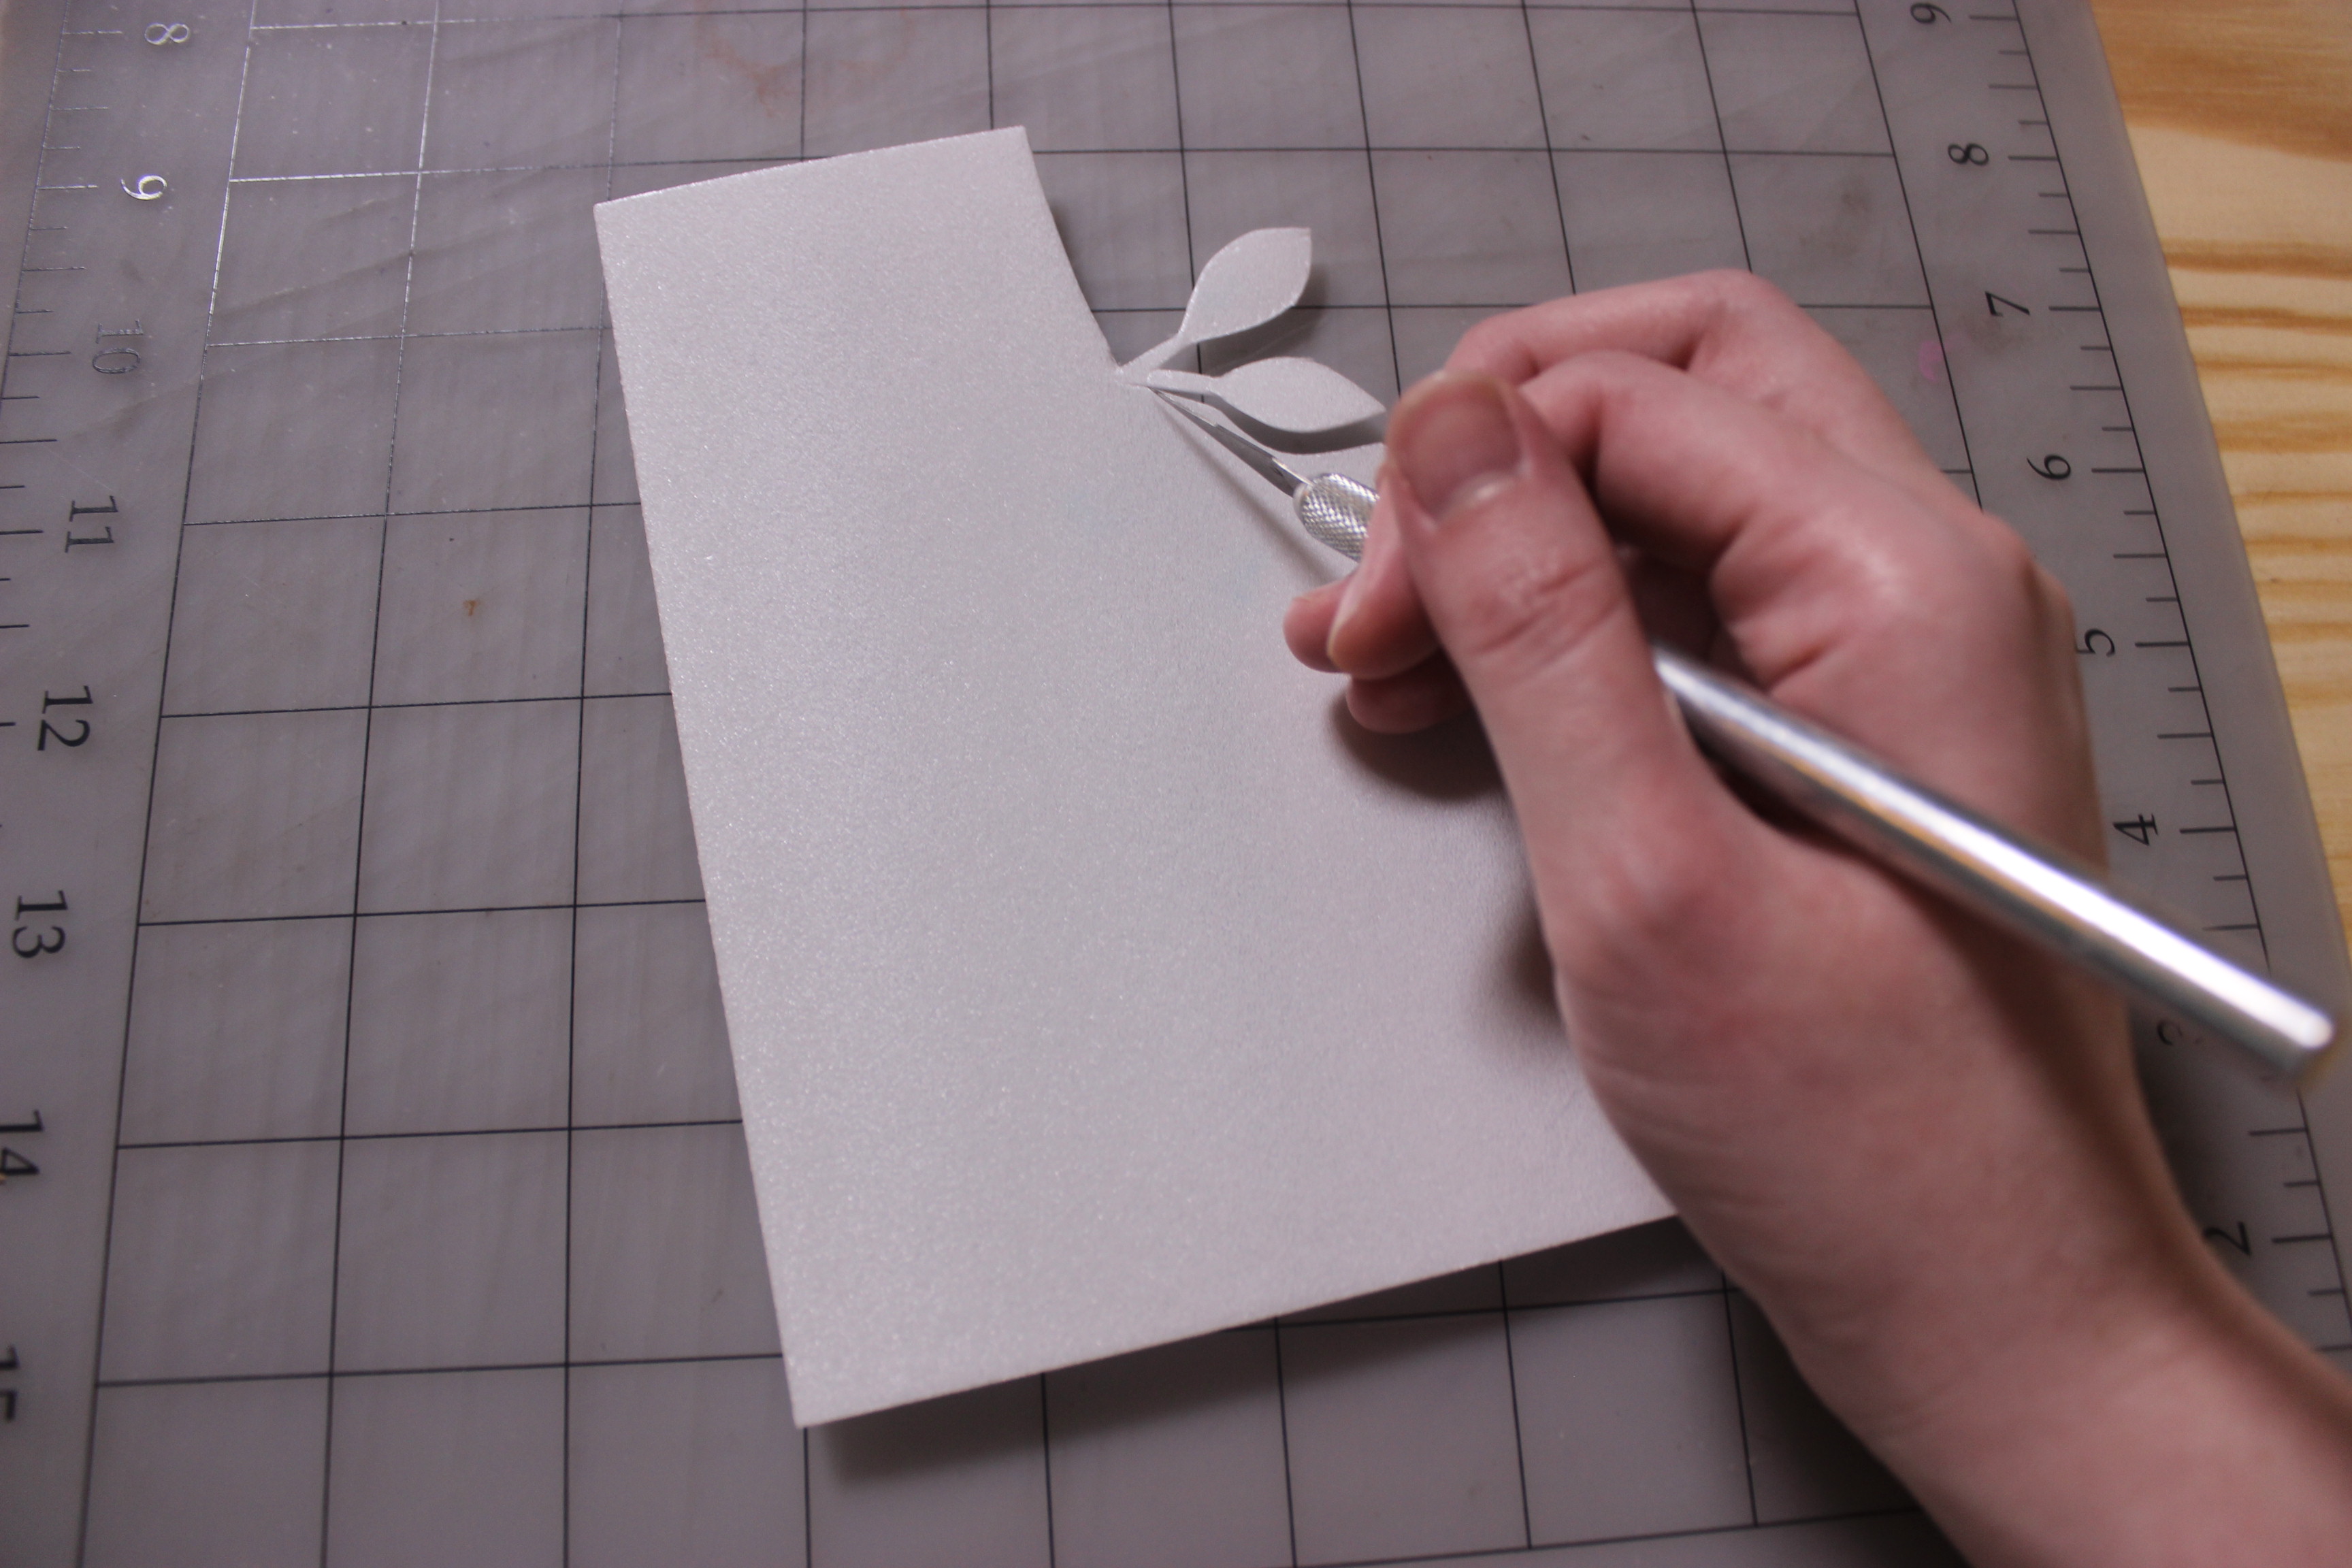
1. Cut a design out of the styrofoam sheet using a pair of scissors or an exacto knife. The styrofoam will act as a stamp that will carry the color to the paper.  

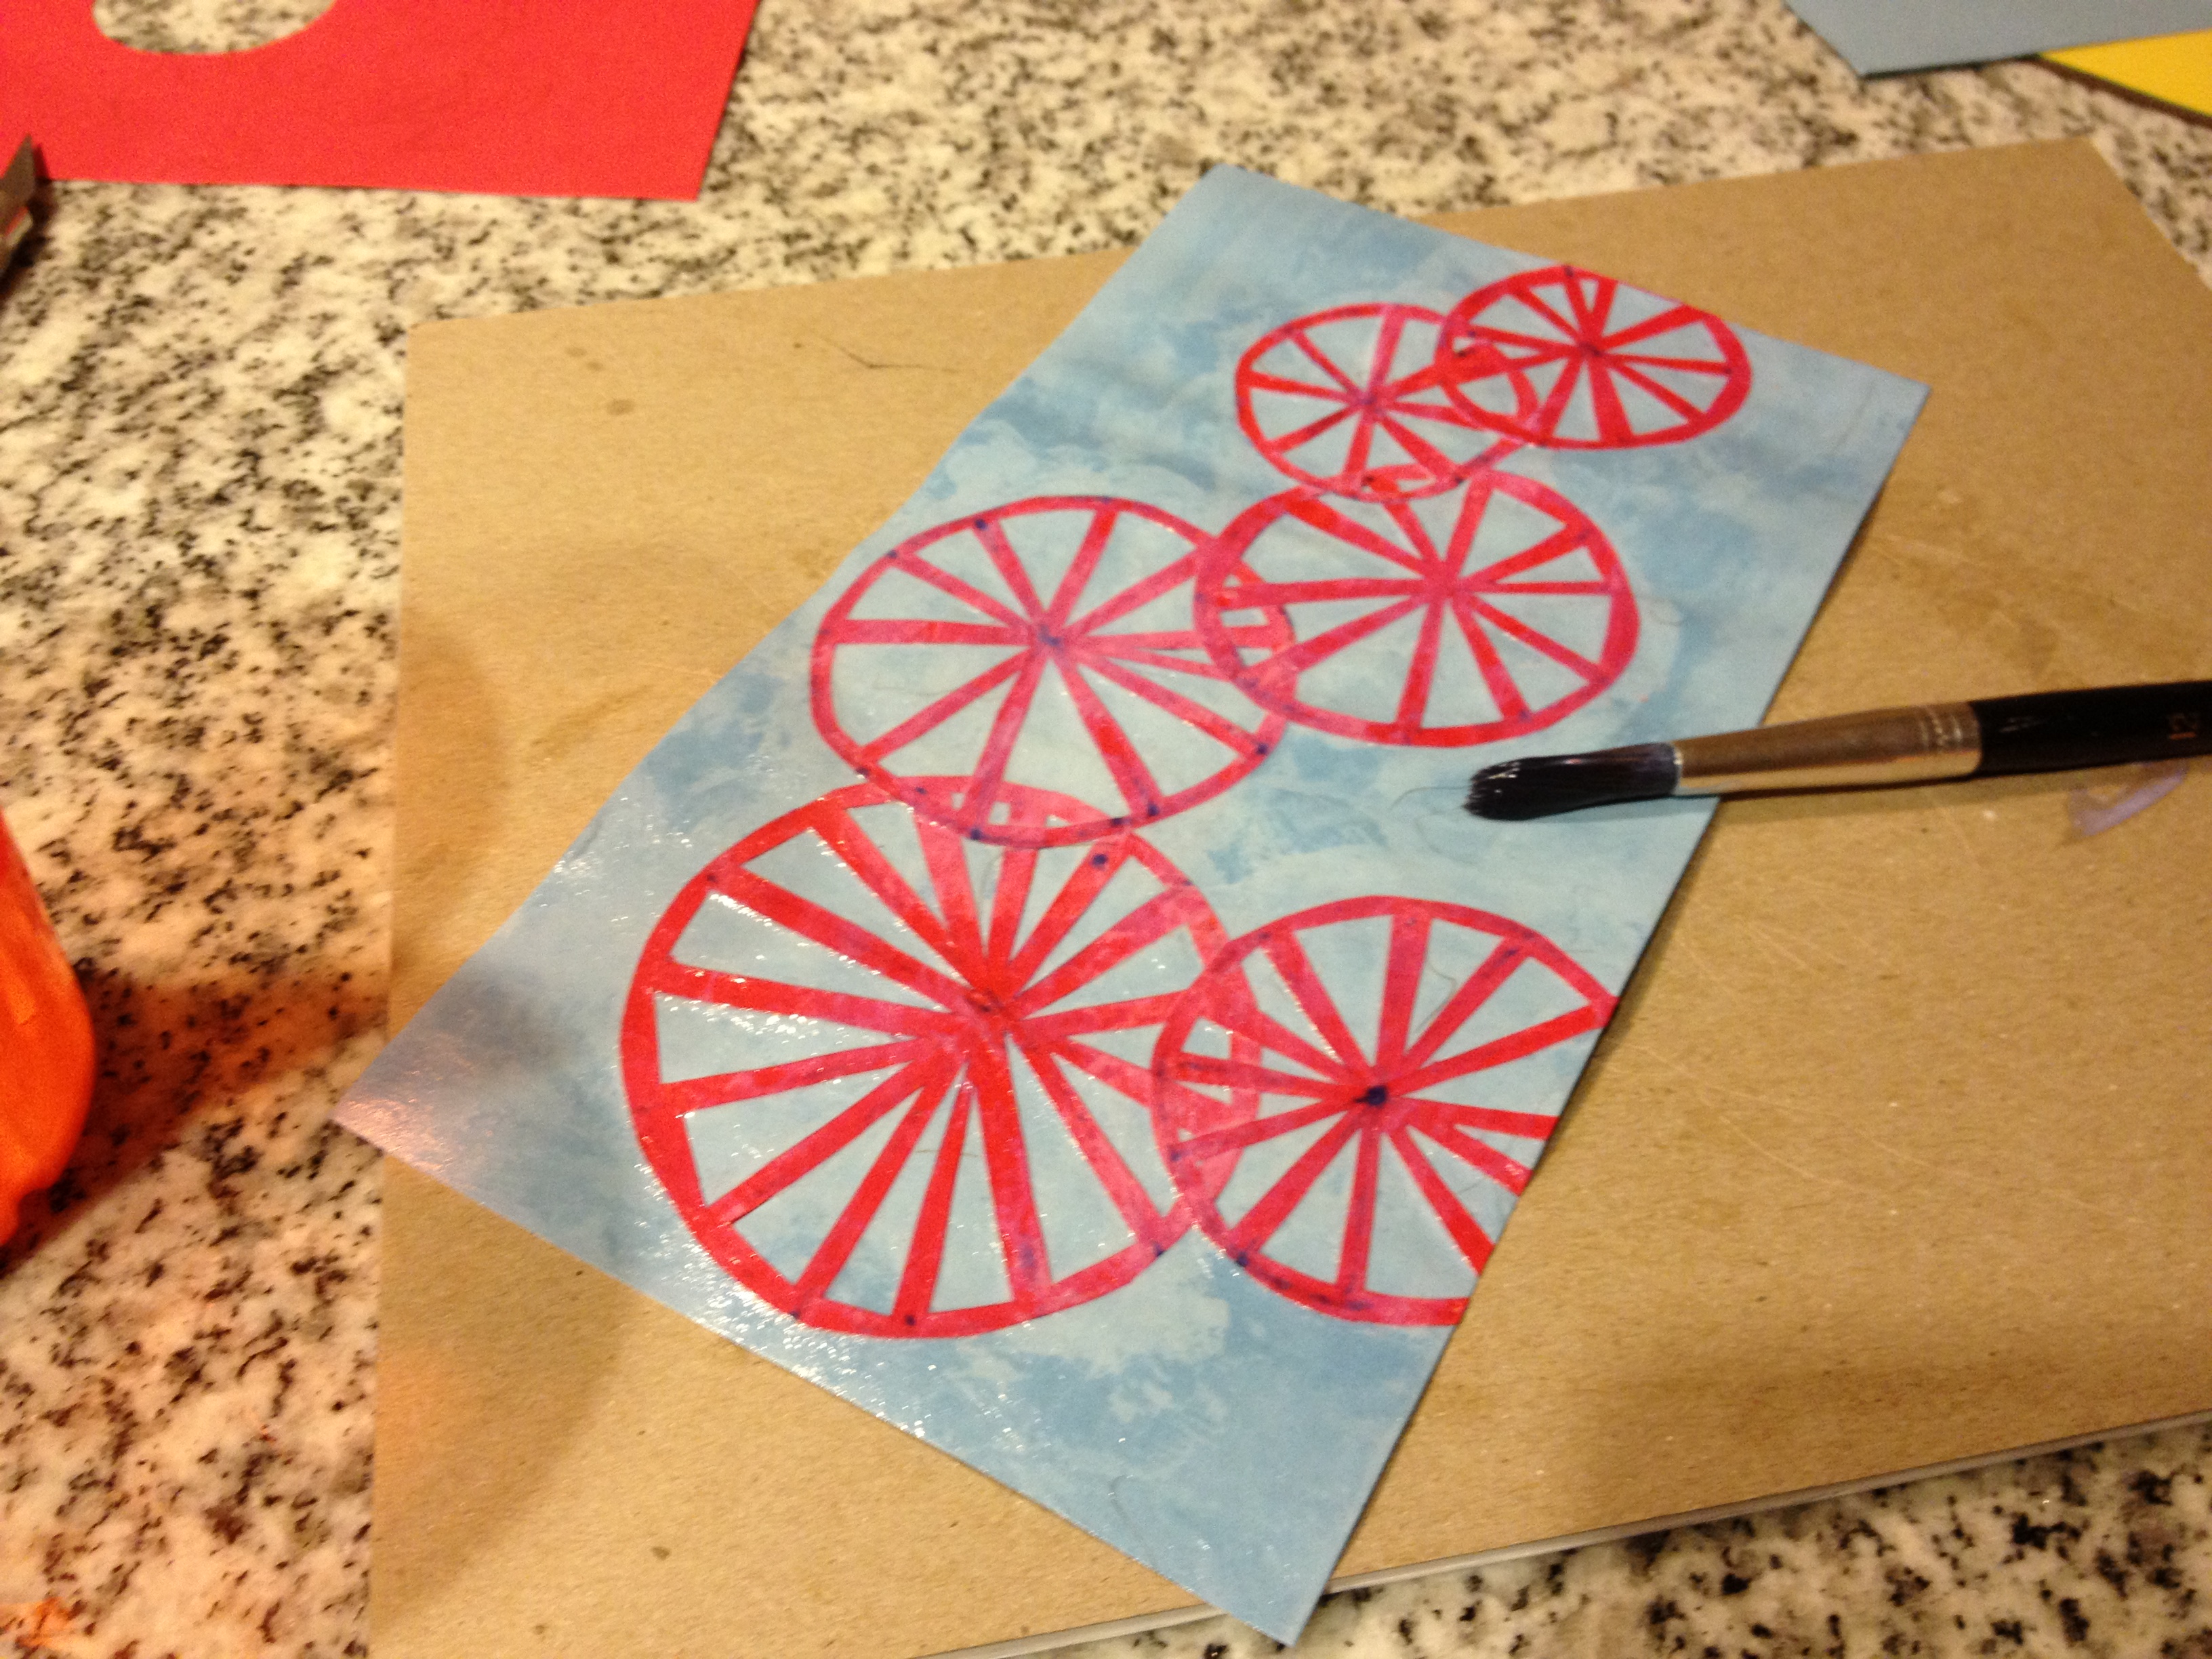
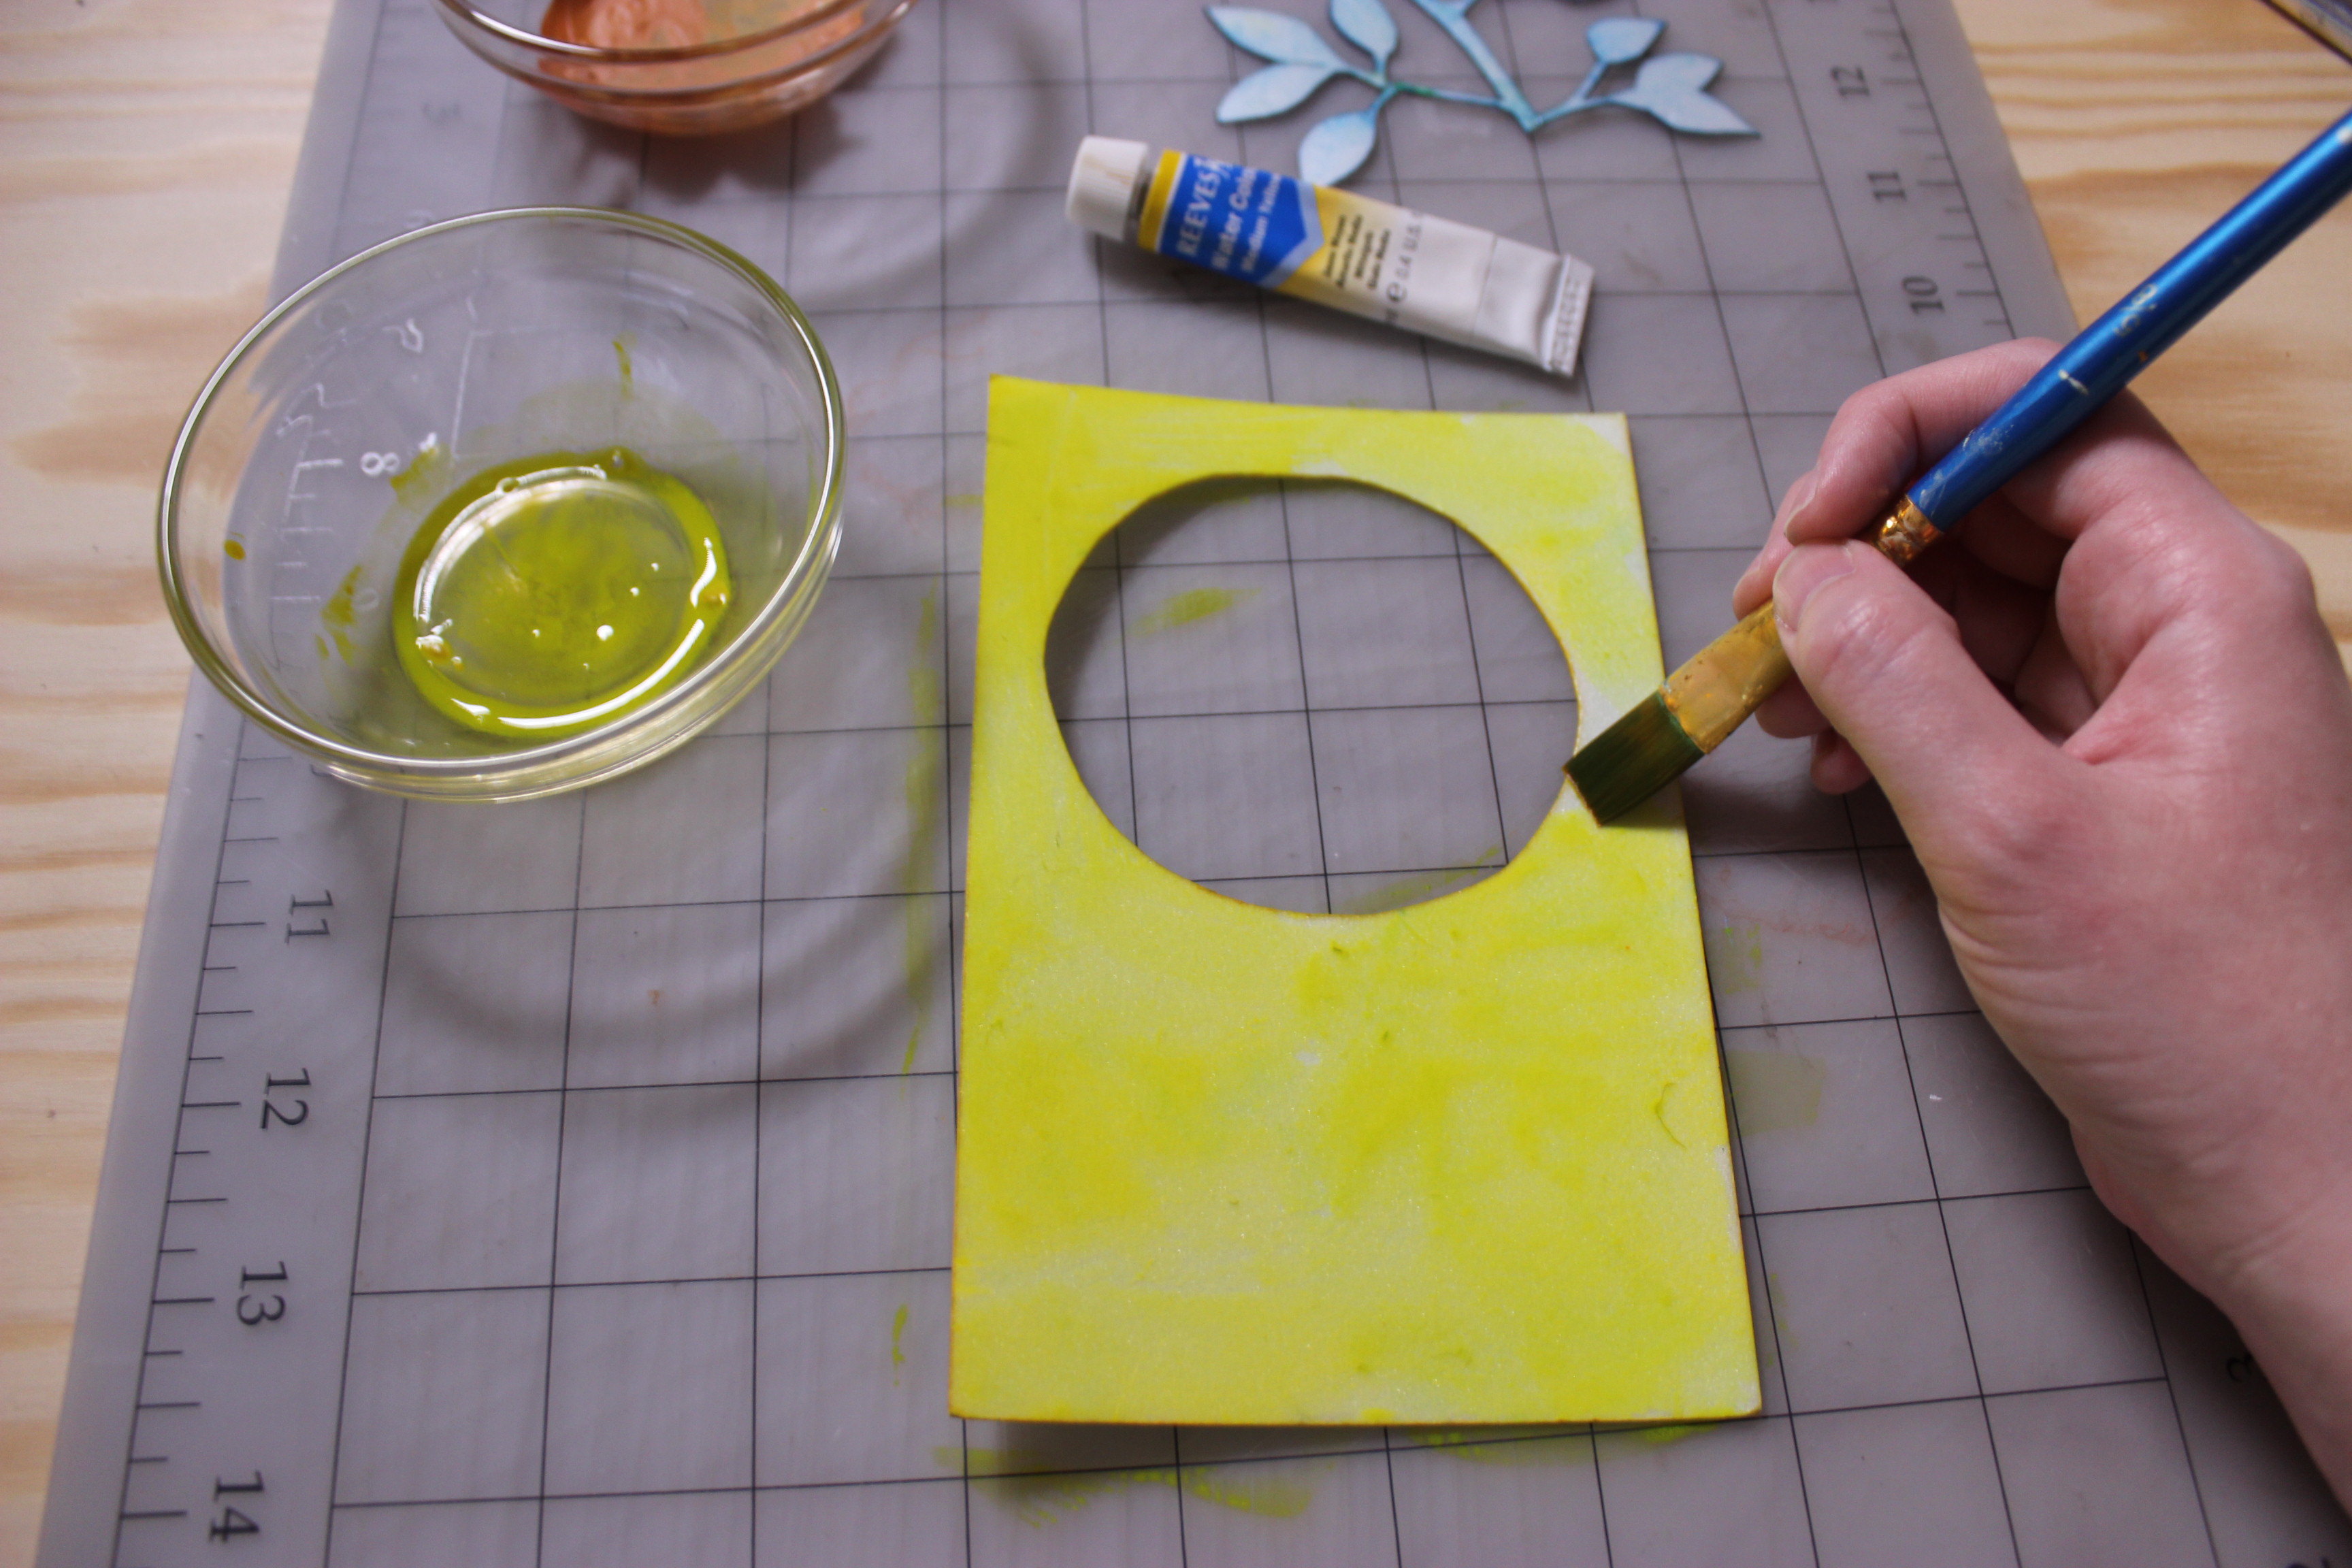
2. Using paint and paintbrush, apply a thin layer of color to the styrofoam. It’s helpful to thin the paint down slightly with water so the layer is even.  

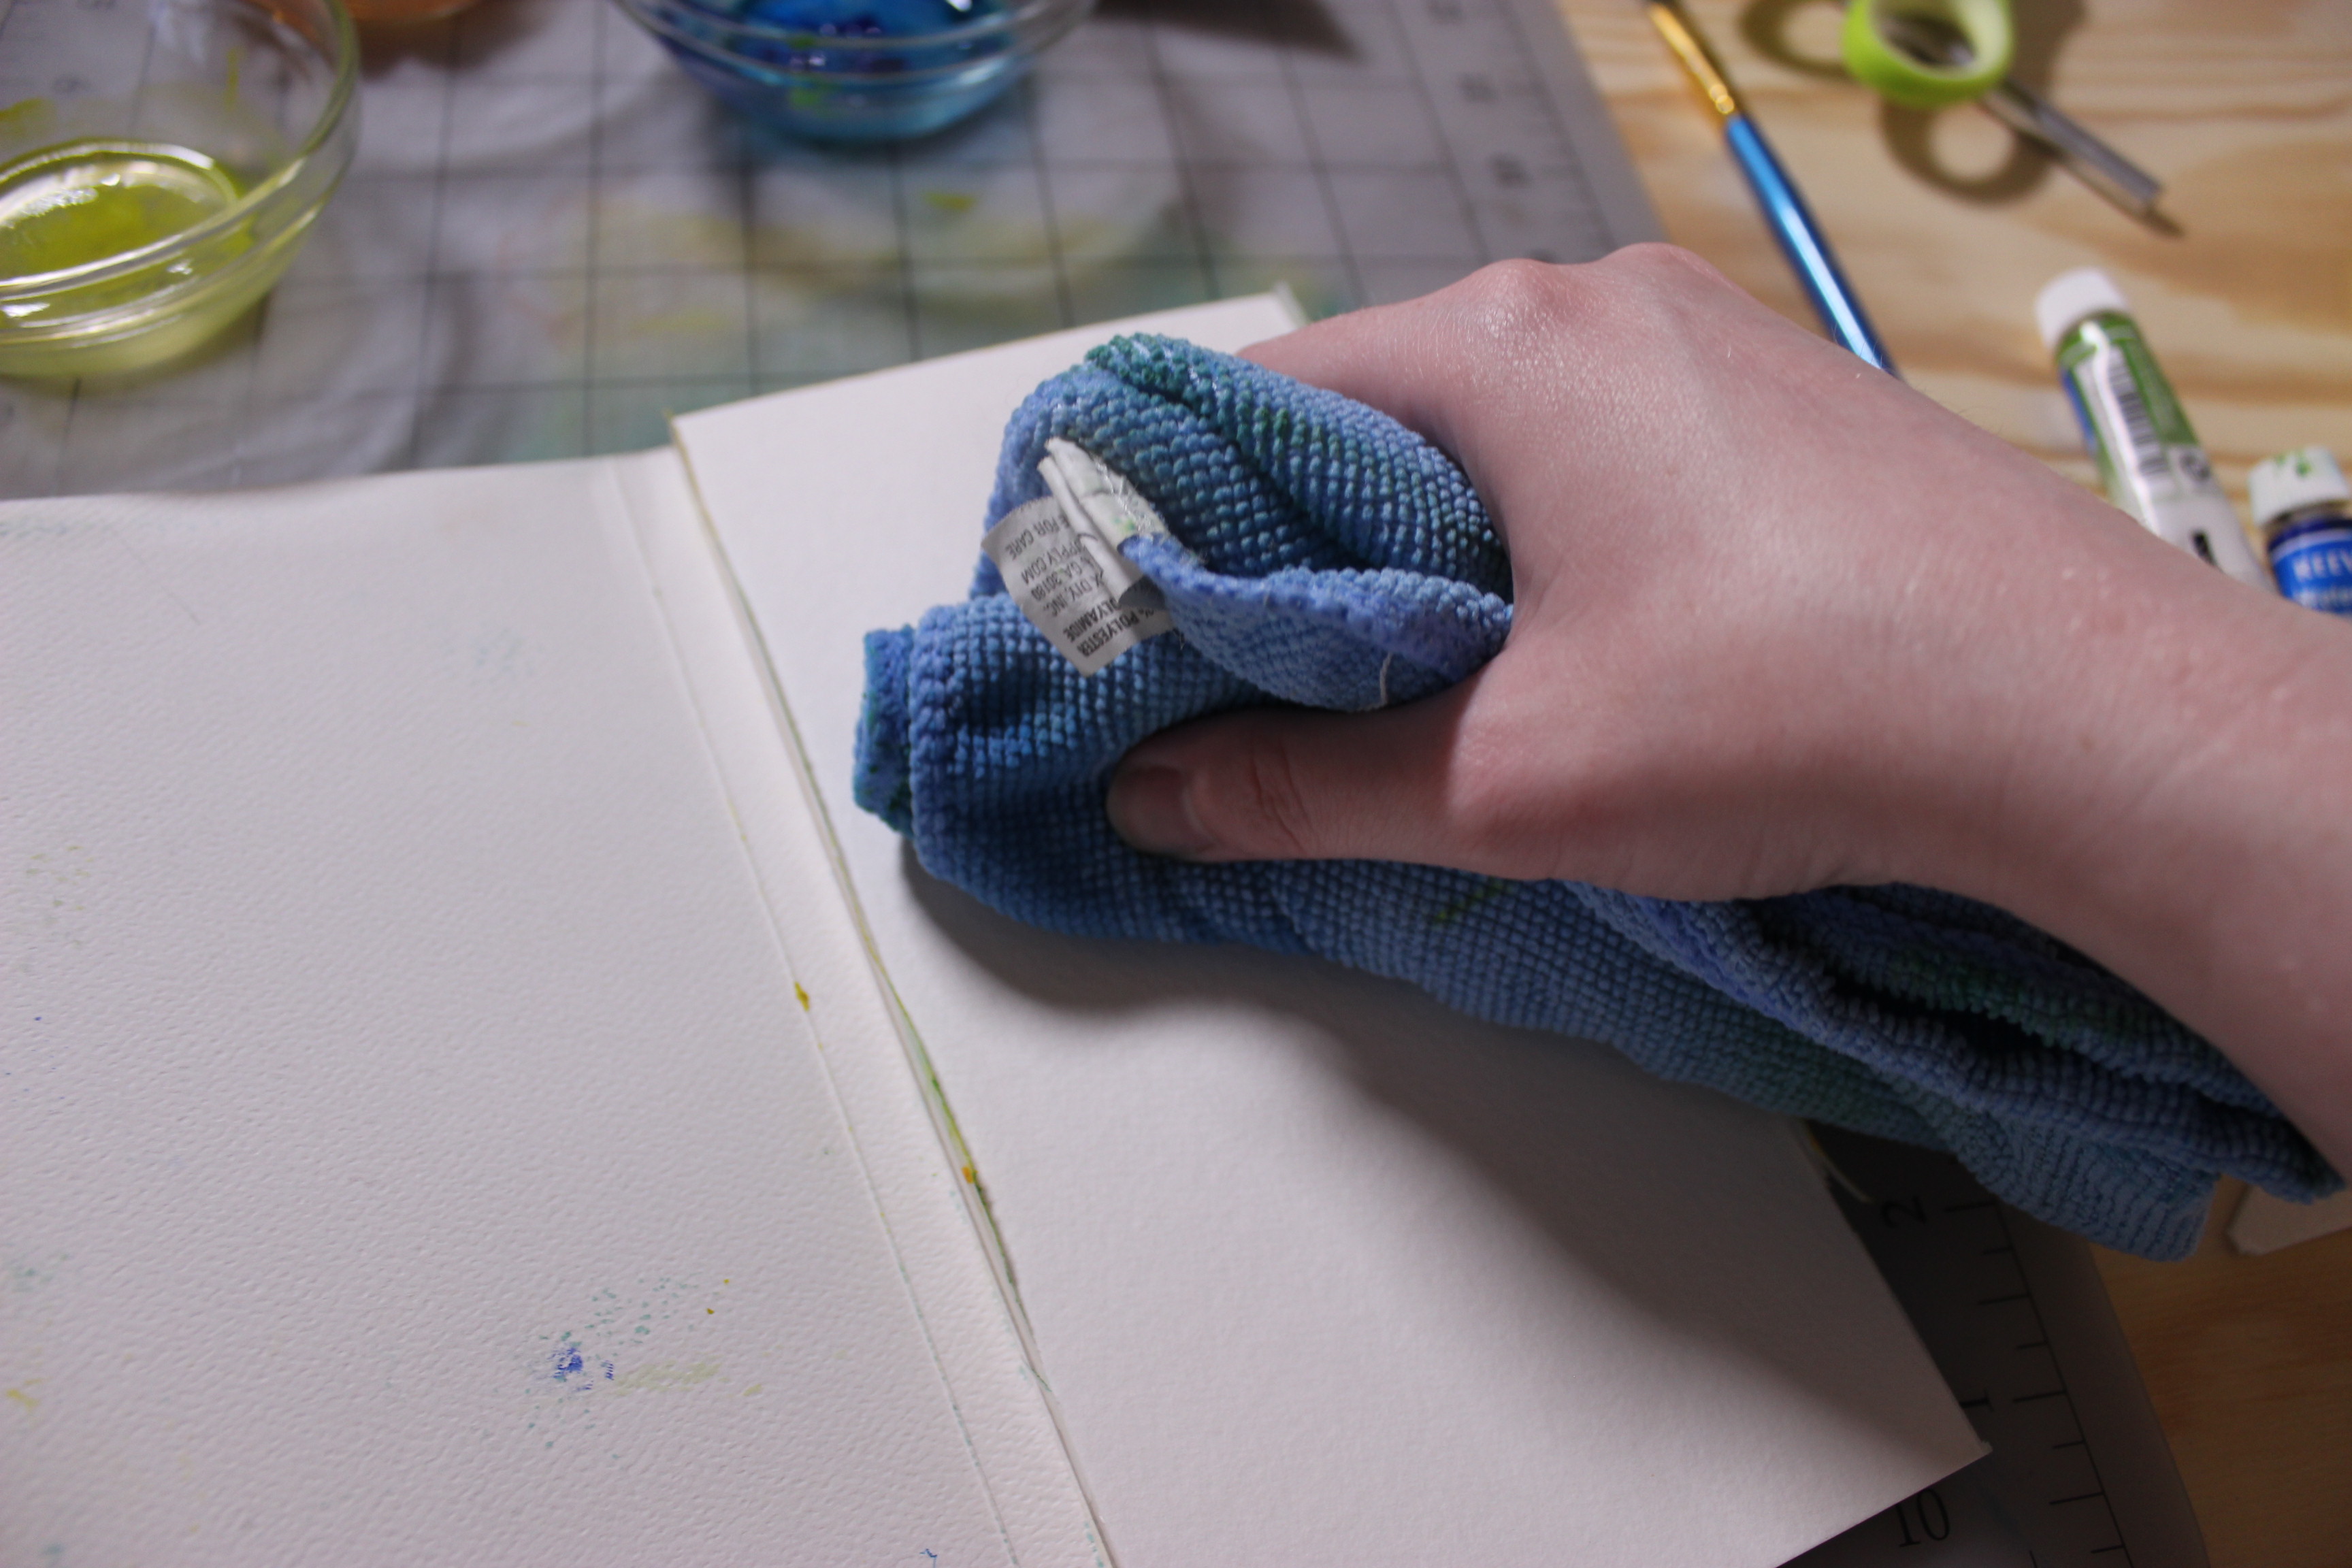
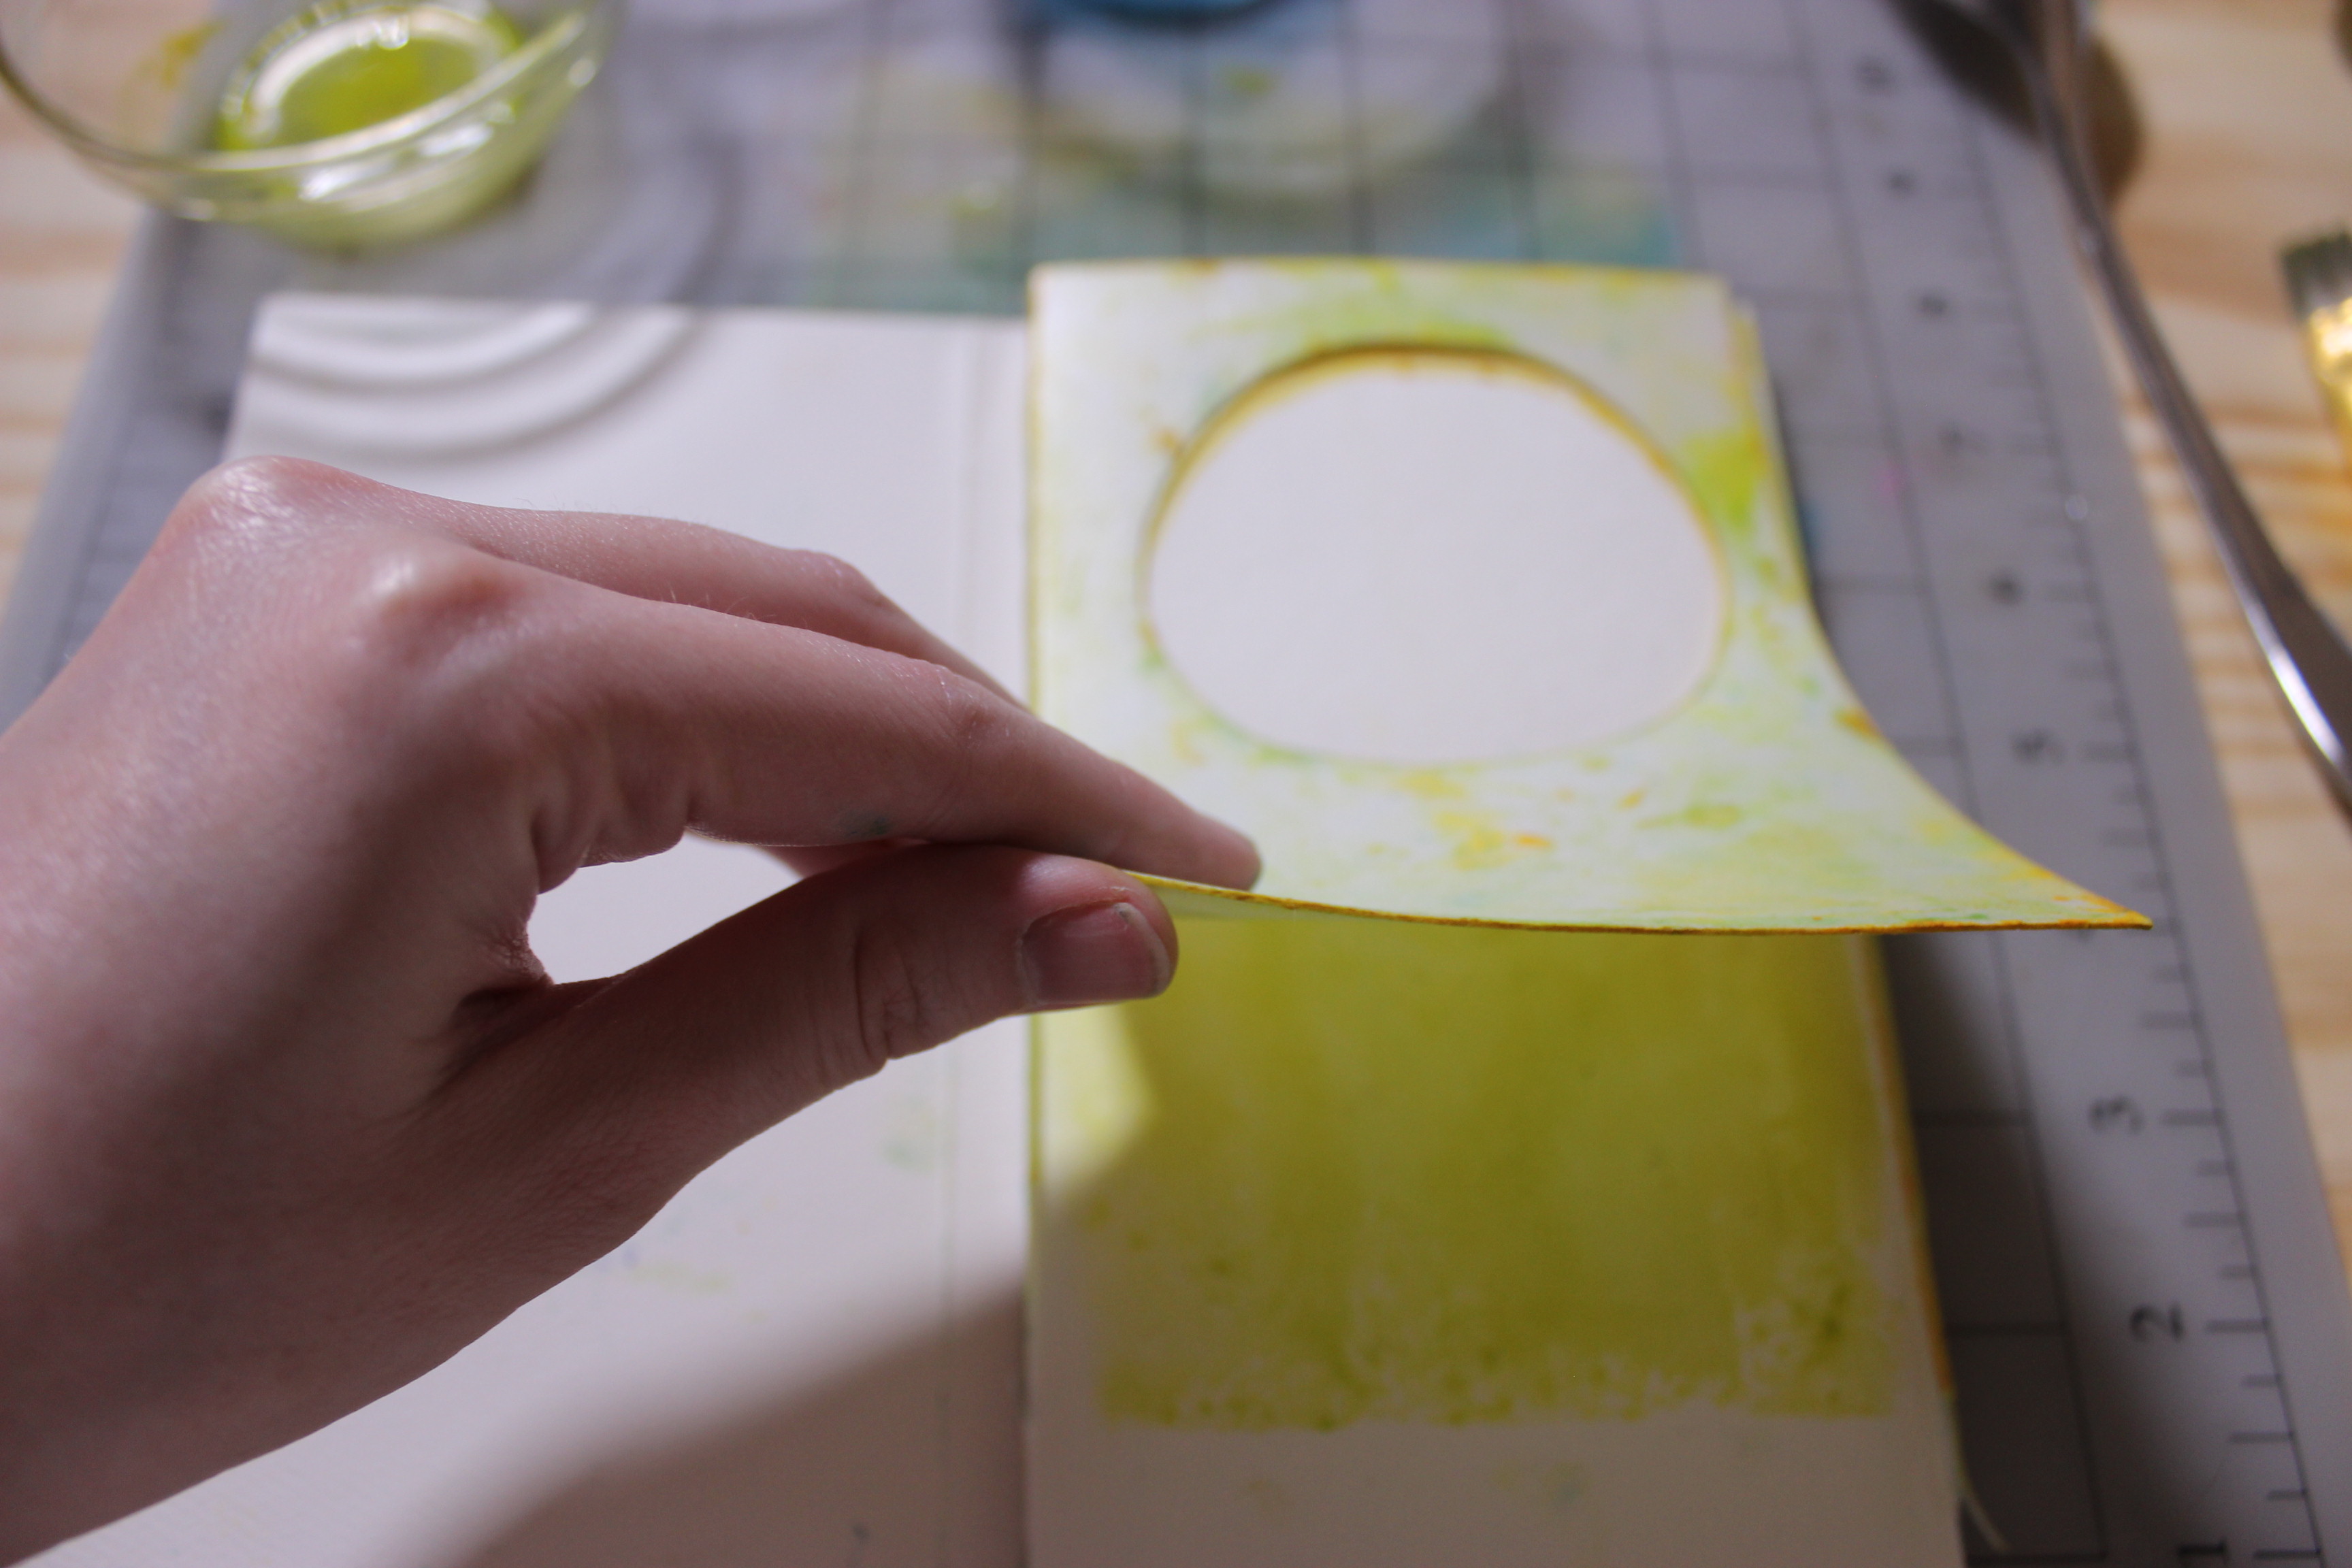
3. With the rag, dampen the watercolor paper slightly. This will help the paper receive the color from the paint.  

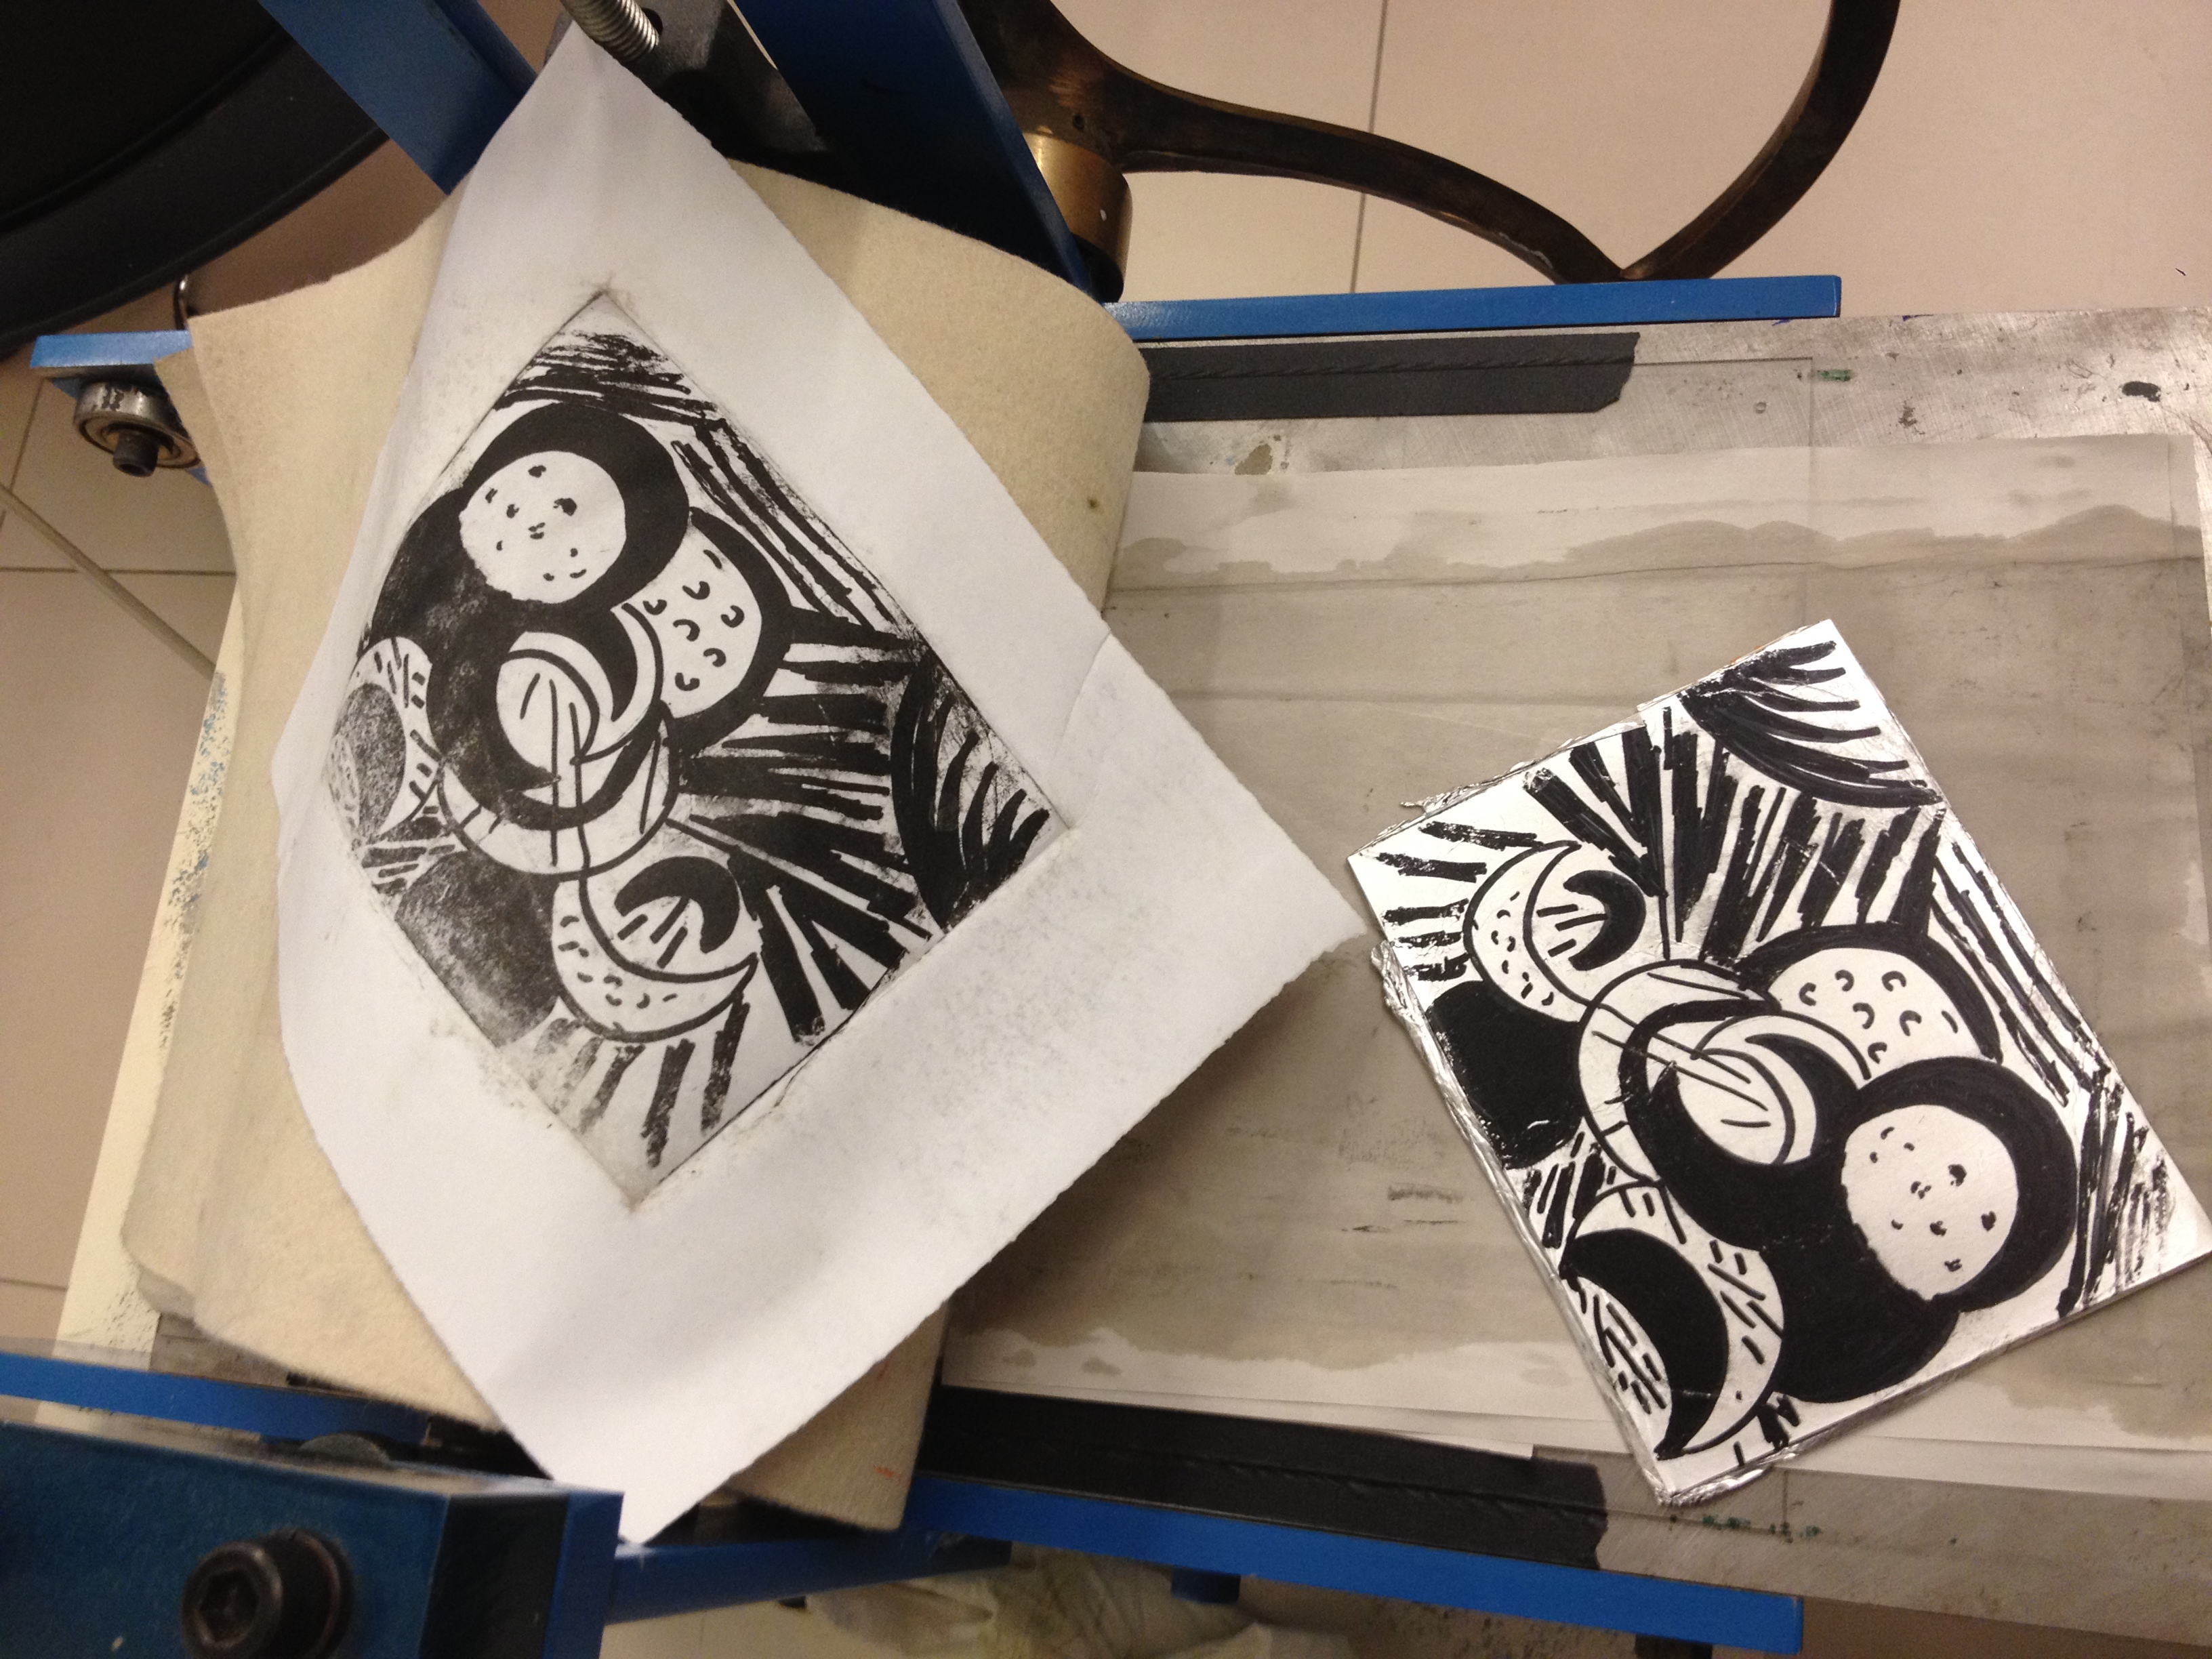
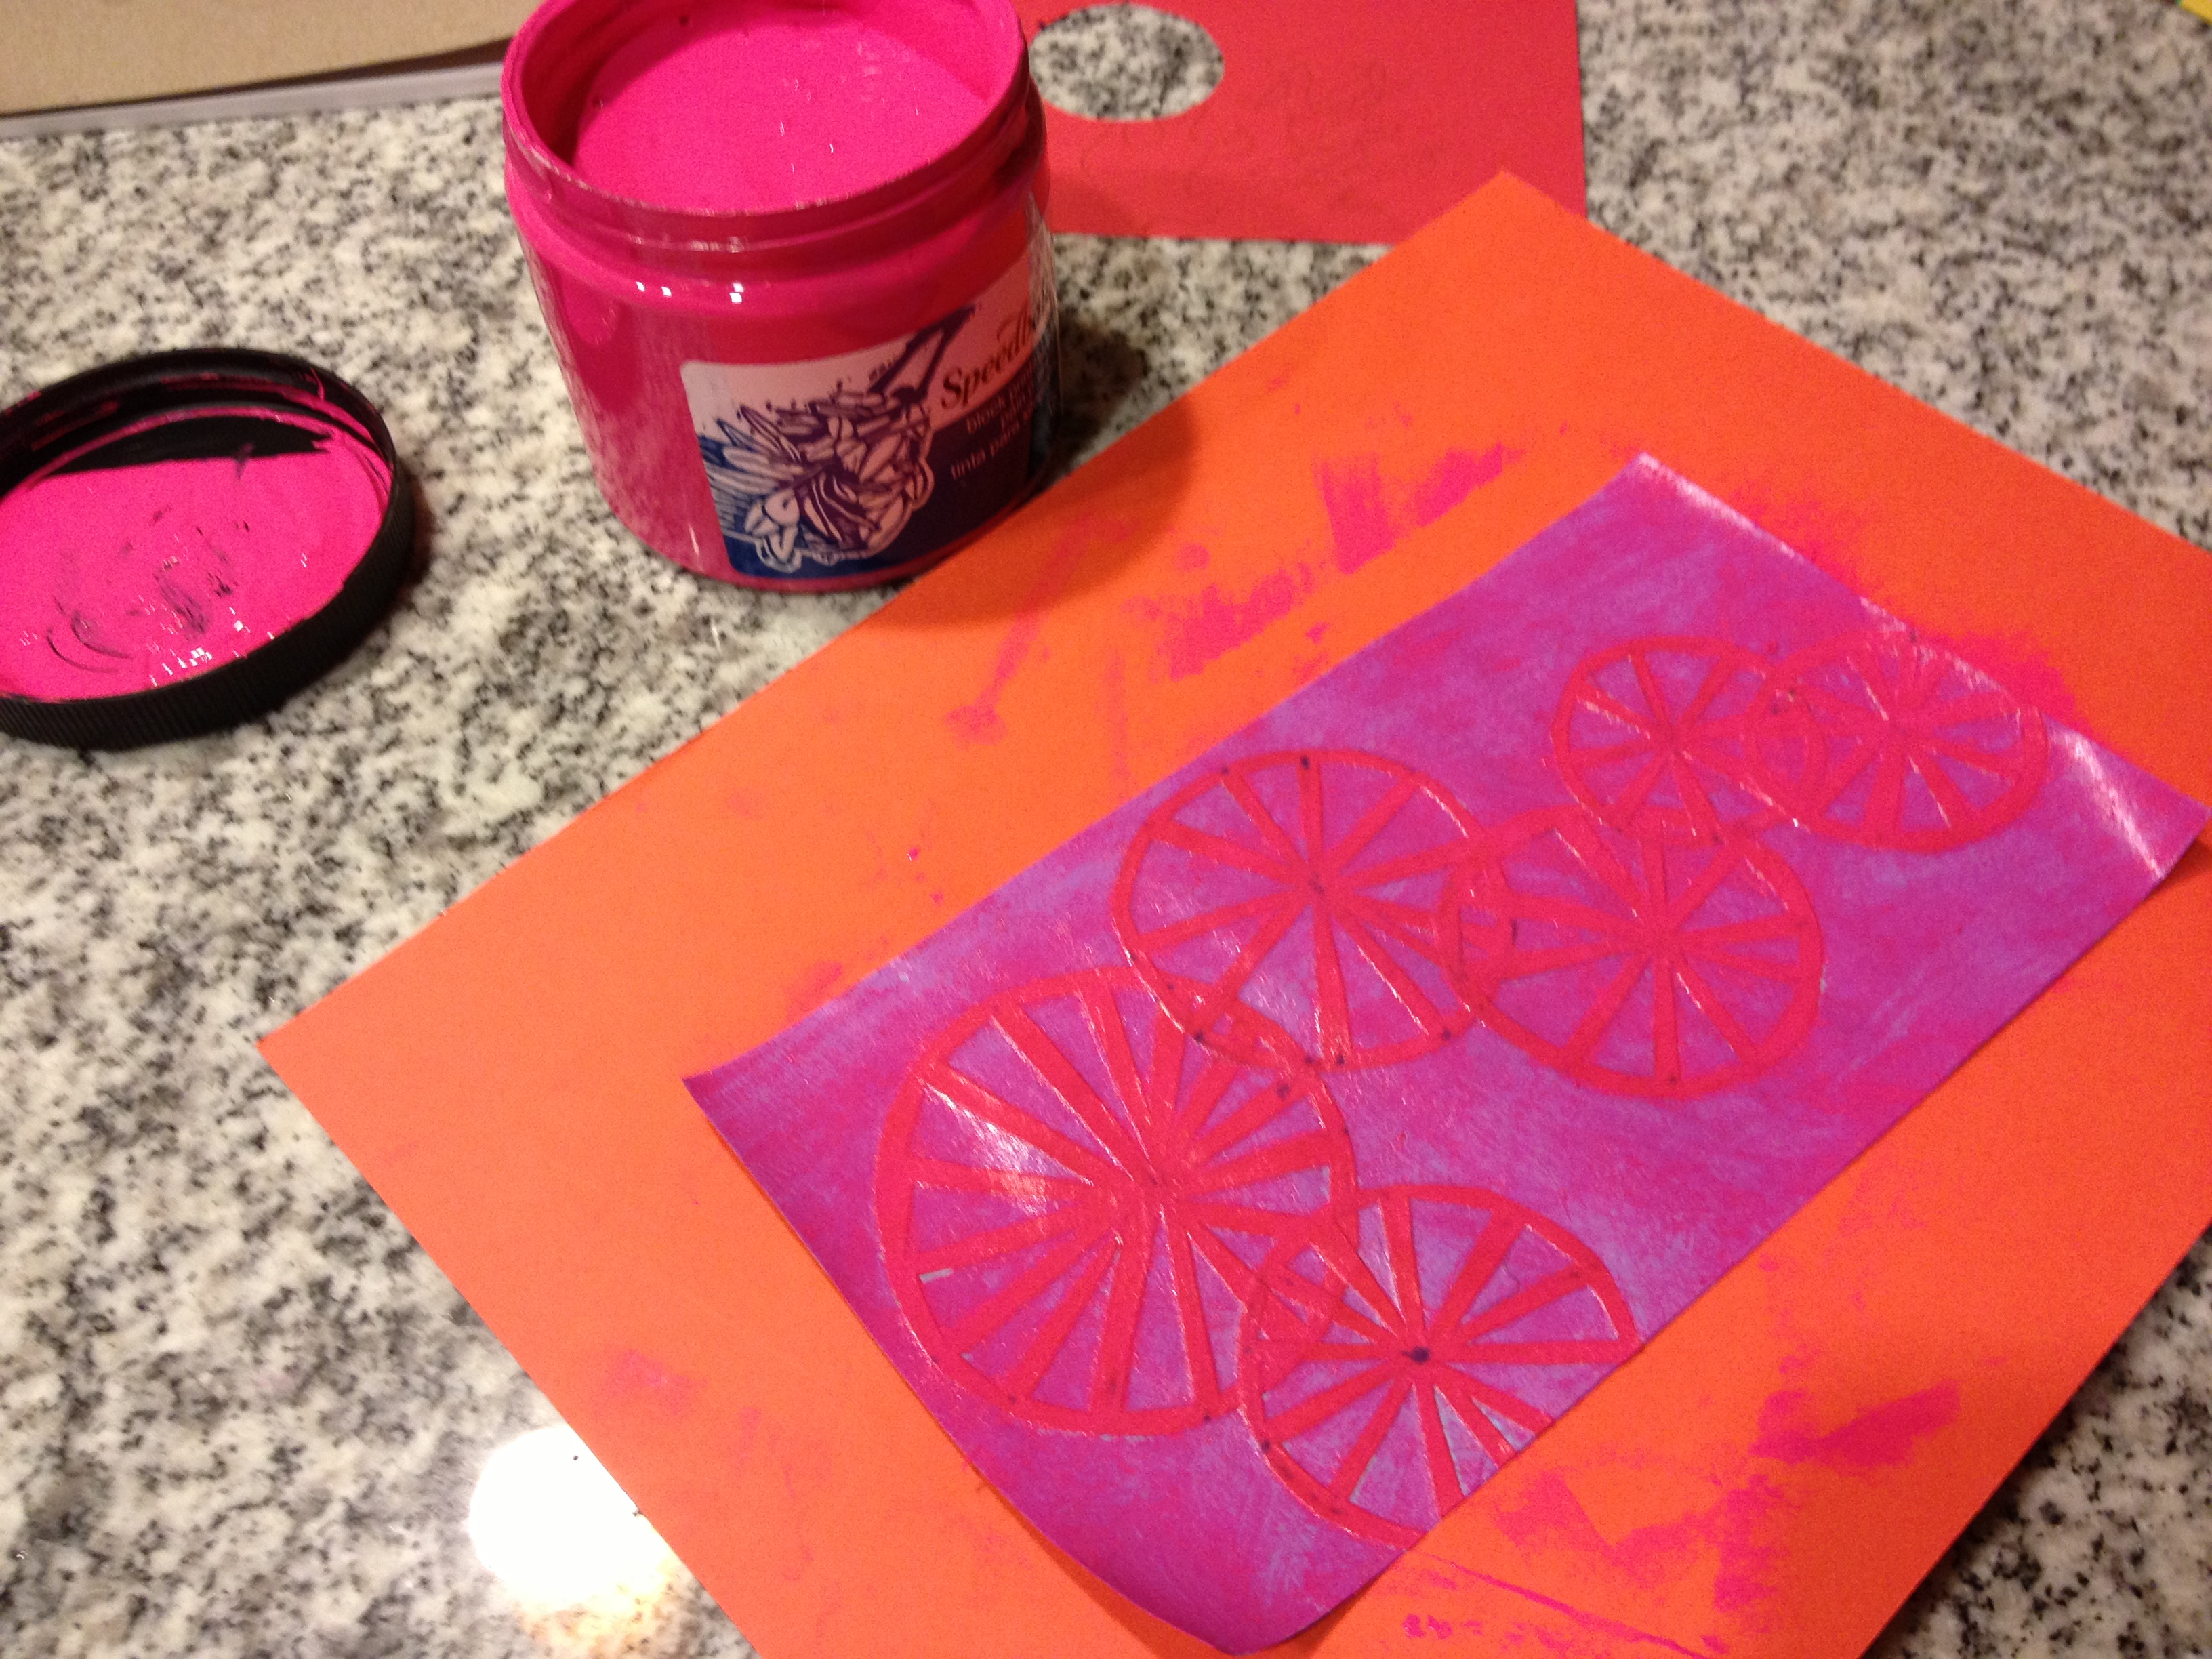
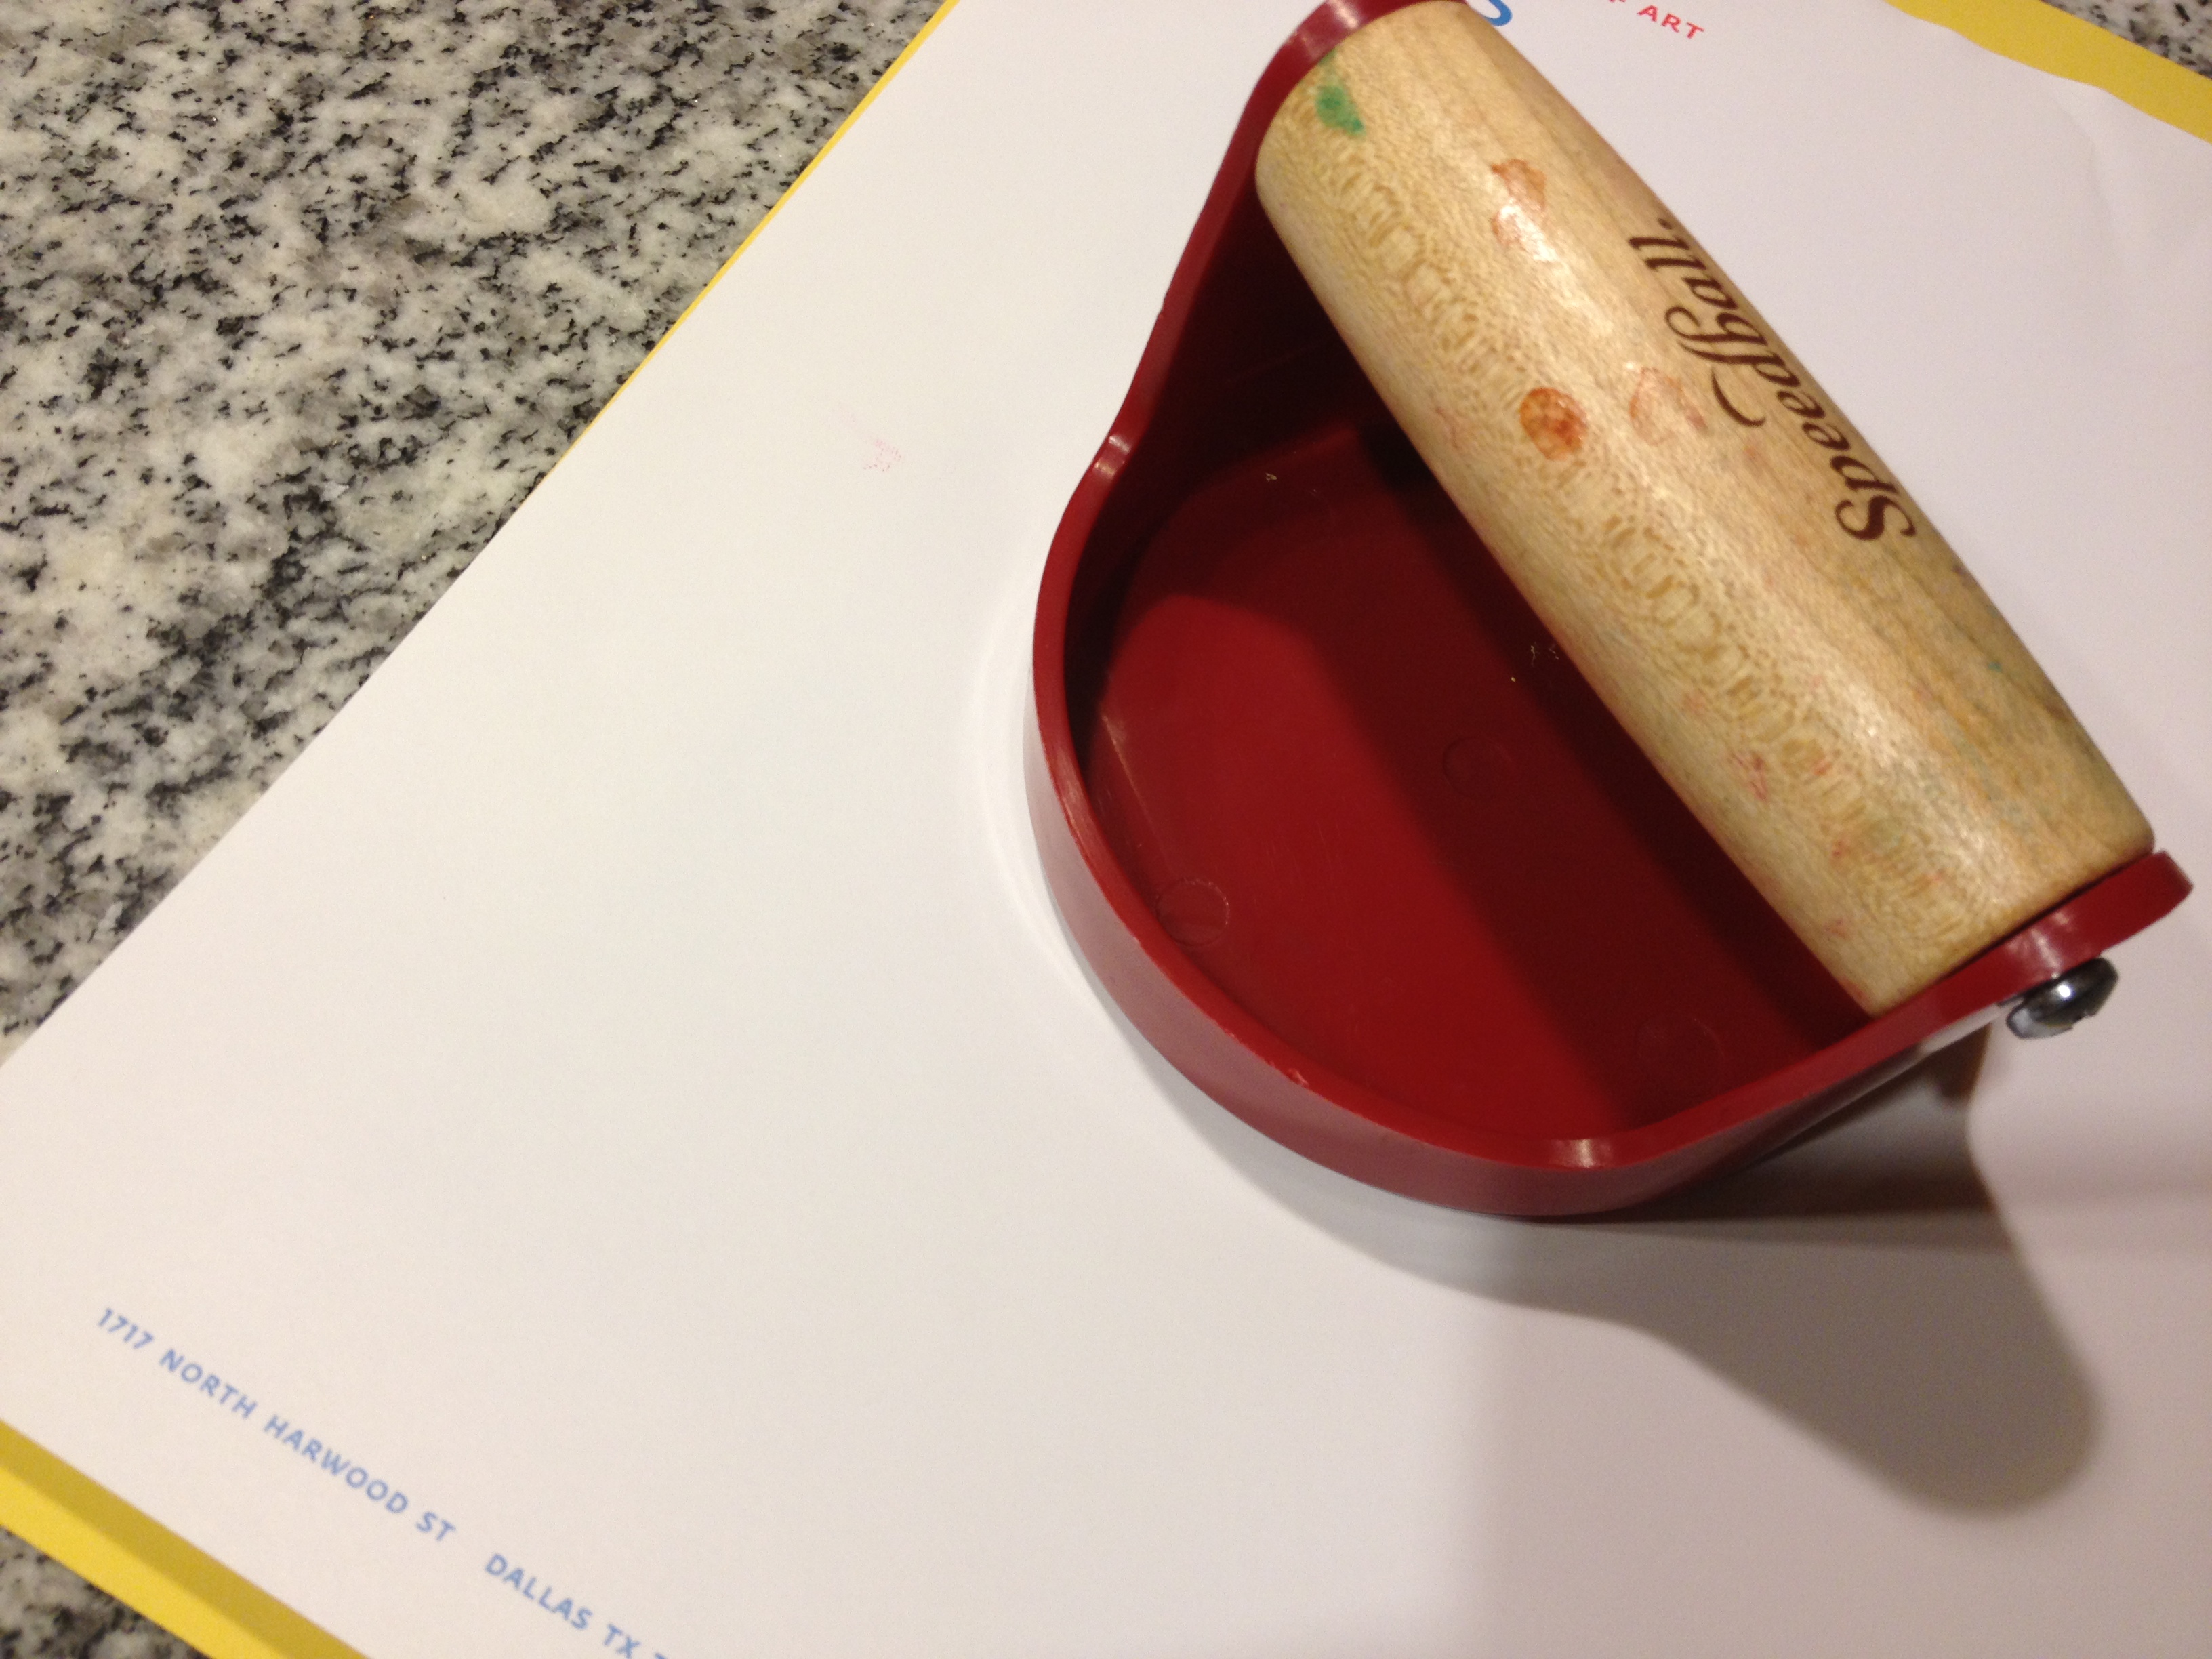
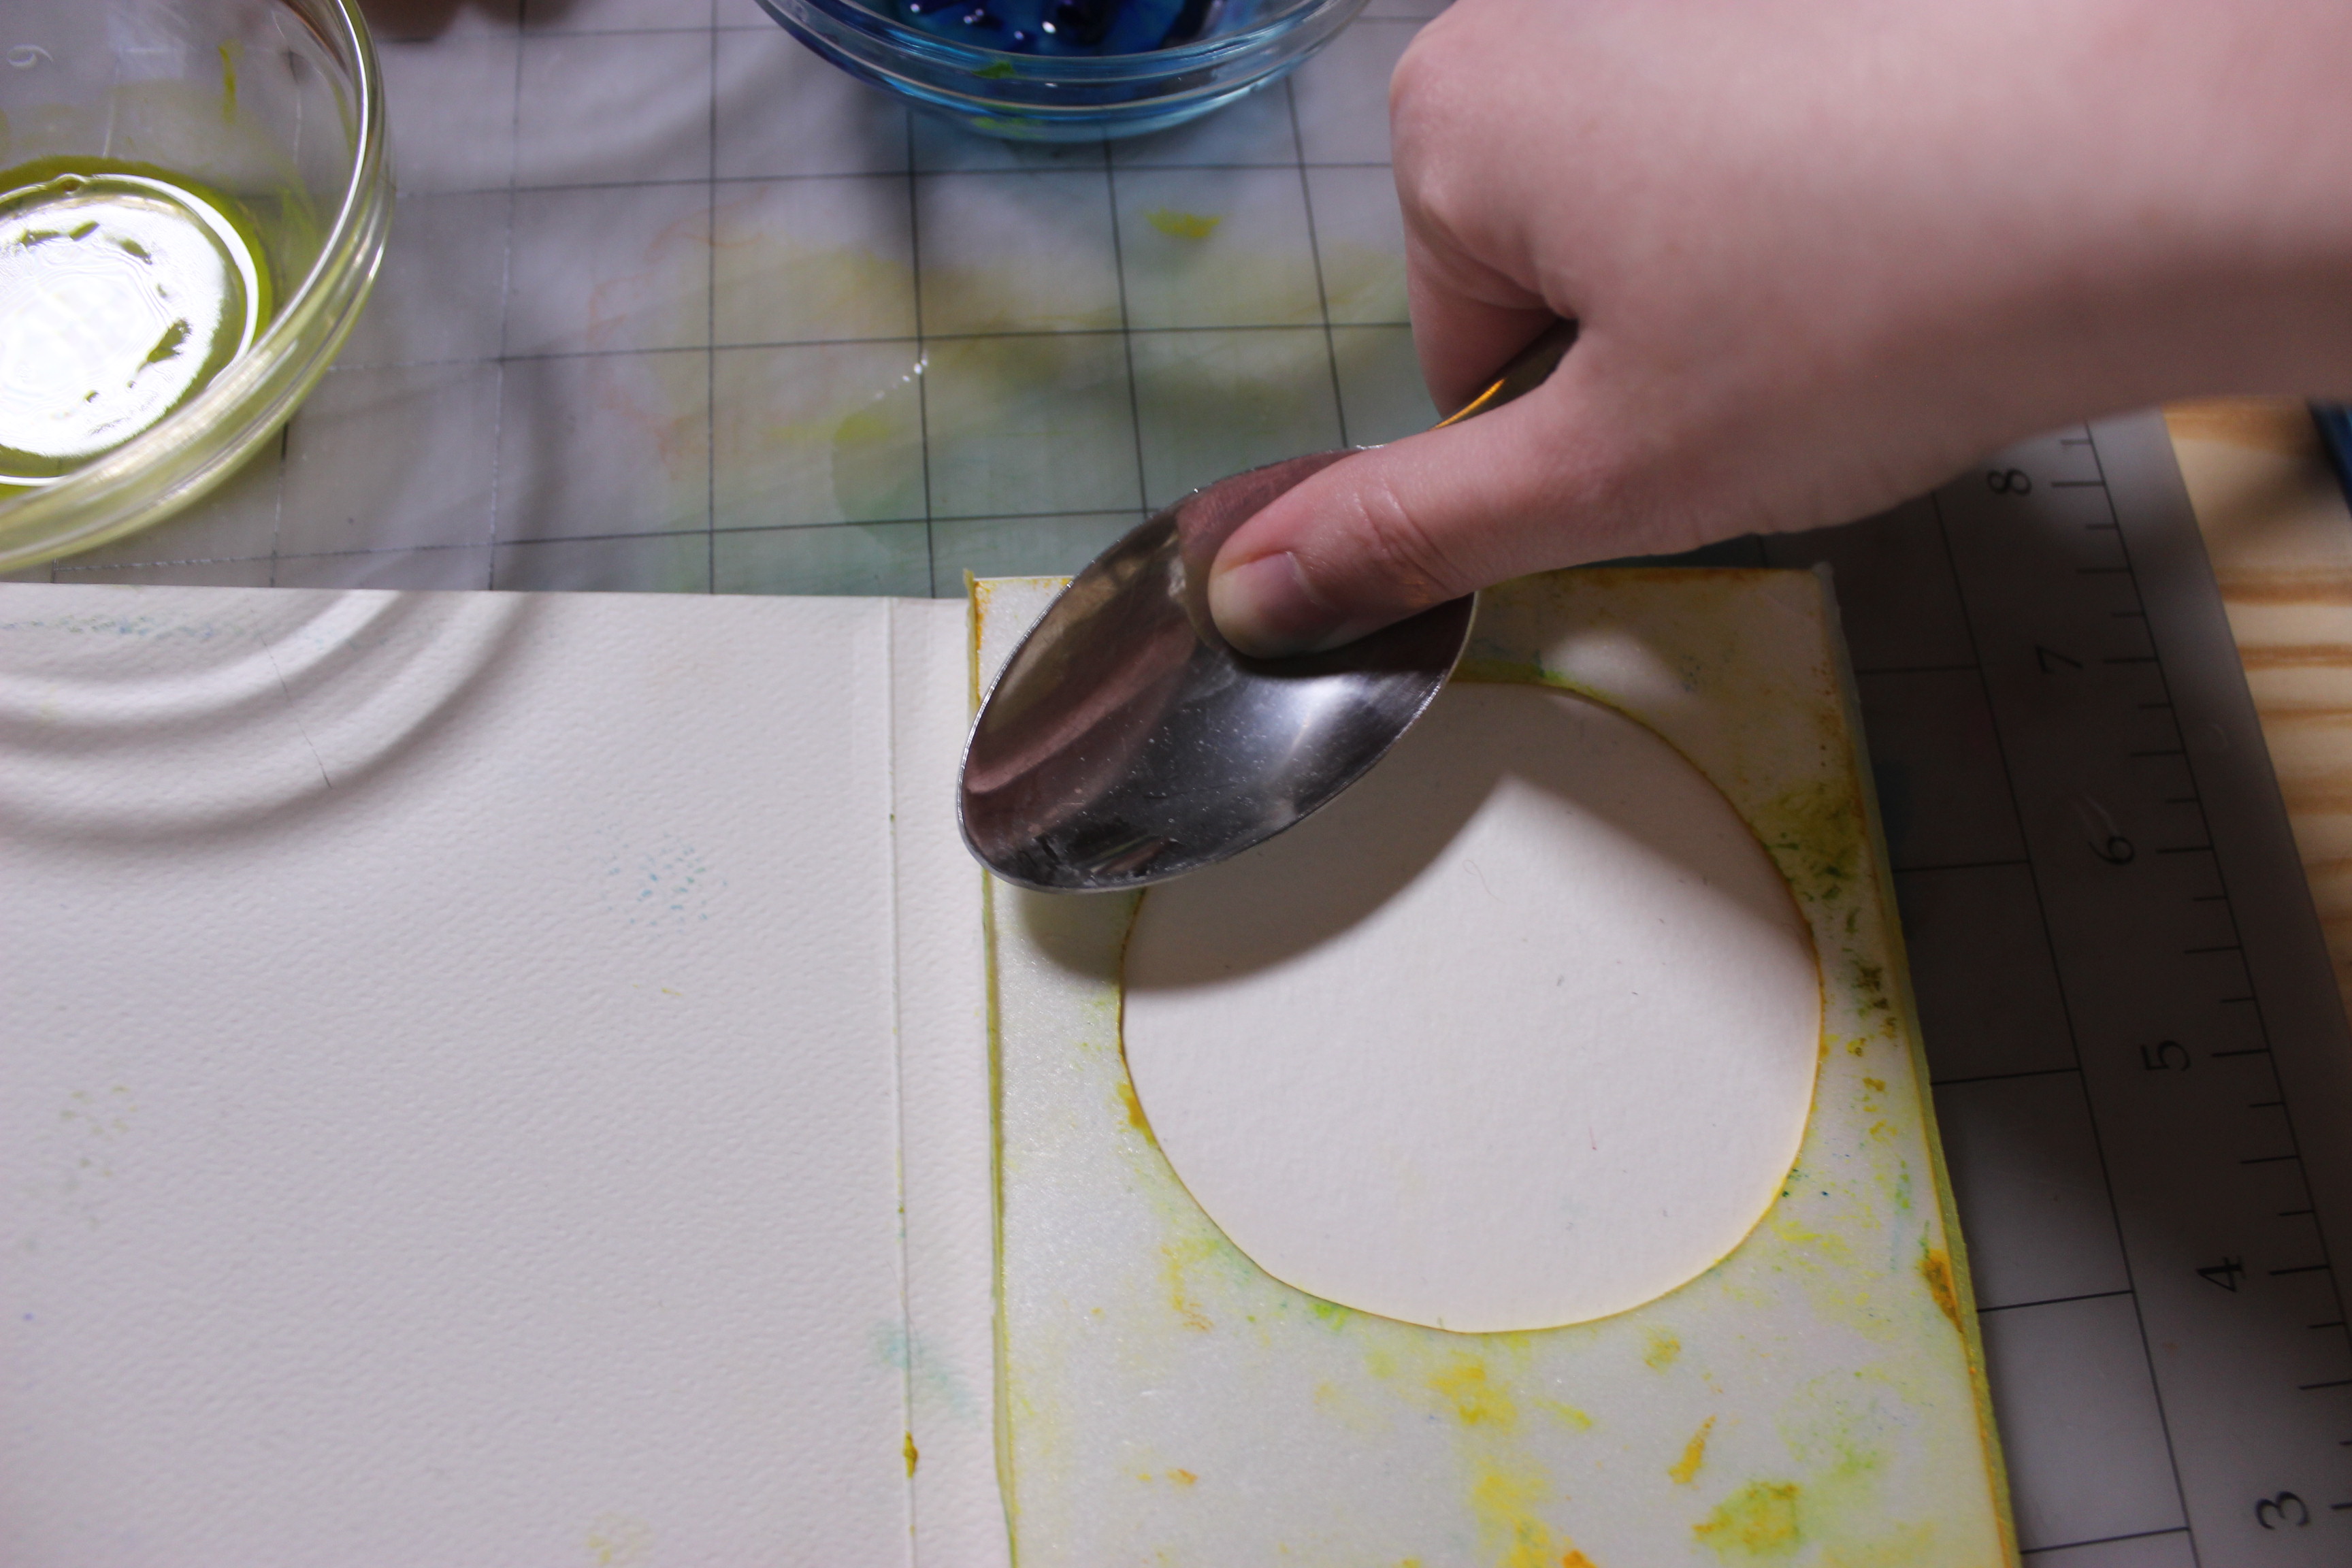
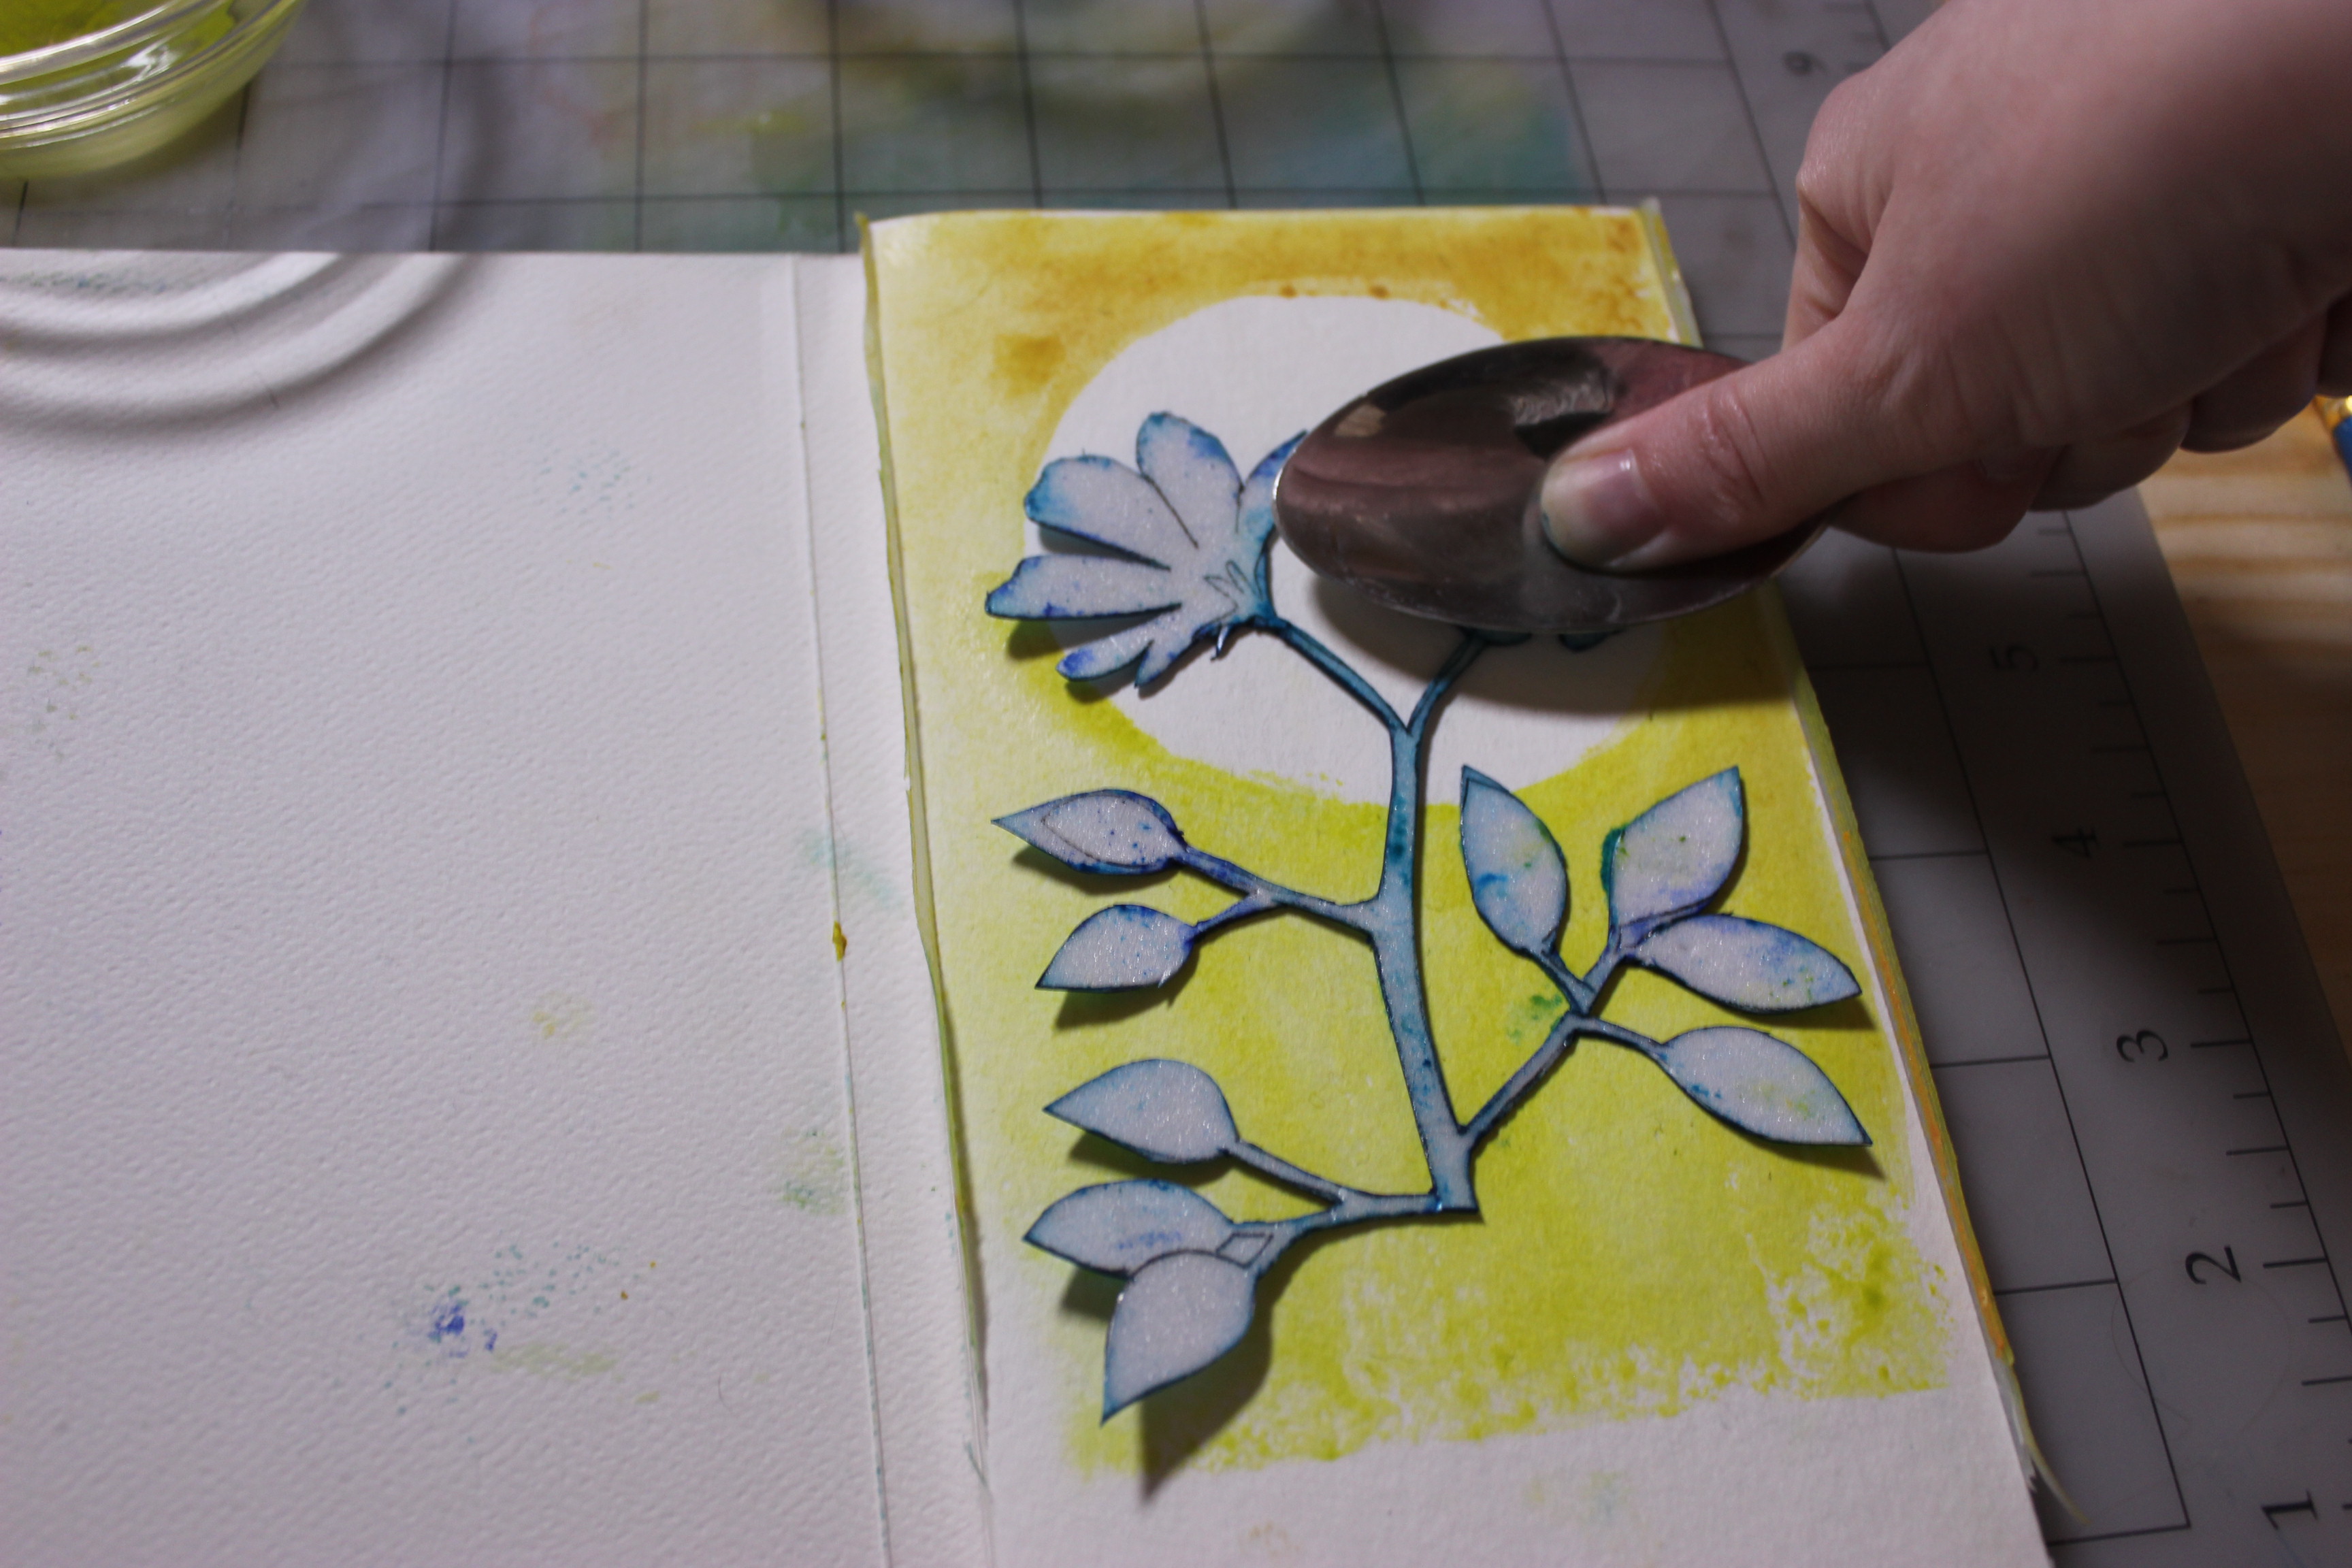
4. Place your styrofoam sheet paint-side down onto the watercolor paper, like a stamp. Use the metal spoon to press down on the paper.  

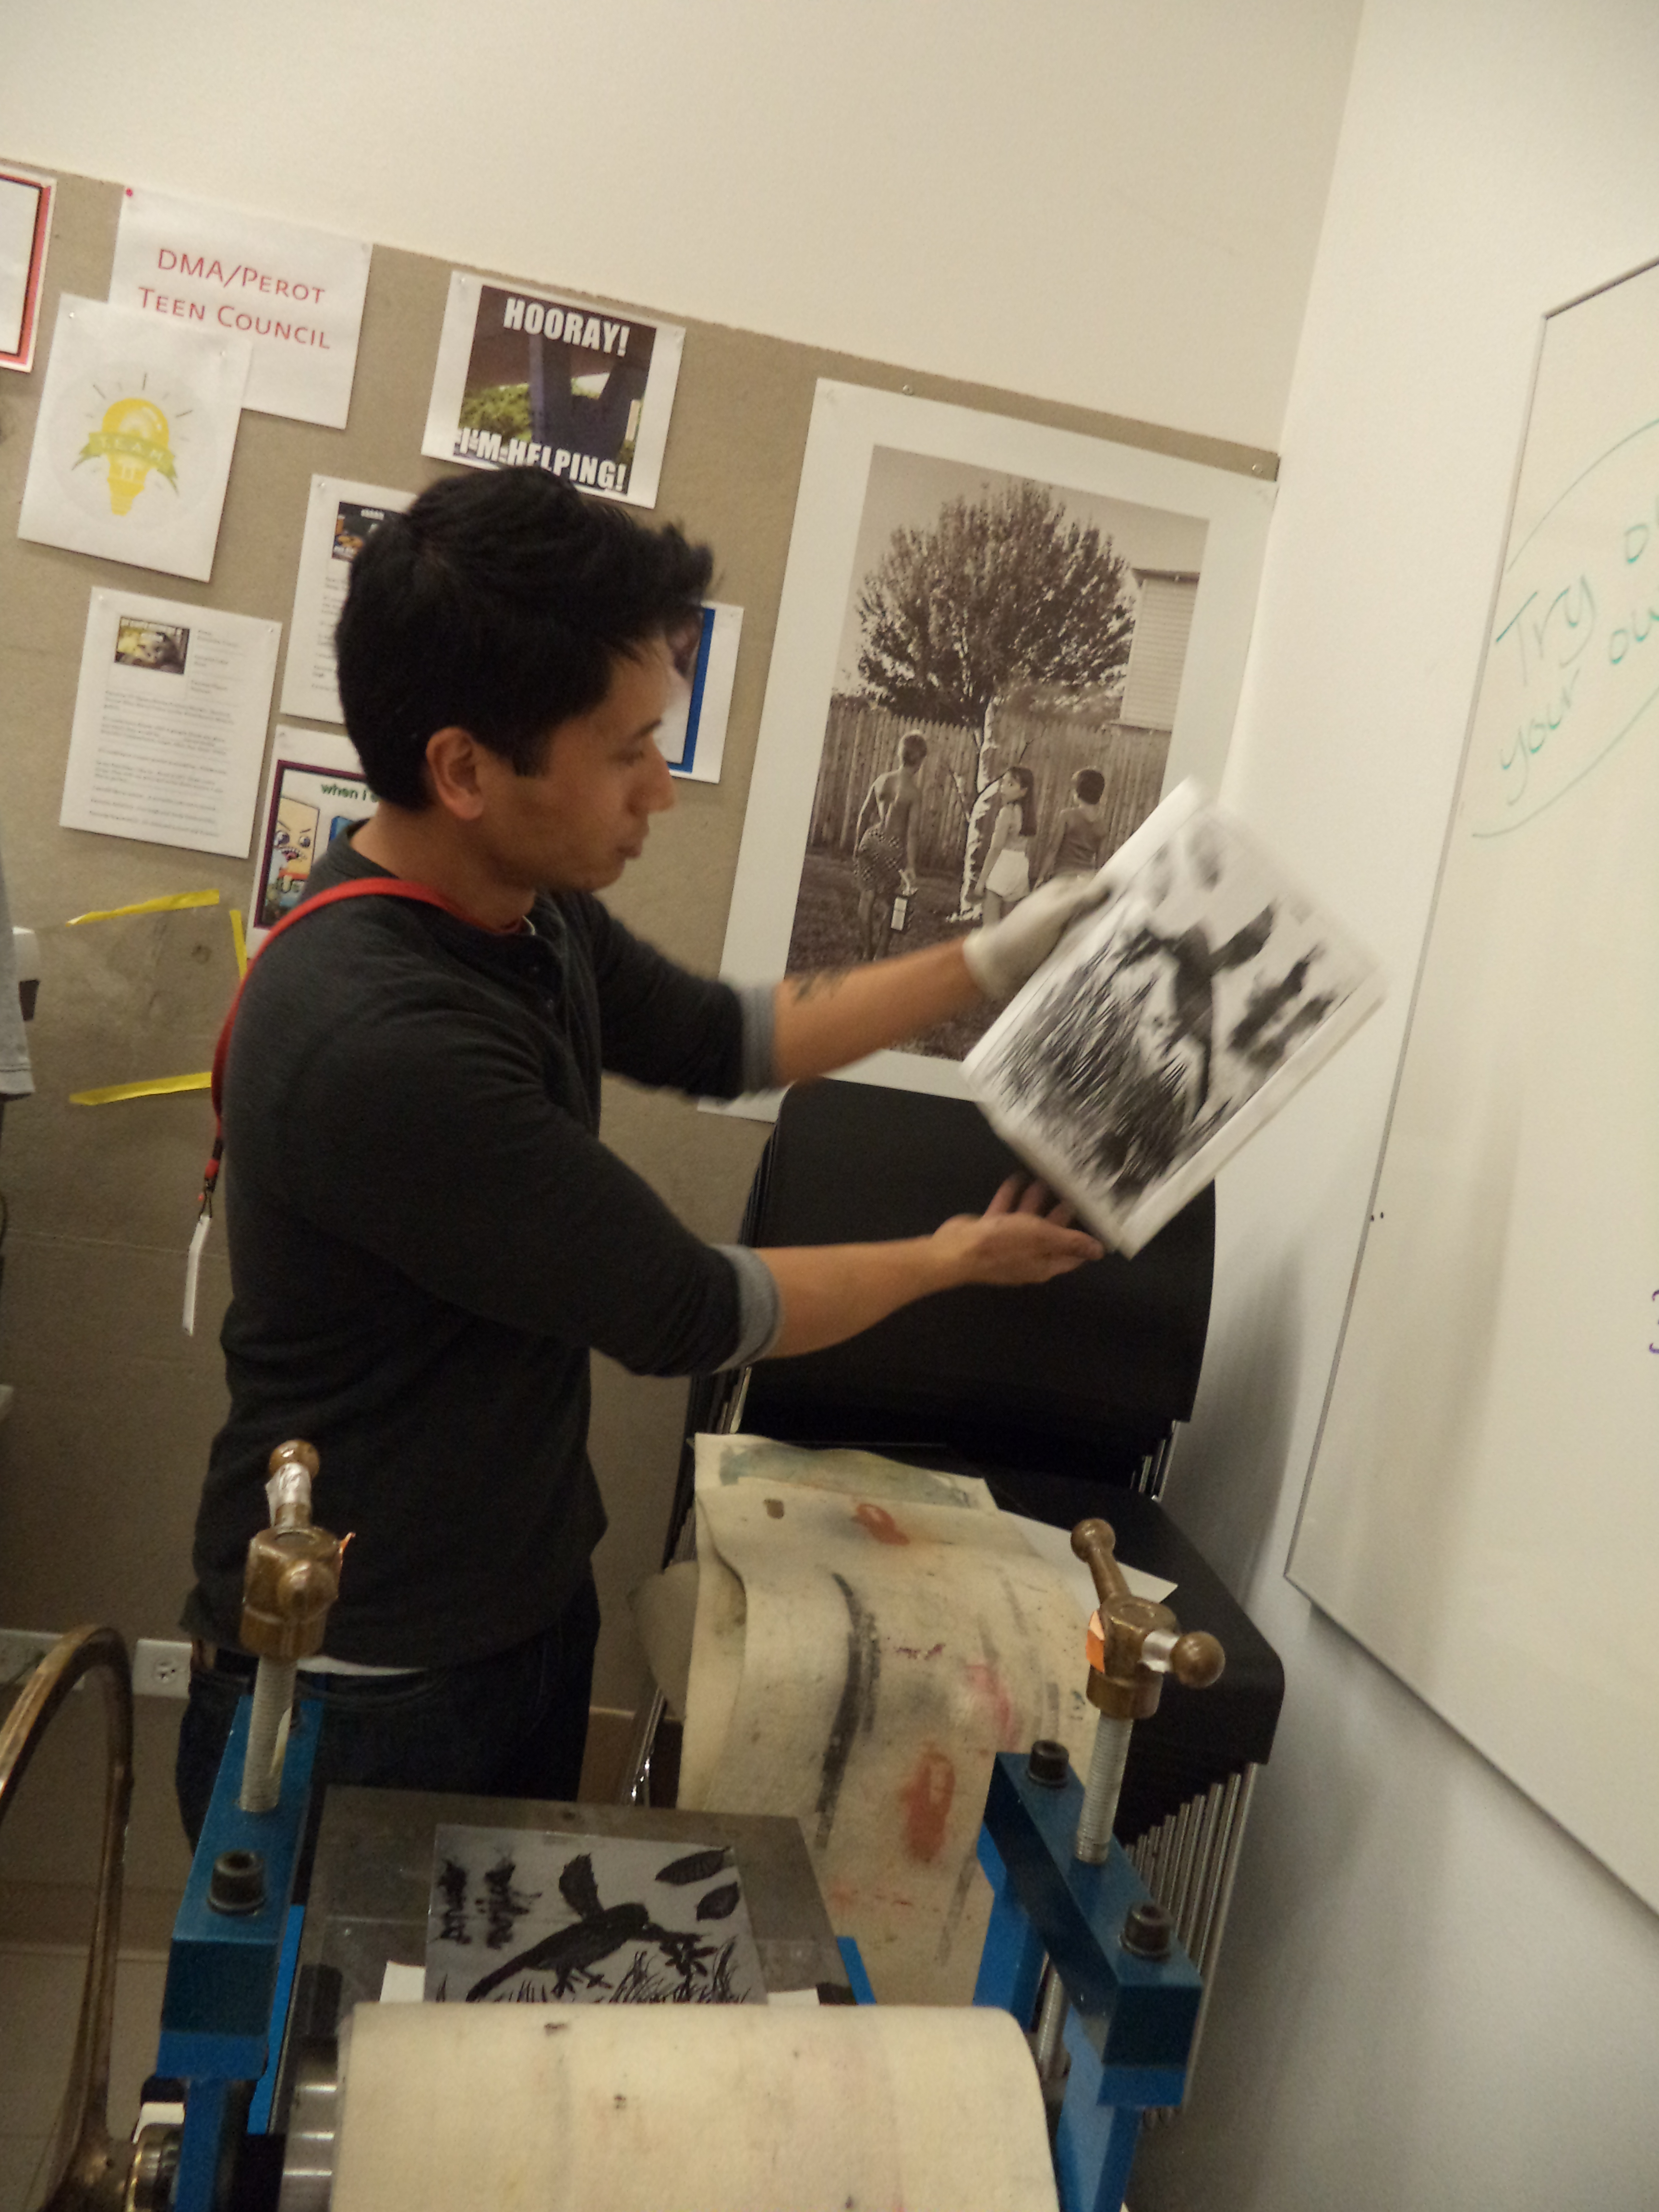
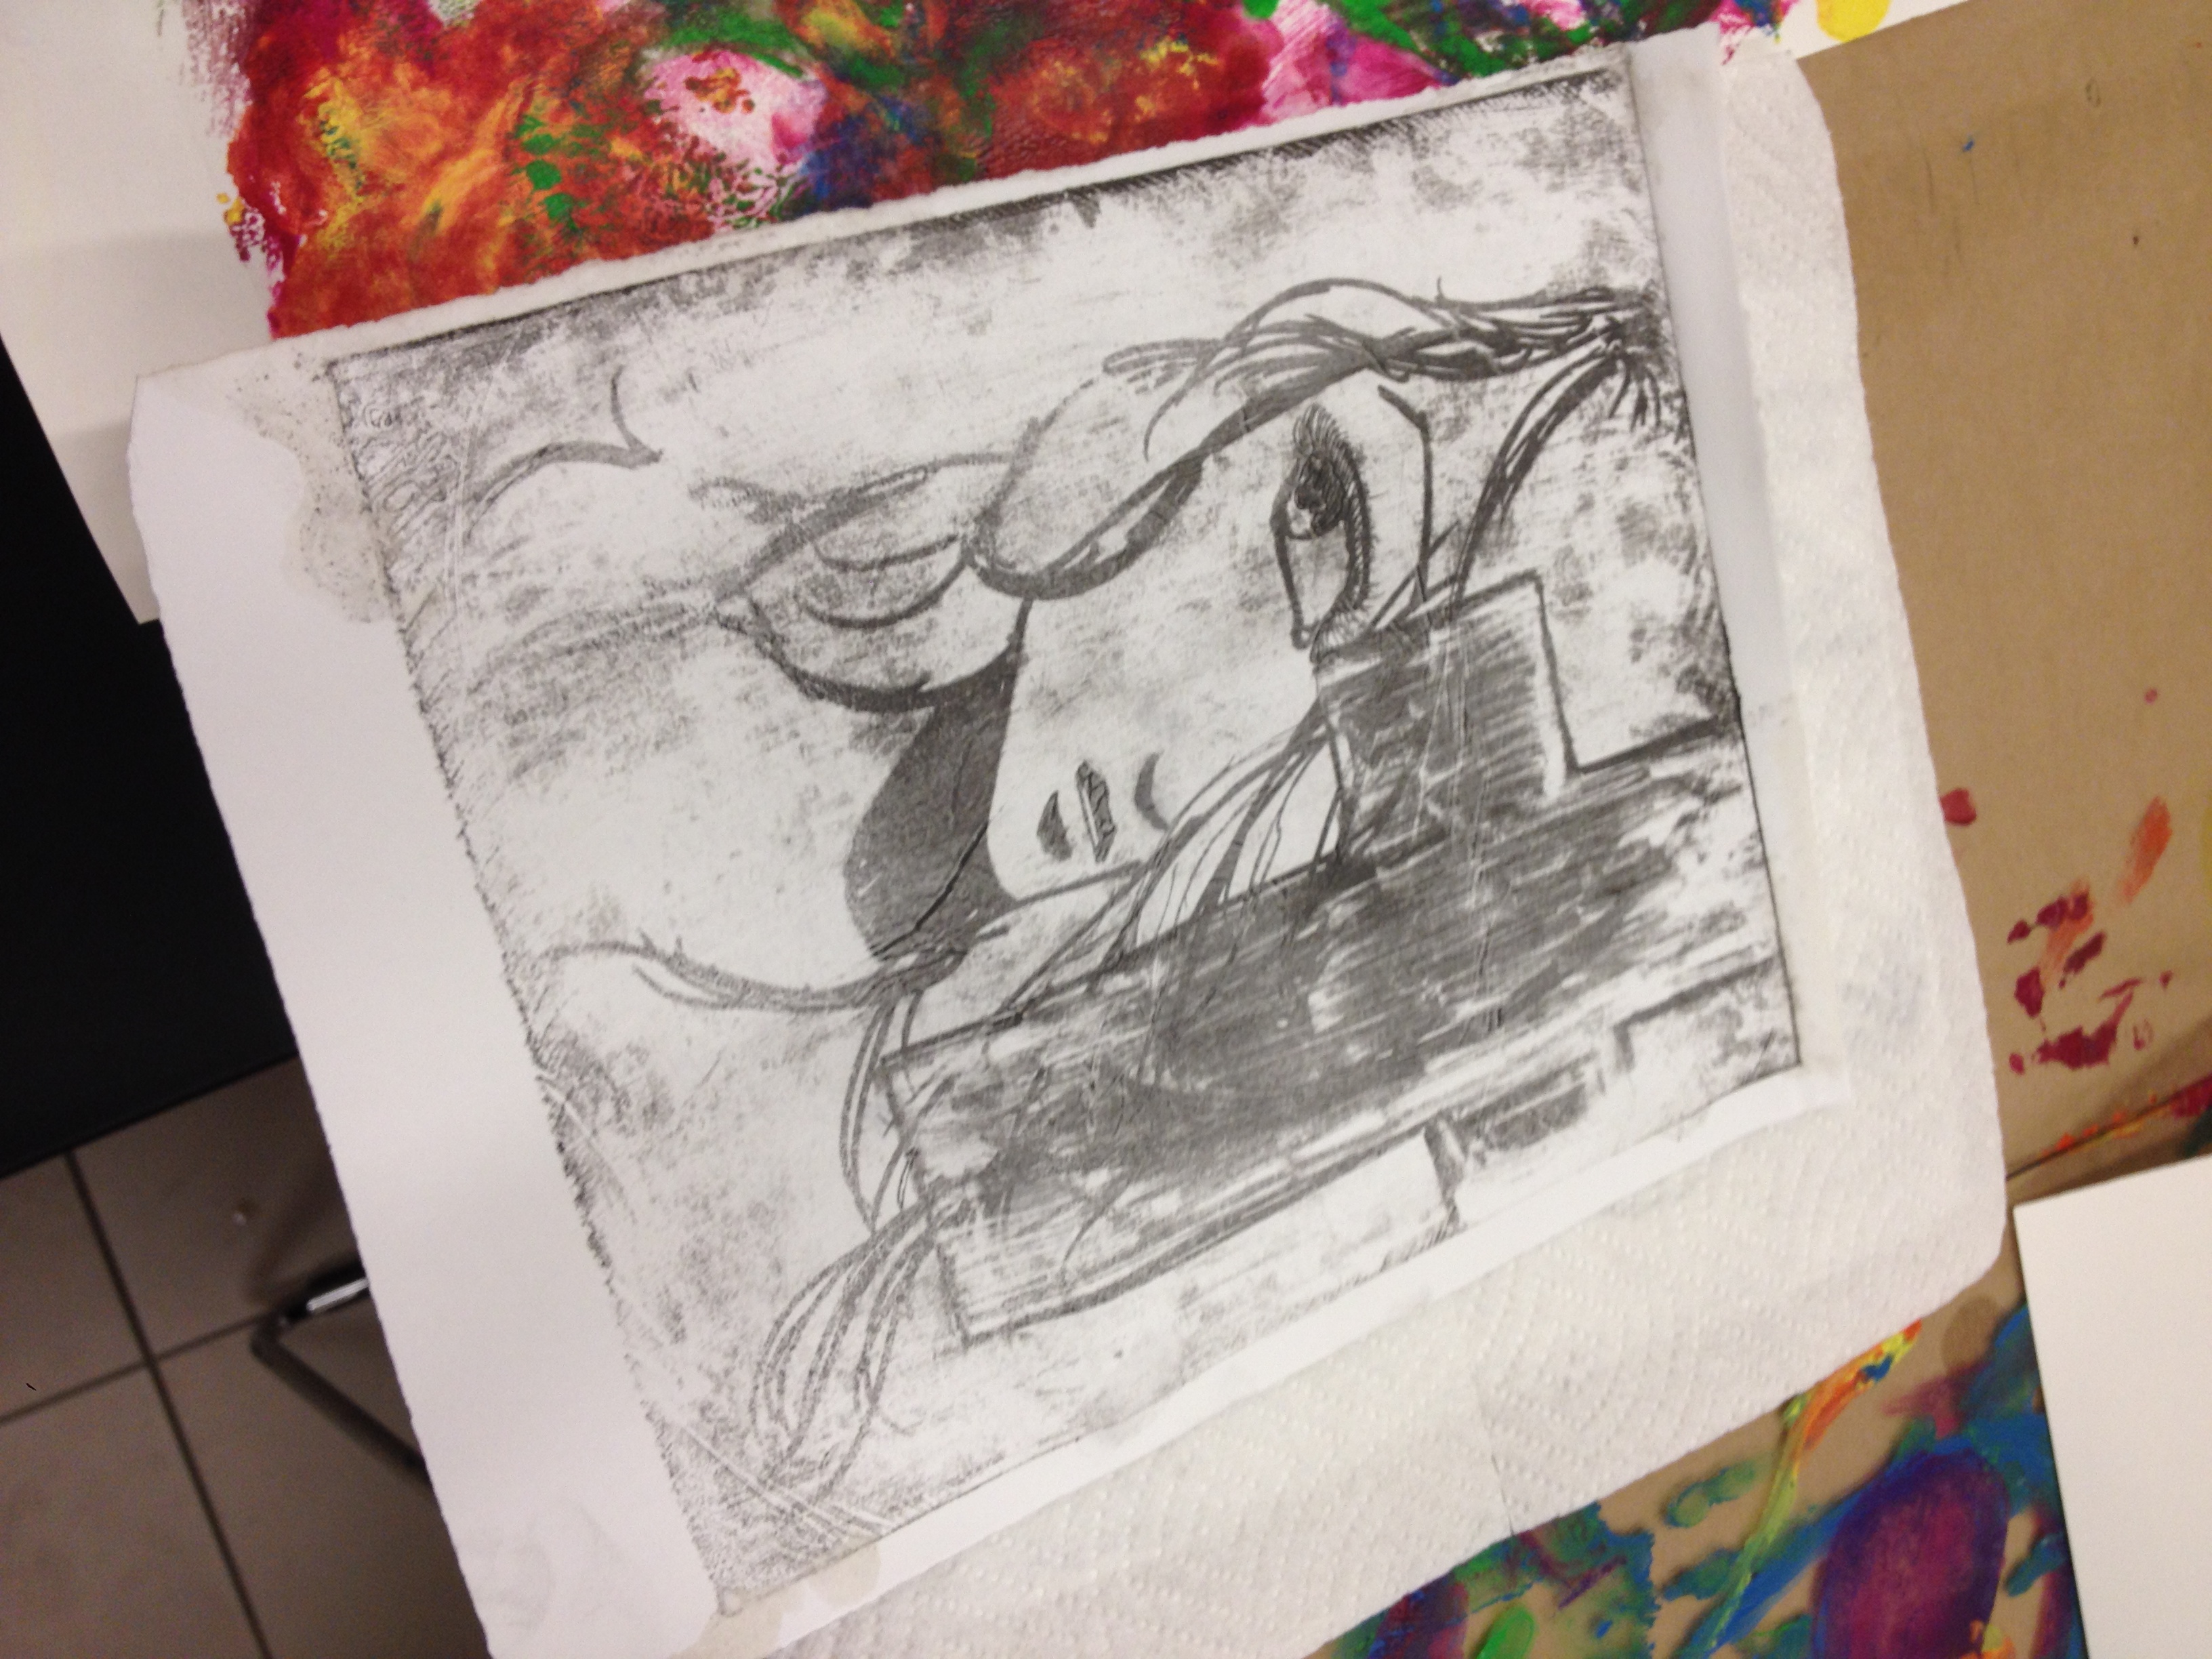
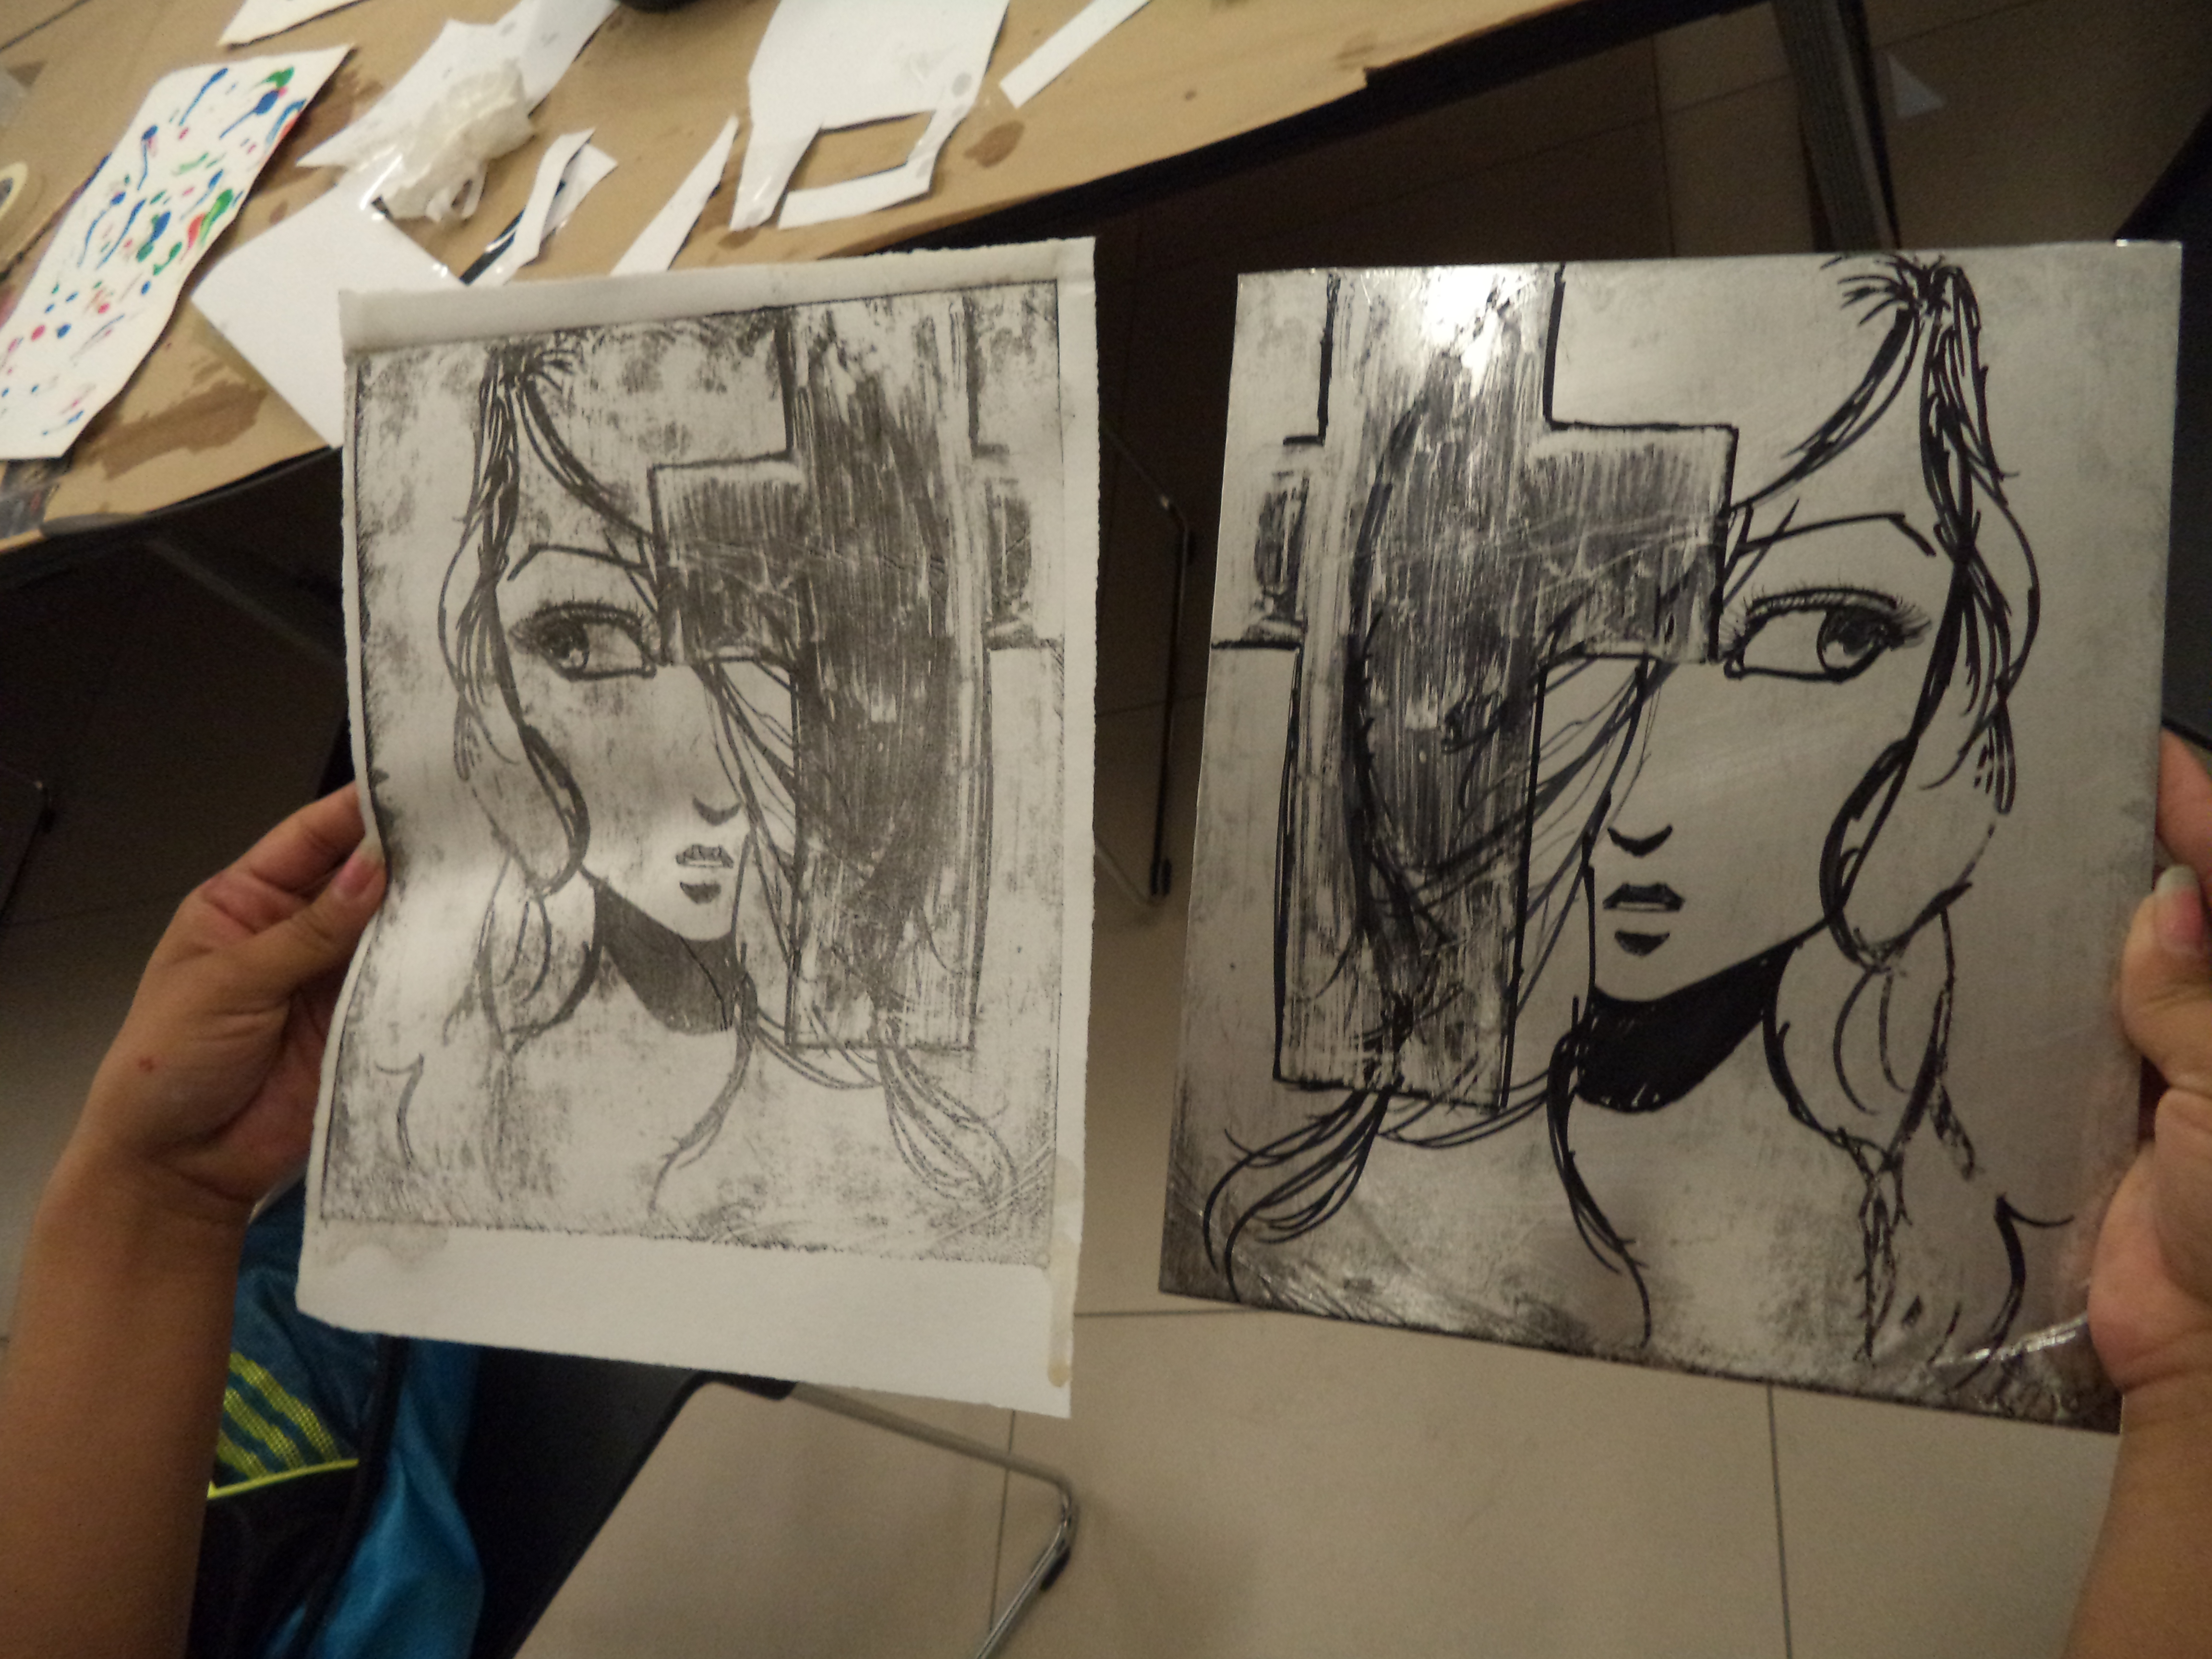
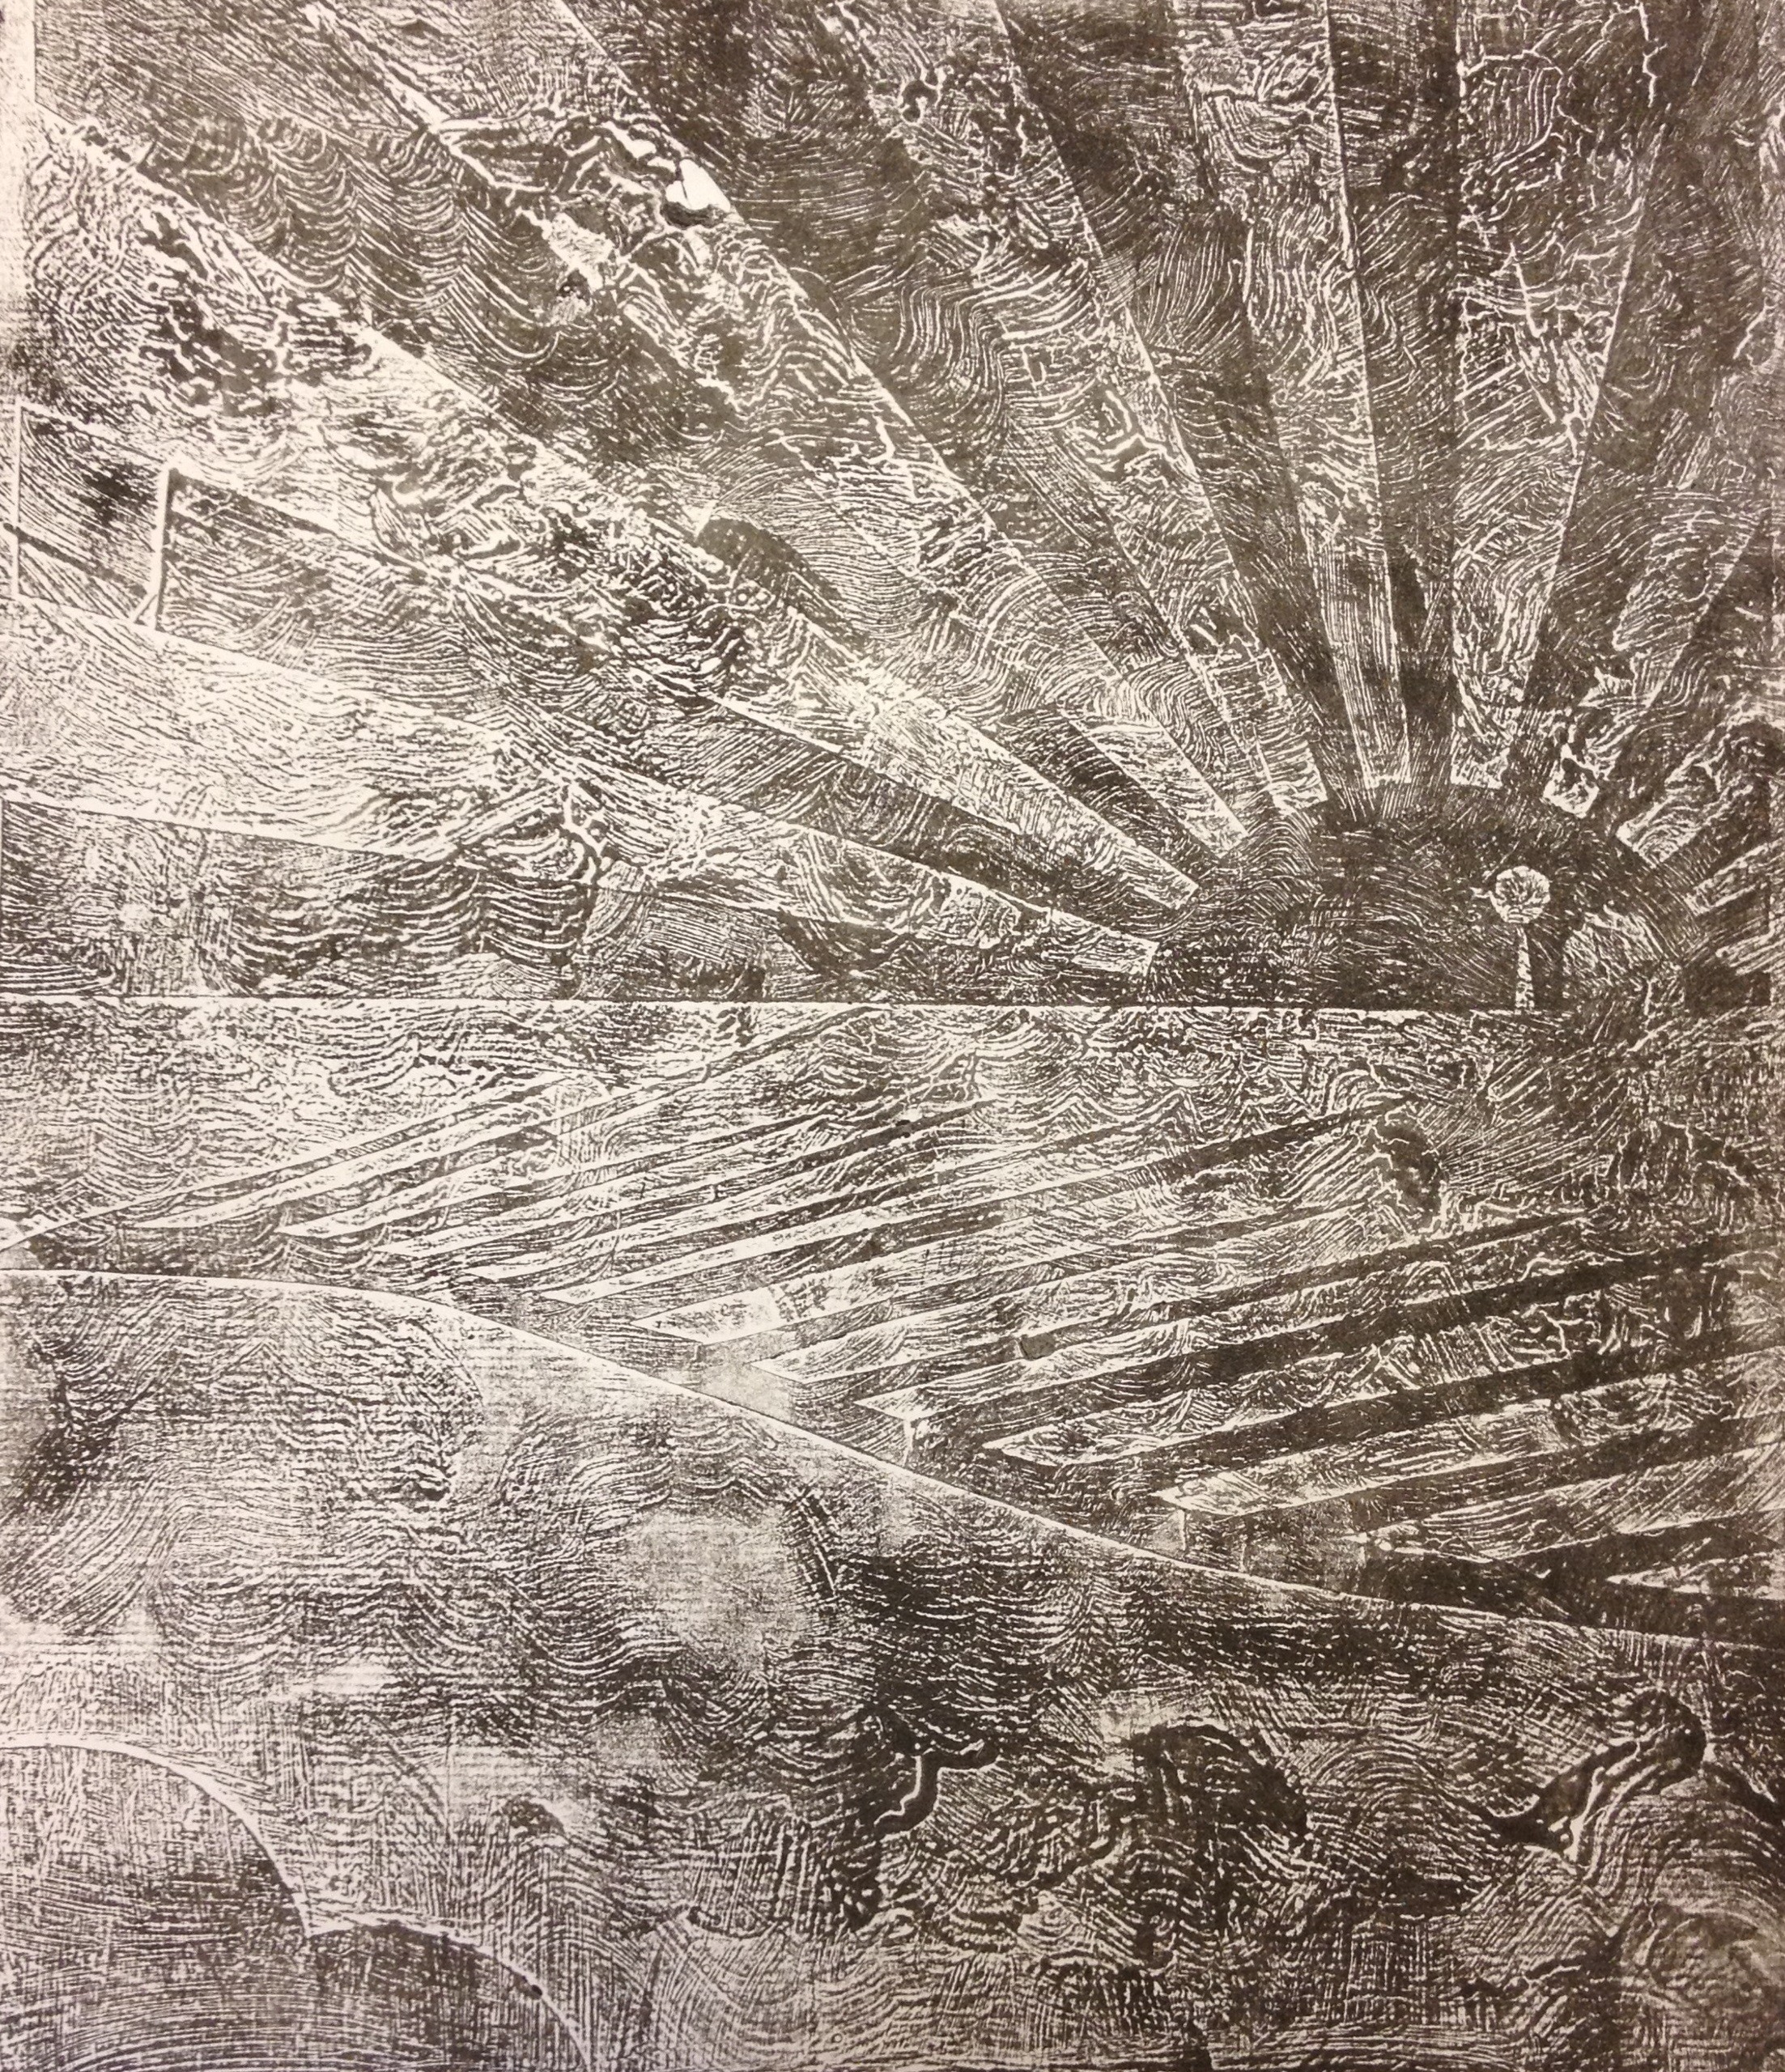
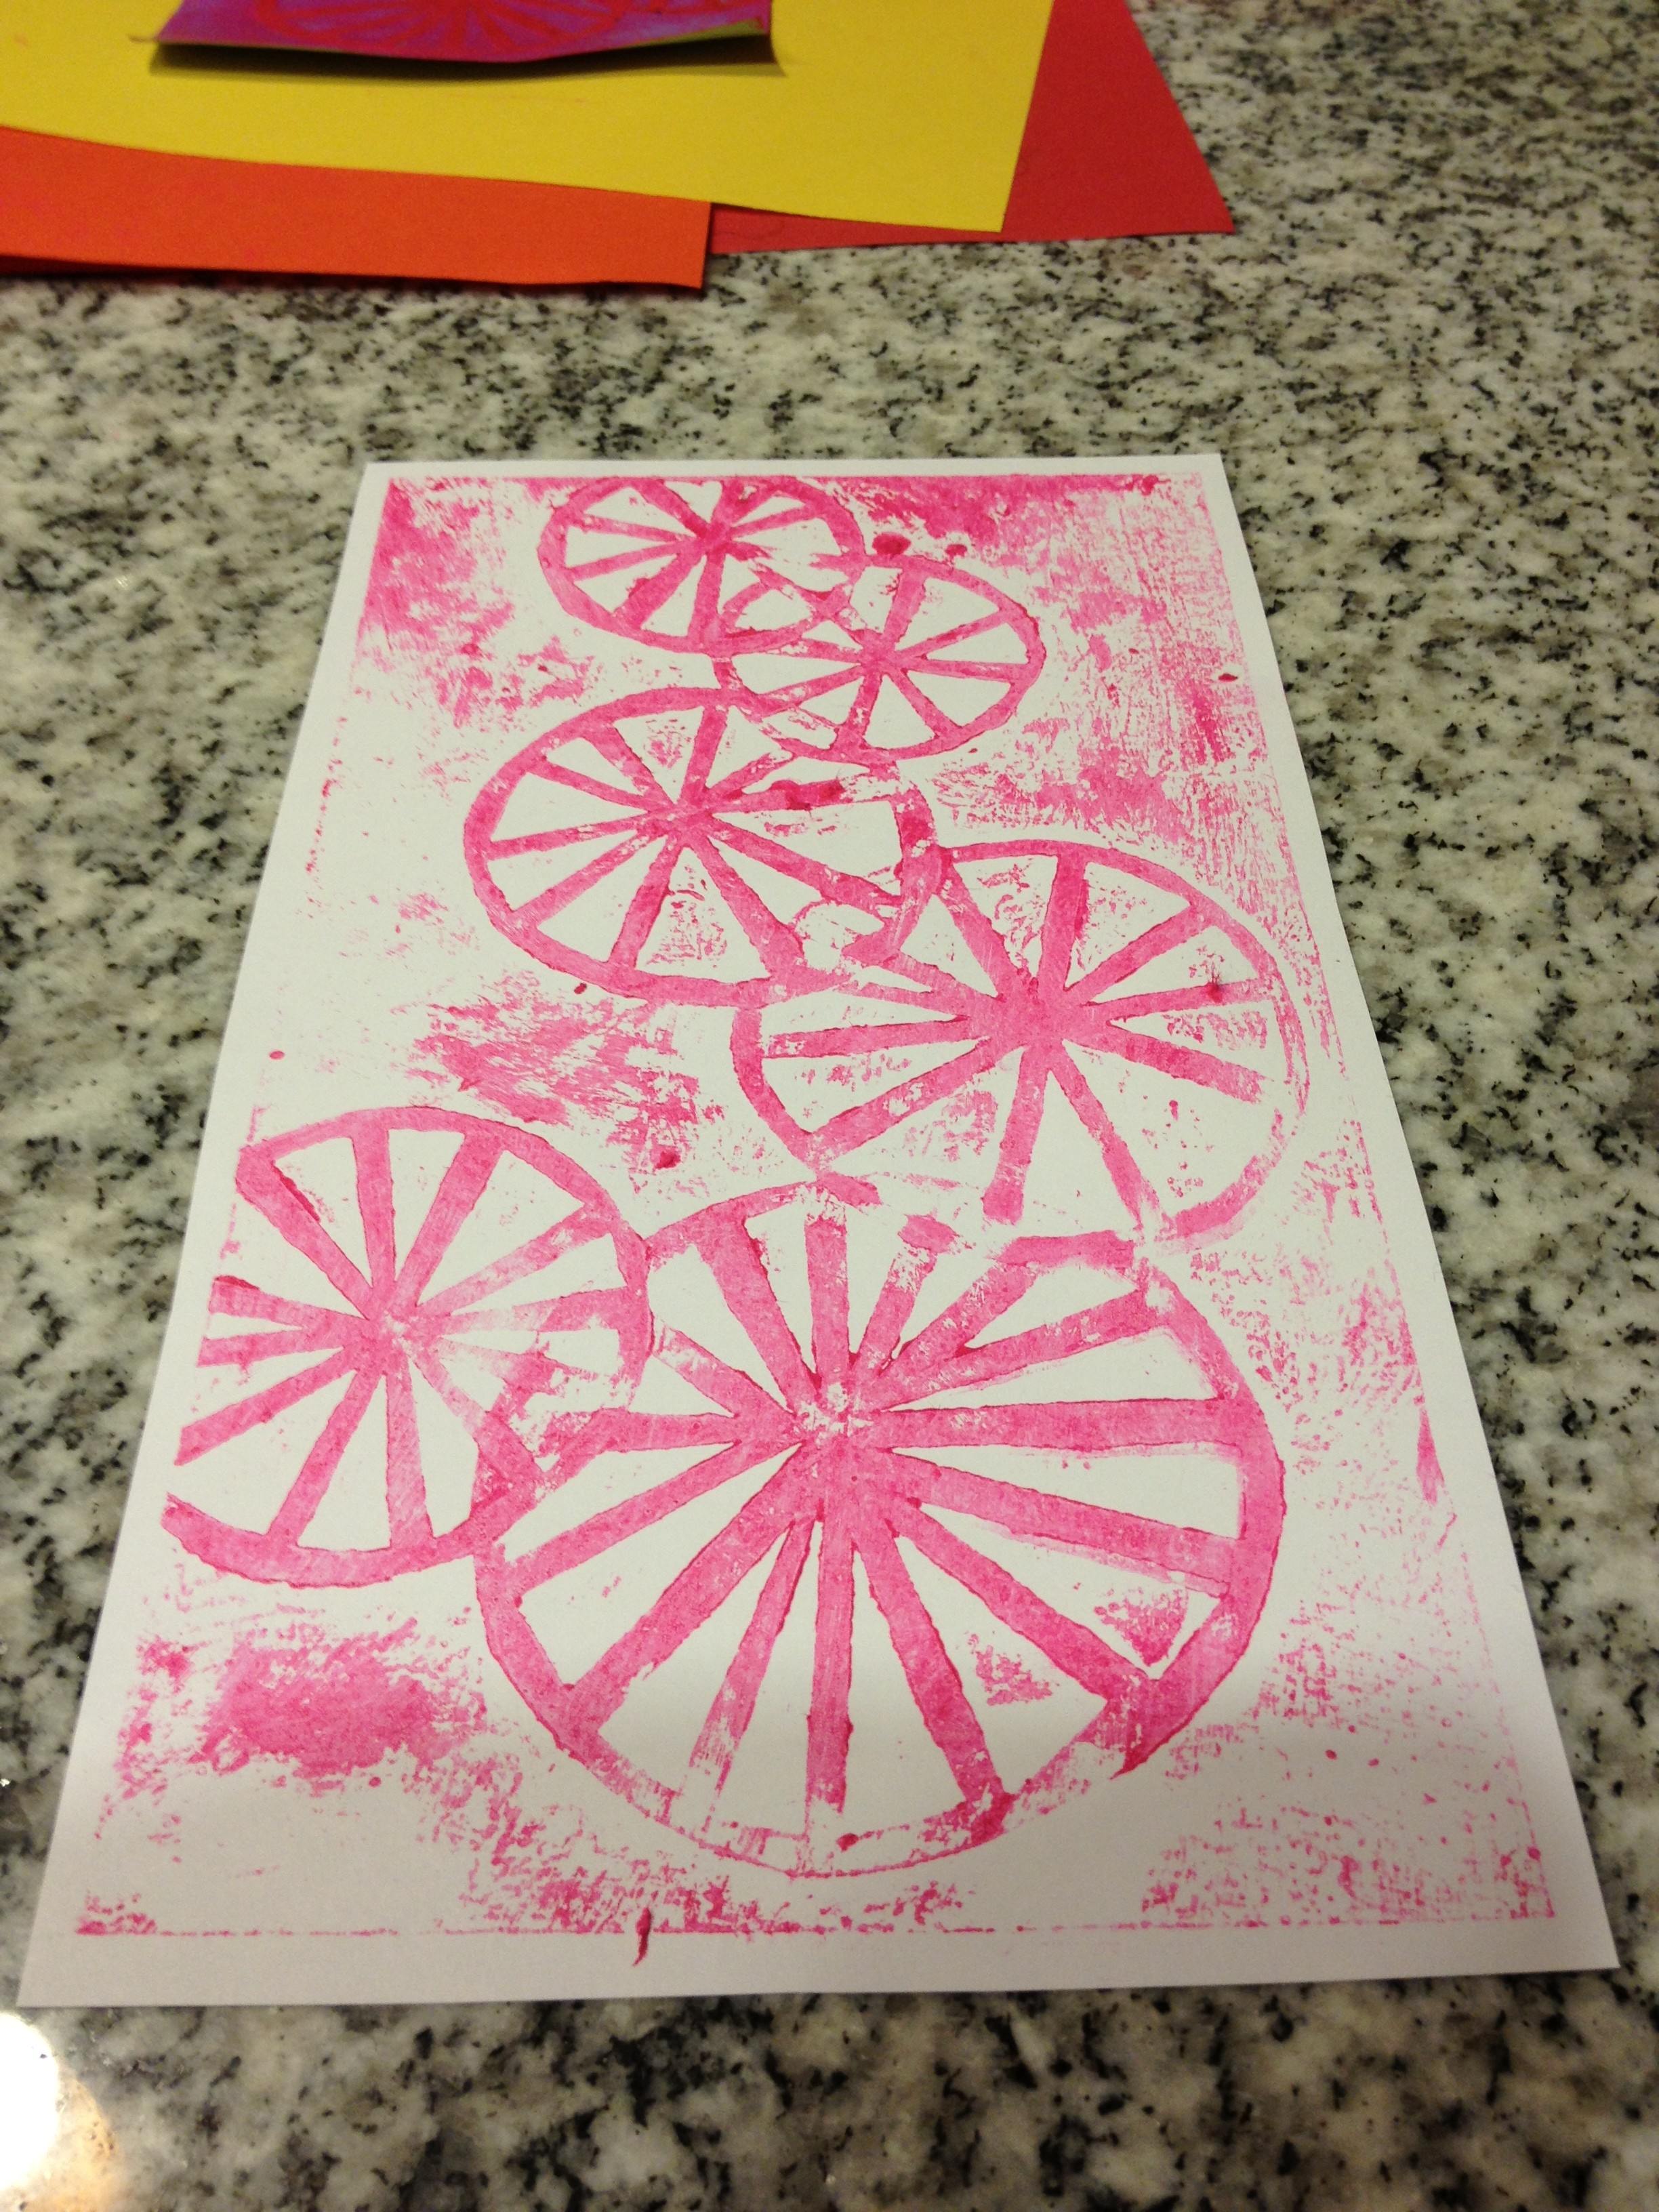
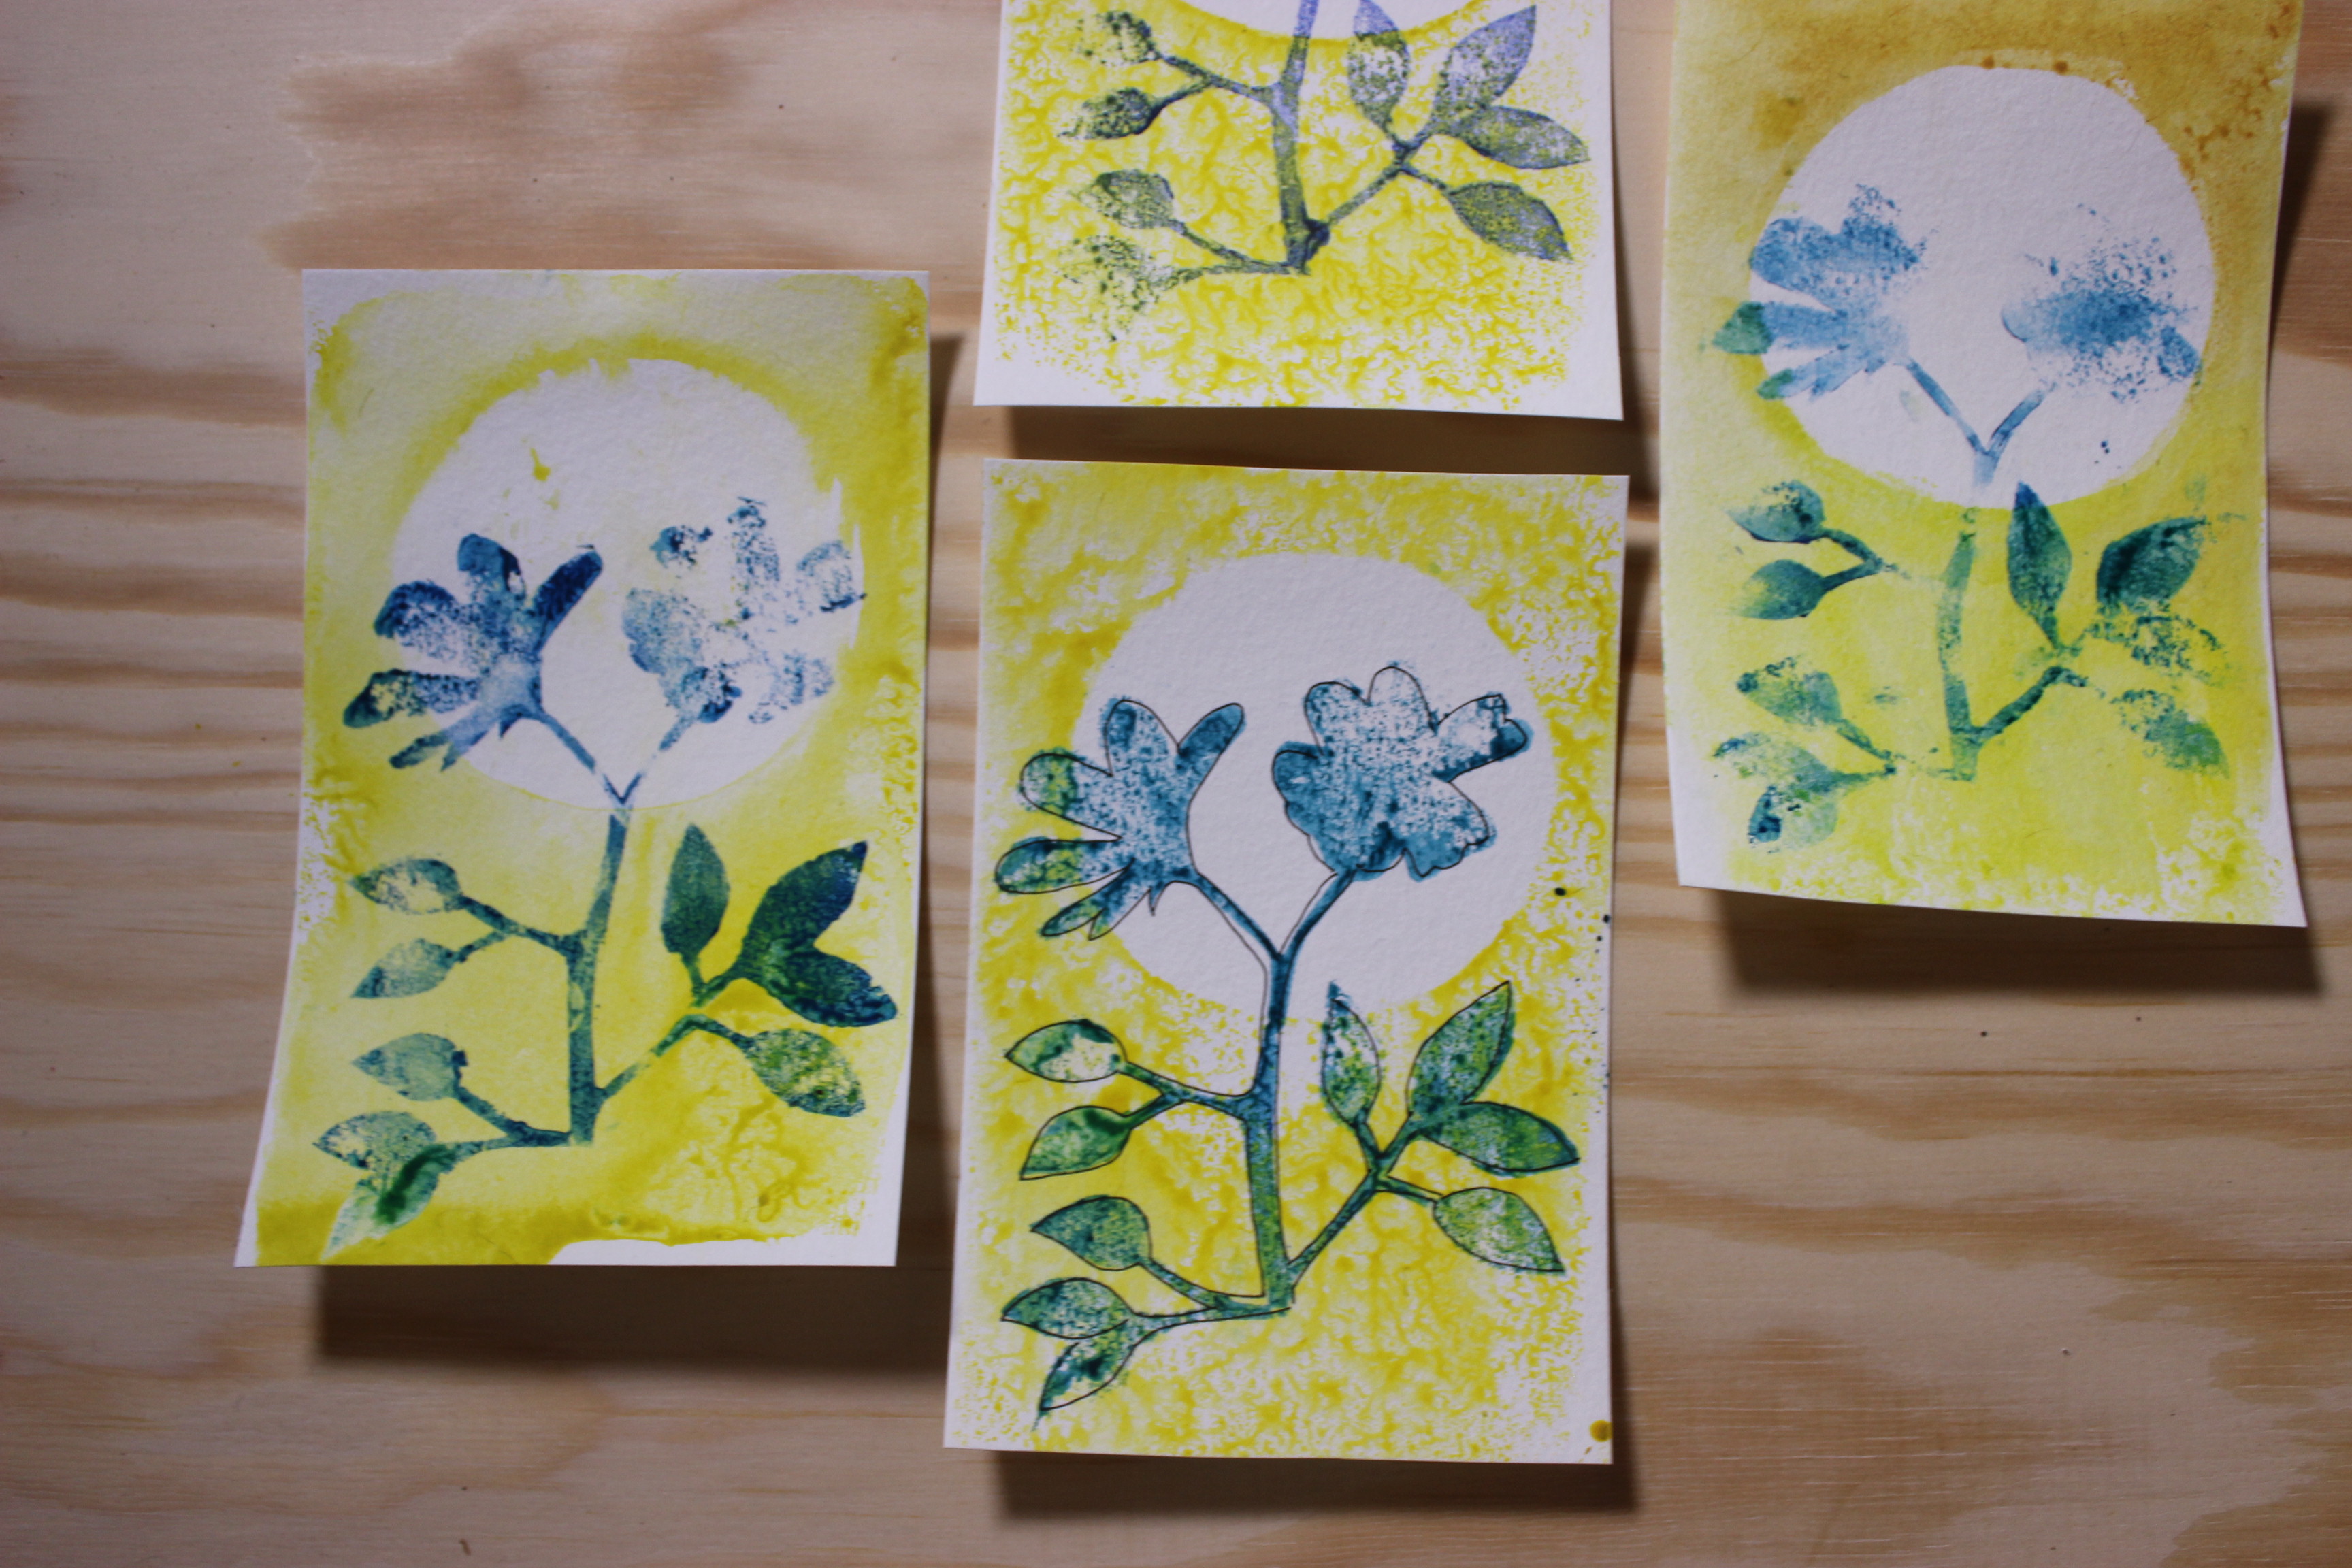
5. Gently peel the styrofoam away from the paper to reveal your design.  

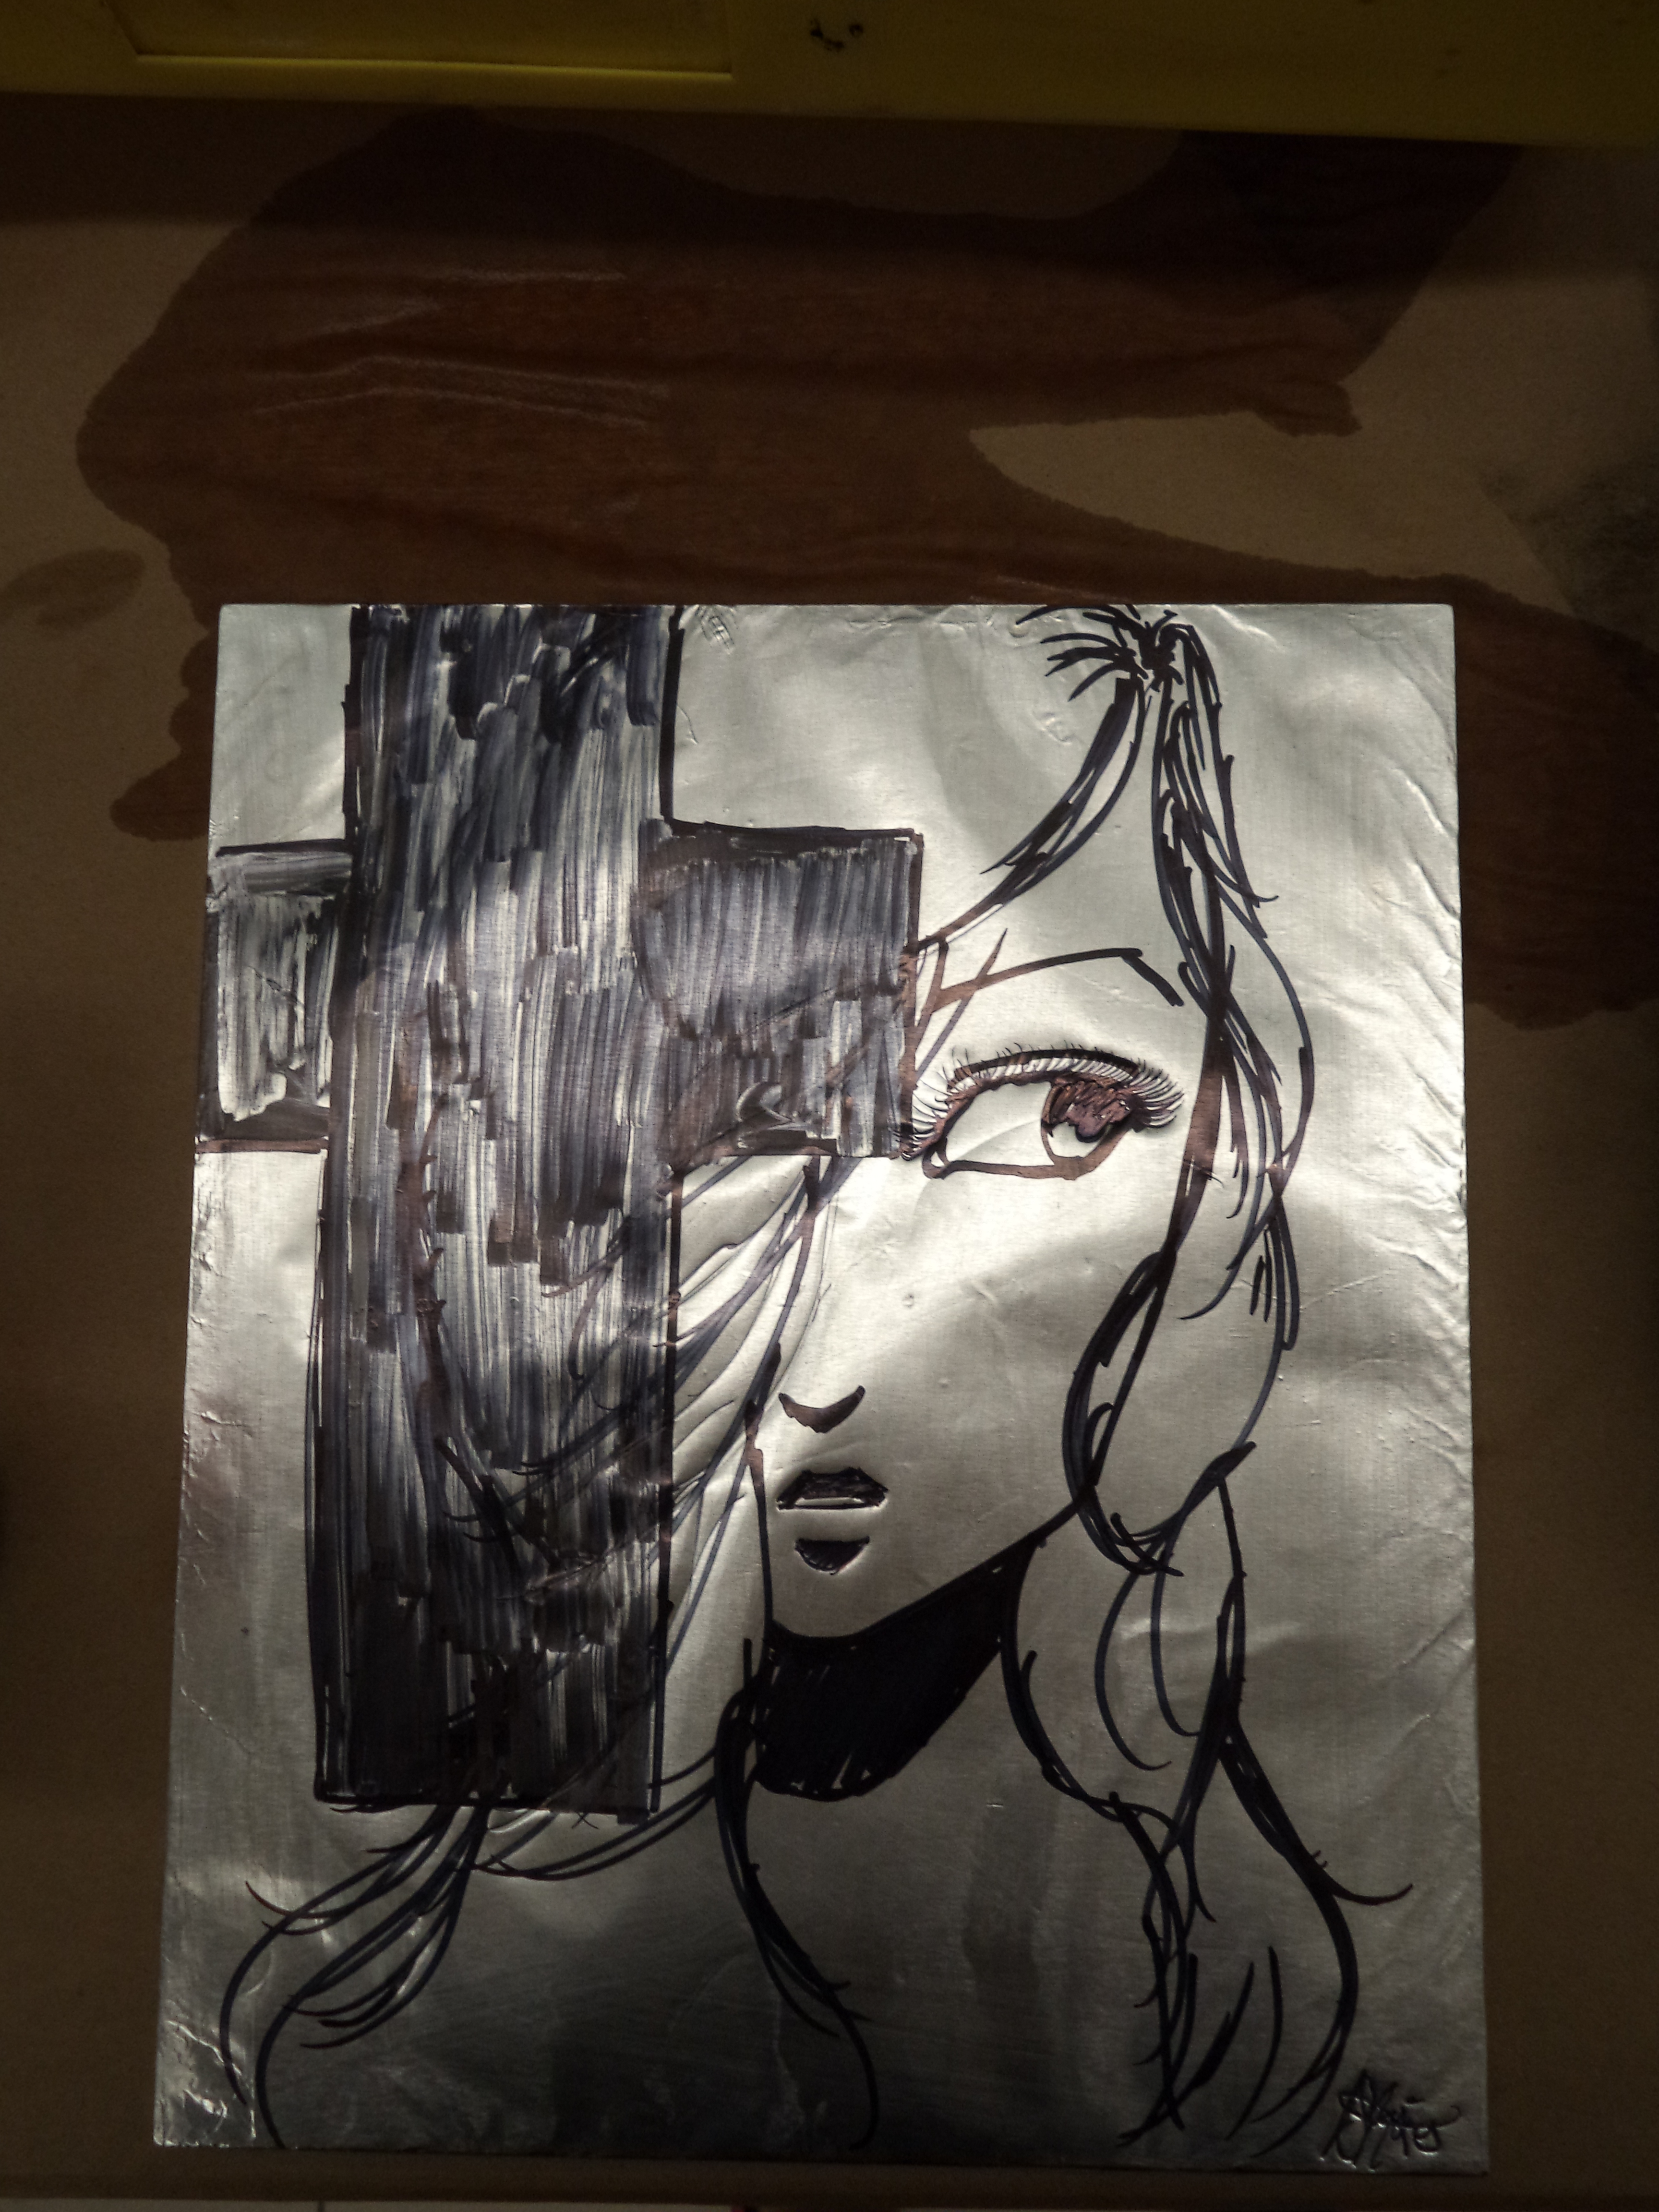
6. Wipe off the leftover paint from the styrofoam and reapply color to print another edition of your print! Each print will look different, but that’s also a part of the process that’s lost when we turn over the work to machines. When something is handmade, there will always be a degree of human error that reveals the presence of an artist behind the artwork.  

Jessica Thompson-Castillo is the Manager of Teen Programs at the DMA.

Friday Photos: Fresh Prints

For our August Meaningful Moments program, participants explored the history of printmaking in the exhibition Visions of America: Three Centuries of Prints from the National Gallery of Art. After enjoying the galleries, we returned to the studio to try our own hand at block printing on tea towels.

Be sure to catch Visions of America before it closes September 3rd!

Emily Wiskera
Manager of Access Programs

The Impact of Printmaking

Industrious civilians, corrupt politicians, taxonomies from the frontier, fame and infamy; all have been and continue to be depicted in the American print. This democratic nature of printmaking’s subjects has often drifted into the processes themselves. For example, Paul Revere’s contributions to print greatly surpassed those of a simple image-maker. He also industrialized copper plate manufacturing thereby giving a much larger group of artists access to the technology.

Print has often transferred its technologies from the forefront of industrialization into the realm of fine art as processes advance. As digital printing becomes cheaper, faster, and more accessible it pushes out more antiquated technologies, and then those technologies are turned by artists towards fine art applications.

Print has often simultaneously bucked and embraced its utilitarian roots. This can be seen in Robert Rauschenberg’s attempts to push print processes far past their traditional capabilities into almost another medium entirely. His monolith in black Accident occupies a space between print, drawing, and collage. Rauschenberg’s method was a precursor to the current and common practice of reassembling proofs and ephemera. This method of repurposing material that was once considered worthless allows contemporary print artists to complete individual works of art where print is the language and repetition is no longer a factor. The prints also give a much larger audience access to his work. They can easily travel, be shown in multiple locations at the same time. It can even be argued that they offer a wider conceptual accessibility than his paintings and assemblages simply through the widely understood aesthetic properties of paper and ink.

Whereas other mediums have been more subject to the wills of those with means, print has catered to a wholly different crowd, often the same one depicted in its imagery. Bellows’ lithograph, A Stag at Sharkey’s, invited wide audiences of the day into a seedier closed realm outside their normal comfort zone to witness a less accessible form of entertainment, illegal prize fighting. One could argue that the original spirit of dissemination represented by the Gutenberg press continues to spring forth from online mediums such as YouTube, which has become a university for the everyman. In addition to representing the most current philosophies and aesthetic possibilities in contemporary art, print is unique in its unfiltered articulation of whatever artistic expressions are evident in the culture at large.

Portions of this article appeared in the Spring/Summer 2017 issue of the DMA Member Magazine Artifacts

Steven Foutch is an artist and assistant professor of painting and printmaking at University of Dallas

Prints Charming

With the opening of Visions of America: Three Centuries of Prints from the National Gallery of Art, we’re completely and utterly in love with a new Prints Charming—the art of printmaking! Printmaking is an artform that is easily accessible to even the youngest children. All you need is paper, some kind of ink or paint, and a surface that “holds onto” your print.

Here are some of our favorite ideas you can try at home!

Monoprinting

We tried monoprinting with the Toddler Art class, and the kids loved the “magic” that appeared before their eyes as their prints were lifted off the inked surface. All you need at home is a cookie sheet or even a piece of waxed paper taped to the table. Completely cover the cookie sheet or waxed paper with a layer of paint, and then have your child “draw” a design in the paint using a Q-tip. Gently press a piece of paper on top of the painted drawing, and watch the image transfer from the cookie sheet to the paper. Then do it all again!

Styrofoam Printing

Styrofoam printing allows you to make multiple prints from a single image. For this process, any Styrofoam will do–a plate (with the ribbed edge trimmed off to create a flat surface), a recycled foam tray from a grocery purchase, or a sheet of foam purchased at a craft store. Children can draw their image into the foam using a dull pencil. Special Note: if they add any letters, numbers, or symbols into their drawings, they’ll need to write them backwards, as their image will be reversed when printed. Once the drawing is complete, cover the entire surface of the foam with ink or paint, then press the inked surface onto a piece of paper. For an extra challenge, older children can try to print layered images by drawing and printing in one color, then drawing additional details on a second sheet of foam, covering the sheet in a different color, and then printing onto the original piece of paper.

veggie printmaking

Fruit & Veggie Printing

This is one of my most favorite printmaking projects to do with kids! Many children have probably done the classic stamping-with-an-apple project. But have you tried printing with celery, okra, or onions? Fruits and veggies have beautiful hidden patterns that make for really fun (and smelly!) printmaking. For this one, cut up fruits and veggies and have your child dip them into paint and then stamp onto paper. I experimented with cutting several of the produce–particularly apples, oranges, onions and bell peppers–both lengthwise and widthwise so that we could create different patterns with each.

For even more fun printmaking ideas, check out these posts on some of my favorite blogs:

Happy creating!

Leah Hanson
Manager of Family and Early Learning Programs


Make This: Etching with Cola

Coke Etching

Example of a “coke” etching

Printmaking is one of my favorite mediums. There’s something satisfying and magical about transferring an image you created onto another surface. Plus, there are so many fun and experimental ways to do it that make learning new techniques a joy and not a chore. I especially love finding alternative methods to techniques that may otherwise be cost-prohibitive for the at-home printmaker–namely, intaglio and lithography.

This idea of alternative processes was the basis of April’s Urban Armor workshop for teens. One of the techniques I taught was a version of lithography appropriately dubbed “kitchen lithography” because most of the supplies can be found in your pantry. Popularized by Emilie Aizier, there are lots of tutorials on how to do it on various internet sites. Finding a perfect guide is hard because the process is finicky and everyone does it in a slightly different way. It’s definitely something to experiment with on your own, but I’ll share what gave me the most consistent results.

If you’ve never tried lithography before, it basically consists of creating a master image on a plate (usually metal or stone); in this case, cola is used to etch the image into aluminum foil (it contains phosphoric acid–yum!). Printing from the plate works on the principle that water and oil repel each other: the plate is first coated with water, which doesn’t stick to the etched image because of the gum arabic in the cola. Oil-based ink is then rolled onto the plate, which sticks to the image but is repelled everywhere else by the water.

Several months back, the DMA hosted the wonderful exhibition Posters of Paris: Toulouse-Lautrec and His Contemporaries that not only featured fantastic lithograph posters from the late 1800s, but highlighted many of the tools and steps involved in lithography.

What you need:

  • Small sheet of plexiglas
  • Heavy duty aluminum foil
  • Tape
  • Sharpie permanent marker
  • Scrubber pad/steel wool
  • Vegetable oil
  • White vinegar
  • Cola (I used Coke)
  • Sponge and bowl of water
  • Lithography ink (NOT water-based)
  • Latex gloves
  • Printing brayer
  • Printing baren or large spoon
  • Heavy drawing paper
  • Spray bottle
  • LOTS of paper towels

Steps:

Prepare your plate

  • Cut a piece of foil slightly larger than your sheet of plexi. Carefully smooth it down so it’s nice and flat; try to avoid creating any folds or wrinkles.
  • Fold the edges of the foil around the plexiglas and tape them down to the back.
  • Use your sponge to wet the surface of the foil with a little water, then sand it lightly with your scrubber until it’s dull and no longer super shiny.
  • Wipe the surface down with white vinegar to clean off the plate.

???????????????????????????????

Sharpie image on plate

Draw and etch your image

  • When the surface of your plate is dry, draw an image on it with a Sharpie permanent marker. If you are adding text, remember to write backwards (your print will be a mirror image of your plate).
  • After you’re finished with your drawing, make a cola bath for your plate: fill a shallow pan (big enough to accommodate the plate) with about 1/4″ of soda. Then place your plate in the cola drawing-side down.
  • Let your plate soak in the cola bath for 10 minutes or longer.
  • Remove the plate and rinse it in the sink, gently trying to remove as much of the Sharpie drawing as you can.
  • Dry off your plate, then buff the surface using a small amount of vegetable oil and a paper towel. This should help remove the last bits of marker. Even though you may not be able to “see” your drawing any more, don’t panic!  The cola should have etched it into the foil, creating a “ghost” image.

Ink your plate and print

  • Load your brayer with ink: spread a small amount of ink on a paper plate, then roll it out with your brayer until the entire surface is coated evenly with ink. Set the brayer aside.
  • Set your plate face-up on the counter. Wipe down the entire surface with a wet sponge.

???????????????????????????????

Inking

  • Roll the brayer across your plate. You should notice the ink start to stick to your ghost drawing. It may take a few passes of alternating between wiping your plate with water and inking it to ink the entire plate.
  • Spray your drawing paper evenly with water and place it on top of your plate. Rub the back of your paper with a baren or the back of a spoon. If you have access to a printing press, that would be ideal.
  • Carefully peel back the paper and leave it to dry.

???????????????????????????????

Printing

???????????????????????????????

Printing

Coke Etching 2

DSC01836

Finished print side-by-side with original plate

As I said earlier, there are many variations on this technique that you can experiment with. People have drawn their image into the foil with grease/litho crayons, touche, even Murphy’s Oil Soap! Each of these options would be fun to try out and should give you different results.

To me, the trickiest part is inking the plate–I ruined the first two that I tried to print during that stage. I found that I didn’t use enough water when I was wetting my plate and the ink ended up sticking to everything instead of just my drawing. The nice thing is that it’s really easy to make a new one–just crumple up the old one and try again!

JC Bigornia
C3 Program Coordinator

Make This: Collagraphs

IMG_0657

For our Urban Armor workshop this month, we focused on different printmaking techniques. We made some awesome block prints using linoleum blocks that we carved and ran through the printing press. We also played around with collagraphy, a fun and easy technique that you can do at home without a press or any other expensive materials.

In collagraphy, you collage an image to create a “plate.” You will then transfer the image from the plate by coating it with ink and pressing it against a new surface. The effect you get is different from a block print–it won’t be as clear, but you’ll get a neat, atmospheric-type of image. Keep in mind that, since you’re creating the plate out of paper, it won’t be as durable as linoleum or other materials, which will limit the number of times you can use it. Remember too that your print will be a mirror image, so if you plan to include text, make sure that it reads backwards on your plate.

What you need:

  • Collage materials (scrap paper, magazines, fabric scraps, etc., but nothing too thick)
  • A pair of scissors or x-acto knife
  • Glue
  • A pencil
  • Heavy paper (heavy drawing paper, watercolor paper, cardstock)
  • Smooth paper for printing (copy paper works in a pinch)
  • Gloss medium
  • Brush
  • Printing ink (I use water-based ink, available at craft stores)
  • Brayer (optional)
  • Paper plate for spreading ink
  • Baren or large spoon for burnishing
  • Scrap cloth or paper towels

IMG_0650

Step 1: Make your plate

Create a collage on top of your piece of heavy paper–this is the image that will be printed. Experiment with layering things on top of each other; this will give your print different effects. Let the glue dry completely before moving on to the next step.

IMG_0651

Cutting out designs

Collaging the plate

Collaging the plate

Step 2: Seal your plate 

Cover the entire plate with a thin layer of gloss medium. This creates a durable, smooth surface that will give you a good ink transfer and allow you to use the plate multiple times.

IMG_0653

Sealing the plate with gloss medium

Step 3: Ink your plate

When your plate is dry, coat the surface with ink. You can do this with a brayer: put a dime-sized amount of ink on your paper plate and then roll it out with the brayer. Now roll the inked brayer across the surface of your image. If you don’t have a brayer, no worries! I dipped a paper towel into my ink and then wiped it onto my plate–it worked just as well. Whichever method you choose, be sure to wipe off excess ink in areas you don’t want printed using your scrap cloth or paper towels.

IMG_0654

Inking the plate

Step 4: Print your plate 

Flip your plate face-down onto your piece of smooth printing paper. Using your baren or spoon, burnish the back of the plate. Then, carefully peel it away from the printing paper. Voila! If you want to print in a different color, wipe your plate off with a damp paper towel.

IMG_0655

Burnishing

Final print: note that it is a mirror image of the plate

Final print: note that it is a mirror image of the plate

Remember that printmaking is an experimental process. Prints created from the same plate can look vastly different depending on how much ink you use, the pressure you apply when burnishing, etc. Part of the fun for me is not knowing exactly how each print will turn out! So I encourage you to make as many prints as you can, experiment, and have fun!

JC Bigornia
C3 Program Coordinator

Papered Walls

Sara Woodbury, McDermott Curatorial Intern for American and European Art, recently organized an installation of prints for the Works on Paper gallery on the Museum’s second floor. Cross Cultural Dialogues in European and American Landscapes features landscapes from the 19th and 20th centuries that demonstrate artistic influences occurring between Europe and America. The show also highlights different printmaking techniques. We’d like to explore a few of these methods here, and also share a behind-the-scenes look at how works on paper are stored and cared for at the Museum. All of the prints you’ll see here are included in the installation, so be sure to check them out in person next time you visit the DMA.

Printmaking Techniques

Artists use a variety of printing techniques, but we’ll highlight just three methods here: woodcuts, etching, and lithography.

Lyonel Feininger, Mansion on the Beach (Villa am Strand), 1921, woodcut

Woodcuts are recognized by their linear quality, reflecting the laborious process required to make them. An artist draws onto a block of wood, and then all of the wood surrounding the drawing is carved away, turning the design into a three-dimensional relief. These raised lines are coated with ink, and the block is pressed to a piece of paper, printing the image. The oldest known printing method, the woodcut developed in Europe around 1400. It became less popular as easier printing techniques emerged, but many 20th-century artists embraced the medium’s bold, linear character.

Charles Emile Jacque, A Corner of the Forest of Fontainbleau, n.d. (mid to late 19th-century), etching

Another interesting technique is etching, which is similar to drawing. To make an etching, an artist draws with a tool called an etching needle onto a metal plate that has been coated in wax. Next, the plate is submerged in an acid bath, which corrodes, or “bites” into the exposed metal lines, leaving the wax-covered areas unaffected. The plate is then rinsed, covered with ink, and wiped down. The ink remains in the grooves of the etched lines, and the plate is ready for printing. Etching first appeared in the 16th century and became especially popular during the 17th century. It also experienced a resurgence in popularity during the late 19th century, a period that has become known as the Etching Revival.

John Rogers Cox, Wheat Shocks, 1951, Lithograph

One of the most important printing techniques in 20th-century art is lithography. An artist draws onto a stone or metal plate with a special greasy crayon. The stone is treated with acid, and then covered with ink and rinsed with water. The ink sticks to the greasy crayon, but washes off everywhere else. A piece of paper is pressed to the stone to print the image.

Lithography was invented in 1798 by Alois Senefelder and was initially used for commercial images. By the late 19th century, however, artists had begun exploring lithography’s creative possibilities. Lithography accommodates a wide range of styles, making it an ideal medium for the stylistic variety that characterizes 20th-century art.

Behind-the-Scenes with Registrar Anne Lenhart

Did you know that works on paper–including prints, drawings, photographs, and other types of work–are  stored and cared for differently than paintings and sculptures? Works on paper are sensitive to various conditions and must be handled with special care and attention. We asked Anne Lenhart, Assistant Registrar, to share insight into how the Museum stores and handles its large collection of works on paper.

What DMA department is responsible for handling prints?

Anne: The care and handling of prints is a shared responsibility between the curators, registrars, conservators, and preparators. The curators are responsible for choosing the works on paper for installations and exhibitions. Once the works on paper are chosen, the registrars, conservators, and preparators are responsible for making sure the prints are in good condition and ready for installation.

Where are the prints stored in the Museum? How are they stored?

Anne:  All of our objects are stored in secured art storage spaces. These areas, which have limited staff access and are monitored twenty-four hours a day, have a consistent temperature of 70° Fahrenheit (+/- 2°) and 50% (+/- 5%) relative humidity. Because paper is susceptible to even small changes in humidity (think about what happens to a sheet of paper when it contacts a drop of water), we try to be especially vigilant in terms of how we store our paper collection.

These numbers are considered guidelines for very stable pieces, such as those created with carbon-based ink applied to a good quality rag paper. Objects that are less stable—where the pigment and the materials are of lower or unknown quality or in the case of color photographs (especially Polaroids)—are exhibited for shorter periods of time.

A display table in the Print and Textiles Study Room, where the Museum’s works on paper are kept.

Many of the Museum’s unframed prints are stored in Solander boxes, such as this one.

How long can prints stay mounted in the galleries?

Anne:  The general rule for exposure of works on paper is one to three months, and we try to keep the maximum period of time any work on paper is on view to less than six months. After a work comes down, we usually do not reinstall it for eighteen months so that it can “rest.”

Cross Cultural Dialogues in European and American Landscapes is on view now, and we hope to see you soon at the Museum.

Sara Woodbury is the McDermott Curatorial Intern for American and European Art, and Karen A. Colbert is the McDermott Education Intern for Teaching Programs.

Printmaking 101

Printmaking has been around since the fifteenth century.  There are many types of printmaking processes, such as woodcuts, etchings, engravings, lithographs, and monotypes. The earliest print technique, the woodcut, was used to illustrate books. To make a woodcut, the artist carved a design from a piece of wood and inked the block. Ink would only stay on the areas of the block that were not carved. Eventually, artists looked for new ways to create images, which resulted in etchings and engravings.  

Etchings and engravings were favored by artists. To make either type of print, an image is drawn onto a metal plate with a v-shaped tool called a burin.  The plate is coated in an acid-resistant surface and ink is beaten into the incised lines with a tool called a dabber. Then, the plate is submerged in an acid bath, which opens up the lines and exposes the metal surface. The acid creates the depth of line by reacting with the areas of exposed metal. Afterwards, the plate go through a printing press. In the engraving process ink rests in the engraved lines and the plate is run through a press. Both prints allowed for greater flexibility with images and a variety of lines and tones in the final product. 

Advances in the print world saw the emergence of  lithographs and monotypes during the nineteenth century. Lithographs are a direct medium; the image is drawn on a flat stone with a greasy oil or crayon and run through a printing press. Monotypes have ink drawn onto a glass or copper plate and transferred to paper. Monotypes produce one image; printing another image results in deteriorated quality.

To help you better understand prints, I included some images of the printmaking process. I hope you enjoy seeing how they are created! If you would like to explore works on paper in the DMA’s galleries, prints by the following artists can be found in the collection: Edgar Degas, Henri de Toulouse-Lautrec, Berthe Morisot, Camille Pissarro, and Pierre Bonnard.

This slideshow requires JavaScript.

Amy Wolf
Coordinator of Gallery Teaching


Archives

Flickr Photo Stream

Categories