Posts Tagged 'recipe'

Break Bread, Break Borders: A Recipe and Reflection

We reached out to Break Bread, Break Borders, one of our community partners for the My|gration exhibition, and invited them to share a favorite recipe from their kitchen, as well as provide some background on their organization. Follow these steps to learn how to make a Syrian-style chicken kabsa dish, and find out more about this local nonprofit that “caters with a cause” in their message below.

Chicken Kabsa: Syrian Style (feeds 4 people)

Syrian Style Chicken Kabsa

Ingredients:

  1. 2 cups basmati rice
  2. 1 whole chicken cut into pieces or 4 thighs
  3. 1 medium size onion
  4. 5 pieces of minced garlic
  5. 1 green pepper
  6. 2 green chili peppers
  7. 1 cup grated carrots
  8. 1 cup tomato sauce
  9. Handful of raisins (can skip)
  10. Nuts (almonds) for decoration (can skip)

Spices and herbs:

  1. Salt
  2. Black pepper
  3. Juice of 1 lime
  4. 2 cinnamon sticks
  5. 2 bay leaves
  6. 3 cloves
  7. 5 cardamom pods
  8. 1 teaspoon of “7 Spices” mix
  9. 1 teaspoon kabsa spice mix
  10. 1 teaspoon ground ginger powder
  11. Parsley for garnish (optional)
BBBB Community Cooks Khuloud Sultan (image left), and Rania Alahmad (image right)

Preparation:

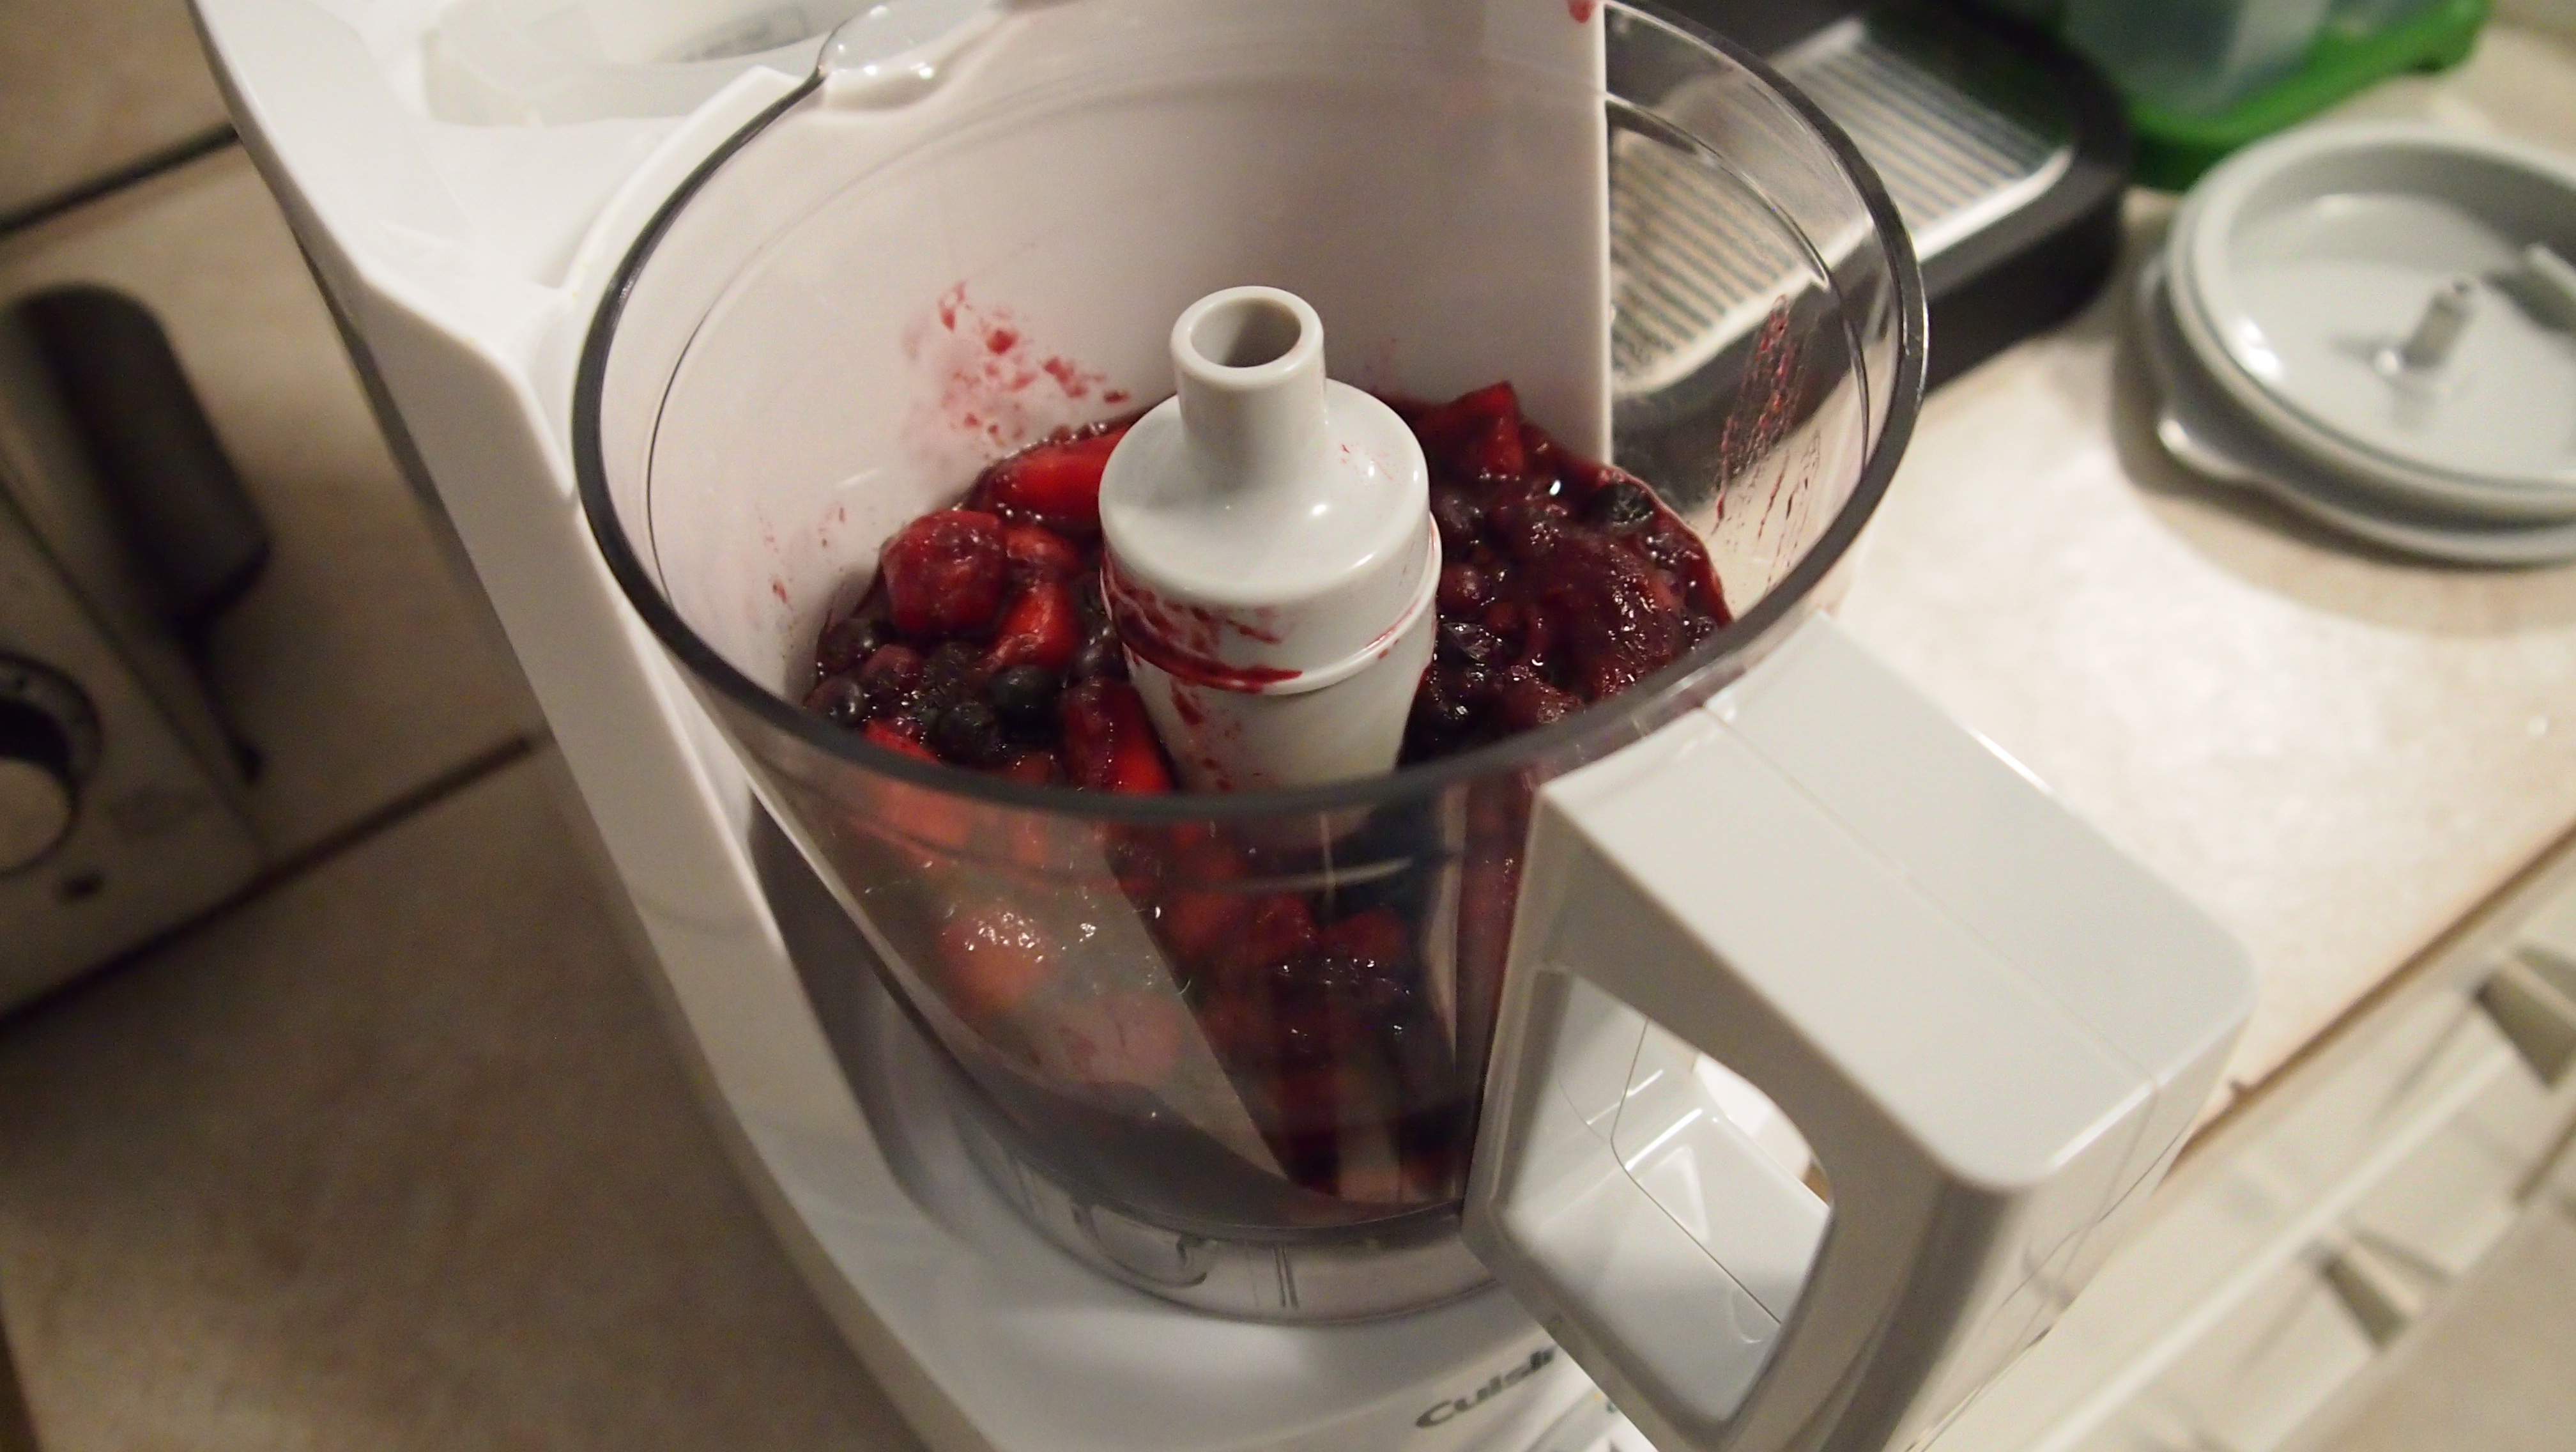
  1. Chop onions and pepper finely
  2. Add oil in pot
  3. Add onions first; when it turns a bit brown, add garlic
  4. Add the rest of the veggies and mix
  5. Add tomato sauce
  6. Add salt and all spices
  7. Lower heat and let it cook for about 5 minutes
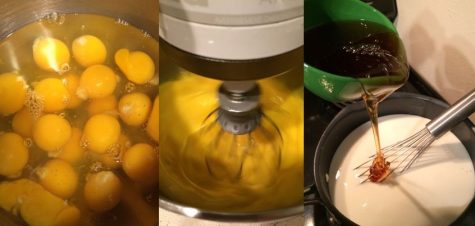
  8. Add washed chicken pieces to the mix
  9. Mix for a little bit and then add water until chicken is covered
  10. Let it cook and boil until chicken is fully cooked
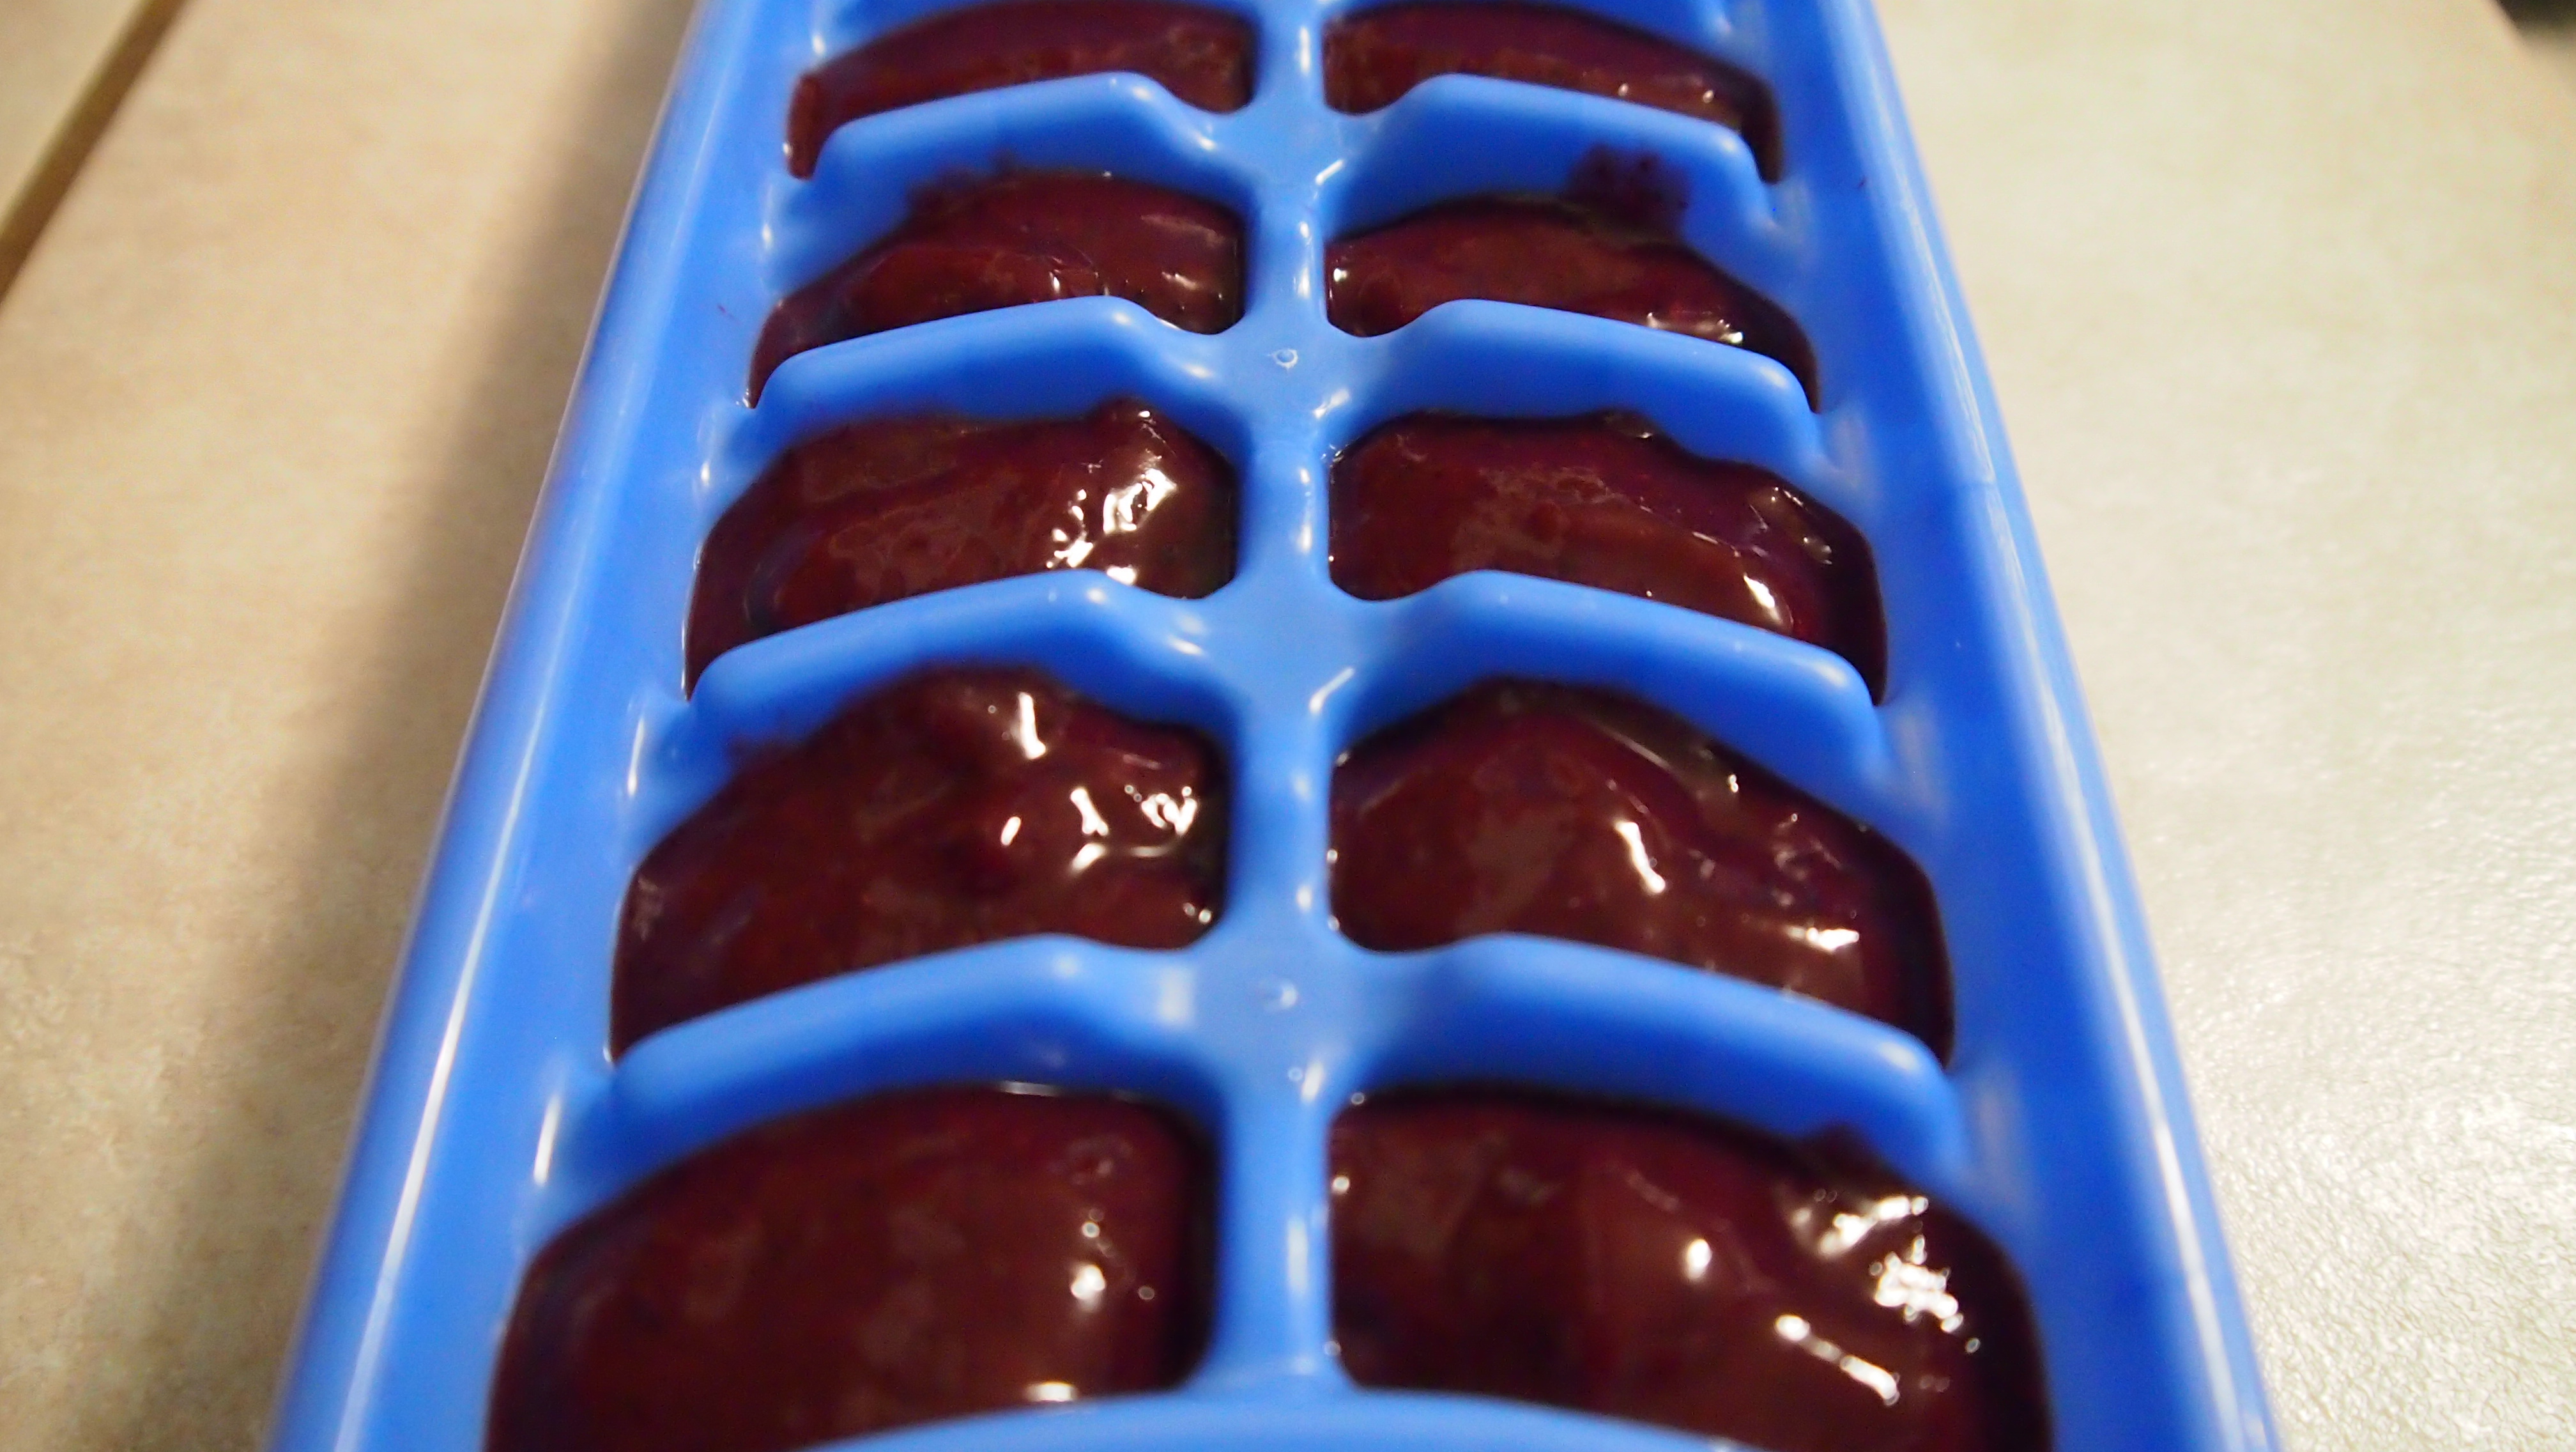
  11. Wash rice very well
  12. Put rice in a pot; add the chicken stock to the rice (for every cup of rice, add a cup and a half of the chicken stock)
  13. Let it boil and then lower heat under it
  14. Add some raisins to the rice 7-10 min before it’s fully cooked
  15. Don’t mix the raisins, only cover the rice and let it cook
  16. Bake chicken in the oven at 275 degrees for 15-20 minutes or until golden brown
  17. Roast nuts in pan until golden brown
  18. Before serving the rice, mix it lightly with a bit of ghee
  19. Serve rice in serving tray and add the chicken, nuts and minced parsley on top
  20. Enjoy!

BBBB Community Cook Rania Alahmad, serving her father’s recipe of Chicken Kabsa

June was first declared World Refugee Awareness Month in 2001. Since then, June has been a time to acknowledge the strength, courage, and perseverance of millions of refugees who live around the globe. By definition, a refugee is someone who fled his or her home and country owing to “a well-founded fear of persecution because of his/her race, religion, nationality, membership in a particular social group, or political opinion,” according to the United Nations 1951 Refugee Convention. Many refugees are in exile to escape the effects of natural or human-made disasters. These are the heroic journeys that inspired the show My|gration at the DMA, and our organization, Break Bread, Break Borders, is honored to be a participant in this community project.

Based in Dallas, Texas, Break Bread, Break Borders (BBBB) is a “catering with a cause” social enterprise, economically empowering women from war-torn countries by teaching them how to earn a living by honing their cooking and entrepreneurial skills. Professional chefs, restaurants, caterers, and culinary consultants mentor refugee women apprentices, who earn food service industry licenses and certifications. BBBB’s women also learn to share their powerful stories with diners, creating a unique cultural exchange.

Jin-Ya Huang founded Break Bread, Break Borders in 2017 to honor the legacy of her late mother—chef, restaurateur, and community leader Margaret Huang. Through food, culture, and powerful storytelling, we break bread with the community, breaking down borders at the same time.

BBBB has served more than 10,000 people, catering events for clients including the City of Dallas, Texas Women’s Foundation, George W. Bush Institute, Texas Lyceum, Toyota of North America, United Way of Metropolitan Dallas, Social Venture Partners-Dallas, and many more. We have been named among Dallas’s Top 50 Most Innovative Social Enterprises by Dallas Innovates. BBBB is part of a cohort of social enterprises at The Hunt Institute at Southern Methodist University. Airbnb International has featured BBBB as a social impact experience partner. Our founder Jin-Ya Huang was selected as a 2019 Food Leader of the Year by Slow Food USA. In 2020 Huang was selected for the prestigious Presidential Leadership Scholars Program, allowing her the chance to work with former presidents George W. Bush and Bill Clinton on community projects to create lasting social change.

Standing on the side of freedom, Break Bread, Break Borders proudly educates on the ideas of equity, anti-racism, and eradication of xenophobia. One bite at a time, we will continue to share the taste of hope, compassion, and transformation to the world. Enclosed here is a recipe from one of our BBBB Community Cooks, Rania Alahmad. Please enjoy her Chicken Kabsa Syrian Style with your families, neighbors, and loved ones. Happy cooking, y’all!

Jin-Ya Huang is the founder of Break Bread, Break Borders, a social enterprise developing a culinary training program to help refugee women from war-torn countries find food service job opportunities by sharing their storytelling through food and culture. She is a member of Orchid Giving Circle and a fellow of the 2020/21 Presidential Leadership Scholars Program.

Re-creating a Roman Feast

On Tuesday, December 11, archaeologist and food writer Farrell Monaco will be here for a talk and feast exploring ancient Roman cuisine. Monaco is the author of a celebrated food blog, Tavola Mediterranea, in which she explores recipes from across the Mediterranean and even re-creates recipes from the archaeological record.

In what has become a tradition for the Adult Programs team whenever we have a program about food, we tried our hand at making a few of the recipes featured in Tavola Mediterranea. You can find our other cooking attempts here, here, here, and here.

Katie Cooke, Manager of Adult Programs
When scrolling through the blog, the Libum caught my eye. I think because of a distant memory about the sweet bread that the Romans ate, from my days learning Latin. I also thought that the idea of an ancient cheesecake drizzled with honey couldn’t be that bad, even with my amateur baking skills.

The ingredients list could not have been easier to assemble. The base for the bread was only three things: eggs, flour, and ricotta. I had Great British Bake Off in the background, so I was reminded to let it proof and not knead it into a stiff mass.

While the dough was resting, I arranged the bay leaves on the bottom of the pans so that the bread would sit on them and soak up all the delicious, savory flavor.

I split the dough between two pans as the recipe says, and it’s a good thing Farrell specified that, because the baking time is already an hour—I would’ve been up very late if all that dough was baked in one loaf! The fun part was decorating the tops with pine nuts.

The finished product was very nicely browned loaves of dense cake/bread. I drizzled them with honey and then used some for dipping. I would recommend keeping a lot of honey on the side when eating this. I thought that the bay leaves were going to give it a little more flavor, but overall the taste of the bread is very neutral.

What I learned: If I were part of an ancient civilization, I would have worshiped honey because it makes even the simplest of breads sugary and delectable.

Jessie Carrillo, Manager of Adult Programs
From the moment I saw Vatia’s Fig-Stuffed Pastry Piglets, I knew I had to make them. While not directly drawn from an ancient source, this dish is not too far off from something that the Romans would have eaten, and the combination of ingredients sounded tasty.

I started by making a dough from whole wheat flour, olive oil, and water. While the dough rested in the fridge, I sliced two portions of pork tenderloin, pounded them with a meat mallet until they were very thin, and seasoned them.

Next I combined dried figs with salt, pepper, and honey in a food processor, spread the mixture on the pork pieces, and then rolled them up like a couple of Ho Hos®. I rolled out my dough until it was about the thickness of a pie crust and cut pieces large enough to wrap around the pork, as well as some smaller pieces that I fashioned into my piglets’ ears, noses, and tails.

After wrapping each piece of pork in pastry and decorating the piglets, I followed the author’s advice and threw them into the oven without naming them. After about 30 minutes at 400 degrees, the piglets came out sadly missing their tails, but otherwise adorable and surprisingly yummy!

What I learned: Meat wrapped in pastry dough has always been delicious, and cooking is even more fun when you combine it with sculpture.

Stacey Lizotte, DMA League Director of Adult Programs
I decided to make Apicius’ Tiropatina (Tiropatinam), which is an egg custard, because it only had three ingredients (six if you count the garnishes), and because I was curious about what flavor and texture you would get in a custard from just eggs, milk, and honey (instead of sugar).

You would think three ingredients would make this a simple recipe, but it was VERY time consuming—literally a two-day process (so if patience is not a virtue of yours, I wouldn’t recommend this recipe).

Once the three ingredients were combined, there was a lot of custard mixture—A LOT. There was no way the mixture I had would only make 18 small custards like the recipe said. If you want to make that amount, I would recommend at least halving this recipe. The one step I added is that I strained my custard mixture before putting it in the tins. I do this for any custard or curd that I make, and I feel that it’s important in order to get a smooth texture.

I didn’t have a pudding tin and my muffin pans were too large to put in a water bath, so I decided to use my mini cheesecake pan. I didn’t take into account how watery this mixture is compared to a cake batter so, as you can see, during the baking process a few of my custards seeped out of the pan.

I often find egg custards too “eggy” for my taste, but these custards actually had a light flavor that I found appealing. I attribute that to the honey. I also enjoyed the black pepper on top—clearly those Romans knew what they were doing.

What I learned: A water bath is essential for baking custards. Since I had so much extra batter, I decided to make a batch of custards in a muffin tin but without a water bath and the result was  horrible.

If you would like to learn more about Roman cooking and enjoy a Roman Feast, you can purchase your tickets for the event here.

Culinary Canvas: Lavender Cookies

Lavender is a plant prized for its healing properties, pleasant fragrance, and–particularly in France–its unique flavor. Fragrant purple fields of these flowers can be found across the south of France, especially in the Provence region. Van Gogh moved from Paris to this area in 1888, to the ancient city of Arles. One September evening, he set up his easel on the square and painted the cafe, which he later translated into this reed pen drawing from the Museum’s Reves Collection. I think these delicate lavender cookies would be the perfect treat to enjoy while sipping a café au lait at this charming spot.

1985.R.79

Vincent Van Gogh, Café Terrace on the Place du Forum, 1888, Dallas Museum of Art, The Wendy and Emery Reves Collection.

Lavender Cookies

Yields about 60 cookies
Level: Easy

2 teaspoons dried lavender, chopped or ground
1 cup sugar
2½ cups flour
1 teaspoon baking powder
½ teaspoon salt
½ cup shortening
½ cup (1 stick) unsalted butter, room temperature
½ teaspoon almond extract
1 egg plus 2 egg yolks, room temperature

Preheat oven to 375° F. Line rimmed baking sheets with parchment paper.

In the bowl of a stand mixer fitted with paddle attachment, stir together lavender and sugar. Set aside for a few minutes, allowing lavender to infuse. In a separate bowl, stir together flour, baking powder and salt.

Add shortening and butter to lavender sugar and beat at medium speed until light. Add almond extract, then slowly incorporate eggs, mixing well until combined. Slowly add dry ingredients to mixer, stirring on low speed and scraping down sides of bowl until fully incorporated.

Using a tablespoon scoop, drop dough onto prepared baking sheets. Bake 9-11 minutes until tops begin to crinkle.

When removed from oven, cookies will look soft and should remain so at room temperature. Allow to cool slightly on baking sheet then transfer to metal rack to cool completely.

Note: Dried lavender can usually be found in the bulk area of specialty grocery stores.

 
Lavender Cookies

Recipe adapted from Taste of Home.

Sarah Coffey
Education Coordinator

Culinary Canvas: Mango Blueberry Puree

Last week, my little guy and I attended Art Babies. We started the class in our exhibition, Between Action and the Unknown: The Art of Kazuo Shiraga and Sadamasa Motonaga, exploring the large, abstract works of art. He smiled and kicked his little feet, so I could tell he really enjoyed the bright and engaging colors!

Rhys_SM

Color is something that I’ve been thinking about a lot when it comes to his diet–the more colorful the better! As you might have expected, I enjoy making food for him at home, so I wanted to share a simple recipe that you could try, inspired by the deep and vibrant colors in the exhibition. Be sure to bring your little one on your next visit, then make some colorful food for him or her to enjoy at home–you’ll be feeding his body and his mind! If you’re brave, you might even let him paint his high chair tray–at least you’ll know the paint is safe to eat!

Sadamasa Motonaga, Work 66-1, 1966, oil and synthetic resin on canvas, The National Museum of Modern Art, Tokyo © 2015 Estate of Motonaga Sadamasa

Sadamasa Motonaga, Work 66-1, 1966, oil and synthetic resin on canvas, The National Museum of Modern Art, Tokyo © 2015 Estate of Motonaga Sadamasa

Mango Blueberry Puree

Yields about 16 ounces
Appropriate for 8+ months
Level: Very Easy

1 ripe mango
1 cup fresh or frozen organic blueberries

Prepare the mango by cutting it around the skin, similar to how you would cut an avocado. Note that the pit can be a bit tricky, so do your best to remove it, separating the fruit into two halves. Using a knife, score the fruit up to the skin, being careful not to cut through it. Scoop out fruit pieces and juice, and add to saucepan set on medium-low heat. Add fresh or frozen berries to pan and lightly simmer for about 5 minutes, allowing the fruits to break down slightly and meld their flavors.

Transfer fruit to the bowl of a baby food maker, small food processor, or large measuring bowl, if using an immersion blender. Puree into desired consistency for your baby.

Divide puree into any portion size you’d like and freeze. I find that an ice cube tray works well for small portions that can be pulled out when needed and added to oatmeal, mixed with other fruits, or combined into a larger meal.


baby food maker

Cooked fruit in the baby food maker

blueberry mango puree

Finished puree in ice trays

Original recipe. And of course, be sure to always check with your pediatrician on the appropriate diet for your special little one.

Sarah Coffey
Education Coordinator

Recipe for Art: The DMA’s Delicious New Tour

With a new year beginning, we are delighted to announce a new school tour at the DMA! Starting this month, schools can book “Recipe for Art,” a tour developed for Kindergarten and First Grade visitors by our Manager of Early Learning Programs, Leah Hanson, and our Manager of Docent and Teacher Programs, Josh Rose.

One of the main goals of “Recipe for Art” is to help children make connections between art and their own personal experience. This is done by connecting a familiar idea (that of using a recipe to make a delicious treat) to the way that an artist makes a work of art. Instead of ingredients like flour and sugar, the ingredients for art are the elements of design: shape, line, color and texture.

On the tour, groups will visit four or five different works of art in the collection, in order to talk about the basic elements of design. Groups first explore what the terms mean before then looking closely at the work of art in front of them. This leads to discussion, after which the children engage in a variety of kinetic and multi-sensory activities. These activities were specially designed to address various learning styles and to focus on the attention span and needs of this particular age group.

One important characteristic of these young visitors is their need to move! The tour was specifically designed to give children opportunities for purposeful movement–movement that helps them connect what they see to the motion that they are asked to make. One example of this is an activity based on Jackson Pollock’s Cathedral. The children are each given “paint” (a piece of string) and they throw it onto a “canvas” (a piece of felt), in order to simulate the movement of Pollock’s action painting. This allows the children to burn off some of their energy, while also connecting them with the art!

The “Recipe for Art” tour was developed by members of the DMA staff, but it will be implemented by our wonderful docents, who lead most of our school tours. Yesterday, the docents gathered for a training dedicated to this new tour. Leah gave them an overview of the tour and its origins, before sharing tips and strategies on how to deal with this particular age group. After that, the docents were given an opportunity to look over the supplies for the wide variety of activities that they may use on the tour. I even took some of my fellow McDermott Interns into the galleries to try out some of the activities!

For most visitors of this age group, it will be their first visit to a museum. With this new and unique tour, we’re hoping to make their first experience not only a positive one, but one that they will remember. By teaching these curious and imaginative children the basic elements of design, they will then be equipped with all of the ingredients to make their own art!

We’ve already begun to schedule the “Recipe for Art” through the month of January. If you’re interested in booking a tour for your school or classroom, complete our tour request form online and our Audience Relations Coordinator Madeleine Fitzgerald will get you scheduled!

Liz Bola
McDermott Graduate Intern for Gallery and Community Teaching

Culinary Canvas: Almond Cookies (Nan-e Badami)

This month’s recipe is inspired by our current exhibition Nur: Light in Art and Science from the Islamic World, which explores Islamic art and science throughout the centuries and around the world. Several beautifully decorated pieces of pottery can be found in the exhibition, including this striking bowl from Kashan, located in modern Iran. The Persian Empire spanned this area during ancient times and its cultural thread has continued, influencing food in the region today. In fact, Persians were one of the first to produce sugar and create recipes for cookies–some dating back to the 12th century–and sweets remain an important part of Persian celebrations today. Try this simple Persian recipe to add an interesting new flavor to your cookie repertoire and then be sure to stop by the Museum before Nur closes next month!

Blue and White Bowl with Radial Design, 13th Century , Iran, Kashan, fritware, painted in cobalt blue under transparent glaze, Brooklyn Museum, Gift of Mr. and Mrs. Thomas S. Brush, Brooklyn, USA

Blue and White Bowl with Radial Design, 13th Century , Iran, Kashan, fritware, painted in cobalt blue under transparent glaze, Brooklyn Museum, Gift of Mr. and Mrs. Thomas S. Brush, Brooklyn, USA

Almond Cookies

Yields about 60 cookies
Level: Very Easy

5 egg yolks
1 ½ cups sugar
3 tablespoons rosewater (optional, can be purchased at Middle Eastern markets)
2 cups finely ground almonds or almond flour
2 teaspoons cardamom
½ teaspoon baking powder

Preheat oven to 250° F. Line rimmed baking sheet with parchment paper.

In the bowl of a stand mixer fitted with paddle attachment, beat yolks and sugar at medium speed until light. Add rosewater if desired.

In a separate bowl, stir together almond flour, cardamom, and baking powder. Slowly add almond mixture to mixer, stirring on low speed and scraping down sides of bowl until fully incorporated. Resulting dough should be slightly sticky.

To form cookies, scoop off about a teaspoon of dough then roll between hands to shape into a ball. Flatten ball between palms and place on baking sheet. Bake about 25 minutes, watching closely to ensure cookies do not brown.

When removed from oven, cookies will look very soft and should remain so at room temperature. Allow to cool on baking sheet then transfer to metal rack to cool completely.


OLYMPUS DIGITAL CAMERA

Recipe adapted from Food of Life: A Book of Ancient Persian and Modern Iranian Cooking and Ceremonies.

Sarah Coffey
Assistant to the Chair of Learning Initiatives

Culinary Canvas: Hazelnut Coffee Cake

Cakes have been around since ancient times, but what we think of as coffee cake was introduced to America during the Colonial period by European immigrants. Coffee was a favorite beverage in the new colonies, and coffee cake became a delicious accompaniment. This coffeepot from our silver collection is a lovely example of how early Americans served this ever popular drink, and perhaps a simple coffee cake would have accompanied it on a Colonial table. And in fact, we just missed National Coffee Cake Day on Monday, April 7. Even though it’s a bit late, this recipe is still sure to take the cake!

Coffeepot, c. 1780-1785, Joseph Anthony Jr., maker, Dallas Museum of Art, gift of the Alvin and Lucy Owsley Foundation, The Eugene and Margaret McDermott Art Fund, Inc., and Mr. and Mrs. H. Ross Perot

Coffeepot, c. 1780-1785, Joseph Anthony Jr., maker, Dallas Museum of Art, gift of the Alvin and Lucy Owsley Foundation, The Eugene and Margaret McDermott Art Fund, Inc., and Mr. and Mrs. H. Ross Perot

Hazelnut Coffee Cake

Yields 1 loaf
Level: Moderate

Topping:

¼ cup hazelnuts, finely chopped
2 tablespoons packed brown sugar
1 tablespoon flour
Pinch of salt
1 tablespoon cold unsalted butter

Filling:

¼ cup Nutella hazelnut spread
¼ cup hazelnuts, finely chopped or ground
¼ cup mini chocolate chips

Cake:

½ cup (1 stick) unsalted butter, room temperature
¾ cup sugar
1 teaspoon vanilla extract
2 eggs, room temperature
6 ounces vanilla Greek yogurt, room temperature
1 ½ cups flour
2 teaspoons baking powder
½ teaspoon salt

Preheat oven to 350° F. Butter loaf pan using butter wrapper.

Topping: Stir together hazelnuts, brown sugar, flour and salt in small bowl. Using a fork, cut in cold butter until mixture forms into small crumbs with a texture resembling coarse sand. Chill until ready to use.

Filling: Combine Nutella, hazelnuts and chocolate chips. Set aside.

Cake: In the bowl of a stand mixer fitted with paddle attachment, cream butter and sugar, beating at medium speed until light. Add vanilla, then incorporate eggs one at a time, mixing well after each addition. Add yogurt and mix until fully combined.

In another bowl, stir together flour, baking powder and salt. Add flour mixture to mixer in two batches, stirring on medium until flour is mostly combined. Remove bowl from mixer and stir by hand with rubber spatula for two revolutions to incorporate remainder. Do not over mix.

Spread half of batter into prepared pan. Cover with filling, then top with remaining batter. Run knife through batter about 3-4 times, across both length and width of pan. Smooth batter and evenly spoon on topping across the top.

Bake 30 minutes at 350° F. Reduce oven to 325° F and continue baking for 15 minutes or until a tester inserted in the center comes out clean.


Filling

Filling

OLYMPUS DIGITAL CAMERA

Original recipe.

Sarah Coffey
Assistant to the Chair of Learning Initiatives

Culinary Canvas: Mini Blueberry Tarts

You can find this stunning silver centerpiece, created for the 1964 New York World’s Fair, on the fourth floor in our Formed/Unformed exhibition. Its delicate central shape is made up of 19 clusters that burst forth with 7 sapphires each. This month’s recipe is also studded with little blue gems, though these are of the berry variety. And while they don’t include such precious materials as our Celestial Centerpiece, these mini treats will certainly serve as the perfect centerpiece for your next party–delighting your guests with their bursting blueberry flavor!

Celestial Centerpiece, Robert J. King, 1964, Silver and spinel sapphires, Dallas Museum of Art, The Jewel Stern American Silver Collection, acquired through the Patsy Lacy Griffith Collection, gift of Patsy Lacy Griffith by exchange and gift of Jewel Stern in honor of Kevin W. Tucker

Celestial Centerpiece, 1964, Robert J. King, designer, Dallas Museum of Art, The Jewel Stern American Silver Collection, acquired through the Patsy Lacy Griffith Collection, gift of Patsy Lacy Griffith by exchange and gift of Jewel Stern in honor of Kevin W. Tucker

Mini Blueberry Tarts

Yields 30 tarts
Level: Very Easy

8 ounces cream cheese, room temperature
½ cup powdered sugar
1 teaspoon vanilla extract
30 frozen mini phyllo shells
1 pint fresh blueberries, rinsed and dried
Coarse sugar (optional, for sprinkling)

In the bowl of a stand mixer fitted with whisk attachment, beat cream cheese and sugar at medium speed. Add vanilla extract and continue whisking until fluffy. Using a rubber spatula, transfer filling mixture to ziploc bag. Press filling into one corner, leaving enough room to hold bag without overflowing contents.

Arrange phyllo shells onto work surface. Snip corner of bag and squeeze filling into each shell, leaving space at top. Cover filling with 4-5 blueberries and sprinkle tops with coarse sugar if desired.

Refrigerate tarts in air tight container and serve chilled. Consume within 2 days.


OLYMPUS DIGITAL CAMERA

OLYMPUS DIGITAL CAMERA

Original recipe.

Sarah Coffey
Assistant to the Chair of Learning Initiatives

Culinary Canvas: Meyer Lemon Mini Cupcakes

A pair of tiny gold earrings in our Ancient Mediterranean gallery was the inspiration for this month’s recipe. Of course jewelry always makes a perfect gift for Valentine’s Day, but these little beauties are particularly appropriate since they depict Eros, the Greek god and Valentine’s Day icon better known as Cupid. But if you can’t afford any ancient golden jewelry for your Valentine this year, how about whipping up some miniature golden cupcakes instead? And be sure to use Meyer lemons to make these goodies extra sweet for your sweetie!

1995_25_a_b

Eros earrings, Greek, late 4th century B.C., Dallas Museum of Art, the Cecil and Ida Green Acquisition Fund

Meyer Lemon Mini Cupcakes

Yields about 48 cupcakes
Level: Easy

Cupcakes:

½ cup (1 stick) unsalted butter, room temperature
1 cup sugar
3 large eggs, room temperature
Zest and juice of 2 Meyer lemons
6 ounces vanilla yogurt
2 cups all-purpose flour
1 teaspoon baking powder
½ teaspoon salt

Preheat oven to 350° F. Line mini muffin pan with paper liners.

In the bowl of a stand mixer fitted with paddle attachment, cream butter and sugar, beating at medium speed until light. Add lemon zest, then incorporate eggs one at a time, mixing well after each addition. Add lemon juice and yogurt and mix until fully combined.

In a separate bowl, stir together flour, baking powder, and salt. Slowly add flour mixture to mixer, mixing on low speed and scraping down sides of bowl until just incorporated.

Divide batter into muffin cups, using a tablespoon scoop to fill each cup ¾ full. Bake about 11 minutes, or until a toothpick inserted in the center comes out clean. Allow to cool completely before frosting.

Frosting:

¼ cup (½ stick) unsalted butter, room temperature
4 ounces cream cheese, room temperature
Zest and juice of 1 Meyer lemon
2 teaspoons limoncello liqueur (optional)
3 cups powdered sugar, sifted

Whip butter and cream cheese in the bowl of a stand mixer fitted with whisk attachment on medium-high speed until creamy. Continue to mix on low while adding lemon zest, limoncello, and half the powdered sugar. Squeeze in juice from half the lemon and incorporate remaining sugar, mixing on low until combined. Add additional juice to reach desired consistency for spreading or piping.


OLYMPUS DIGITAL CAMERA

Recipe adapted from Brown Eyed Baker.

Sarah Coffey
Assistant to the Chair of Learning Initiatives

Culinary Canvas: Apple Pie Cupcakes

This month’s recipe is inspired by our wonderful Pointillist painting by Pissarro, Apple Harvest. I imagine this painting, like most apple picking, takes place in the fall. But that doesn’t mean there aren’t still bountiful varieties of apples to be had at this time of year–just check your local grocery store! And one of our very own McDermott Interns–whose favorite dessert is apple pie–just happened to have a birthday last week. But much like the Neo-Impressionists, I wanted to do my own thing. So I decided on an apple pie inspired cupcake, which combines apples and spice into a scrumptious handheld bite. Try these out for your next holiday get together and impress your friends with your artistic hand. Happy Holidays!

Camille Pissarro, Apple Harvest, 1888, Dallas Museum of Art, Munger Fund

Camille Pissarro, Apple Harvest, 1888, Dallas Museum of Art, Munger Fund

Apple Pie Cupcakes

Yields 24 cupcakes
Level: Moderate

Topping:

2 Jonagold (or similar) apples, diced small
2 tablespoons unsalted butter
1 tablespoon sugar
2 tablespoons caramel sauce (left over from last month’s recipe)

In medium saucepan, melt butter and sugar over medium heat until sugar is dissolved. Add diced apples and sauté for 8-10 minutes, stirring frequently, until apples are soft and lightly caramelized. Remove from heat and stir in caramel sauce. Set aside to cool. Note: 2 tablespoons sugar can be substituted for caramel sauce.

Cupcakes:

1 cup (2 sticks) unsalted butter, room temperature
1 cup sugar
½ cup brown sugar
1 ½ teaspoons vanilla
4 eggs, room temperature
2 cups all-purpose flour
1 teaspoon baking powder
1 teaspoon cinnamon
½ teaspoon nutmeg
½ teaspoon salt
1 cup milk

Preheat oven to 325° F. Line muffin pan with paper liners.

In the bowl of a stand mixer fitted with paddle attachment, cream butter and both sugars, beating at medium speed until light. Add vanilla and continue beating at medium speed. Incorporate eggs one at a time, mixing until fully combined.

In medium bowl, whisk together flour, baking powder, cinnamon, nutmeg, and salt. Beginning and ending with dry ingredients, slowly add flour mixture to mixer, alternating with milk. After each addition, mix on low speed until just incorporated, scraping down sides of bowl as needed.

Divide batter into muffin cups, filling each cup slightly more than ½ full. Bake 18-20 minutes, or until a toothpick inserted in the center comes out with sparse crumbs. Allow to cool slightly in pan, then transfer to metal rack to cool completely.

Frosting:

½ cup (1 stick) butter, room temperature
½ cup shortening
2 ½ cups powdered sugar
1 teaspoon vanilla
1 teaspoon cinnamon
Splash of milk as needed

Beat butter and shortening in the bowl of a stand mixer fitted with paddle attachment on medium-high speed until creamy. Add powdered sugar, vanilla, and cinnamon, mixing on low until combined. Add splash of milk and additional sugar as needed to achieve thickened, slightly firm consistency.

Assembly: Fill quart size Ziploc bag with frosting. Squeeze frosting to one corner and snip to create opening. Outline the rim of each cupcake with a line of frosting. Place a spoonful of apple filling in the middle of each cupcake. Cross filling with lines of additional frosting in a basket weave pattern, mimicking pie crust.

Store finished cupcakes in refrigerator until ready to serve.

 
OLYMPUS DIGITAL CAMERA

OLYMPUS DIGITAL CAMERA

Recipe adapted from Alpineberry.

Sarah Coffey
Assistant to the Chair of Learning Initiatives


Archives

Flickr Photo Stream

Categories