Posts Tagged 'DIY'

Patches with a Purpose

The Guerrilla Girls exhibition is in its final week on view at the DMA. For the last few months, the posters, books, and videos in the gallery have prompted a lot of questions, including the often overheard “What’s the deal with the gorilla masks?”

MzZCjLlg

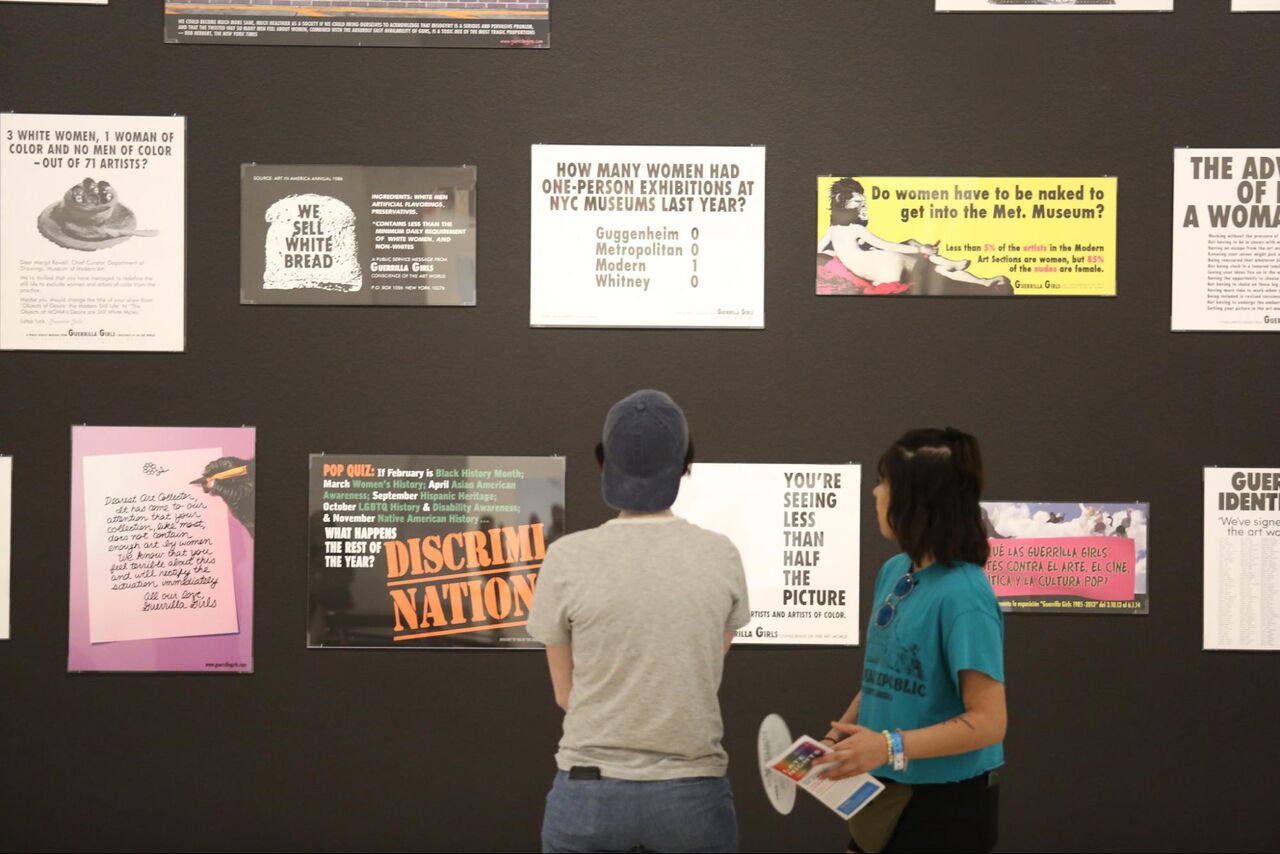
The Guerrilla Girls are an anonymous collective of women artists who draw attention to sexism and racism in the art world. To borrow their words, without women and people of color represented in the art world “you’re seeing less than half the picture.” Using bold protest art and guerrilla-style marketing techniques (hence their name and use of gorilla masks, as a play on words), they demonstrate how images are a powerful way to send messages to others.

Consider what is important to you. When you think about those things, is there an image or symbol that comes to mind? Taking inspiration from the Guerrilla Girls, here’s a way to broadcast that idea or cause through a DIY iron-on patch.

Materials Needed
Felt or fabric
Embroidery floss
Embroidery hoop
Tapestry needle
Scissors
HeatnBond iron-on adhesive sheet
Iron
Threader (optional)

Using the screw at the top, loosen and separate the two rings of your embroidery hoop. Load the embroidery hoop with the felt or fabric of your choice, placing the fabric on top of the smaller ring and closing the larger ring around it to hold the fabric in place.

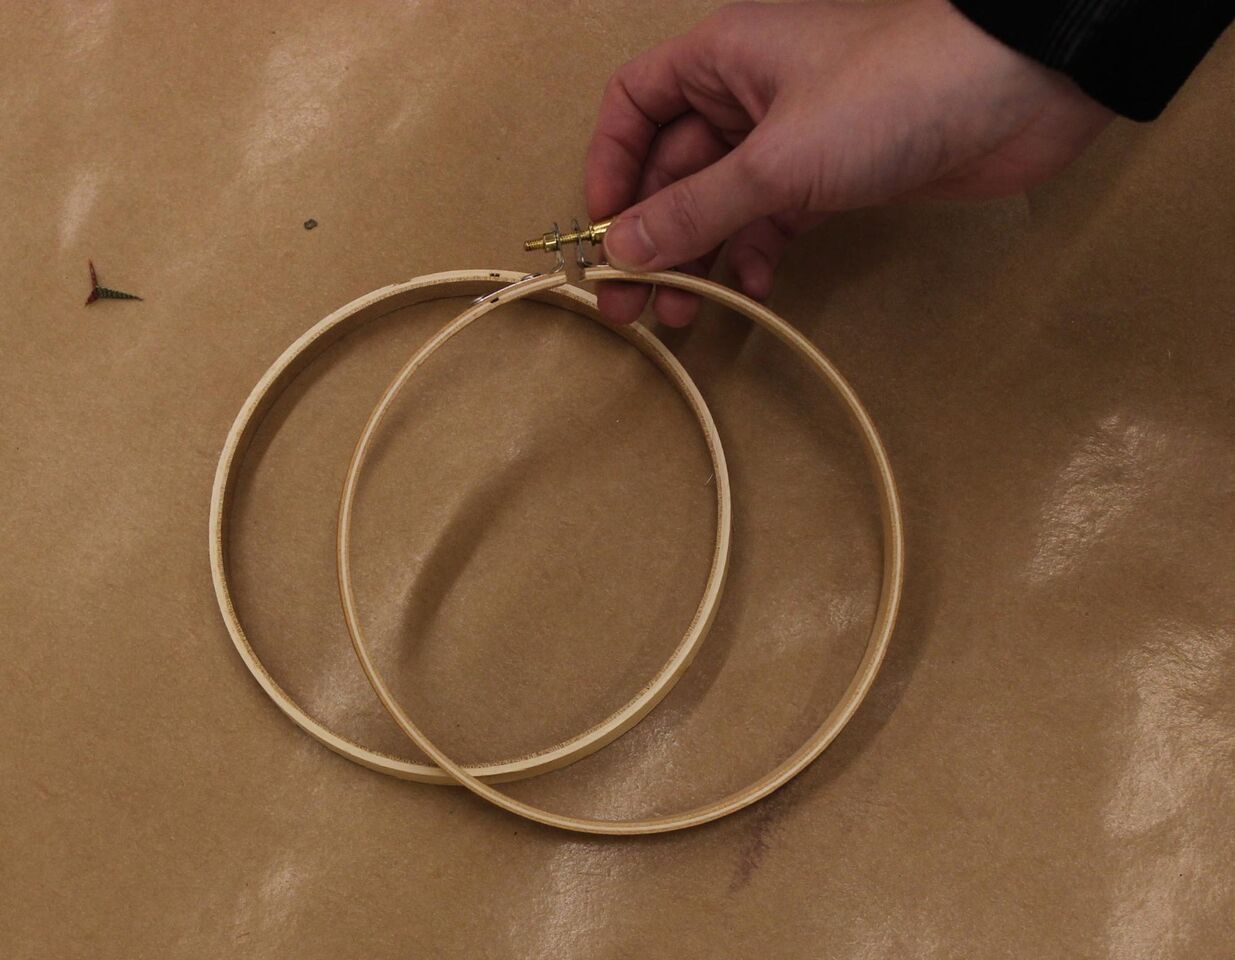
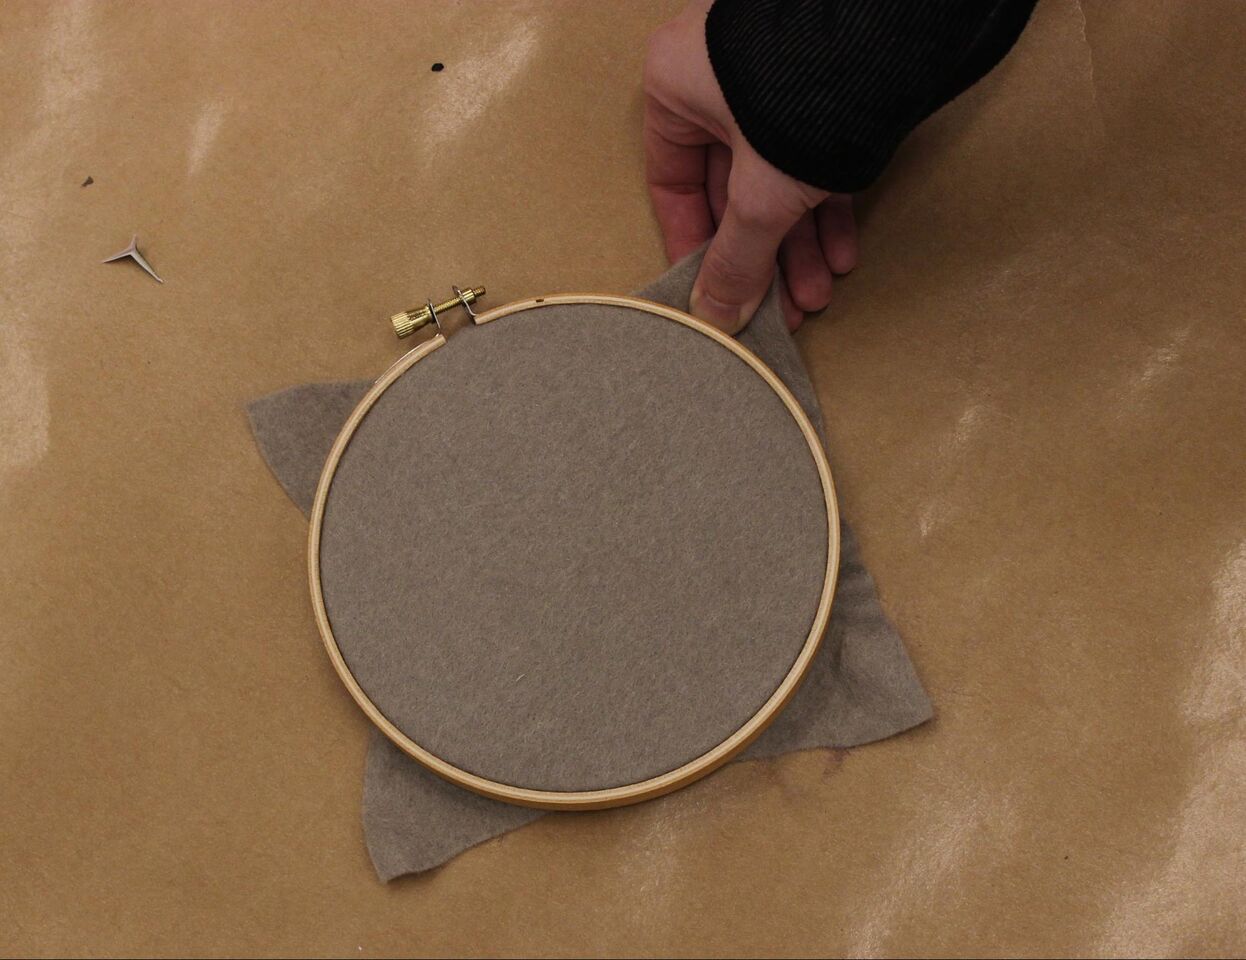
Tip: The hoop stretches the fabric tight to create tension. If the fabric sags in the middle, pull the edges before tightening the hoop screw all the way.

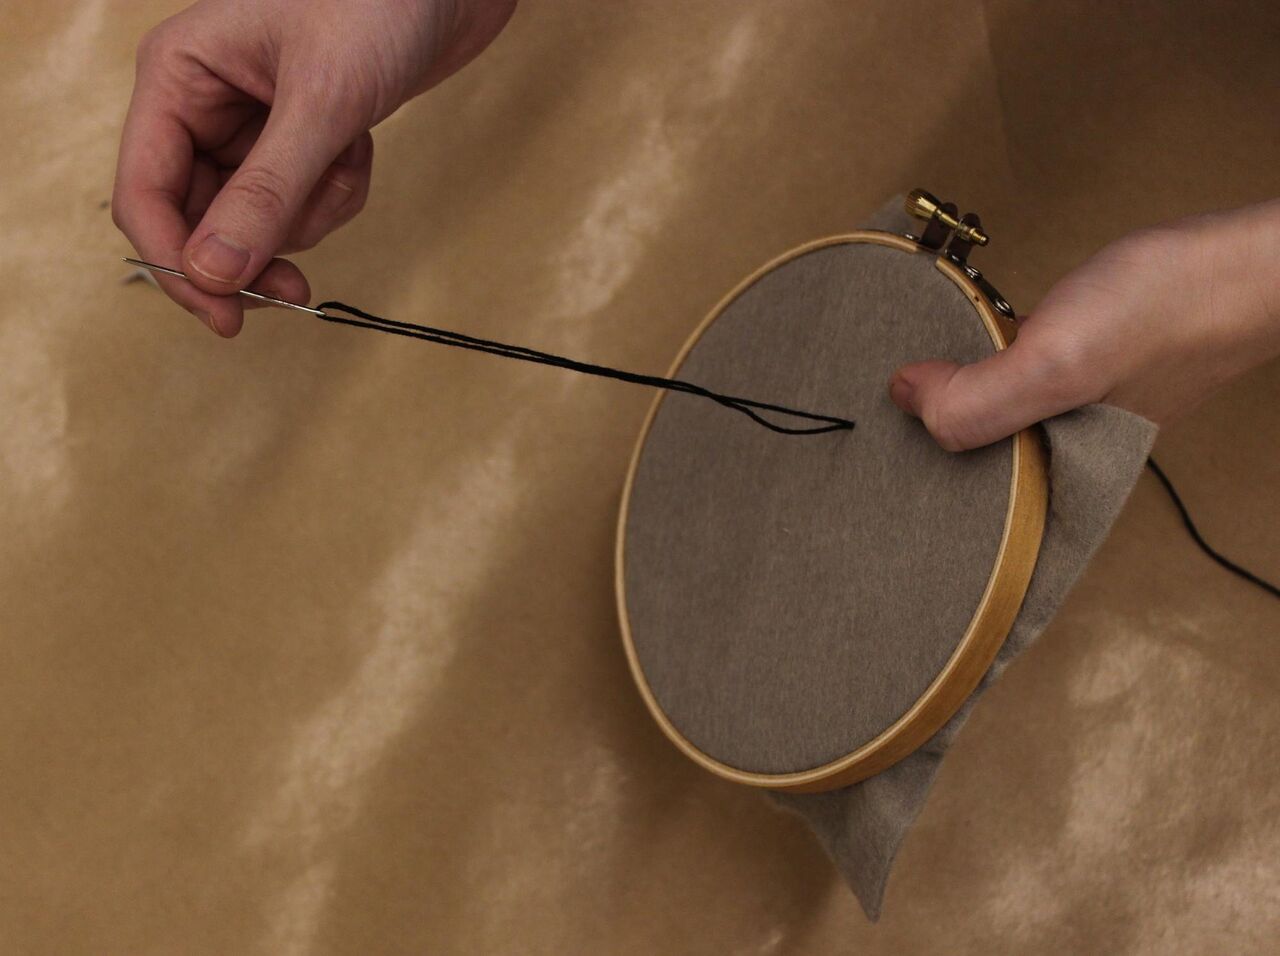
Thread your needle with the first color of embroidery floss, tying off one end. Start your design from the back side of the hoop, pulling the needle straight through the fabric. Create the first stitch by pulling the needle straight back down through the fabric. When you’d like to switch colors, simply tie the floss off on the back and repeat the process.

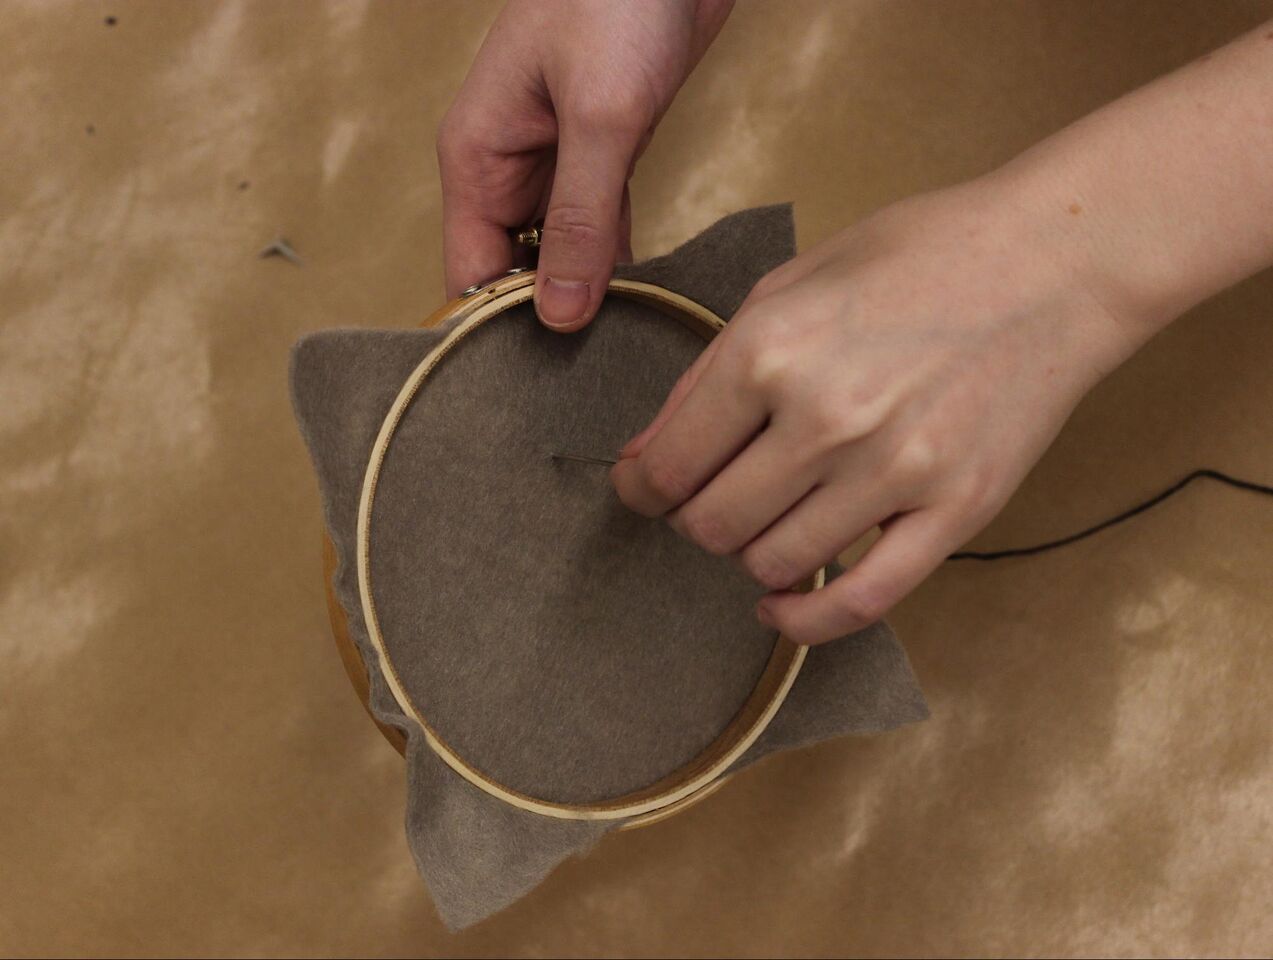
Tip: Keeping the needle straight and avoiding pulling hard keeps the stitches even and fabric wrinkle-free. Knowing how to sew makes embroidery pretty intuitive, but different kinds of stitches create different textures and effects. DMC Embroidery has great resources for those looking to learn new techniques.  

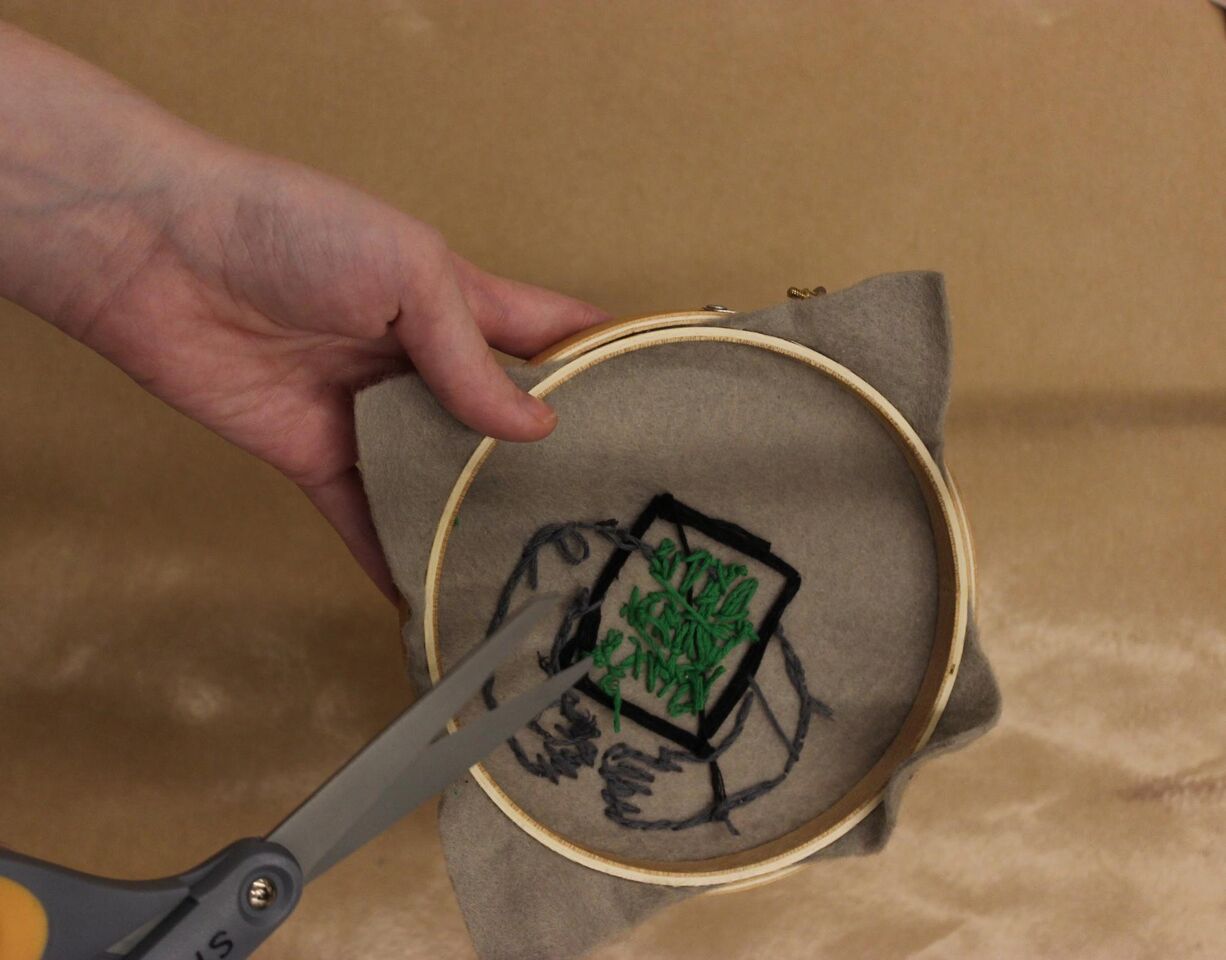
Once you finish your design, make sure all the thread is tied off on the back, and any loose threads are trimmed.

Rm64yqnQ

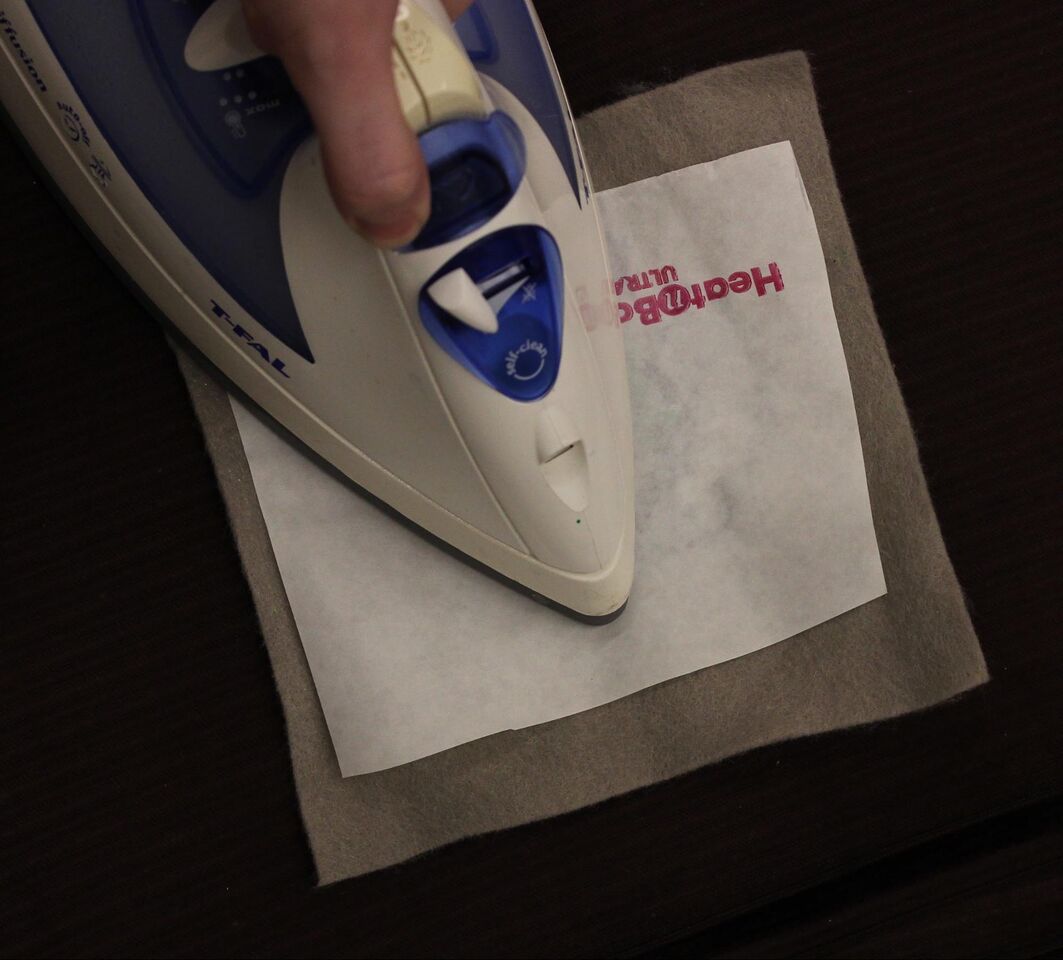
HeatnBond adhesive sheets will make the design into a patch. HeatnBond is two sided, with a shiny, textured plastic side and a paper side. Cut a piece of HeatnBond large enough to cover the design and place it on the backside of the fabric, with the paper side of the HeatnBond facing up. Pass an iron set on medium heat over the HeatnBond for approximately 30 seconds, ensuring that the iron passes over the edges and corners of the adhesive. Make sure that the HeatnBond is completely adhered to the fabric; no corners or edges should lift.

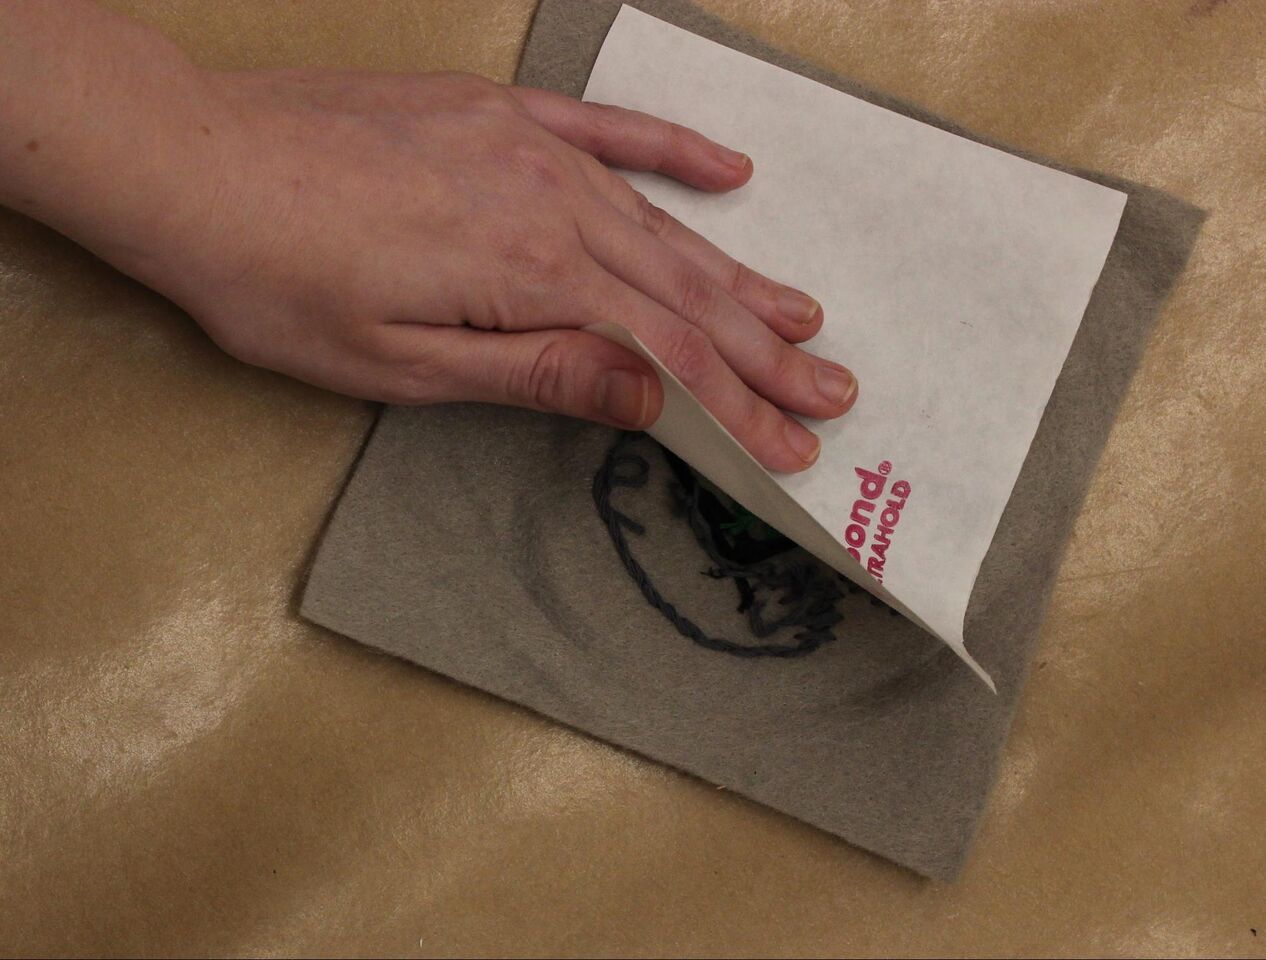
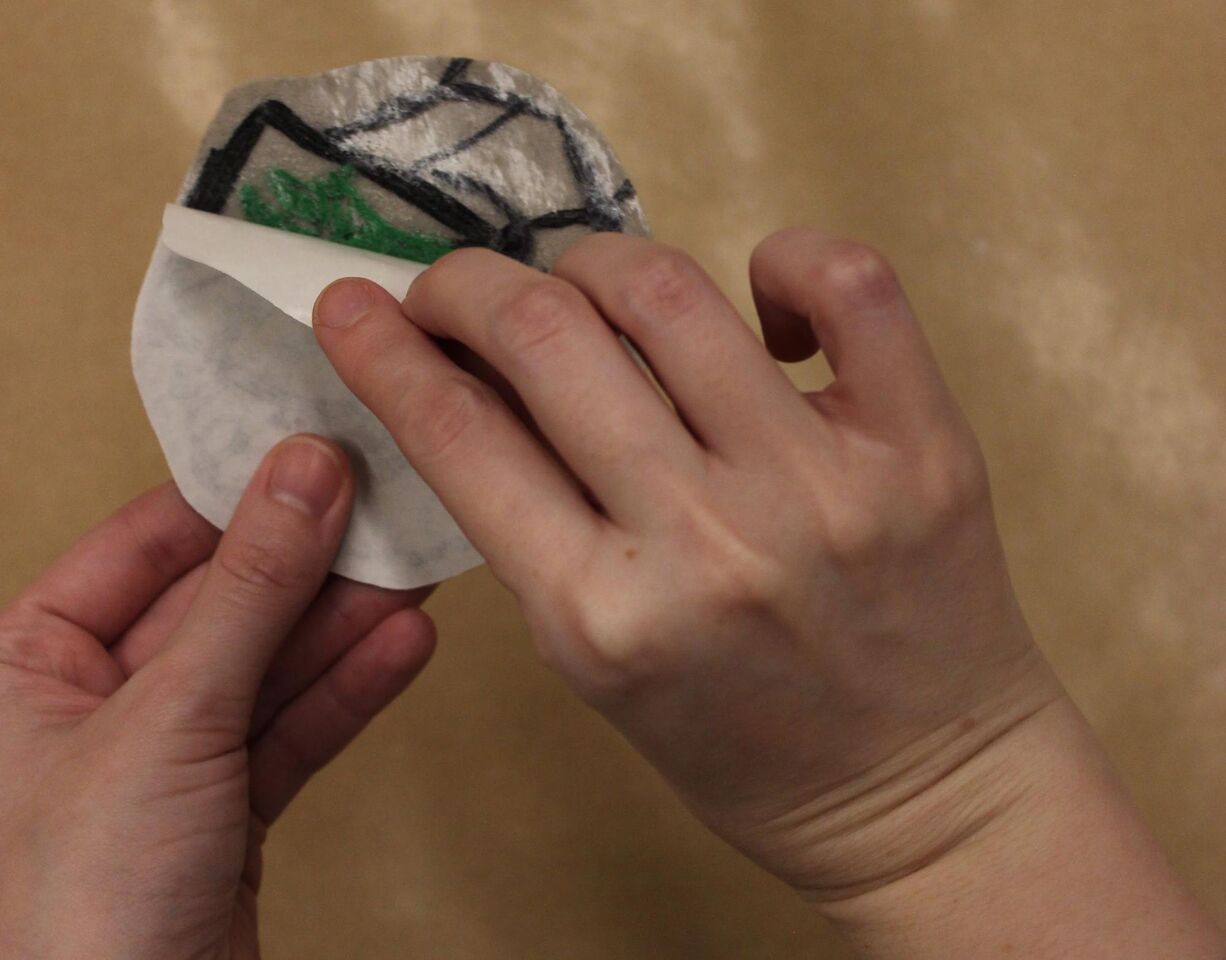
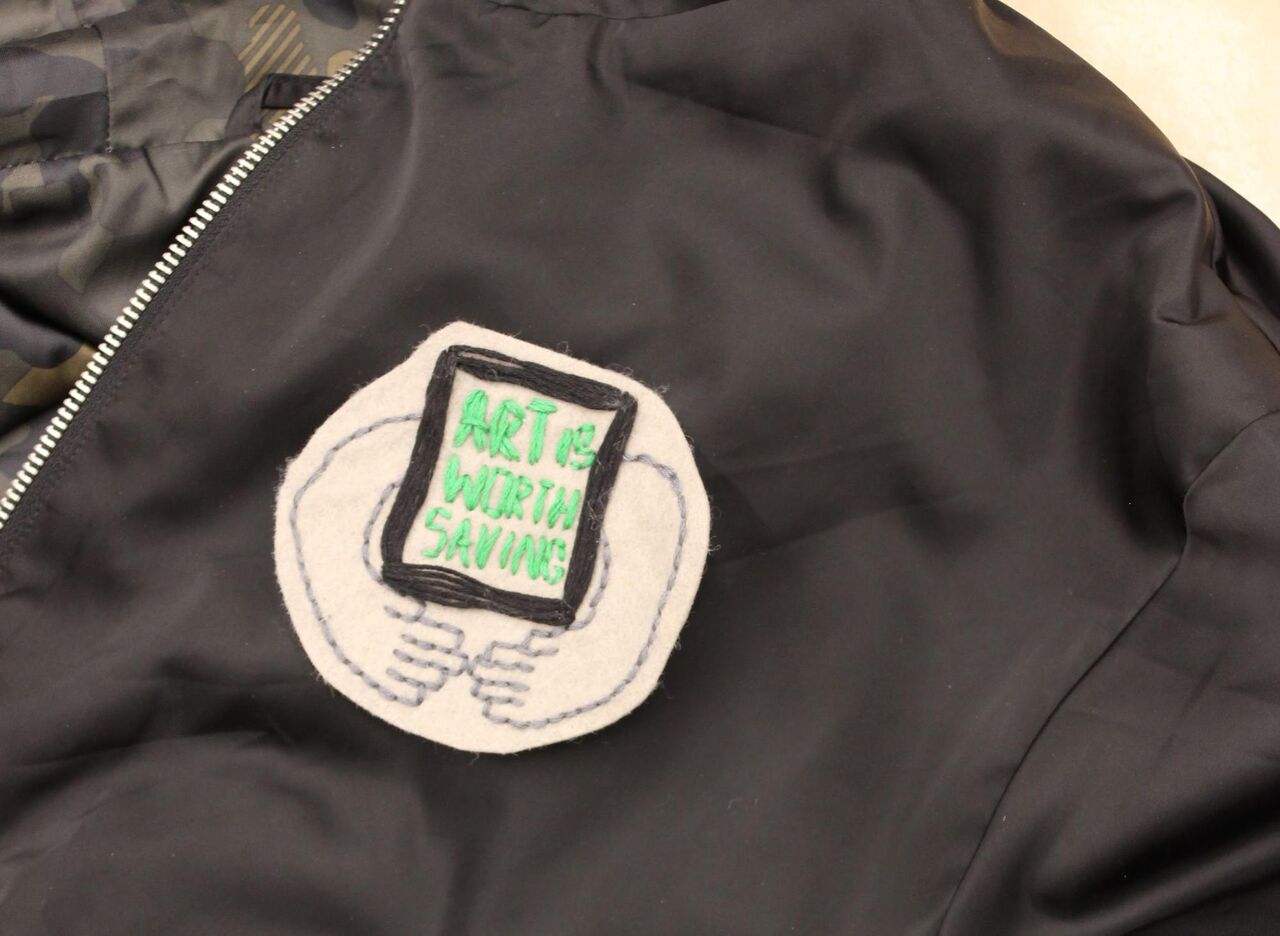
Once the fabric has cooled, use scissors to trim around the design. The HeatnBond seals the fabric, so no hemming is needed. After the design is cut to size, remove the paper backing from the back of the design. Underneath, the plastic should be smooth and shiny. Now the patch can be ironed onto another piece of fabric, like a jacket or backpack.

Be sure to visit The Guerrilla Girls before it closes on September 30. If you liked this project, join us at our upcoming workshops for families, teens, and adults to get your make on.

Jessica Thompson is the Manager of Teen Programs at the DMA.

Prints Charming

With the opening of Visions of America: Three Centuries of Prints from the National Gallery of Art, we’re completely and utterly in love with a new Prints Charming—the art of printmaking! Printmaking is an artform that is easily accessible to even the youngest children. All you need is paper, some kind of ink or paint, and a surface that “holds onto” your print.

Here are some of our favorite ideas you can try at home!

Monoprinting

We tried monoprinting with the Toddler Art class, and the kids loved the “magic” that appeared before their eyes as their prints were lifted off the inked surface. All you need at home is a cookie sheet or even a piece of waxed paper taped to the table. Completely cover the cookie sheet or waxed paper with a layer of paint, and then have your child “draw” a design in the paint using a Q-tip. Gently press a piece of paper on top of the painted drawing, and watch the image transfer from the cookie sheet to the paper. Then do it all again!

Styrofoam Printing

Styrofoam printing allows you to make multiple prints from a single image. For this process, any Styrofoam will do–a plate (with the ribbed edge trimmed off to create a flat surface), a recycled foam tray from a grocery purchase, or a sheet of foam purchased at a craft store. Children can draw their image into the foam using a dull pencil. Special Note: if they add any letters, numbers, or symbols into their drawings, they’ll need to write them backwards, as their image will be reversed when printed. Once the drawing is complete, cover the entire surface of the foam with ink or paint, then press the inked surface onto a piece of paper. For an extra challenge, older children can try to print layered images by drawing and printing in one color, then drawing additional details on a second sheet of foam, covering the sheet in a different color, and then printing onto the original piece of paper.

veggie printmaking

Fruit & Veggie Printing

This is one of my most favorite printmaking projects to do with kids! Many children have probably done the classic stamping-with-an-apple project. But have you tried printing with celery, okra, or onions? Fruits and veggies have beautiful hidden patterns that make for really fun (and smelly!) printmaking. For this one, cut up fruits and veggies and have your child dip them into paint and then stamp onto paper. I experimented with cutting several of the produce–particularly apples, oranges, onions and bell peppers–both lengthwise and widthwise so that we could create different patterns with each.

For even more fun printmaking ideas, check out these posts on some of my favorite blogs:

Happy creating!

Leah Hanson
Manager of Family and Early Learning Programs


Papel Picado

Papel picado has taken over the DMA art studio!

In celebration of México 1900–1950: Diego Rivera, Frida Kahlo, José Clemente Orozco, and the Avant-Garde, the DMA offered many exciting activities during our DMA Family Days/DMA días familiares. Not only was admission to the exhibition free, but visitors could also enjoy music performances in the atrium, visit a new Pop-Up Art Spot in the Ancient American Galleries on Level 4, and make papel picado in the studio.

Papel picado is a type of Mexican folk art often used as decoration for all kinds of festivities, like Dia de los Muertos, Easter, and Christmas. Papel picado literally means pecked paper and is made by cutting designs from tissue or crepe paper. These designs are often very geometric and might feature floral elements, birds, skeletons, and more, depending on the celebration.

In the video below, you can watch artisans at work in San Salvador Huixcolotla, a municipality in the Mexican state of Puebla that is well-known for papel picado. Look at how deftly they use chisels (rather than knives or scissors) to punch out designs – using this method, an artisan can cut up to 50 sheets of tissue paper at a time!

At home, papel picado is often made using the fold-and-cut method, which is probably familiar to you if you’ve ever made a paper snowflake. This was our method of choice in the studio. To help visitors get started, Jessica put together some instructions and a simple template to go along with them. Click on the link to download the instructions, find some 8 1/2″ x 11″ tissue paper, and have a go at making your own papel picado!

¡Buena suerte!

DSC01043

Jennifer Sheppard
Teaching Specialist

2017 Goes Medieval

mm1

This month, our Meaningful Moments participants had fun exploring medieval art in the exhibition Art and Nature in the Middle Ages. We were especially impressed by the richly illustrated and intricately detailed pages of the medieval prayerbook, called the Book of Hours.

Calendar page from a Book of Hours: June France c. 1500 Tempera and ink on parchment Overall: 8 3/4 x 6 1/2 in. (22.2 x 16.5 cm) Musée de Cluny, musée national du Moyen Âge, Paris, Cl. 22715 g © RMN-Grand Palais/Art Resource, NY. Photograph: Jean-Gilles Berizzi

Calendar page from a Book of Hours: June
France
c. 1500
Tempera and ink on parchment
Overall: 8 3/4 x 6 1/2 in. (22.2 x 16.5 cm)
Musée de Cluny, musée national du Moyen Âge, Paris, Cl. 22715 g
© RMN-Grand Palais/Art Resource, NY. Photograph: Jean-Gilles Berizzi

The Book of Hours was the bestseller of the Middle Ages and Renaissance, from about 1250 to 1550. The core of the Book of Hours is a set of prayers, called the Office of the Virgin Mary, which are to be recited at home at eight different hours of the day. A calendar typically prefaces each Book of Hours, listing the important feast days throughout the year, and is illustrated with the common activities that characterized each month.

Inspired by Books of Hours, participants returned to the studio to create their own illuminated calendars using watercolor and gold paint. What better way to kick off 2017?

Download a PDF of our medieval style calendar to make your own at home! We printed ours on cream colored paper to mimic the look of parchment, but any 11″x17″ paper will do.

Happy crafting!

Emily Wiskera
Manager of Access Programs

DIY Sensory Bottles

sensory-bottle-1

What do you get when you pair an ordinary plastic bottle with water, glitter, paint, sand, beans, or even toothpicks? An easy DIY toy, a great way to recycle, a crafty project, something to entertain the kids–How about all of the above! Sensory bottles are a great quiet toy for little ones to explore during those in-between moments—in the car on the way to the grocery store, at home when you need something to occupy their hands, or in the stroller when you’re on the go. At its most basic level, a sensory bottle is a container with cool stuff inside. Sounds easy, right?

sensory-bottle-2

Here at the DMA, we have quite a collection of sensory bottles that we use for the Art Babies and Toddler Art classes and the monthly First Tuesday event for preschoolers. Some bottles are great noise-makers; others are simply mesmerizing to stare at. For today’s DIY, we’ll get the low-down on how to make a sensory bottle and then take on the challenge of making bottles inspired by art in the museum.

sensory-bottle-contents

It might seem like it shouldn’t really require a complicated set of instructions to make a sensory bottle.

  1. Find a bottle.
  2. Put cool things inside.
  3. Close it up.

Easy, right? However, there are a few things to take into consideration that might not seem so obvious.

Containers. Any sort of bottle will probably do, but I’ve learned to take a minute to think about who will be using the sensory bottle and what will be inside. I strictly use plastic bottles and jars, so that there is no safety concern when the bottle inevitably gets dropped. I also vary the sizes I use. Babies need smaller, lighter bottles that are easier for them to pick up and hold (think of the mini water bottles you see in kids’ lunchboxes). Older children can handle slightly larger bottles. If a bottle will be holding liquid ingredients, make sure that the plastic is durable and strong. I prefer using bottles with wide openings so that small toys and objects can fit through the bottle neck. Make sure your bottle has been thoroughly cleaned and is completely dry before filling it up. (If the label gives you any trouble, use an adhesive remover like Goo Gone to remove it and get rid of the sticky stuff).

Contents. Basically, anything goes when it comes to contents. Consider how your child will play with it—do you want a noisemaker or do you want to explore how colors mix? Do you want something that has a hide and seek element to it? Here are some of my favorite combinations.

  • For musical shakers: beans, rice, sand, toothpicks, plastic beads, jingle bells, or nuts and bolts
  • For color-mixing: vegetable oil or baby oil + water + liquid watercolor
  • For “I Spy” play: colored rice and small toys
  • For mesmerizing gazes: clear dish soap and/or hair gel + colorful mini rubber bands
  • For glowing play: glow in the dark stars + glow in the dark paint + seltzer water (which glows under black light!)

Closure. Sensory bottles are not meant to be open, so run a line of strong adhesive around the mouth of the bottle before permanently screwing on the plastic cap. My favorite glue to use is E6000.

Now for the DMA Sensory Bottle Challenge—extend your Museum visit to at-home play by creating a sensory bottle inspired by a favorite work of art. Use a work of art your child has expressed an interest in as a starting point. Pay attention to the colors, shapes, lines, and objects you see in the work of art and then make a list of things you could fit into a bottle. Here’s what I came up with!

The Lily Pond Sensory Bottle—inspired by Claude Monet’s Water Lilies
Contents: Water, blue & silver liquid watercolor, toy frogs and turtles, silk flower petals

The Purrrfectly Egyptian Sensory Bottle—inspired by works of art in Divine Felines
Contents: Water + sand + gold glitter + Egyptian-themed toys

By playing with a sensory bottle, your child is gaining experience with all kinds of “big kid” concepts—gravity, density, color mixing, viscosity, cause and effect, and so much more! But more importantly in my book, they are having fun. Play on!

Leah Hanson
Manager of Family and Early Learning Programs

DIY Shaving Cream Art

If you asked me what the most popular art supply was in camp this summer, my answer wouldn’t be paint. It wouldn’t be clay, it wouldn’t be paper – it wouldn’t even be hot glue. It would be…

dsc05535

shaving cream!

You read that correctly. Not just one but SIX of our summer camps had a day when they made masterpieces using shaving cream. Our teachers this year were certainly inspired by this unconventional material! What other material could you use to marble paper, mix your own textured paint, make the freshest smelling foam dough, AND clean everything up afterwards?

As for what the campers thought, let me offer this quote overheard in carpool:

“Mom, we made art out of SHAVING CREAM today!!!” (Extra exclamation marks included.)

What you need:

  • A can of foaming shaving cream. I used Barbasol; shaving cream that comes out as a gel won’t work here!
  • A cookie sheet, which you’ll fill with a layer of shaving cream.
  • Various colors of paint. Nearly anything will do: tempera, acrylic, liquid watercolor, and food coloring are just a few ideas.
  • Craft sticks.
  • A ruler.
  • Heavyweight paper. You need something like watercolor paper or thick cardstock – thinner paper will warp, dissolve, and tear from all the moisture in the shaving cream.

dsc08753-2

When coming up with the plan for my print, I looked to a piece of art that’s inspired cookie decorating (twice!) and marshmallow peep art made by DMA staffers: Odalisque (Hey, Hey Frankenthaler) by Lynda Benglis. The twisty poured latex shapes were fun to recreate by swirling paint through the shaving cream.

You can see how I made my print in the slideshow below:

This slideshow requires JavaScript.

Once you’ve scraped the foam off your print, lay it flat so it can dry. Your paper may start to curl up at the corners, but that’s not anything a little time under a heavy book can’t fix. You can continue to make prints using the remaining shaving cream in your cookie sheet with the paint already there or by adding more paint and swirling with a craft stick again.

When you’re all done, admire your finished prints as they are or turn them into thank you cards, backgrounds for imaginative drawings, or anything else you can think of!

dsc08955-3

The neat part about this technique is that it can be used on more than just paper. Try using acrylic or fabric paint to print cool rainbow bandanas. Even food coloring can be used to dye Easter eggs! For more fun, check out these other shaving cream ideas:

What crazy craft can you come up with?

Jennifer Sheppard
Teaching Specialist


Make This: Camera Obscura

Johannes Vermeer, star of the eponymous Vermeer Suite: Music in 17th-Century Dutch Painting, is famous for his illusionism. Vermeer’s small, gem-like paintings are little windows into 17th century Dutch life. Instead of composing his images from naked-eye observation, however, some art historians believe that Vermeer used a device called a camera obscura.

A camera obscura, Latin for dark chamber, is the precursor to the modern camera, and has been known to artists, scientists, and philosophers since the time of Aristotle. At their most basic, they are made from light-tight boxes with a tiny hole on one side. Light enters the hole and casts an inverted image on a screen inside the box. Its earliest uses can be traced to astronomers, who used the camera obscura to safely view eclipses. However, it didn’t take long for artists to use it as a drawing tool. Camera obscuras can be built to reflect that image on a drawing surface, which artists can trace over to create compositions.

Although early camera obscuras were made from finely crafted wooden boxes, you can make one out of everyday materials. Here’s how to do it.

Supplies:

IMG_8716

  • Cardboard box
  • Black tape (duct tape is the best, but I used a little black masking tape too!)
  • Masking tape/painters tape
  • Magnifying glass
  • Tracing paper or vellum
  • Box cutter
  • Scissors
  • Pencil or sharpie

Step 1: Fold down the flaps on one side of your box and tape them down with black duct tape. This will be the bottom of your camera obscura. Remember that camera obscuras need to be light-tight, so make sure to tape down the sides and corners of your box too! I make sure that I have the bottom sealed tight by holding the box up to a light.

IMG_8717

Step 2: Draw a small square in the middle of one of the sides of the box and cut it out with a box cutter. A 1-1 ½ inch square is a pretty good size to shoot for. Remember that the sides of the box with flaps, including the one you just taped down, should be the top and bottom of your camera obscura–don’t cut those!

IMG_8718

Step 3: Tape a magnifying glass over the small hole. This will be the lens for the camera obscura. My magnifying glass was pretty heavy, so I used a lot of tape to make it secure.

IMG_8721

Step 4: On the opposite side of the box from the lens, cut a large hole out of the box. This hole should be nearly as large as the side of the box. If cutting out this side weakens the box or one of the top flaps falls off, don’t worry–just reinforce the box with some tape! It should look like this when you’re finished.

IMG_8724

Step 5: Leaving about a 1 inch margin around the sides, cut a smaller hole from the piece of cardboard that was just cut out. This will be used to create a frame for the screen on which the image will be reflected.

IMG_8727

Step 6: Trim a piece of tracing paper and use four pieces of masking/painters tape to secure it to our frame. This is the screen for our camera obscura!

IMG_8729

Step 7: Now for the exciting part–time to test! Find a brightly lit window in front of which to set your device. I chose a window overlooking our Sculpture Garden in the Barrel Vault, which is one of my favorite places in the Museum.

IMG_8730

Step 8: Slide your screen through the top of your camera. An image should appear! Slide the screen closer or further away from the hole in the box to focus your image, or make it sharper. Once you’re satisfied with how the image looks, tape down the top flaps to keep the light out.

IMG_8733

And viola! You have your own camera obscura. You can use a pencil to trace what you see on the tracing paper. The best part about this variation on the camera obscura is it’s reusable. Simply tape a new piece of tracing paper on the frame when you want to make another drawing.

Whether Vermeer used a camera obscura to compose his beautiful images is still up for debate. Historians often cite the blurry highlights on metallic objects in Vermeer’s paintings as evidence that he used the tool. These kinds of highlights, called halations, are typical of lens-based devices. However, it’s important to remember that a camera obscura is just another tool in an artist’s toolbox. Tools don’t make art–artists do! There’s no denying the skill it took to represent the tiny details in Vermeer’s paintings, even if he did use a camera obscura.

Try making a camera obscura of your own and see how it fits into your artistic practice. Report back with your findings – we’d love to see what you create!

And don’t forget to stop by the Museum to check out Vermeer Suite before it closes this summer!

Jessica Thompson
Manager of Teen and Gallery Programs

Pollock for the People!

Art Babies Pollock.jpg

For the last few months here at the DMA, we’ve been proclaiming “Pollock for all!” From toddlers to teens, and grade schoolers to grannies, the exuberant and lyrical works of “Action Jackson” have inspired thoughtful discussions, messy art, and even a dance performance! As a museum educator, one of the things I love most about Pollock’s work is his approach to putting paint on a canvas by splattering, flinging, dripping, and dropping (a process we often refer to as action art). When you have a bunch of squirmy three year-olds, Pollock makes all kind of sense! But Jackson Pollock: Blind Spots goes beyond Pollock’s all-over paintings and explores a body of work known as the black pourings, in which Pollock’s trademark action is tightly controlled, sweeping and swooping over the canvas to create figures that almost seem to be hiding amidst black lines, puddles, and splatters.

The exhibition has inspired all kinds of Pollock-ing in the studio, proving that no matter how old or young you are, Pollock is for all ages! Read on for some Pollock-inspired ideas you can try at home.

Art Babies Pollock 2

Babies

Our Art Babies class wiggled and giggled our way through the Pollock exhibition, then enjoyed sensory play inspired by the artist’s work. Pollock’s all-over paintings often remind me of a tangle of lines, with one line twisting and turning over another, so I created a sensory bin of “Pollock lines” for the little ones to explore. One little guy couldn’t get enough of throwing fistfuls of “noodles” into the air as high as he could. Recreate this at home with a large bin of either plastic cording or cooked spaghetti noodles (follow this helpful DIY recipe). But remember, since babies tend to put everything in their mouths, this activity does require grown-up supervision!

Arturo's Preschool Pollock

Toddlers and Preschoolers

If you are feeling brave, suit up your children in their messiest clothes, cover the floor with a drop cloth (or paint outside), and let them go to town, dribbling and splattering paint onto paper. If that idea has convinced you that Pollock is not for you, here are some less messy alternatives.

Marble painting is a fun way to get a feel for the energy and action Pollock might have used, while containing the mess. Place a piece of paper and a marble in a large box or box top, squeeze puddles of paint onto the paper, then have your child tip and shake the box back and forth to roll the marble through the paint. In no time at all, you’ll have a Pollock-ing, rollicking masterpiece.

Or if you want to avoid paint all together, substitute markers, yarn, and contact paper for the messy stuff. Have your child throw, dribble or drop pieces of yarn onto a piece of paper to create some Pollock-like lines. Cover the entire piece of paper with clear contact paper to seal the yarn in place. Then use colored markers (permanent works best on the contact paper) to create puddles of color. Pollock’s Convergence served as our inspiration for this project, and the children loved the layered effect.

Homeschool Pollock

Elementary & Middle School

The Pollock exhibition at the DMA features an entire gallery of paintings Pollock created on paper rather than canvas. We tried a similar approach using Japanese paper, droppers, and liquid watercolor. Layer two or three sheets of paper together, then gently move the dropper around the paper, squeezing watercolor as you go. Watch as different colors swirl and puddle together, then separate the individual pieces of paper to discover what images have soaked through.

Teens

At a recent Late Night event, we used scribble bots to create a modern take on Pollock’s work. All you need is a plastic cup, a toy motor, a battery, and a brush to make your own painting robot! The motor sends the robot skittering across the paper, and the paintbrush “captures” the movement in visual form. Download step-by-step instructions here: Scribble Bot Instructions.

Dance for PD Pollock

Any Age

This final project is as mess-free as you can get! And it provides the most amazing results. Since November, we’ve been privileged to be a part of the Dance for Parkinson’s Disease program. We’ve hosted a wonderful group of individuals who have regularly visited the Museum galleries, and, under the direction of Misty Owens, choreographed a dance performance inspired by Jackson Pollock. As part of the choreography process, the group created light graffiti using laser pointers, flash lights, and a DSLR camera. It’s like painting in the air! This tutorial gives some great tips on creating your own light graffiti. To see Pollock in dance form, join us for the Dance for PD performance in the Center for Creative Connections on Friday, February 19 at 2:00 p.m.

So are you convinced? Ready to join our “Pollock for the People” crusade? We’d love to see what Pollock inspires you to do. Share your Pollock creations on social media with #DallasSpotsPollock and tag us @DallasMuseumArt.

Leah Hanson
Manager of Early Learning Programs


Quick Craft: Pumpkin Pie Sculpture

Inspired by Wayne Thiebaud’s scrumptious pie paintings, I whipped up a little DIY activity for young art lovers to make their own pumpkin pie art (no baking required!).

Materials needed:

  • One paper plate
  • Orange tissue paper
  • Cotton balls
  • Glue stick (Elmer’s glue also works, but is a bit messier!)
  • Scissors

WP_20151125_11_29_27_Pro

Step 1:

Cut your plate into 6 pie slices.

WP_20151125_11_31_46_Pro

Step 2:

Cut tissue paper into small squares.

WP_20151125_11_34_28_Pro

Step 3:

Glue tissue paper pieces down to paper plate slice. Overlap your tissue paper pieces until the flat part of the plate is covered, leaving the edge of the “crust” white.

WP_20151125_11_35_33_Pro

Step 4:

Glue a cotton ball to the center of your pie slice for a dollop of whipped cream.

WP_20151125_11_39_02_Pro

Tah-Dah! Experiment with using different colors of tissue paper to create other flavors of pie.

You can see some of Wayne Thiebaud’s delicious artwork in the exhibition International Pop, on view at the DMA until January 17, 2016.

Happy Thanksgiving!

Emily Wiskera
McDermott Graduate Intern for Family and Access Teaching


Art to Go Family Totes at Home: DIY Story Dice

Whether you’re seeking sunburn-free, sweat-free fun this summer or new experiences to share with your family, the DMA has what you’re looking for! As usual, the Art Spot in the Center for Creative Connections is open every day for art-making and exploration, and our Family Guides are always available at the front entrance for exploring the galleries. Weekdays and Saturdays through June and July will also offer different (air-conditioned!) activities as part of the DMA’s Summer Family Fun. These activities include the Pop-Up Art Spot, story time and family tours, and our wonderful Art to Go Family Totes.

A family using the Color Art to Go Family Tote and story dice in Between Action and the Unknown: Shiraga/Motonaga.

A family using the Color Art to Go Family Tote and story dice in Between Action and the Unknown: Shiraga/Motonaga.

An important thing to note is that the Art to Go Family Totes are only available this summer on Tuesdays between 11:00 a.m. and 1:00 p.m.! In June, we’ll have them out for use in Between Action and the Unknown: The Art of Kazuo Shiraga and Sadamasa Motonaga, and in July you can find them up on Level 4 in Formed/Unformed: Design from 1960 to the Present.

If you can’t wait to make it to the Museum to try out our Totes, or have already enjoyed them and wished you could have the Art to Go experience at home, here’s a quick and easy DIY to help you recreate one of the activities from our Color Tote.

DIY Story Dice

Art to Go Family Tote - Color, Writing Activity

Color Art to Go Family Tote – Writing Activity: Once Upon a Time

The Art to Go Family Totes include activities to MAKE, PLAY, TALK, and WRITE. This “Once Upon a Time” writing activity is one of our favorites and includes two ‘story dice’ to inspire a story written with a piece of artwork as its setting. Our dice are pretty simple–images of possible main characters and colors are pasted on the sides of two cube-shaped cardboard boxes (small ones that fold down for easy storing).

Color Art to Go Family Tote - Writing Activity Story Dice

Color Art to Go Family Tote – Writing Activity Story Dice

To make your own story dice at home, you could use boxes like we have here (big or small – play with proportions!). Other options include small wooden craft blocks or making your own paper cubes. If you’re feeling ambitious, you could even put together this twelve-sided paper dodecahedron to use instead of the traditional six-sided dice shape!

Once you have the base for your die, all that’s left is to decide which theme you’re going to assign to it, pick out images or words to convey different ideas for each side, and attach your images. The possibilities are absolutely endless. To get you started, here are a few ideas for combinations of themes:

  • Attach images of family members on one die and parts of an adventure on others: settings for the adventure, modes of transportation, treasures to hunt, etc.
  • Fill one die with superhero images and another with giant monsters to face off in an epic battle!
  • Make murder mystery themed dice (for older storytellers) with possible murder weapons, locations of the murder, and prime suspects.
  • Have entirely artwork-based dice: cover one with your favorite portraits, one with landscapes, and one with still lifes or ancient artifacts–or anything else you might think of.

With a little imagination and teamwork, any kind of story dice you create can lead to a GREAT story and a serious brain workout! You can even re-purpose your story dice. Maybe on a day when you’re feeling more like an illustrator and less like an author, just give your dice a roll and voilà! Your story ideas work just as well for creating a new piece of artwork. Have a go at it and let us know in the comments how your efforts turn out. And don’t forget to stop by the Museum to check out the rest of our Art to Go Family Tote activities and other Summer Family Fun experiences!

Jennifer Sheppard
McDermott Intern for Family and Access Teaching


Archives

Flickr Photo Stream

Categories