Posts Tagged 'crafting'

2017 Goes Medieval

mm1

This month, our Meaningful Moments participants had fun exploring medieval art in the exhibition Art and Nature in the Middle Ages. We were especially impressed by the richly illustrated and intricately detailed pages of the medieval prayerbook, called the Book of Hours.

Calendar page from a Book of Hours: June France c. 1500 Tempera and ink on parchment Overall: 8 3/4 x 6 1/2 in. (22.2 x 16.5 cm) Musée de Cluny, musée national du Moyen Âge, Paris, Cl. 22715 g © RMN-Grand Palais/Art Resource, NY. Photograph: Jean-Gilles Berizzi

Calendar page from a Book of Hours: June
France
c. 1500
Tempera and ink on parchment
Overall: 8 3/4 x 6 1/2 in. (22.2 x 16.5 cm)
Musée de Cluny, musée national du Moyen Âge, Paris, Cl. 22715 g
© RMN-Grand Palais/Art Resource, NY. Photograph: Jean-Gilles Berizzi

The Book of Hours was the bestseller of the Middle Ages and Renaissance, from about 1250 to 1550. The core of the Book of Hours is a set of prayers, called the Office of the Virgin Mary, which are to be recited at home at eight different hours of the day. A calendar typically prefaces each Book of Hours, listing the important feast days throughout the year, and is illustrated with the common activities that characterized each month.

Inspired by Books of Hours, participants returned to the studio to create their own illuminated calendars using watercolor and gold paint. What better way to kick off 2017?

Download a PDF of our medieval style calendar to make your own at home! We printed ours on cream colored paper to mimic the look of parchment, but any 11″x17″ paper will do.

Happy crafting!

Emily Wiskera
Manager of Access Programs

DIY Shaving Cream Art

If you asked me what the most popular art supply was in camp this summer, my answer wouldn’t be paint. It wouldn’t be clay, it wouldn’t be paper – it wouldn’t even be hot glue. It would be…

dsc05535

shaving cream!

You read that correctly. Not just one but SIX of our summer camps had a day when they made masterpieces using shaving cream. Our teachers this year were certainly inspired by this unconventional material! What other material could you use to marble paper, mix your own textured paint, make the freshest smelling foam dough, AND clean everything up afterwards?

As for what the campers thought, let me offer this quote overheard in carpool:

“Mom, we made art out of SHAVING CREAM today!!!” (Extra exclamation marks included.)

What you need:

  • A can of foaming shaving cream. I used Barbasol; shaving cream that comes out as a gel won’t work here!
  • A cookie sheet, which you’ll fill with a layer of shaving cream.
  • Various colors of paint. Nearly anything will do: tempera, acrylic, liquid watercolor, and food coloring are just a few ideas.
  • Craft sticks.
  • A ruler.
  • Heavyweight paper. You need something like watercolor paper or thick cardstock – thinner paper will warp, dissolve, and tear from all the moisture in the shaving cream.

dsc08753-2

When coming up with the plan for my print, I looked to a piece of art that’s inspired cookie decorating (twice!) and marshmallow peep art made by DMA staffers: Odalisque (Hey, Hey Frankenthaler) by Lynda Benglis. The twisty poured latex shapes were fun to recreate by swirling paint through the shaving cream.

You can see how I made my print in the slideshow below:

This slideshow requires JavaScript.

Once you’ve scraped the foam off your print, lay it flat so it can dry. Your paper may start to curl up at the corners, but that’s not anything a little time under a heavy book can’t fix. You can continue to make prints using the remaining shaving cream in your cookie sheet with the paint already there or by adding more paint and swirling with a craft stick again.

When you’re all done, admire your finished prints as they are or turn them into thank you cards, backgrounds for imaginative drawings, or anything else you can think of!

dsc08955-3

The neat part about this technique is that it can be used on more than just paper. Try using acrylic or fabric paint to print cool rainbow bandanas. Even food coloring can be used to dye Easter eggs! For more fun, check out these other shaving cream ideas:

What crazy craft can you come up with?

Jennifer Sheppard
Teaching Specialist


Friday Photos: A-B-C-D-Edie!

On Tuesday, we celebrated Amanda with a book-themed baby shower for her upcoming addition, Edie. Being the artistic bunch we are, the creativity abounded with children’s book inspired bites (green eggs and ham quiche, anyone?), Westie George bookplates (great work Emily!), and other book-centric decor. Our very talented Jennifer even created a DIY alphabet book for attendees to illustrate! Check out our pics and this post to find inspiration for your own artful book-themed gathering!

Sarah Coffey
Education Coordinator

Quick Craft: Pumpkin Pie Sculpture

Inspired by Wayne Thiebaud’s scrumptious pie paintings, I whipped up a little DIY activity for young art lovers to make their own pumpkin pie art (no baking required!).

Materials needed:

  • One paper plate
  • Orange tissue paper
  • Cotton balls
  • Glue stick (Elmer’s glue also works, but is a bit messier!)
  • Scissors

WP_20151125_11_29_27_Pro

Step 1:

Cut your plate into 6 pie slices.

WP_20151125_11_31_46_Pro

Step 2:

Cut tissue paper into small squares.

WP_20151125_11_34_28_Pro

Step 3:

Glue tissue paper pieces down to paper plate slice. Overlap your tissue paper pieces until the flat part of the plate is covered, leaving the edge of the “crust” white.

WP_20151125_11_35_33_Pro

Step 4:

Glue a cotton ball to the center of your pie slice for a dollop of whipped cream.

WP_20151125_11_39_02_Pro

Tah-Dah! Experiment with using different colors of tissue paper to create other flavors of pie.

You can see some of Wayne Thiebaud’s delicious artwork in the exhibition International Pop, on view at the DMA until January 17, 2016.

Happy Thanksgiving!

Emily Wiskera
McDermott Graduate Intern for Family and Access Teaching


Paper Peonies and Tissue Tulips: Build Your Own Beautiful Bouquet!

With last week’s opening of Bouquets: French Still-Life Painting from Chardin to Matisse, you might say we’re all abuzz with excitement here at the Museum. Although fall is just arriving, all we can think of are these beautiful blooms!

It’s easier than you might think to recreate some of your floral favorites at home. Try modeling your bouquet after one you might have seen or put together the posy of your wildest dreams. I took my inspiration from the DMA’s own Bouquet of Flowers in a Blue Porcelain Vase.

Bouquet of Flowers in a Blue Porcelain Vase (1776), Anne Vallayer-Coster

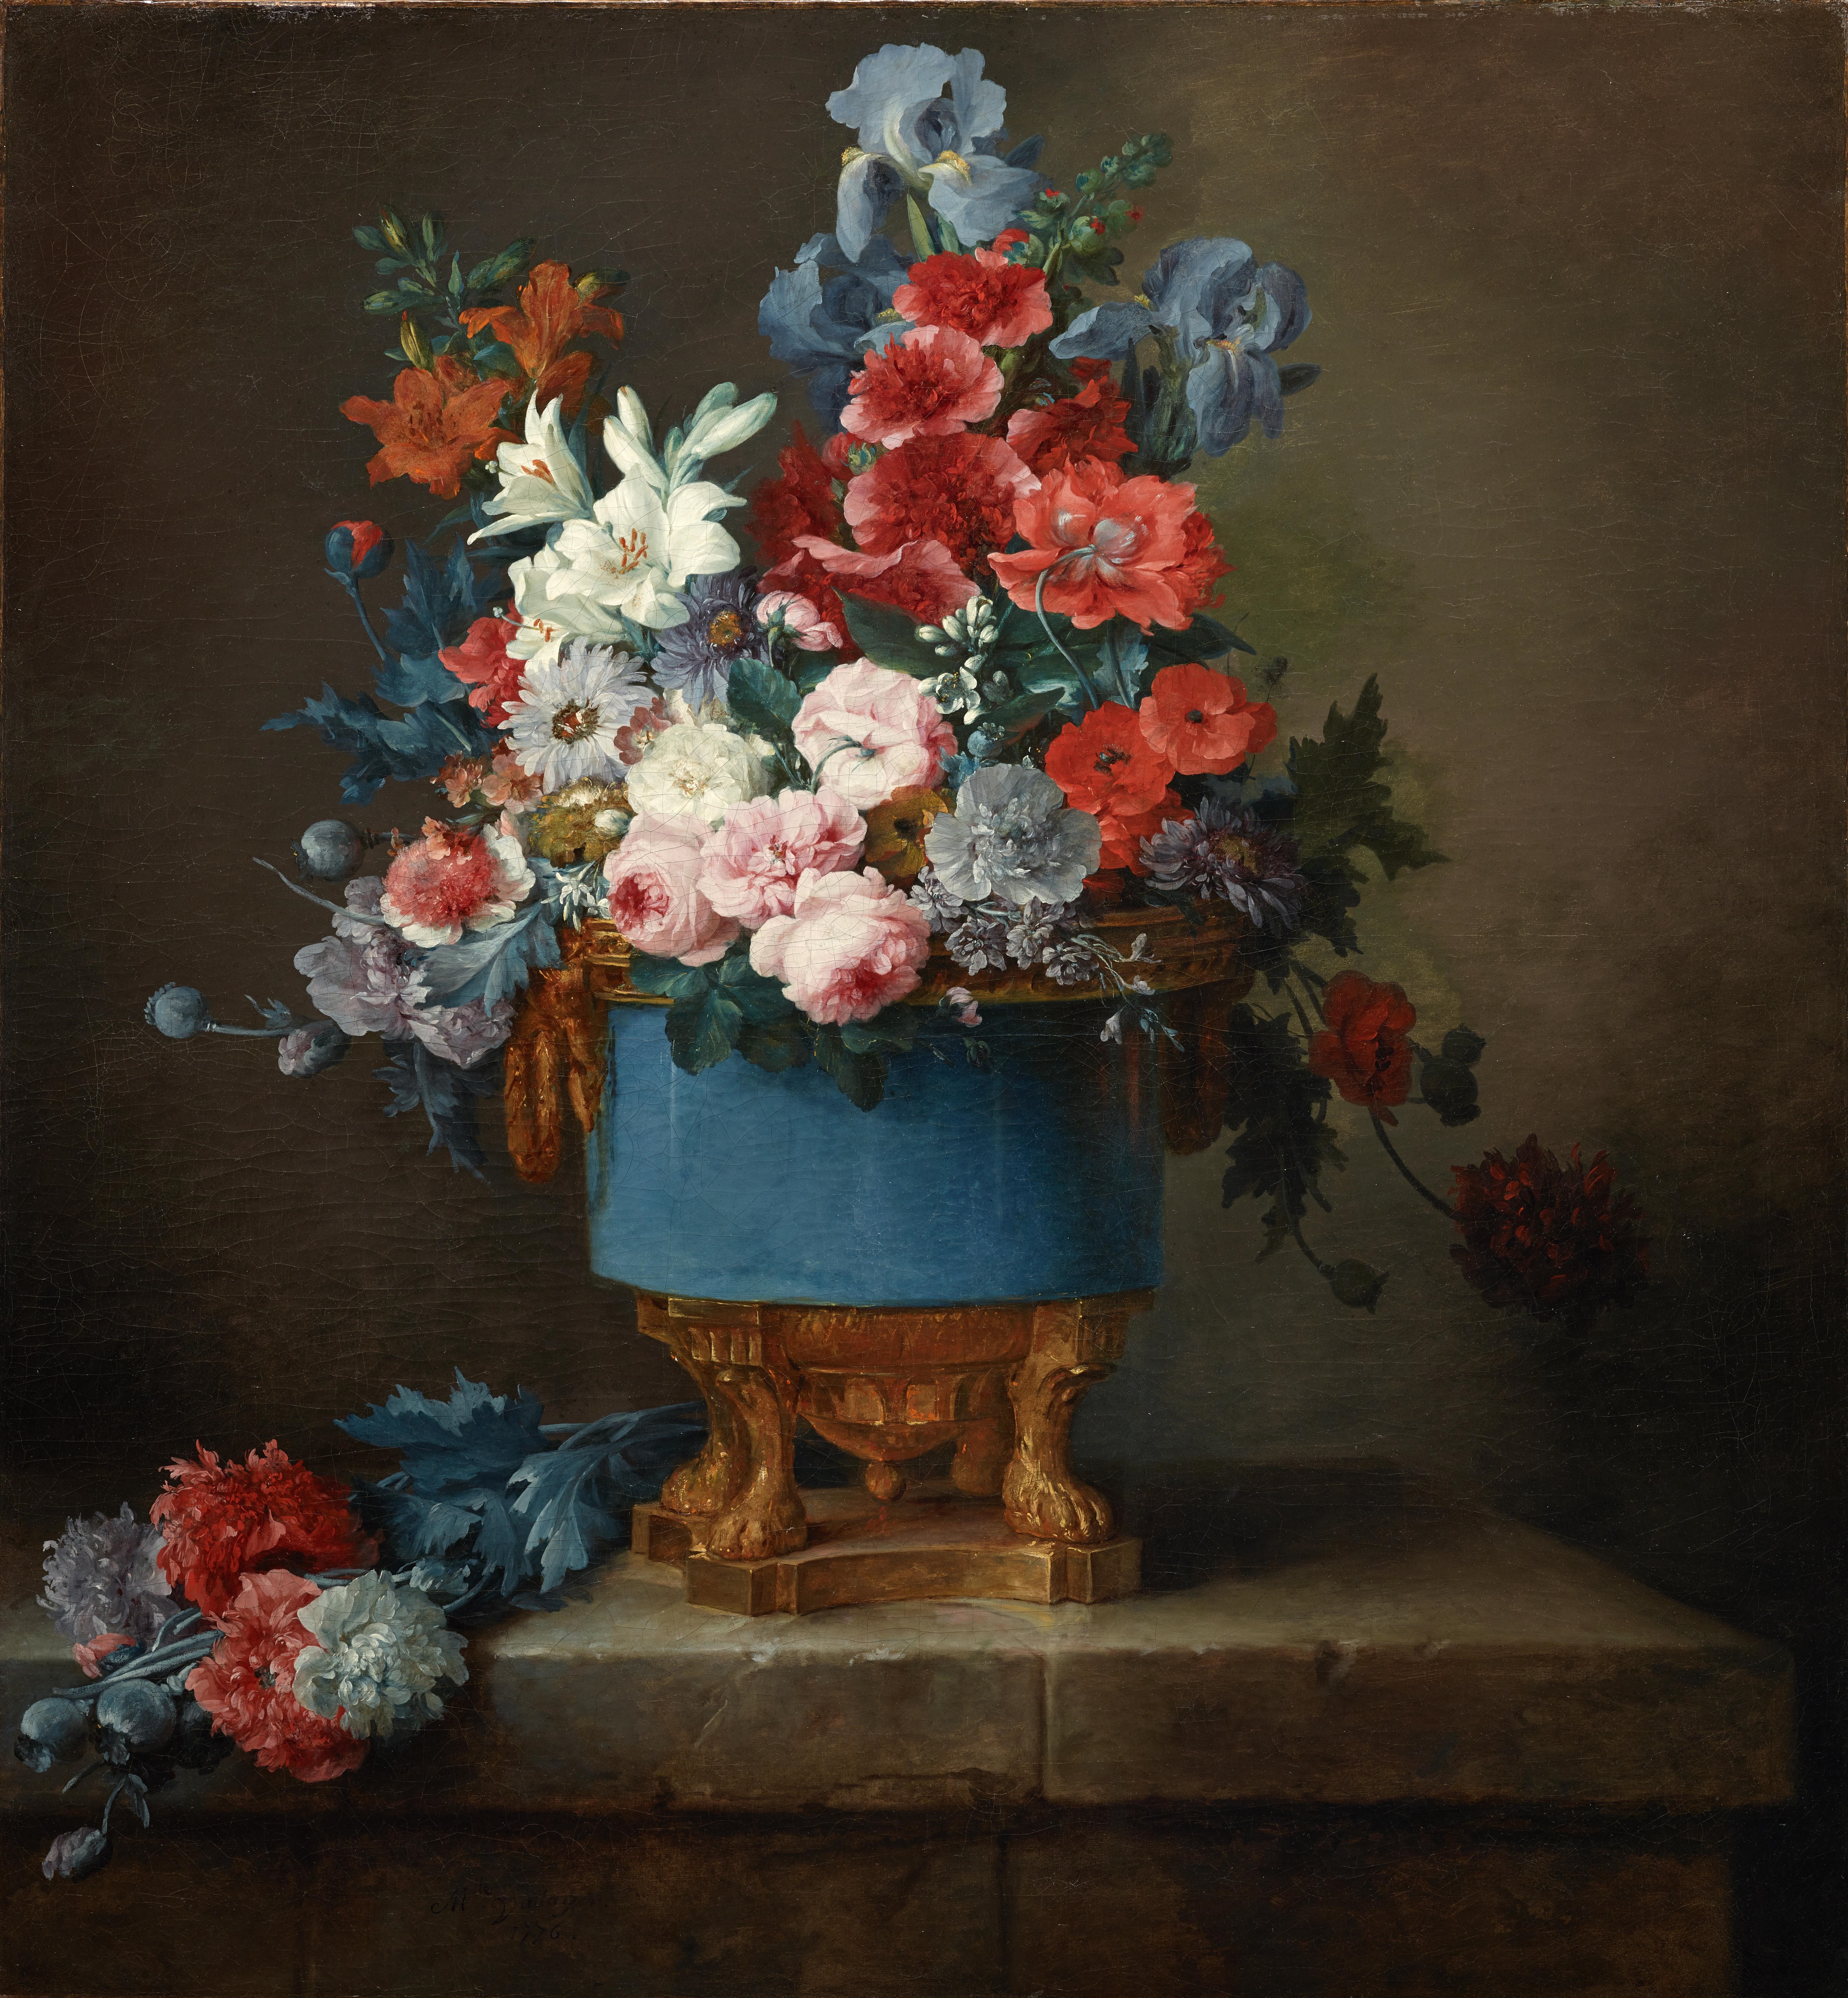
Anne Vallayer-Coster, Bouquet of Flowers in a Blue Porcelain Vase, 1776, Dallas Museum of Art, Foundation for the Arts Collection, Mrs. John B. O’Hara Fund and gift of Michael L. Rosenberg

There are some great tutorials online for making your own paper flowers. Martha Stewart Weddings can show you how to make some really lovely, delicate flowers here, and the Rust and Sunshine blog (here) has easy to follow instructions to make a variety of blooms with a little bit of inventive folding. With the help of these tutorials, I made carnations, roses, and star lilies. I couldn’t find a tutorial I liked for making irises, so I designed my own! You can print off this template and follow the directions below to make them too.

A quick note before we get started: for some flowers (particularly irises and lilies, whose petals you want to stand up a little bit), you might find that a sturdier paper works better for you. This is the perfect time and place to experiment! I liked the unified look of having all my flowers made out of tissue paper, but it’s your bouquet, so you’re the boss.

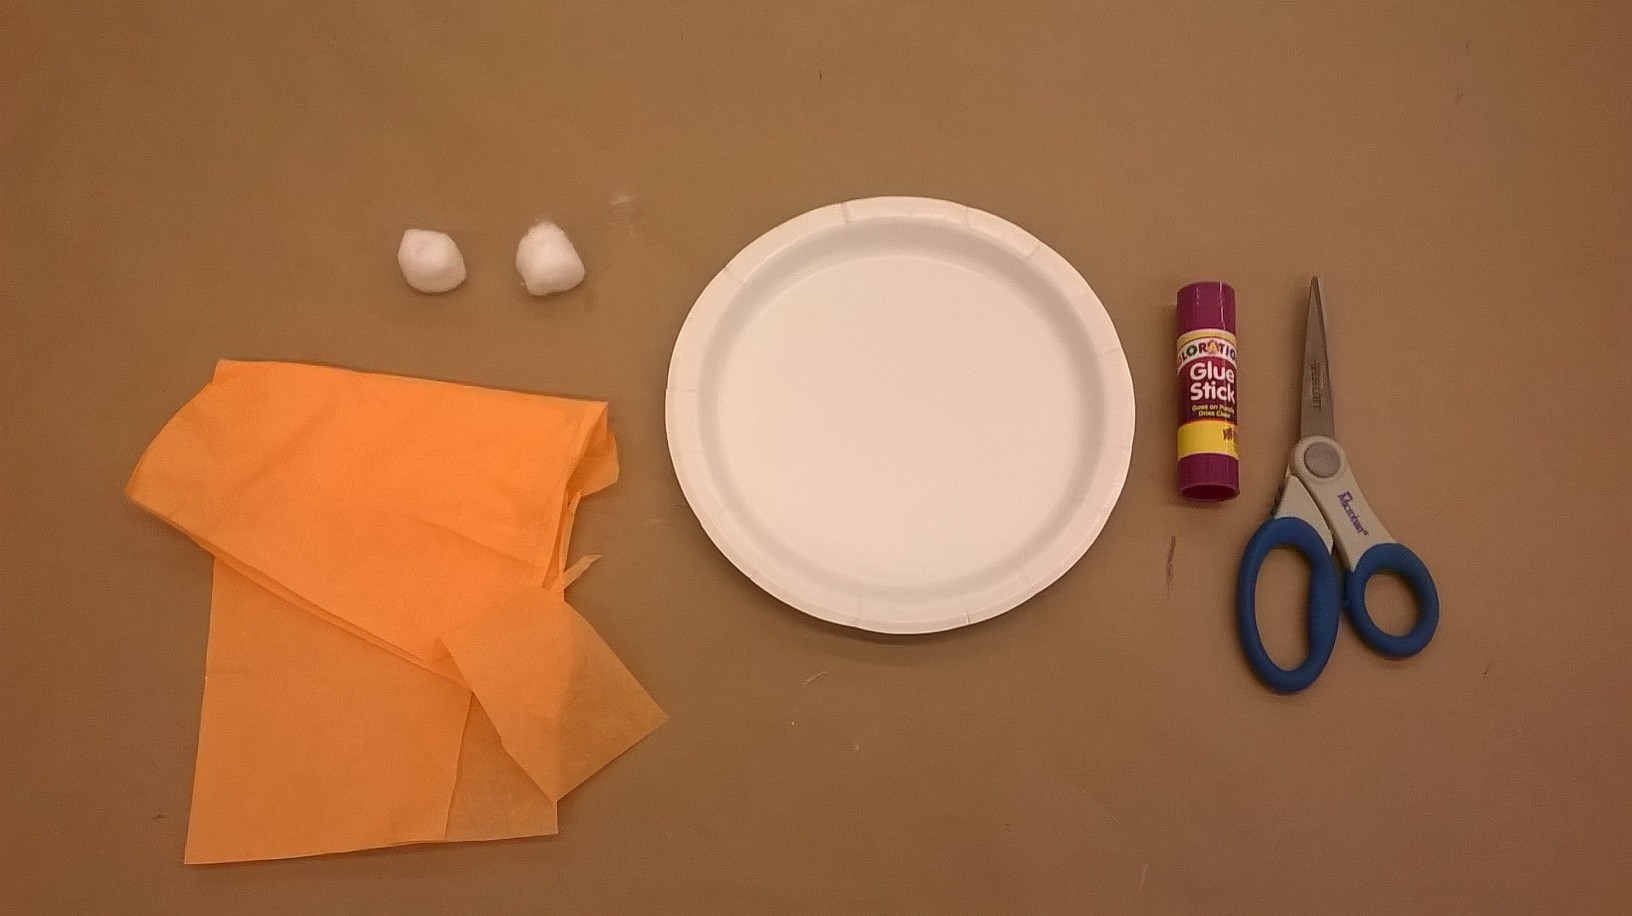
What you’ll need to make irises:

  • Tissue paper in a variety of colors – blue, purple, and yellow are pretty common for irises, though they come in a number of other colors as well
  • Pipe cleaners or art wire (for the stems)
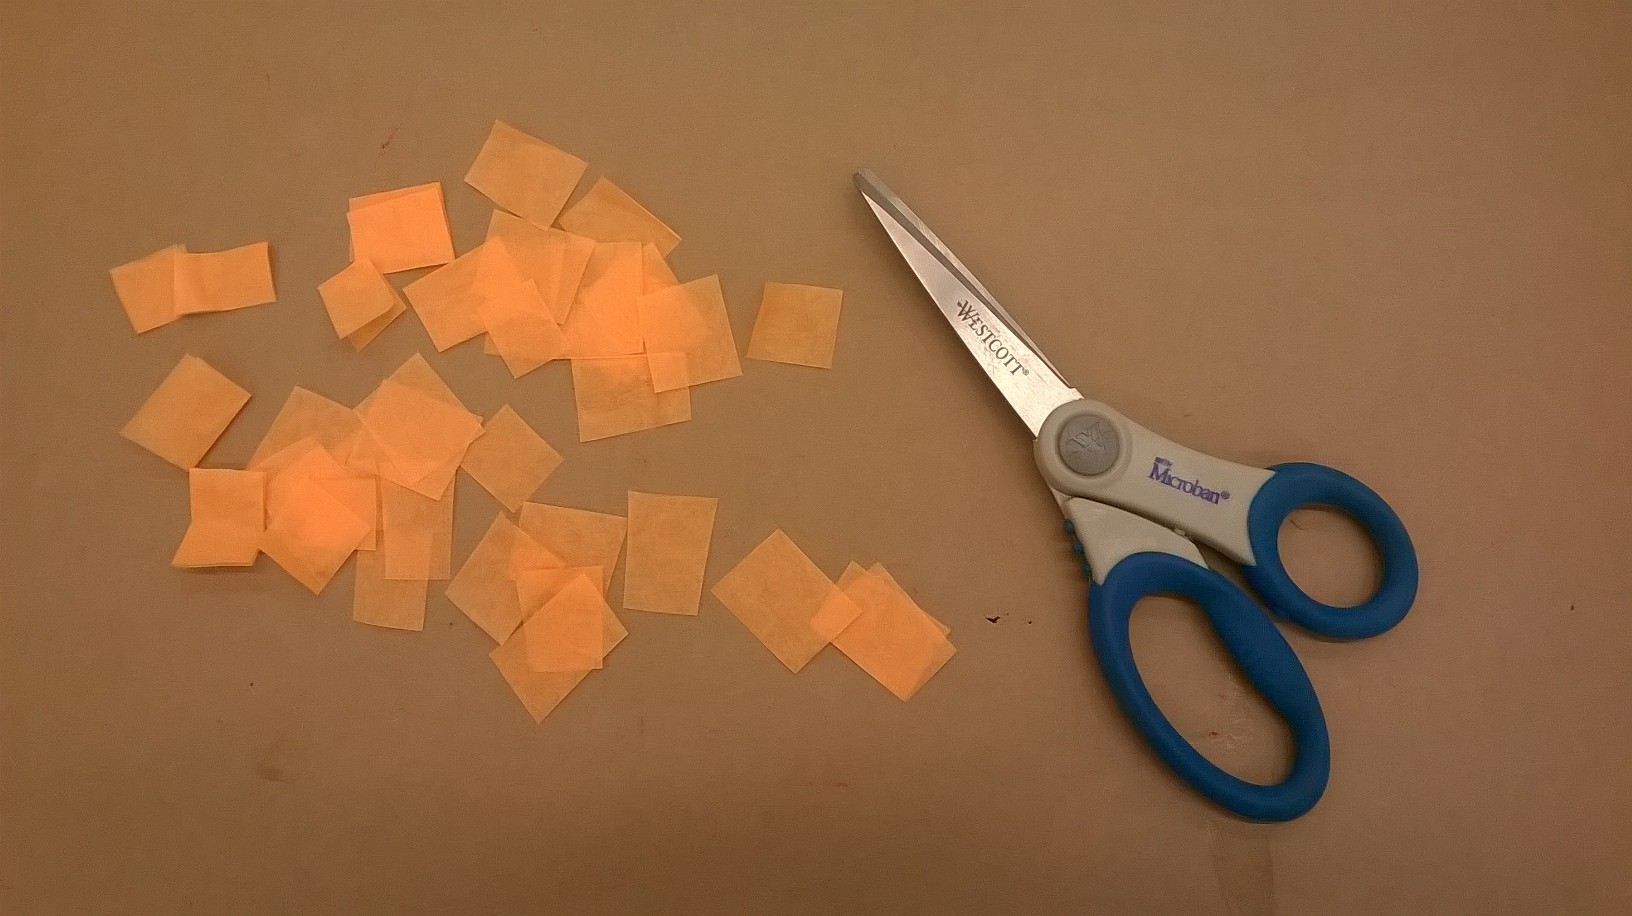
  • Scissors
  • Clear tape
  • Optional: paint, glitter, glue, markers, colored tape, vase

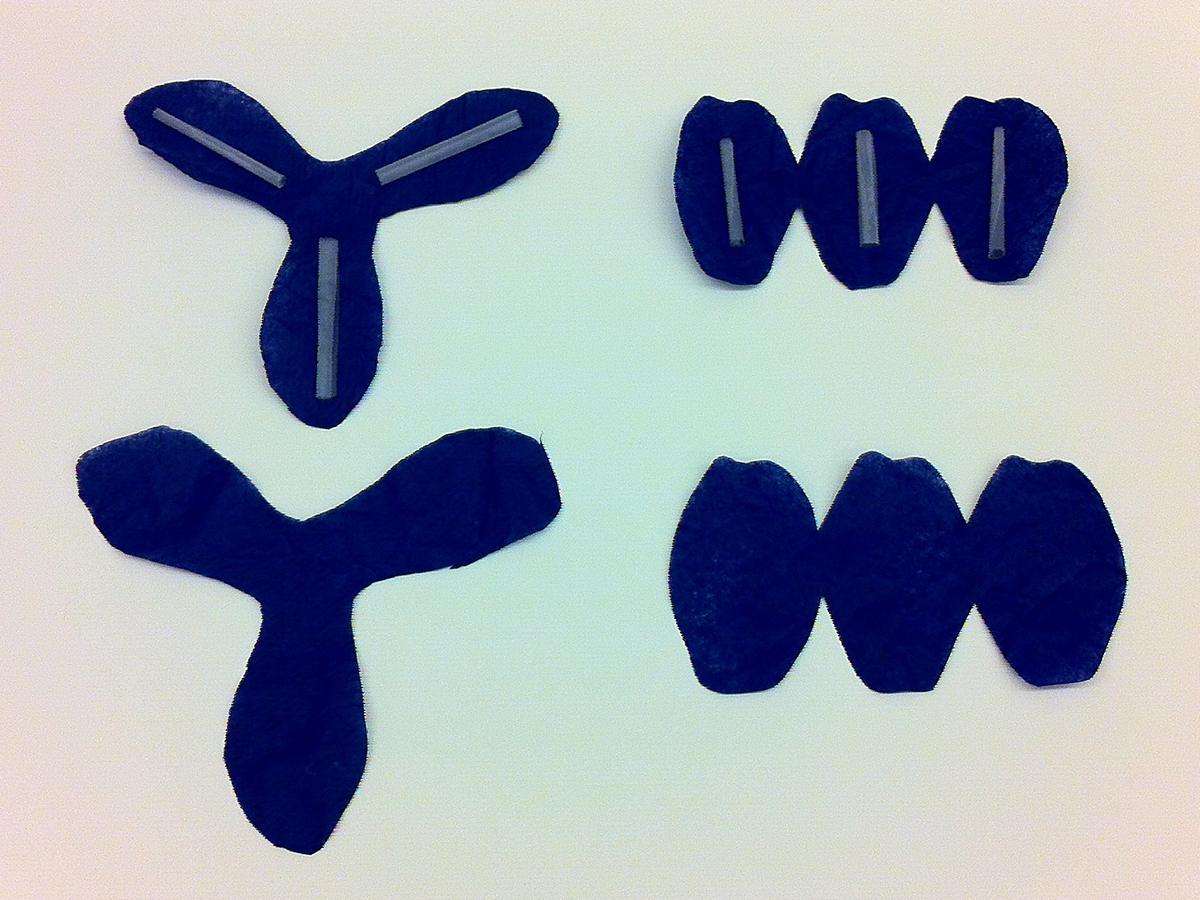
If you opted to use something like card stock instead of tissue paper, cut out only one each of Iris A and Iris B and skip ahead to Step 4. If you’re using tissue paper like me, you’ll need to take an extra step or two to give the petals a little structure, so start here.

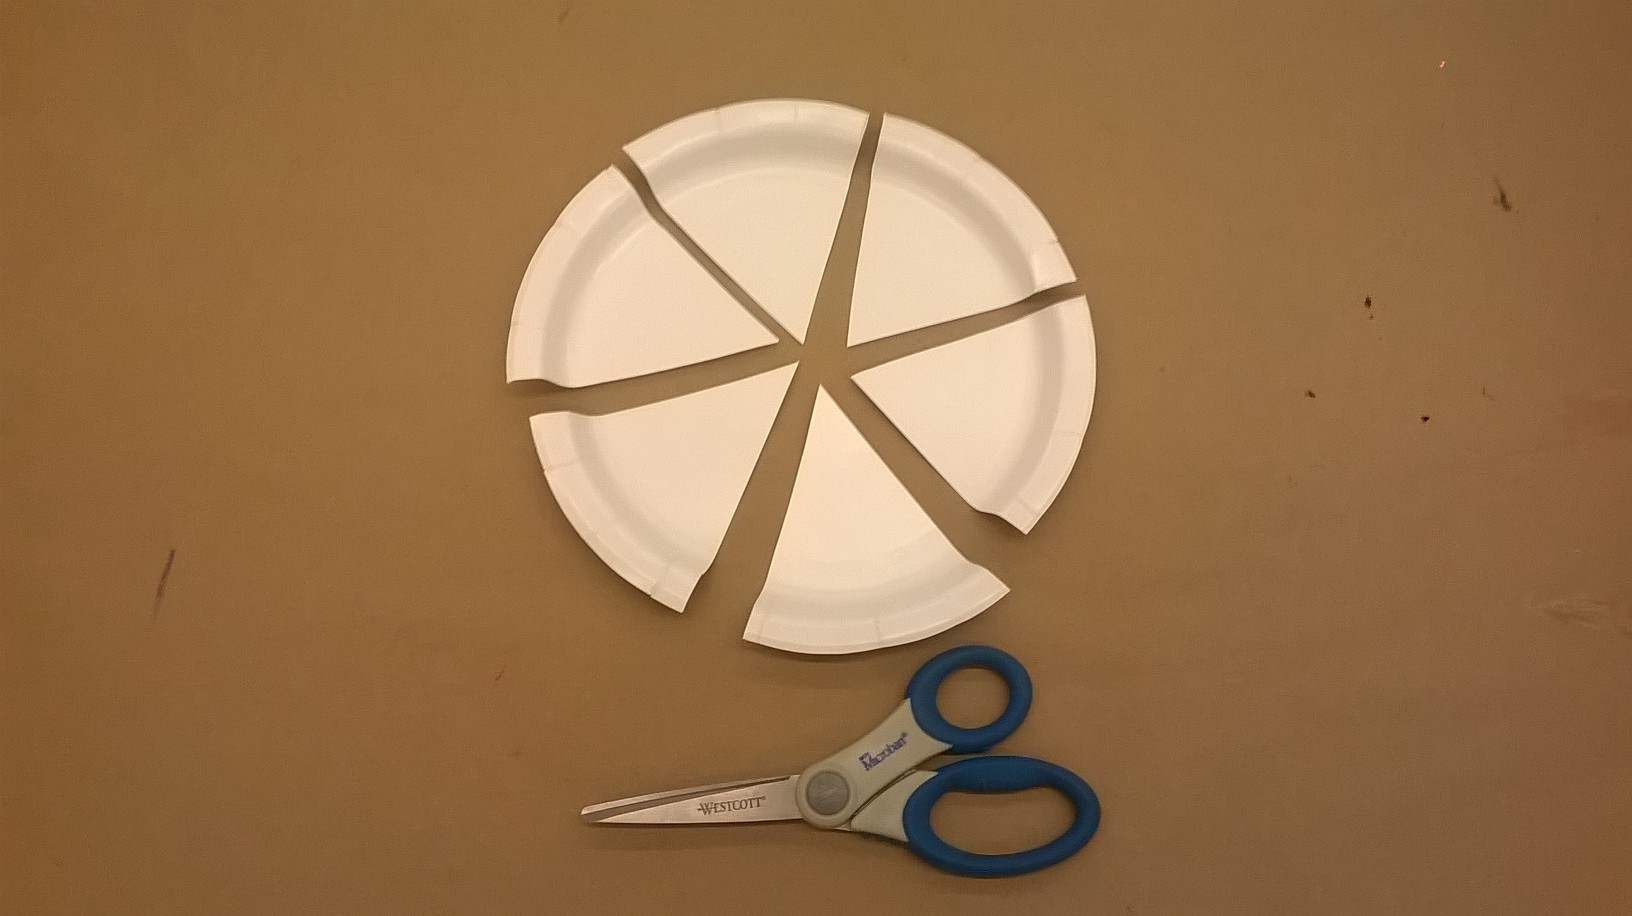
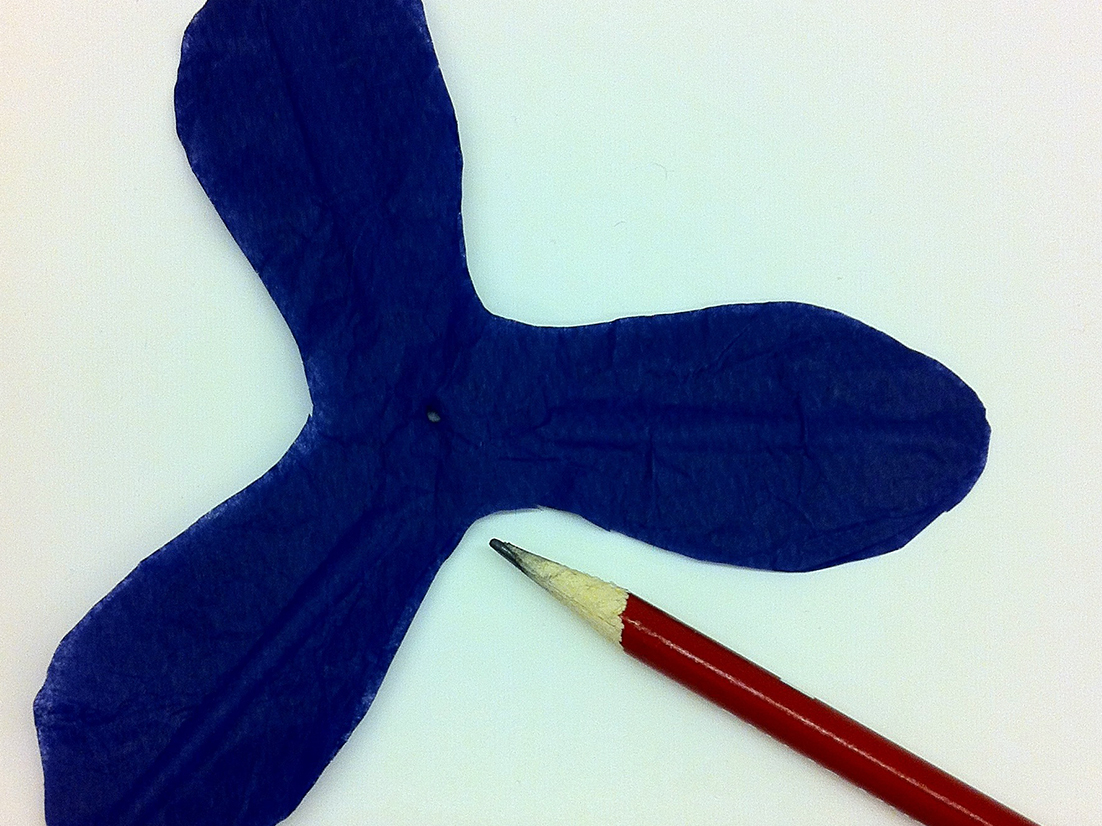
1. Trace and cut out two each of Iris A and Iris B in your tissue paper of choice. Double-layering the tissue paper will help beef up the flower.

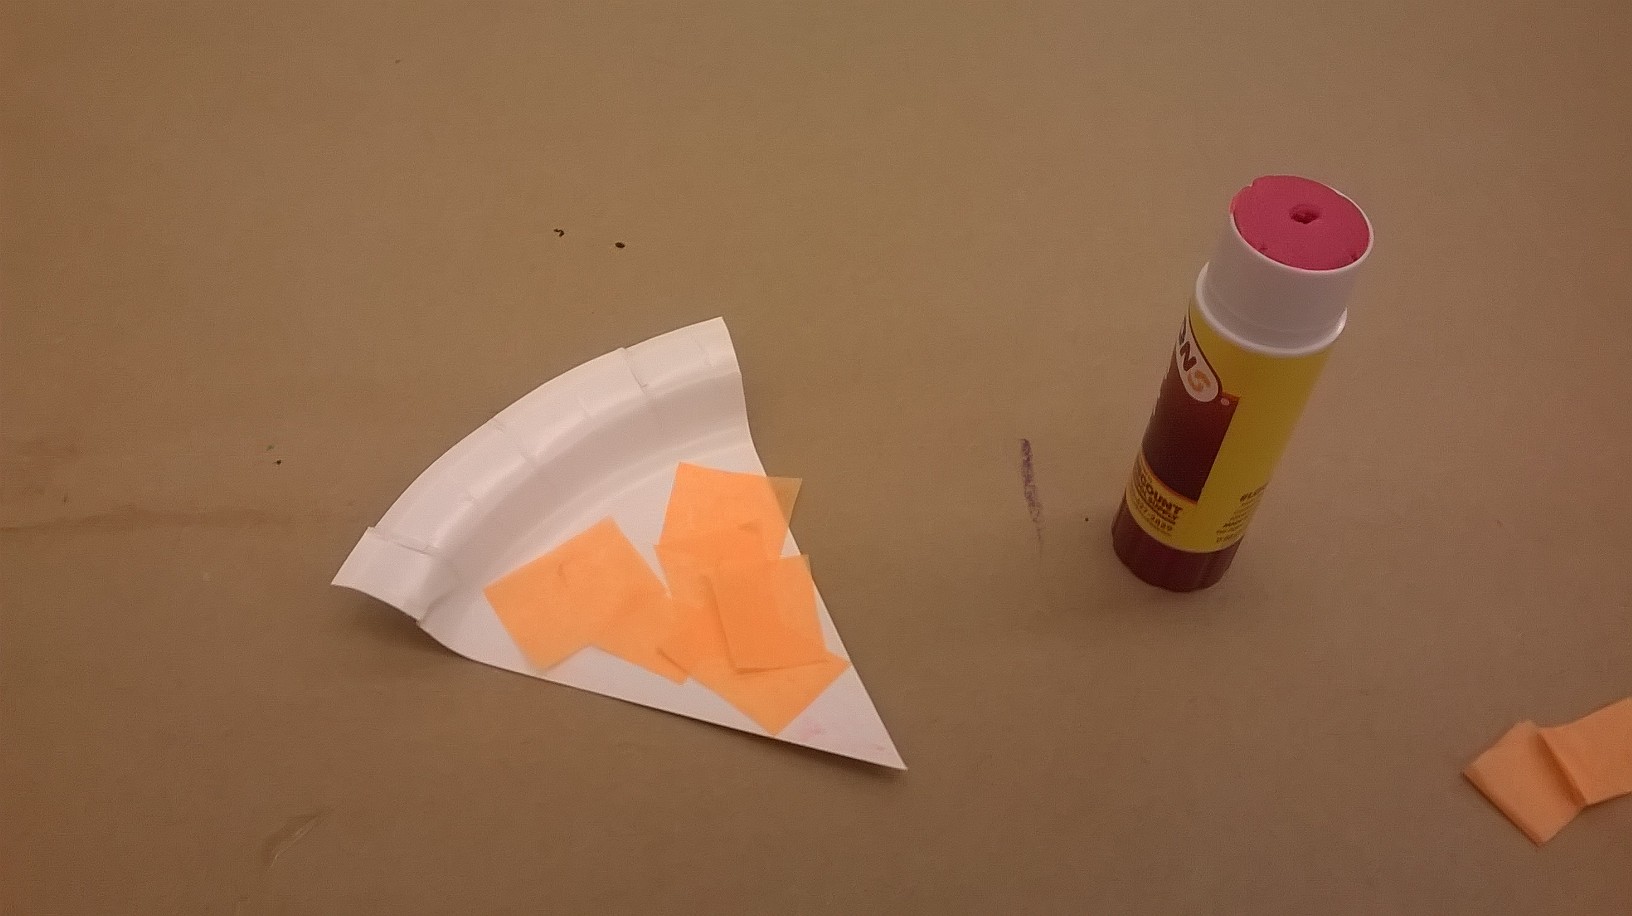
2. Roll six pieces of tape – one for each pair of petals – in on themselves, sticky side out. Lay one tape roll lengthwise along each petal of one set of Iris A and Iris B. Make sure you don’t cover up the very center of Iris B! This will make Step 4 a little easier.

3. Match up the second set of Iris A and Iris B with the first and press down, sandwiching the rolls of tape between the two layers of tissue paper.

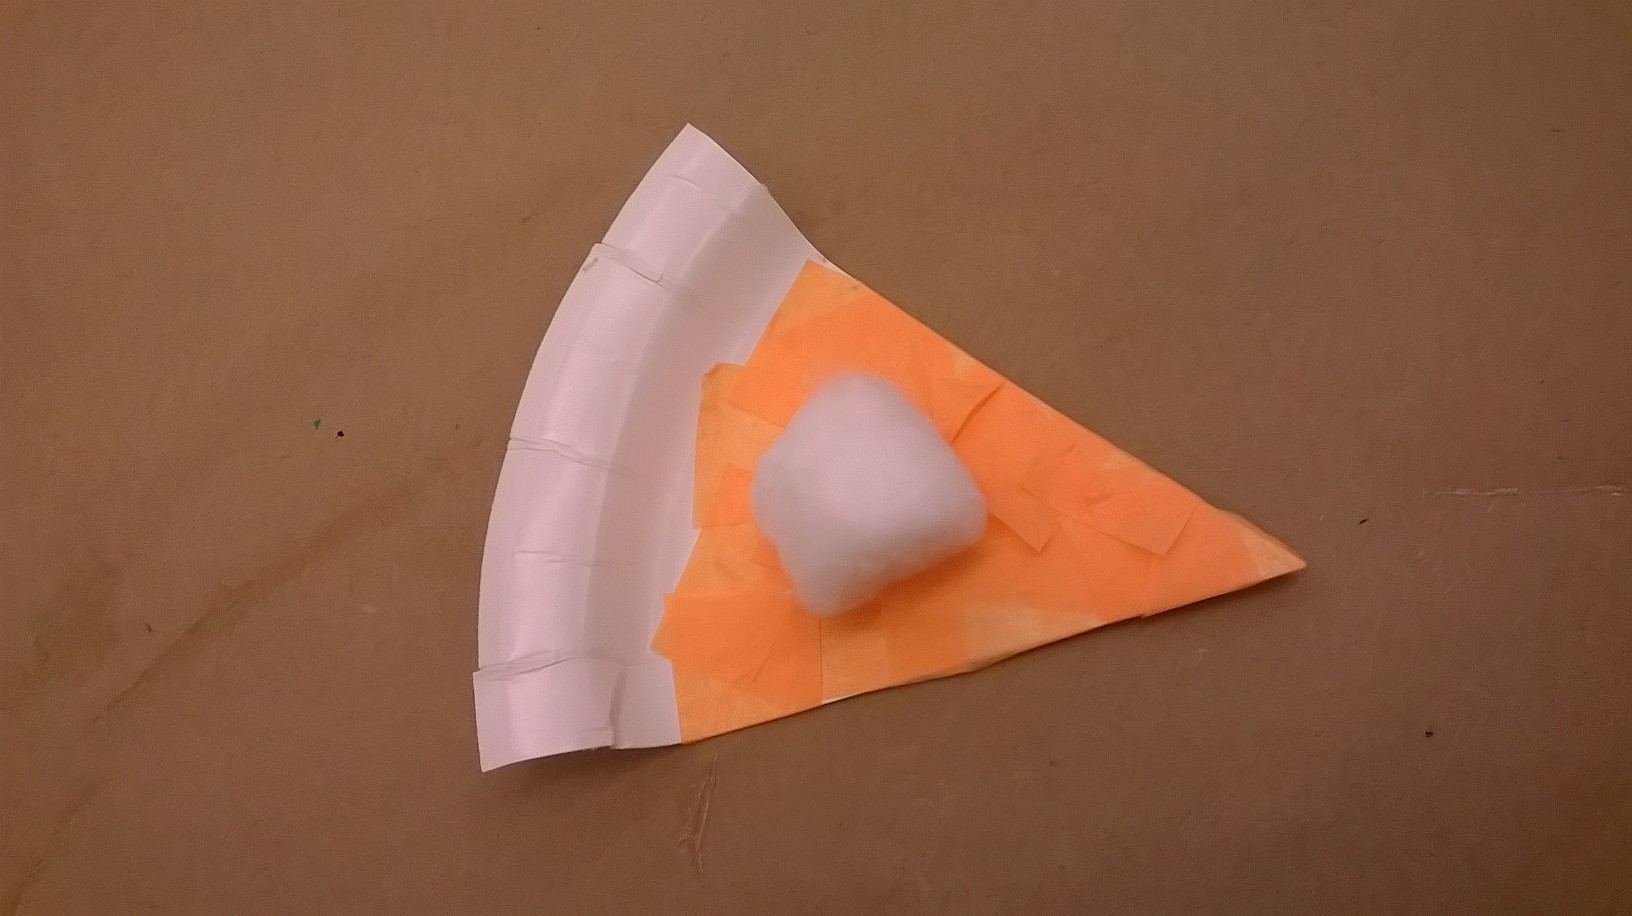
4. With the point of a pen or pencil, poke a small hole right through the center of your Iris B cutout or tissue paper and tape sandwich. This is why you didn’t want to block the very middle with tape in Step 2! Be careful not to press too strongly – you don’t want to accidentally rip your flower base in half.

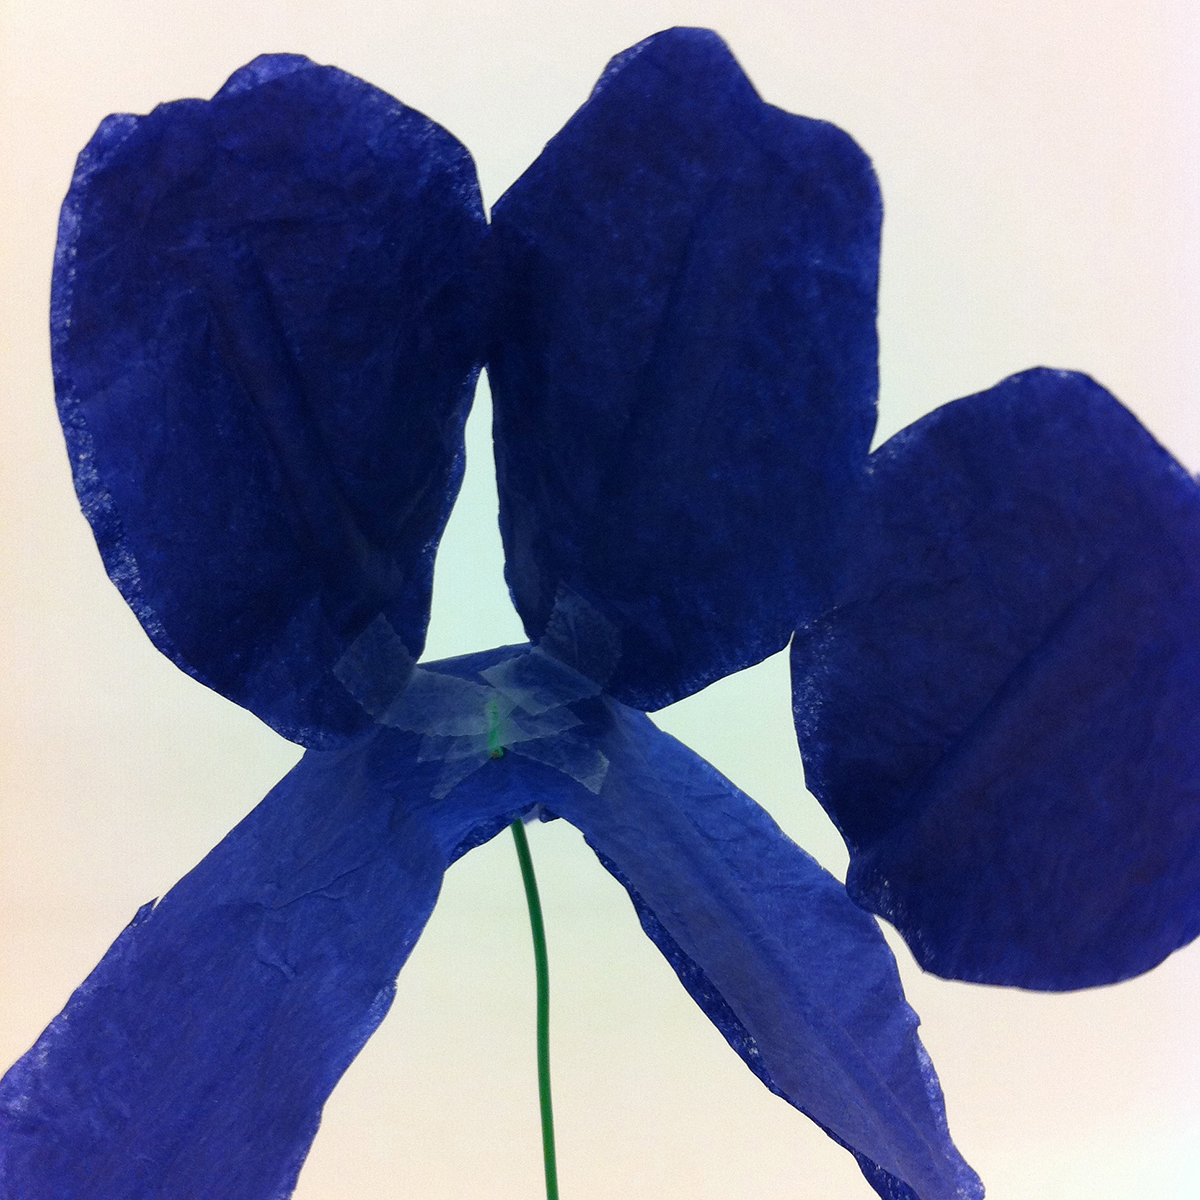
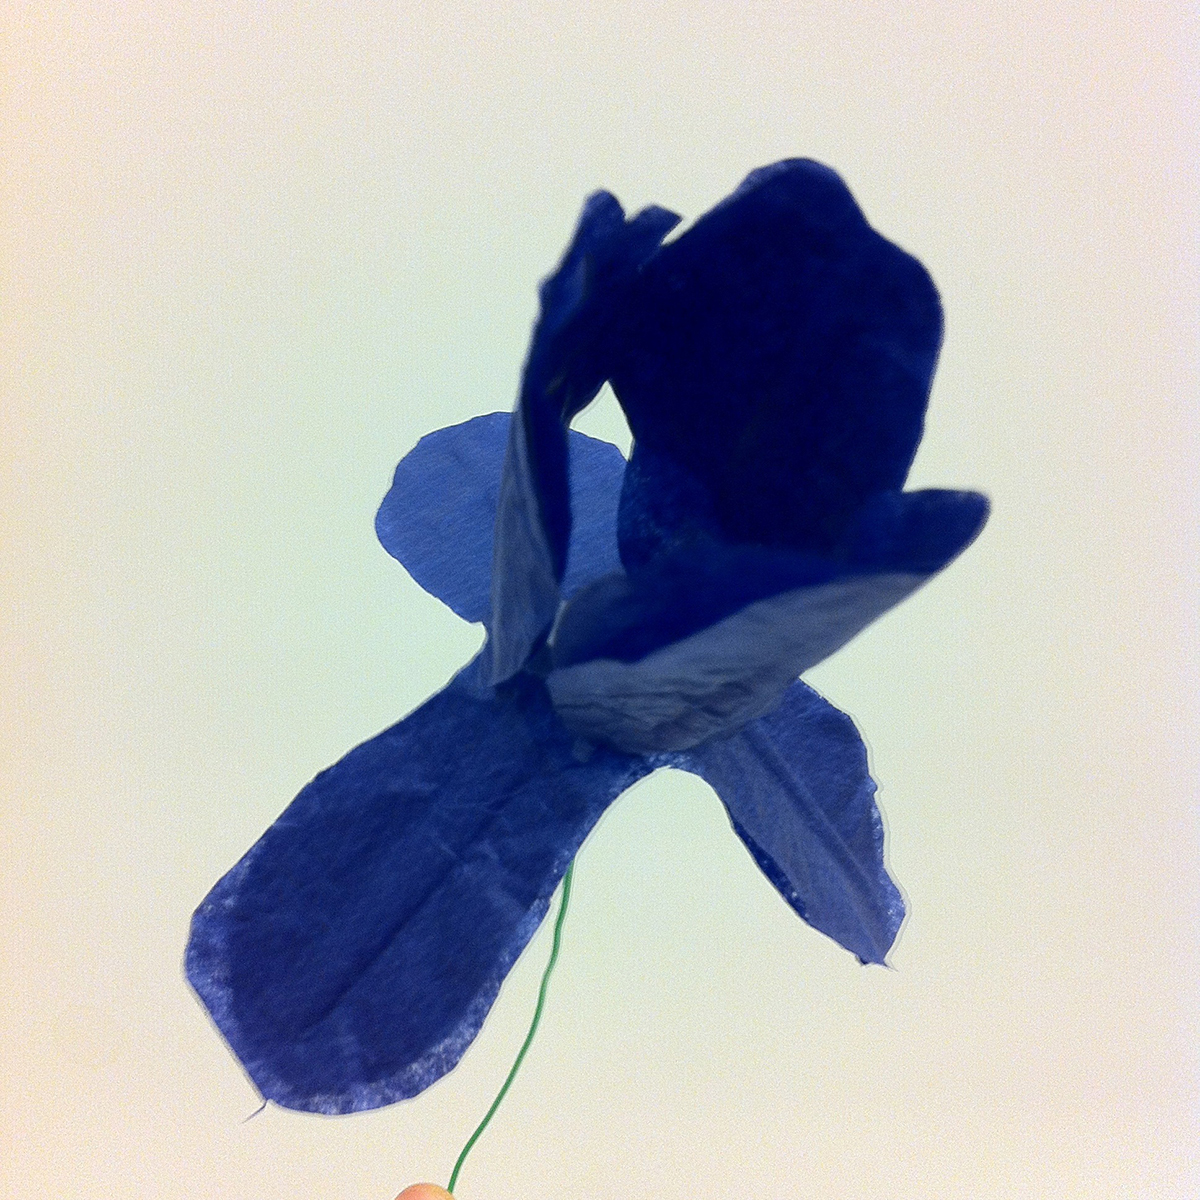
5. Make an L-shaped bend in the end of your wire or pipe cleaner and thread it through the hole you just made in Iris B. Adjust so that the bend end lies flat on Iris B and the remaining wire/pipe cleaner extends downwards in a straight line. Secure with tape.

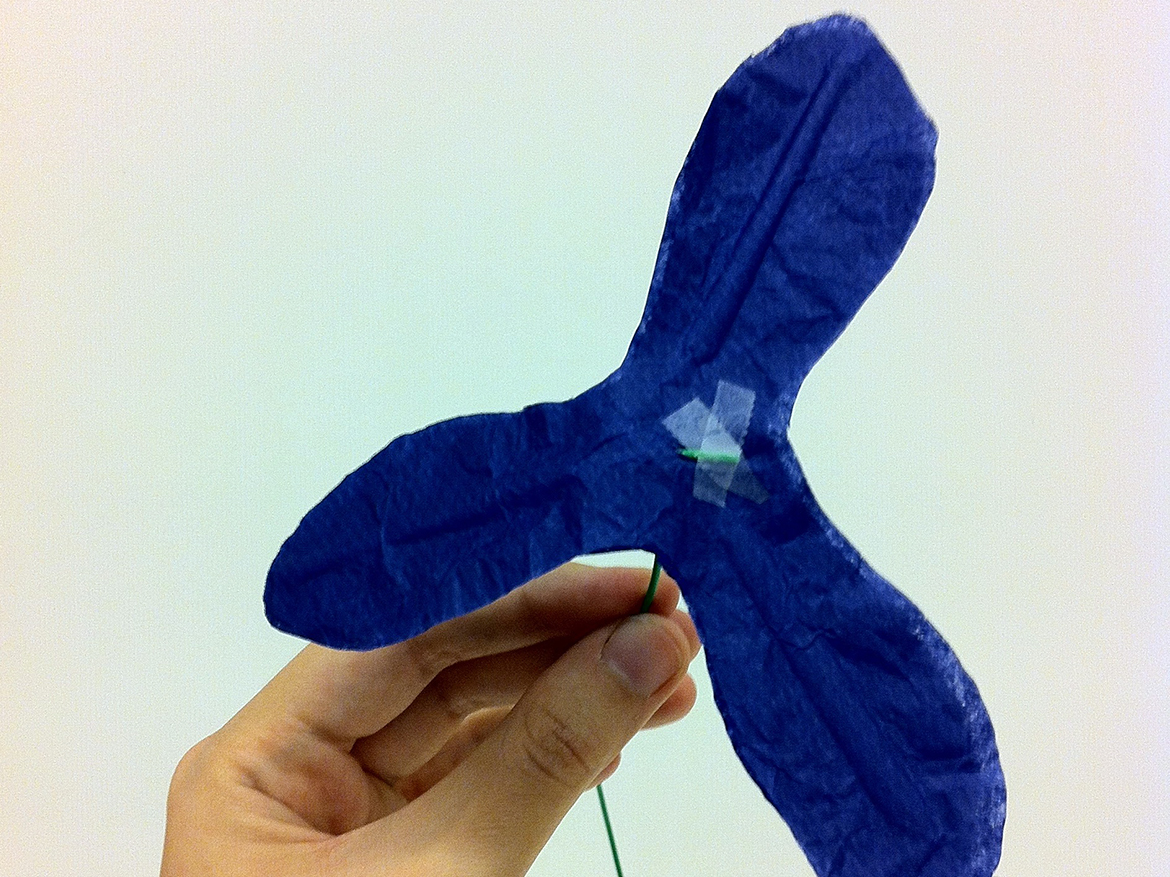
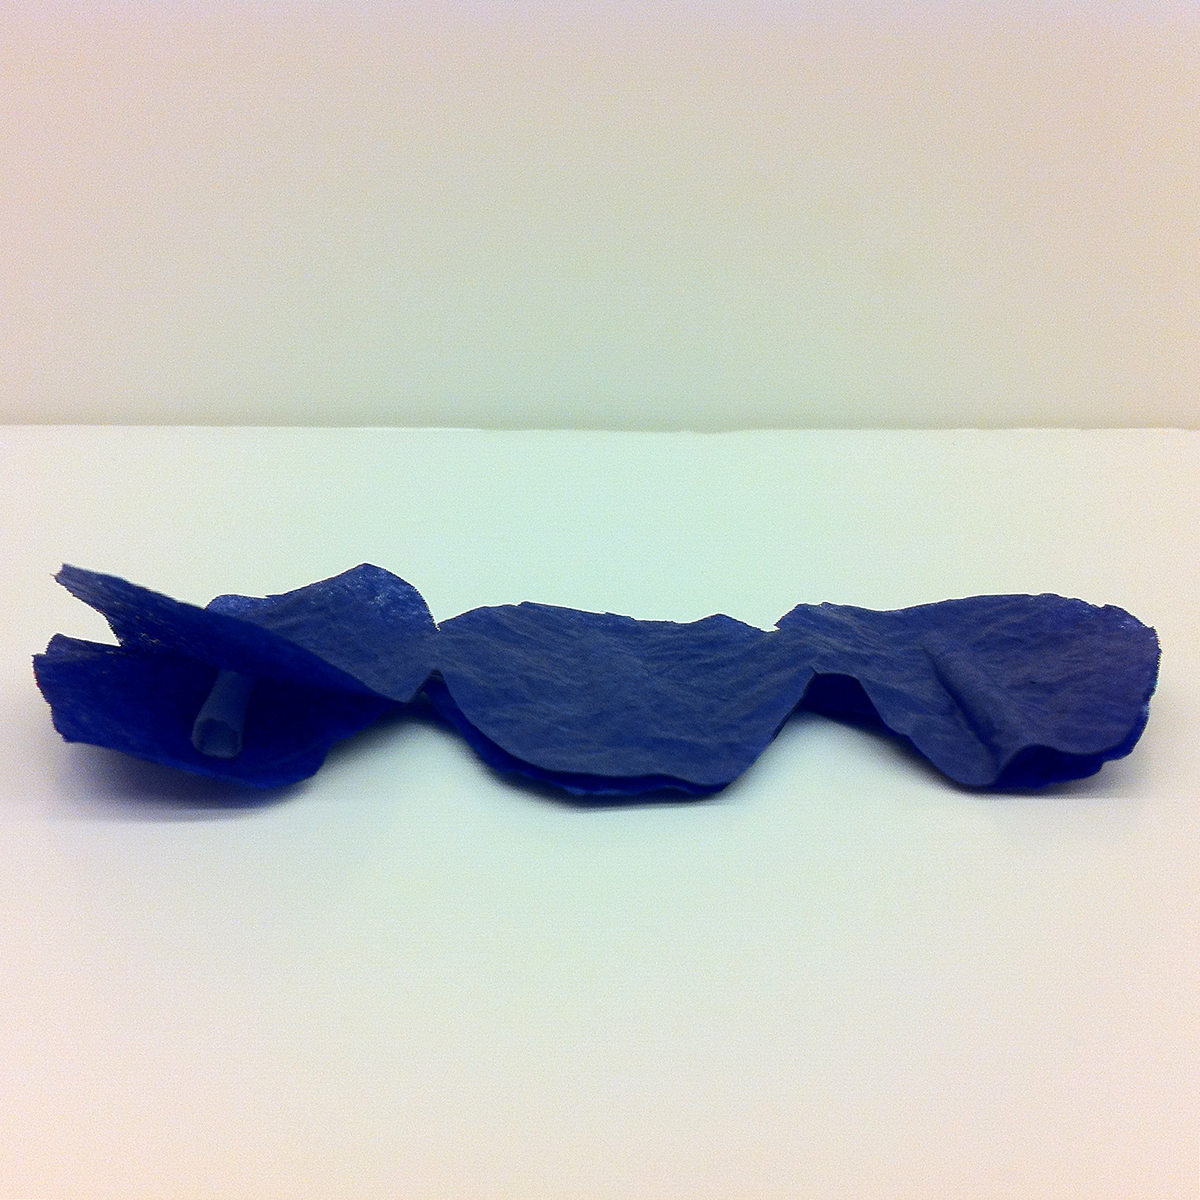
6. Using three narrow pieces of tape, attach the bases of Iris A’s petals to the spots marked in the template with dashed lines. I suggest doing this so the tape pieces end up on the interior of the flowerand aren’t visible.

7. Finally, embellish with whatever extras strike your fancy – paint, markers, glitter, you name it – and arrange your completed iris with your other flower creations in a vase.

Bouquet of (Paper!) Flowers in a Blue Vase (2014), Jennifer Sheppard

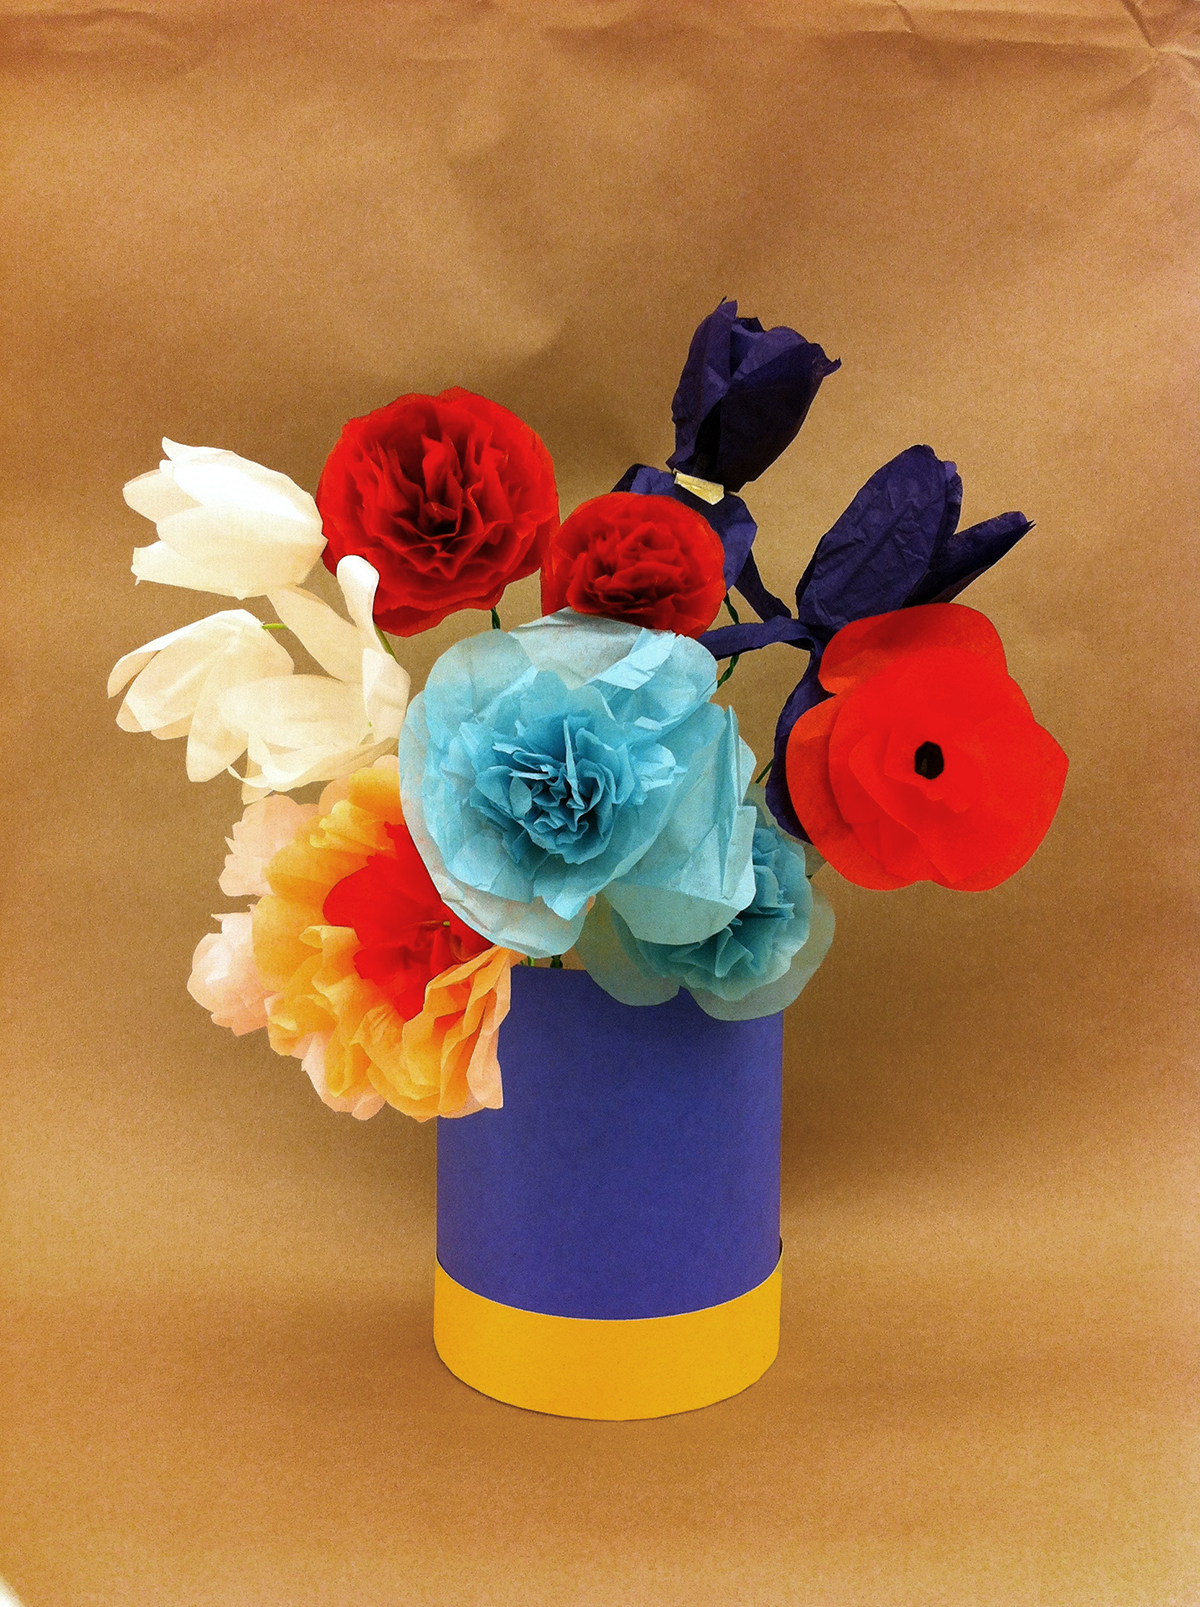
Jennifer Sheppard, Bouquet of Paper Flowers in a Blue Vase, 2014

Voila! You now have a beautiful bouquet that needs no water…in fact, you probably shouldn’t have water anywhere near your nice new paper flowers, unless soggy is the look you’re going for! So skip that annoying watering step and enjoy these low maintenance blooms — and our blooming exhibition!

Jennifer Sheppard
McDermott Intern for Family and Access Teaching

Friday Photos: A Very Pinteresting Holiday

This slideshow requires JavaScript.

DMA Education staff have been as busy as Santa’s elves this holiday season, crafting, baking, painting, and getting ready for this most wonderful time of the year. We get a lot of inspiration from the art that surrounds us each day, but we also find inspiration on a little site called Pinterest.

Check out what we’ve been doing when we’re not at the DMA. If you see a project or recipe you like, use the links below to find instructions, ingredients, materials, and recipes.

We wish you and yours a very Pinteresting Holiday!

Leah Hanson
Manager of Early Learning Programs


Archives

Flickr Photo Stream

Categories