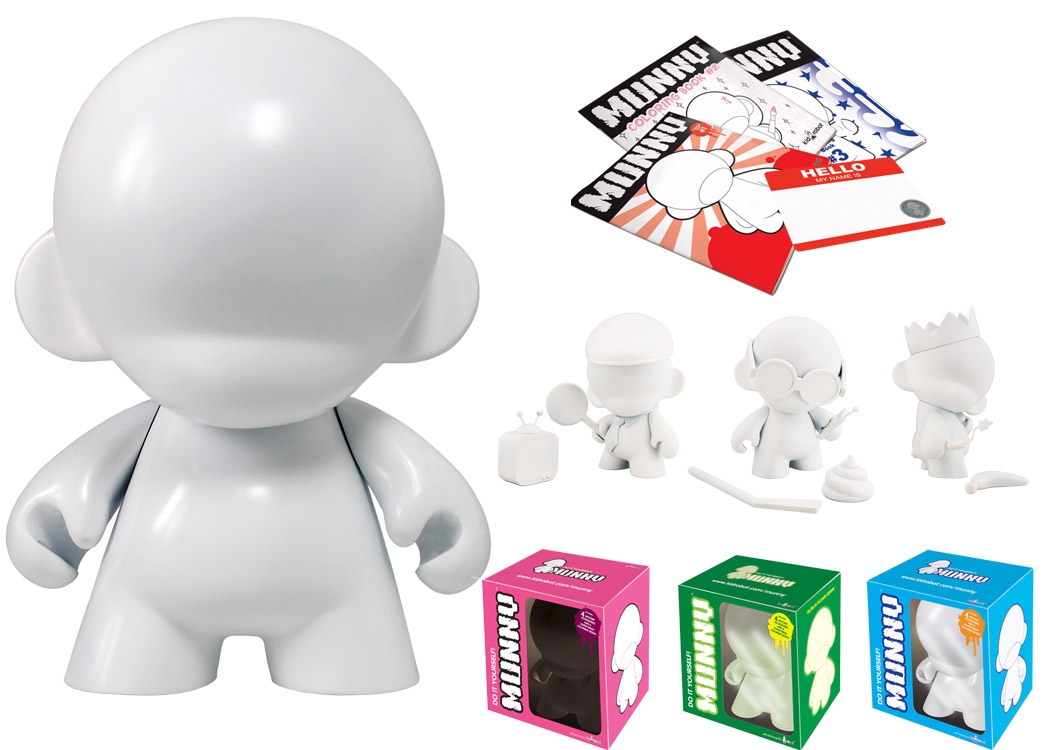
I’m a big urban vinyl toy collector, and I especially love Kidrobot’s Munny line. If you’re not familiar with them, Munnys are customizable figures that are totally suited to makers and DIY-lovers alike. I’ve been tinkering with a few examples to show at this month’s vinyl toy-themed Urban Armor teen workshop with Mark Gutting and came up with both a fun and utilitarian Munny project that I hope you enjoy!
One of the coolest things about Munnys is that you can pretty much turn them into anything you want with the right materials. You can find terrific instructions on how to turn a Munny into a speaker, so I thought I’d combine that idea with an Altoids mini-amp project that I was recently working on to create a Munny mini-amp for an MP3 player or smartphone. What’s nice about it is that the amp provides a little more juice for your music than the speaker alone, and since they are separate components, you can make more Munny speakers and interchange them with the amp. You can also use the amp with most any type of MP3 gadget!
This is definitely a more intermediate to advanced-level project for ages 13 and up that would be perfect to do over a weekend. You’ll also need a few specialized tools and basic knowledge of circuits and soldering.
What you need:
- Munny mini-figure
- Mini speaker: This can be scavenged from an old pair of computer speakers, etc. I used a 1½” speaker to fit the figure’s head
- Exacto knife
- Pencil
- Spray paint (make sure to get one that works on metal and plastic)
- Altoids tin
- Mini amp components: I used Canakit’s 5W kit
- Speaker wire
- Soldering iron and solder
- Hair dryer
- Single hole punch
- Tin snips
- Batting
- Silicone glue or caulk
- 9-volt adapter
- Male to male audio cable
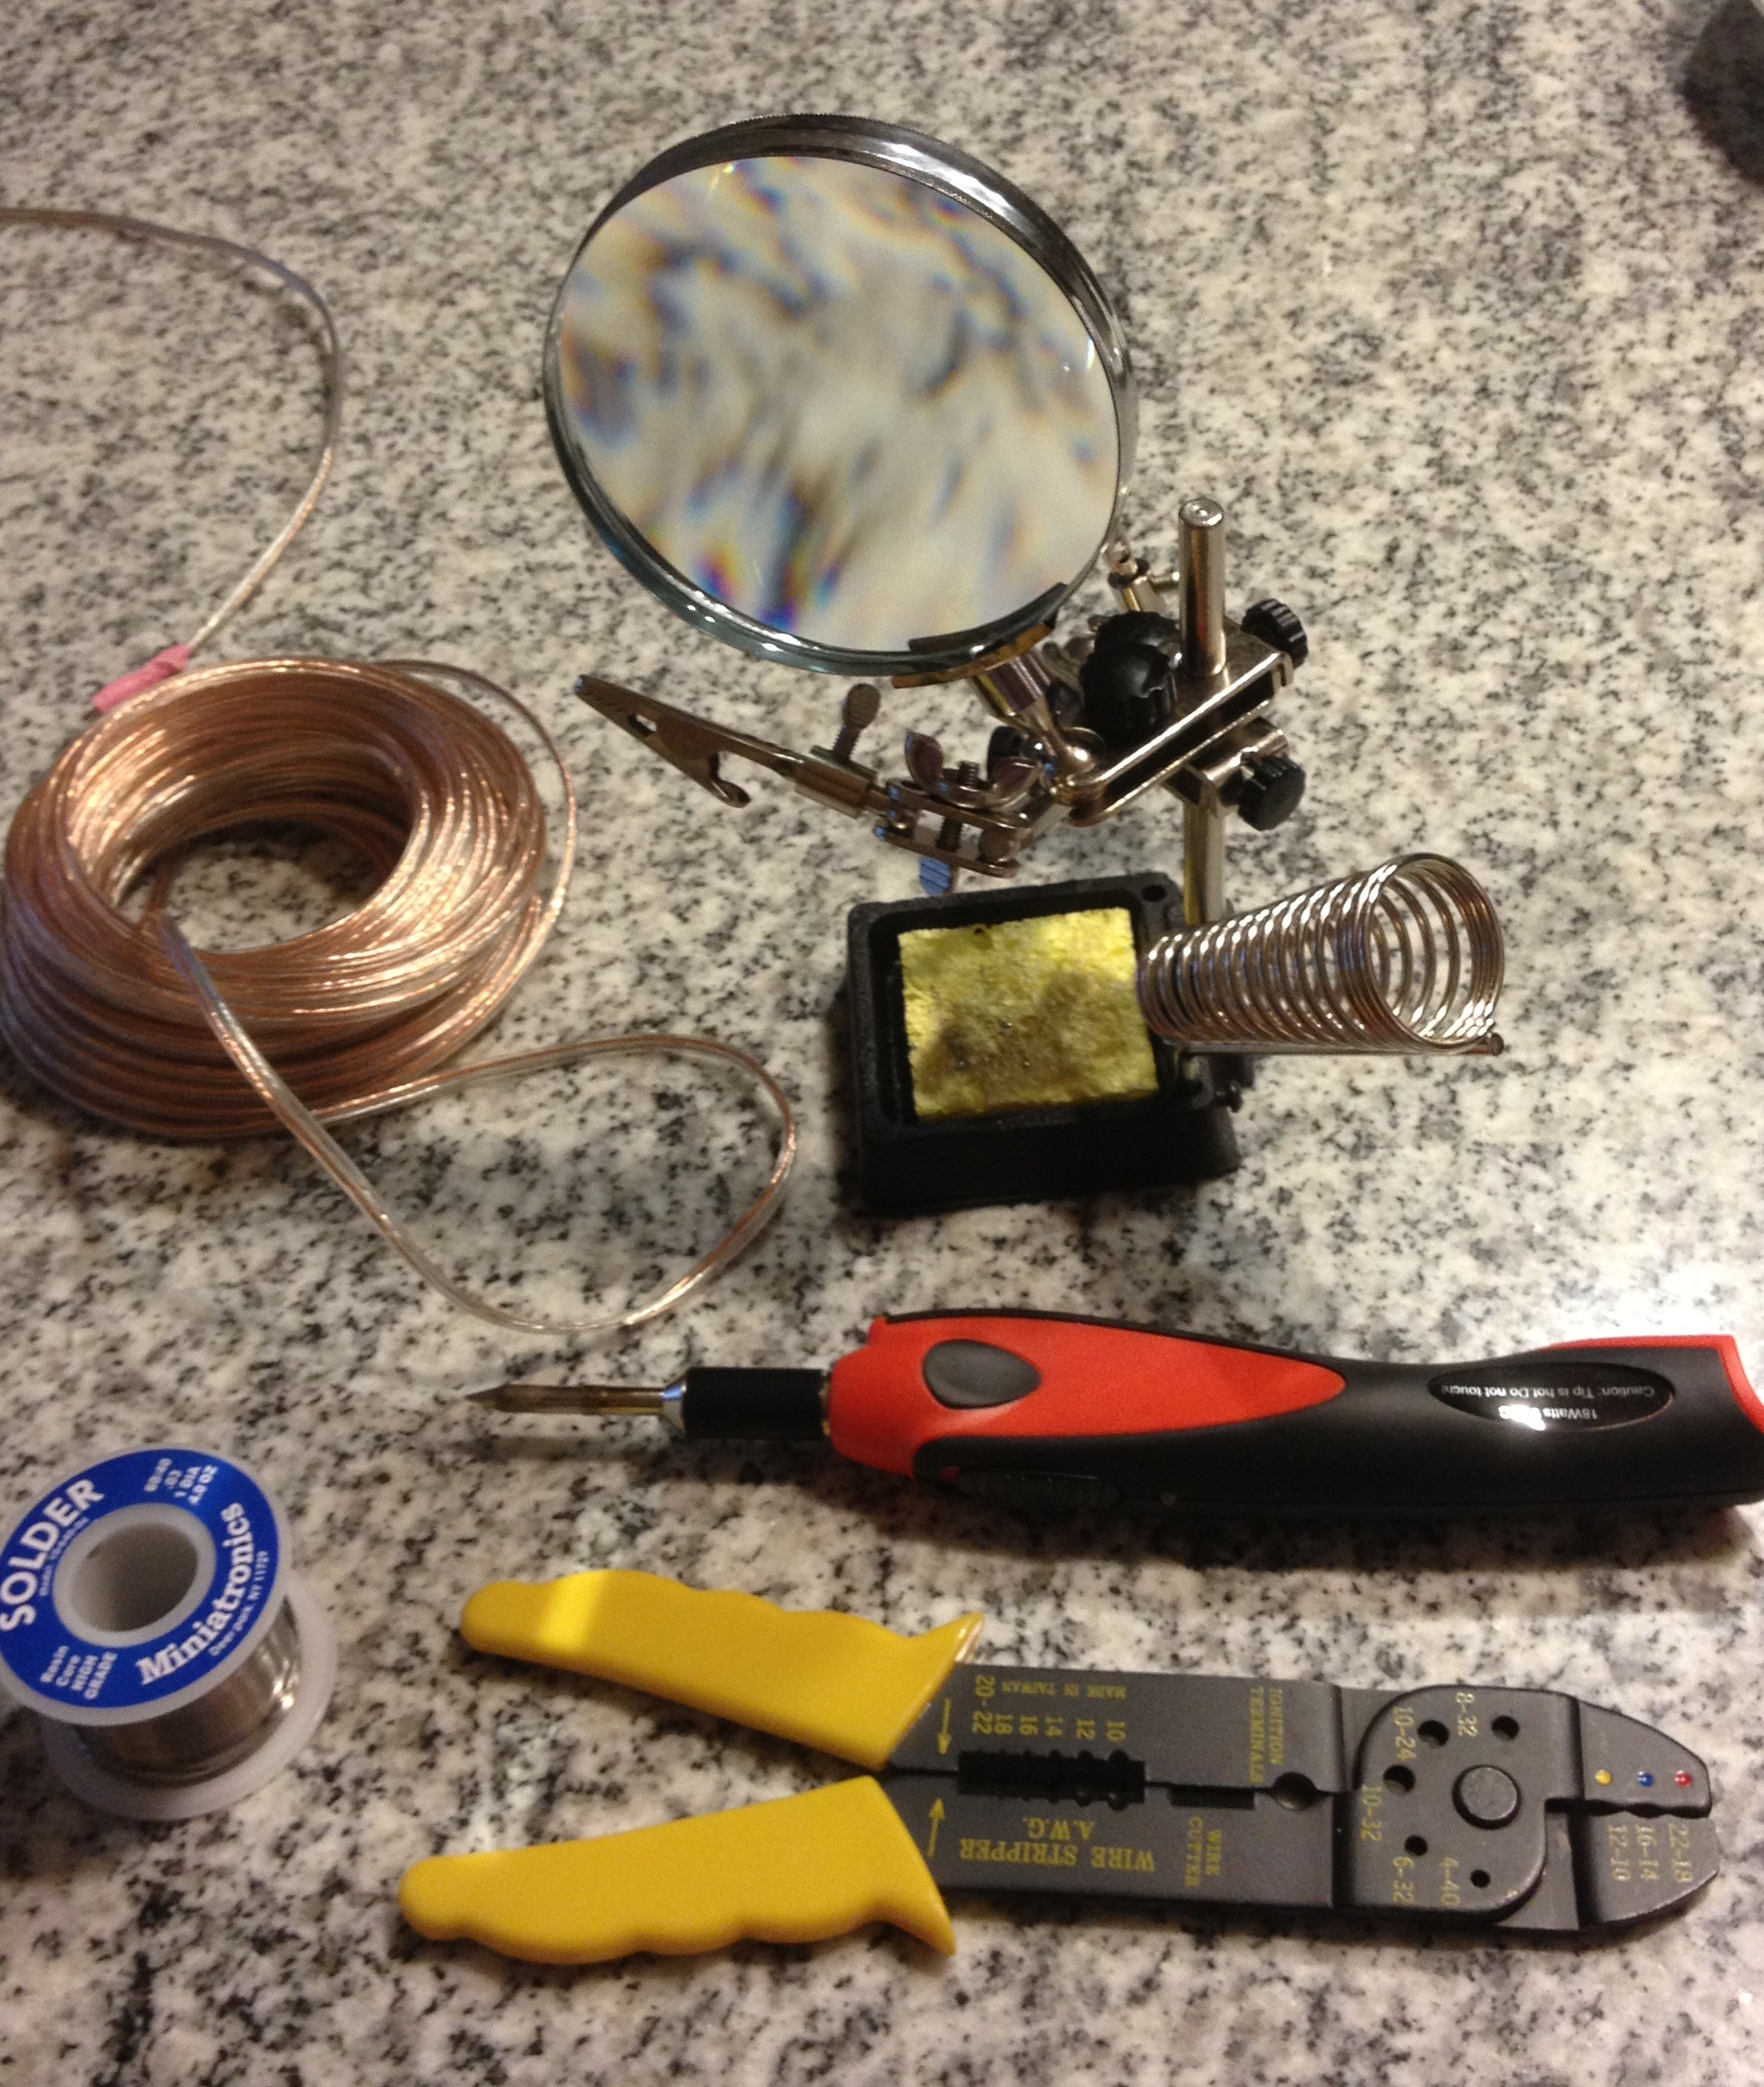
Some of the tools you will need
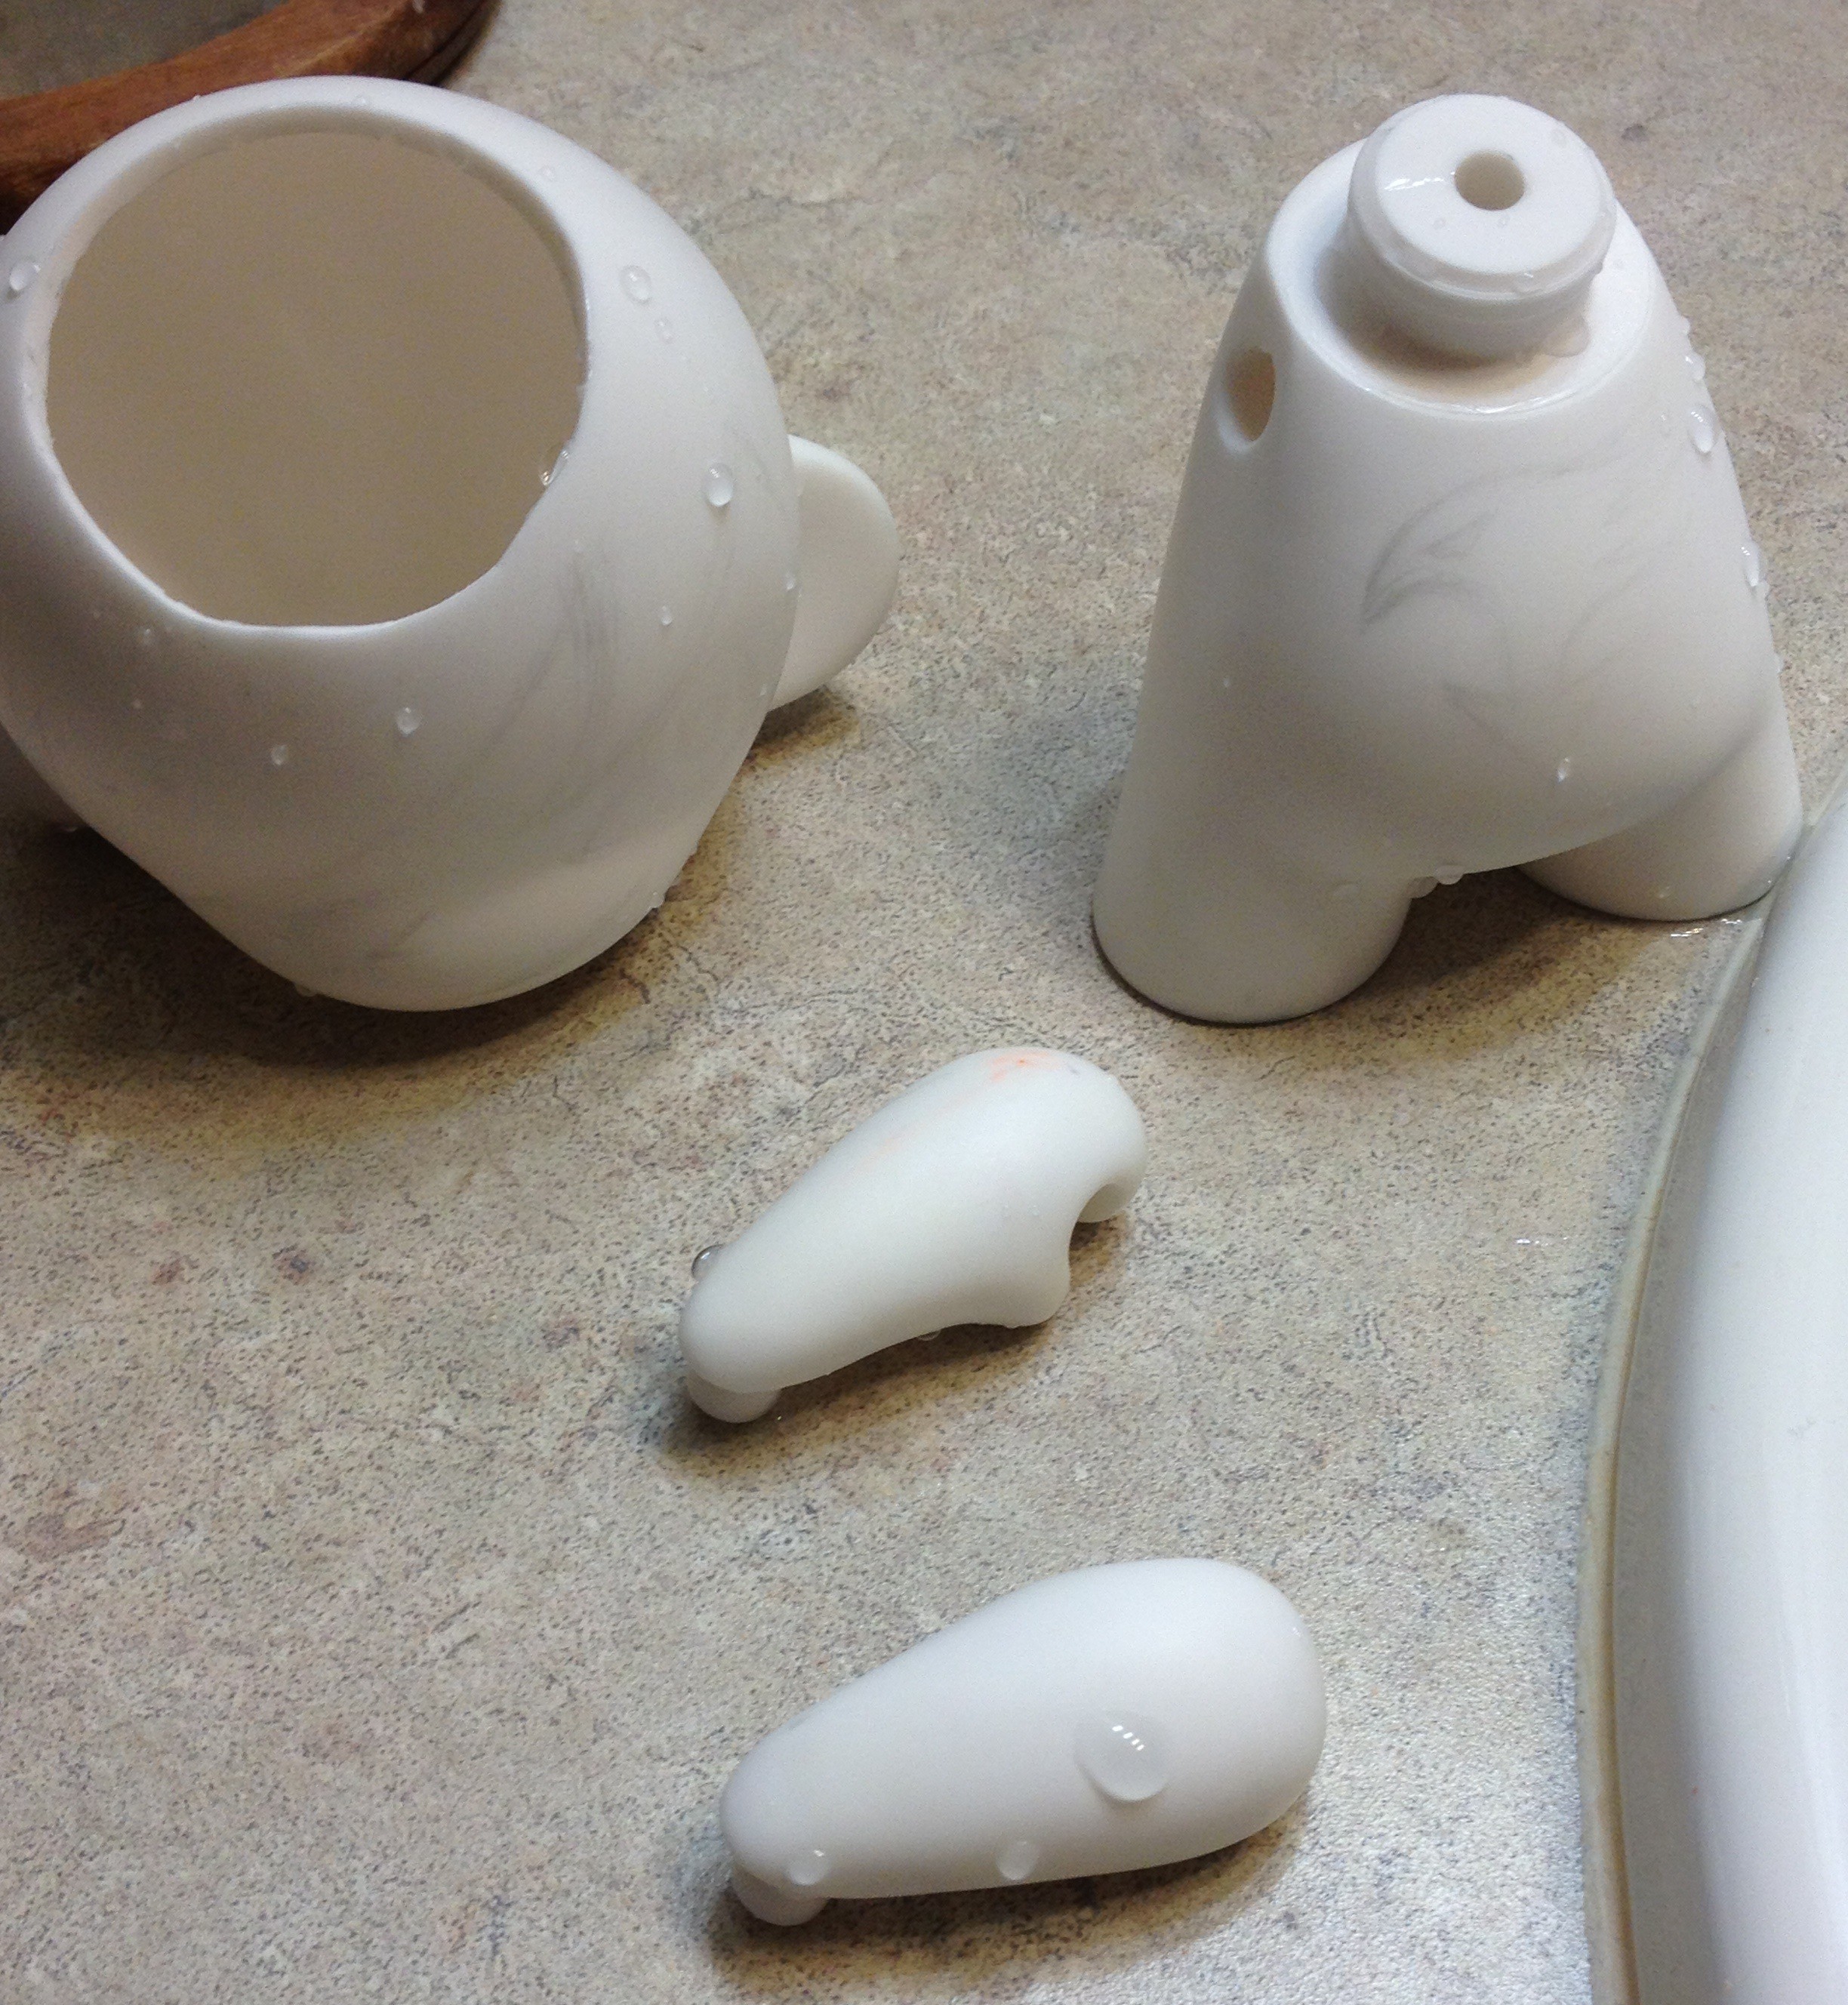
Step 1: Clean Your Munny
Carefully take apart your mini-figure and give it a nice bath using mild soap to remove any oils, residues, etc.
Step 2: Cut a hole for the speaker and cable
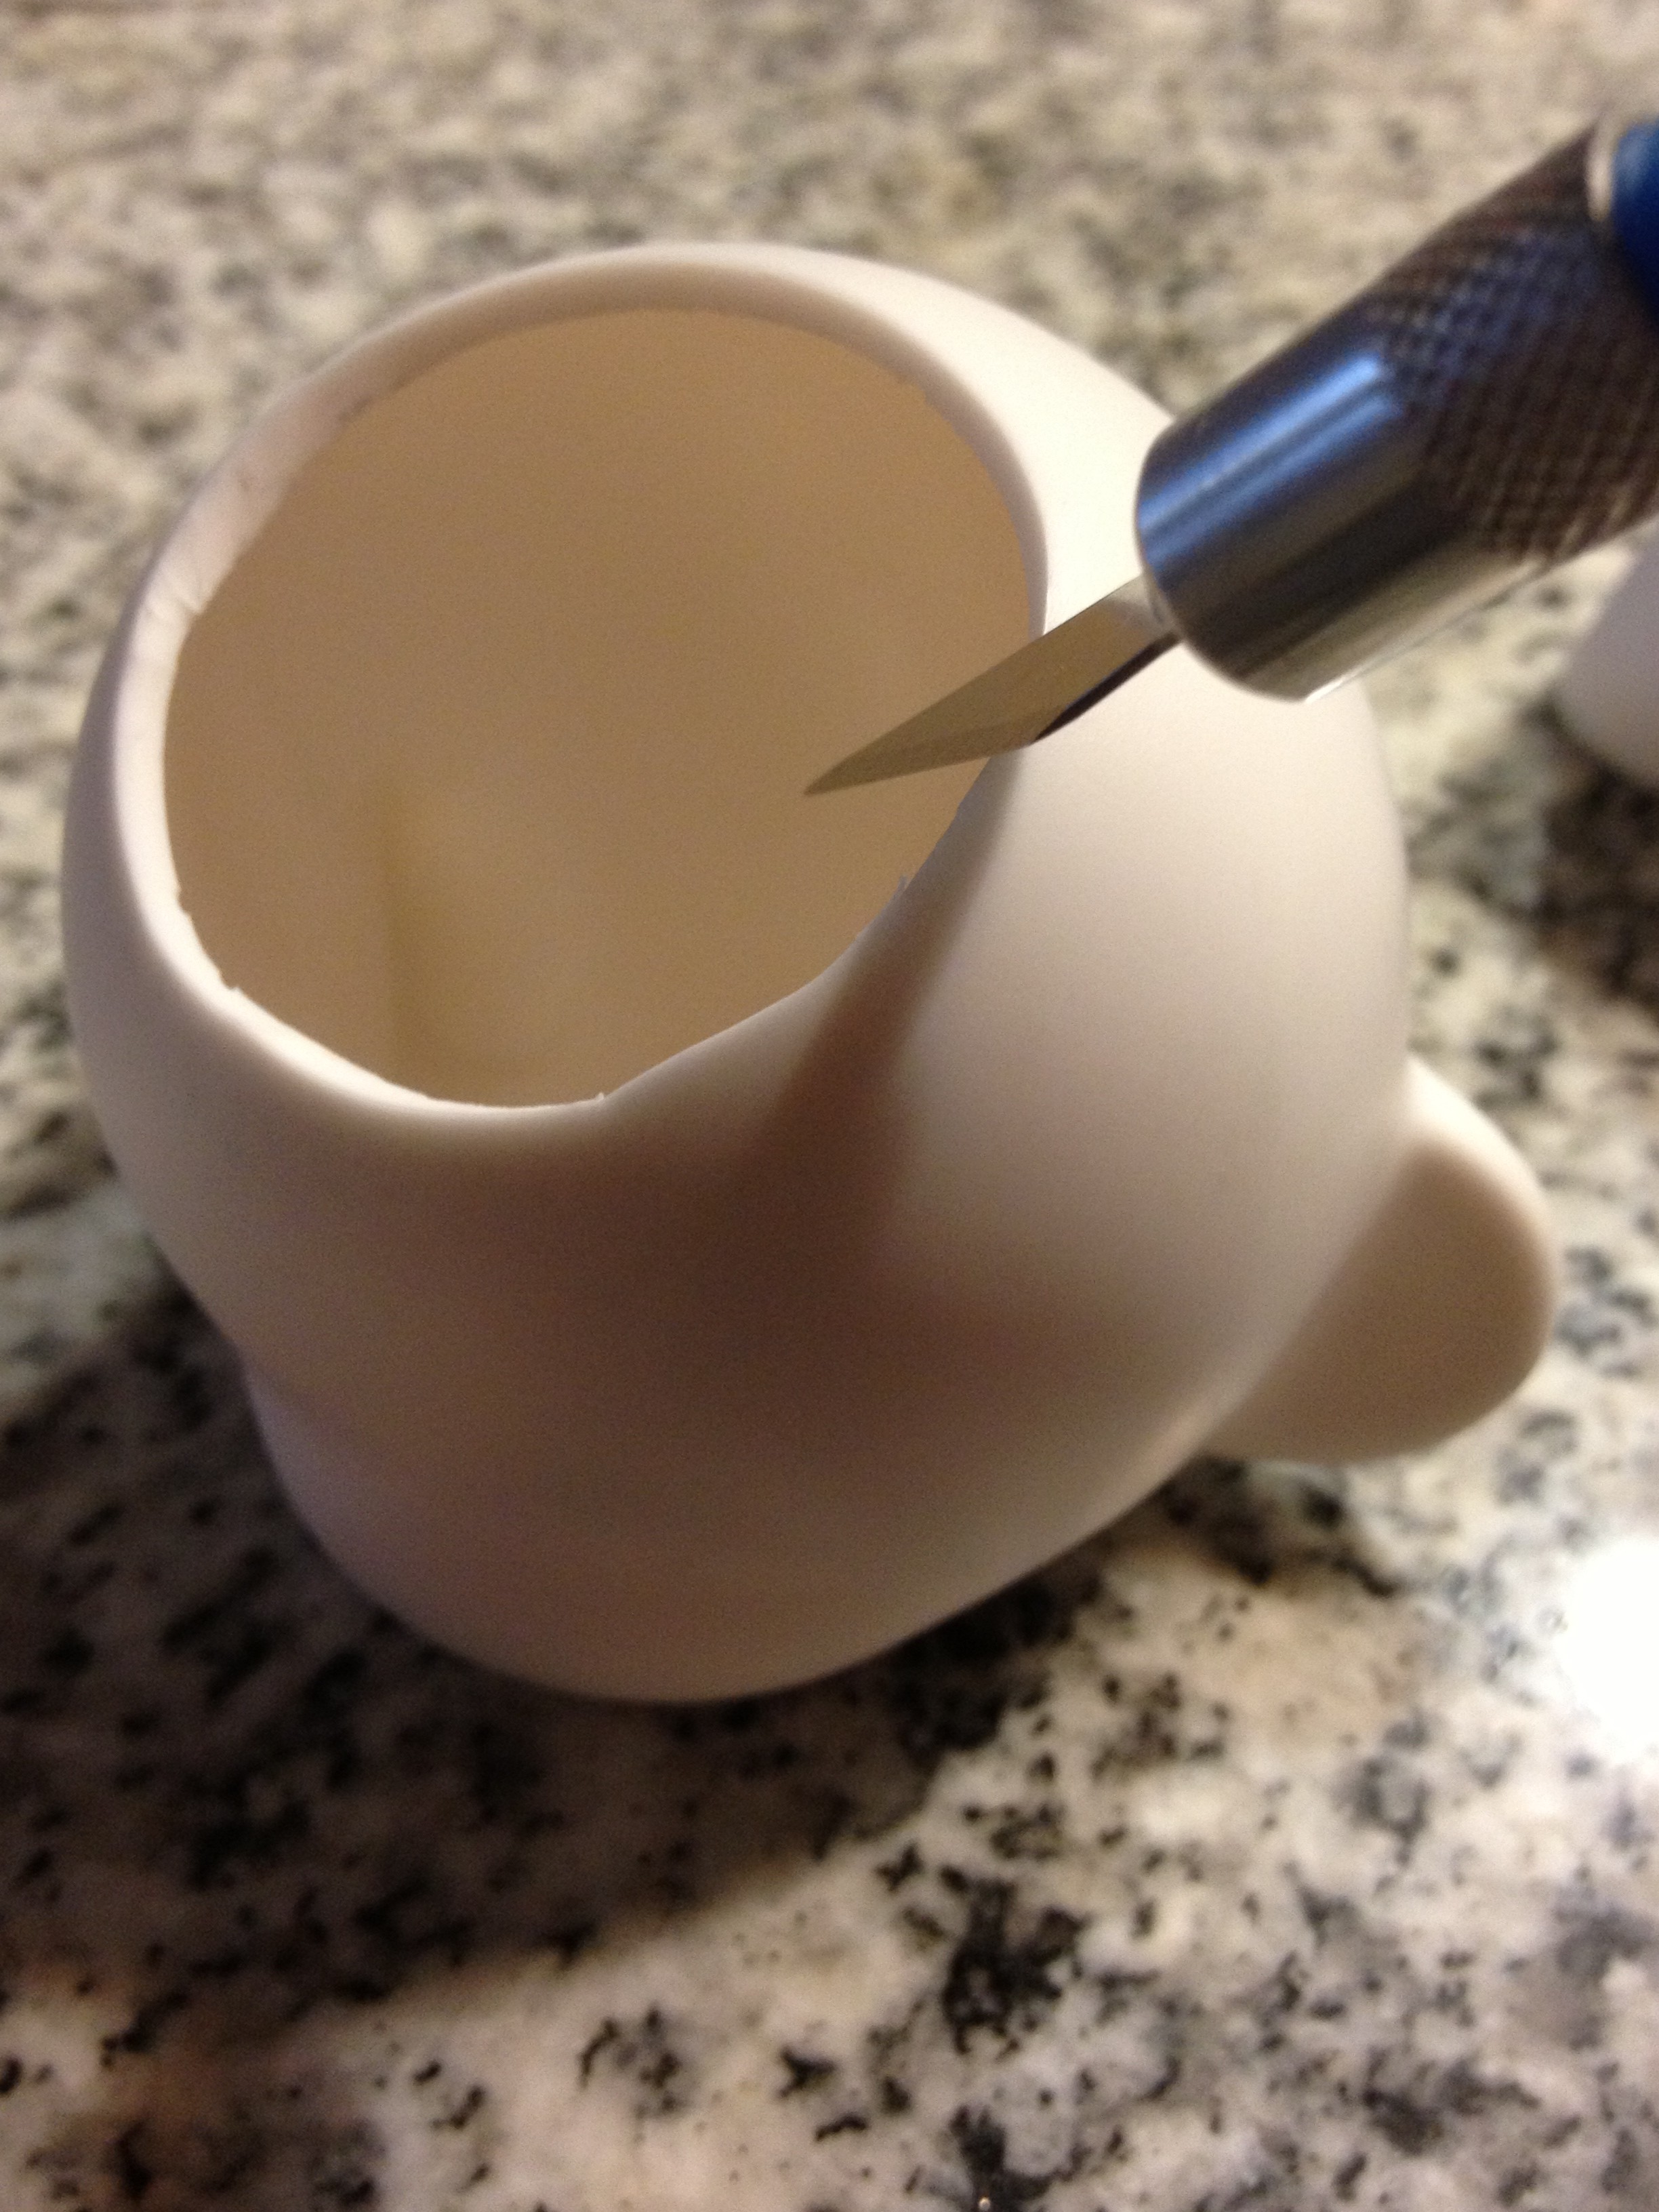
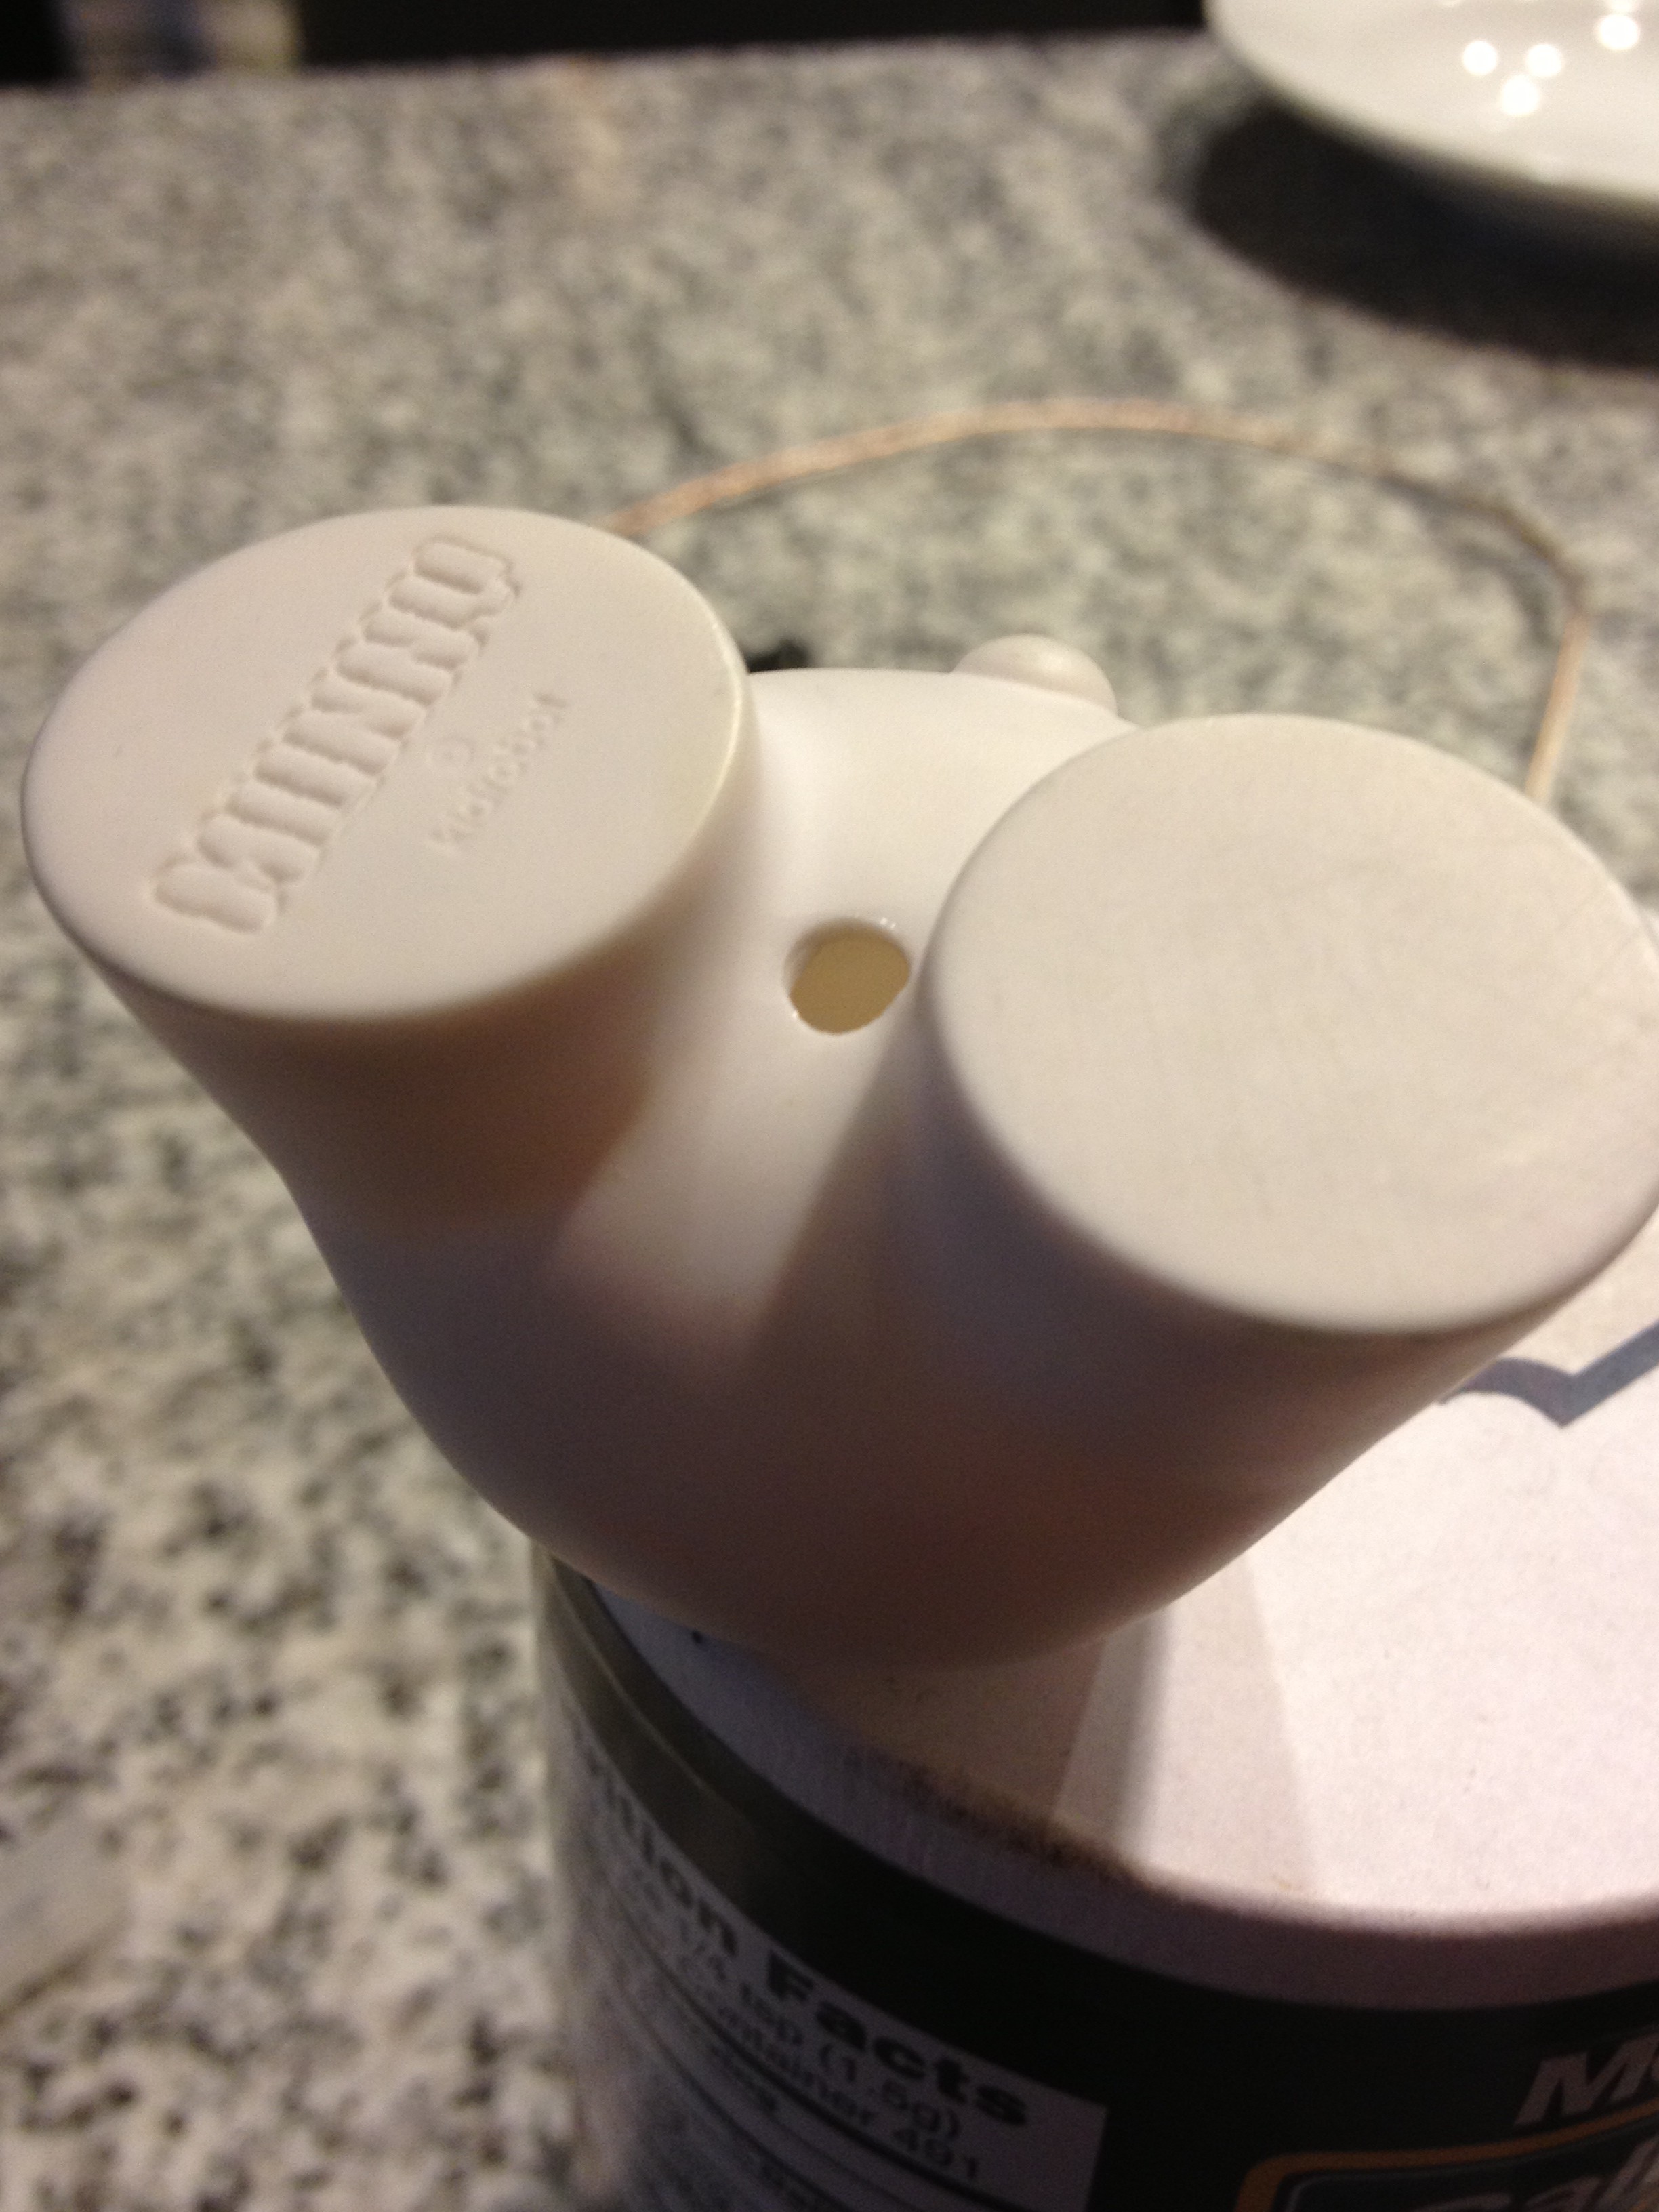
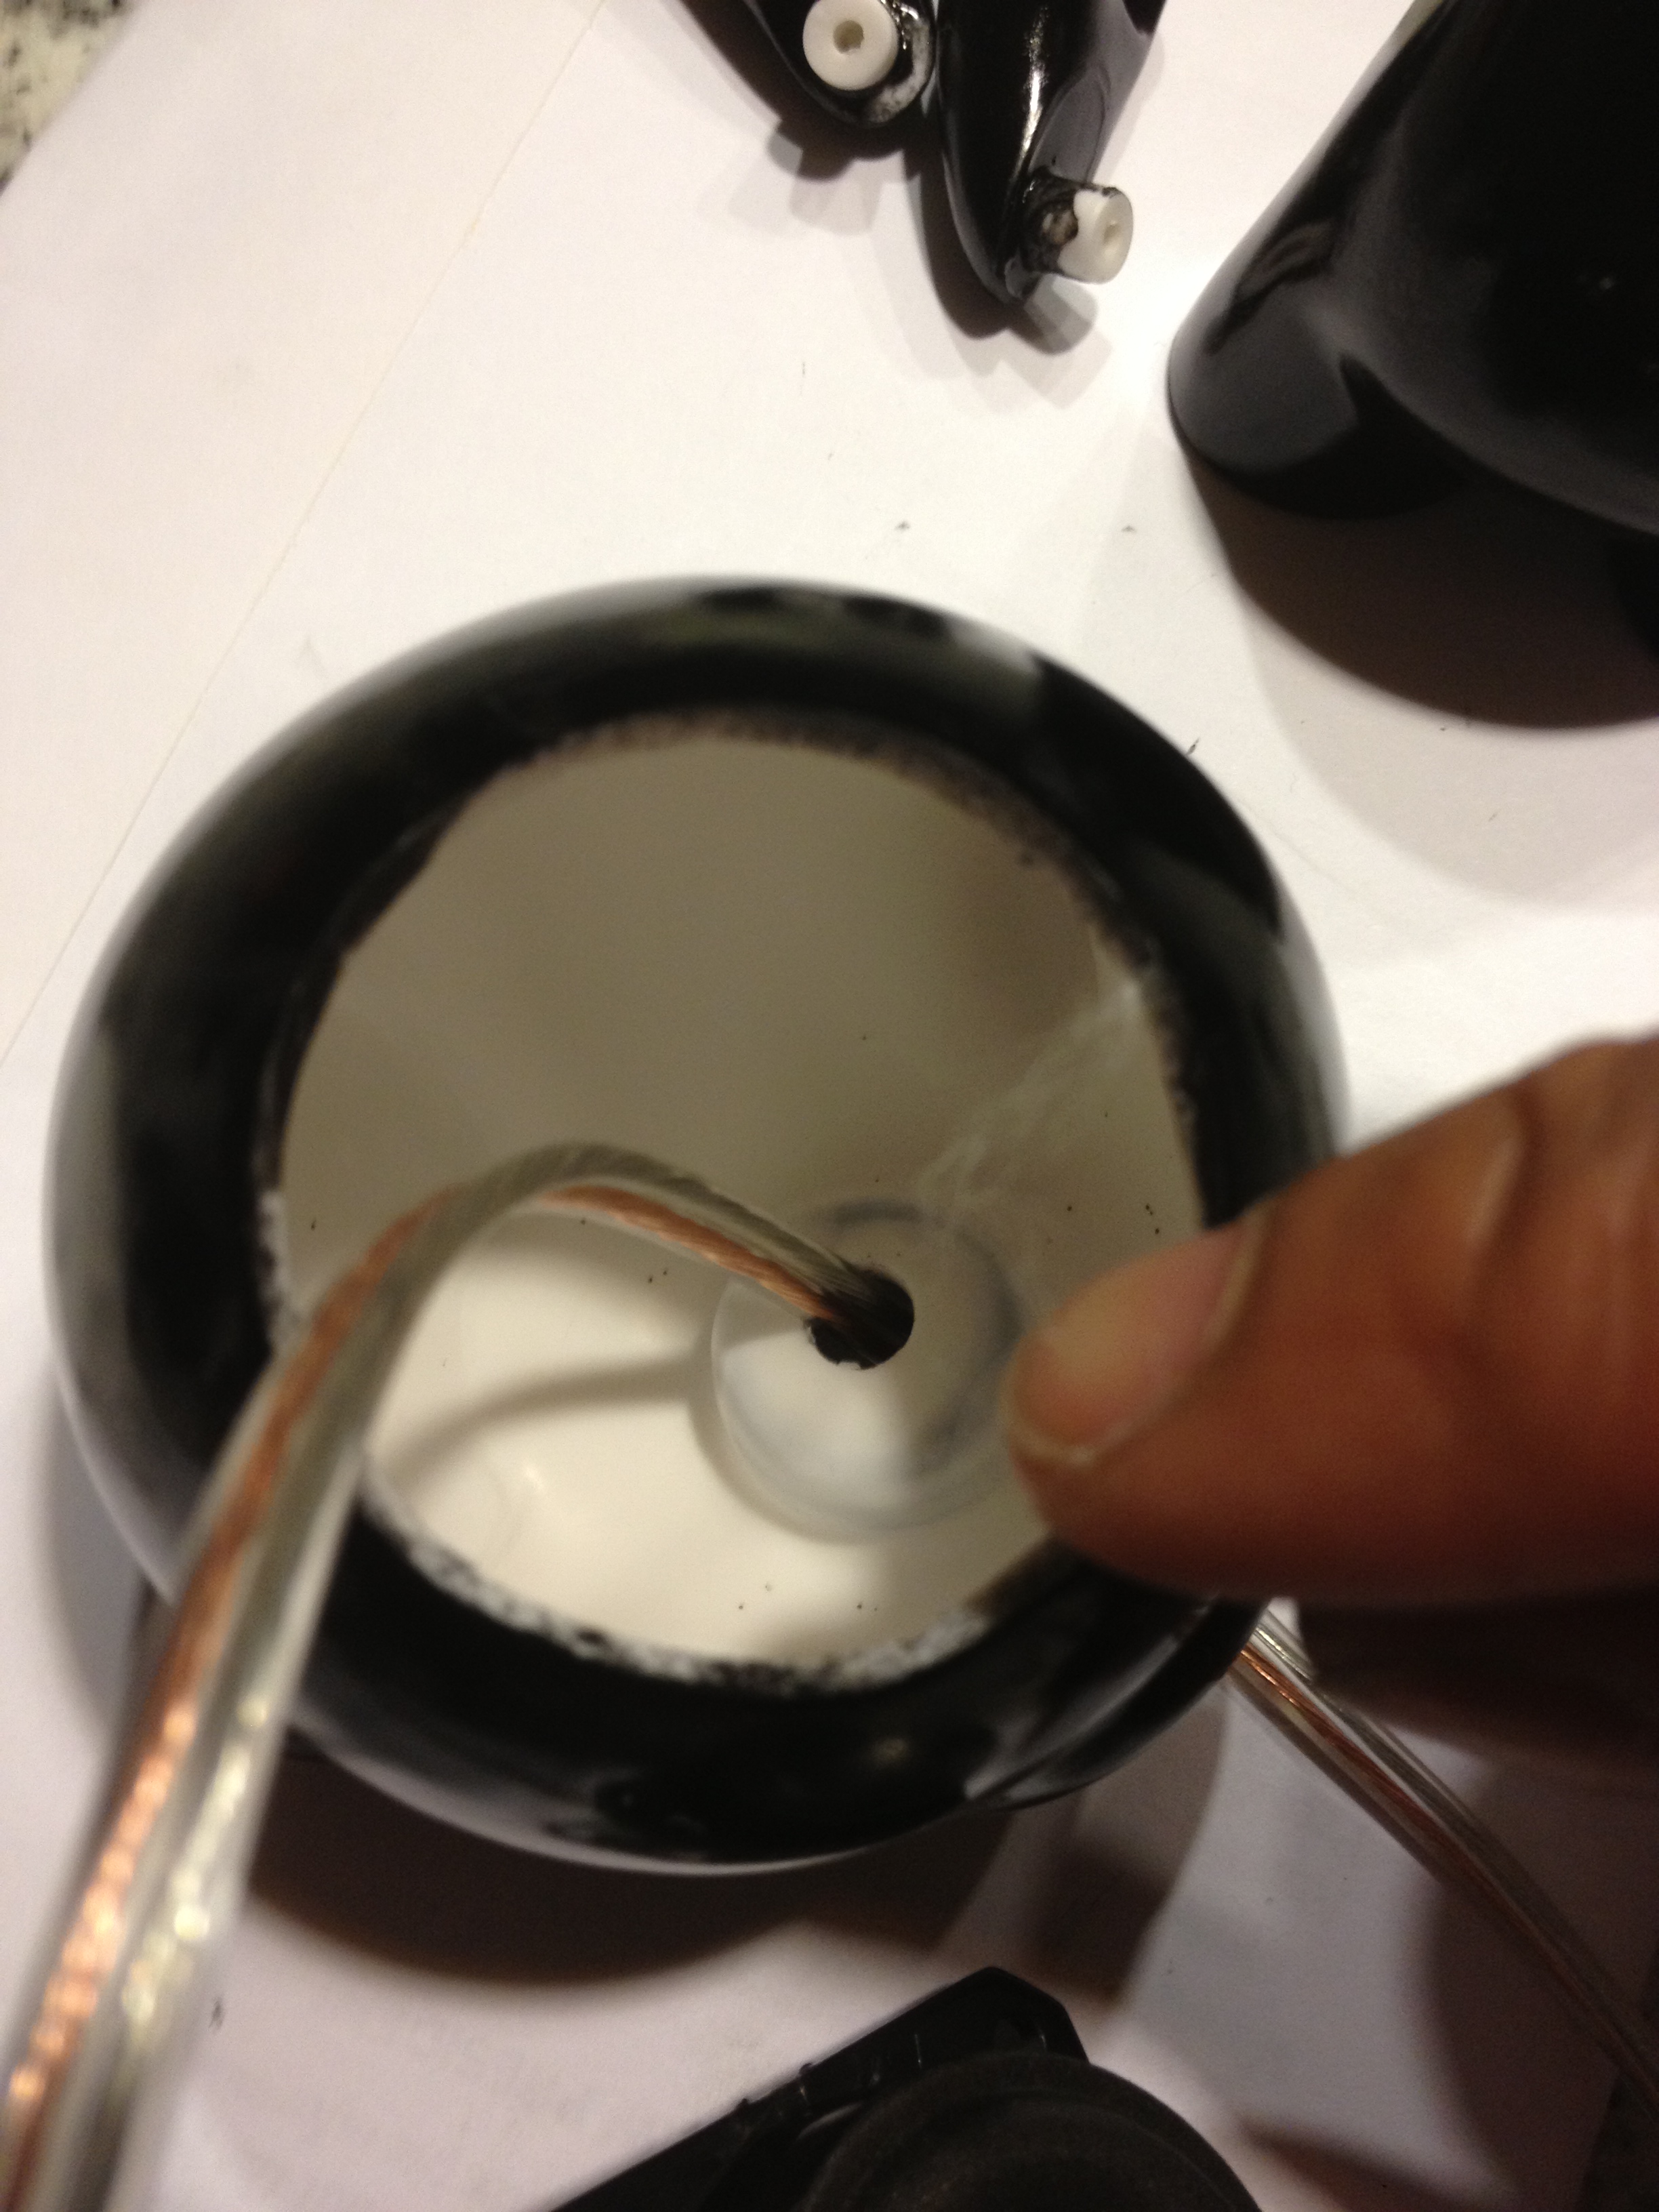
Using your speaker as a guide, mark a hole on the face of your Munny in pencil. Gently heat the vinyl with your hair dryer, making sure not to let it melt or warp. Cut the hole out with the exacto knife–be VERY careful because the warm vinyl cuts really easily. Test the fit with your speaker and cut away more material as needed.
Use your knife (or a cordless drill, if you have one) to make a hole at the bottom of your figure’s body for the speaker cable to pass through.
Step 3: Paint your figure
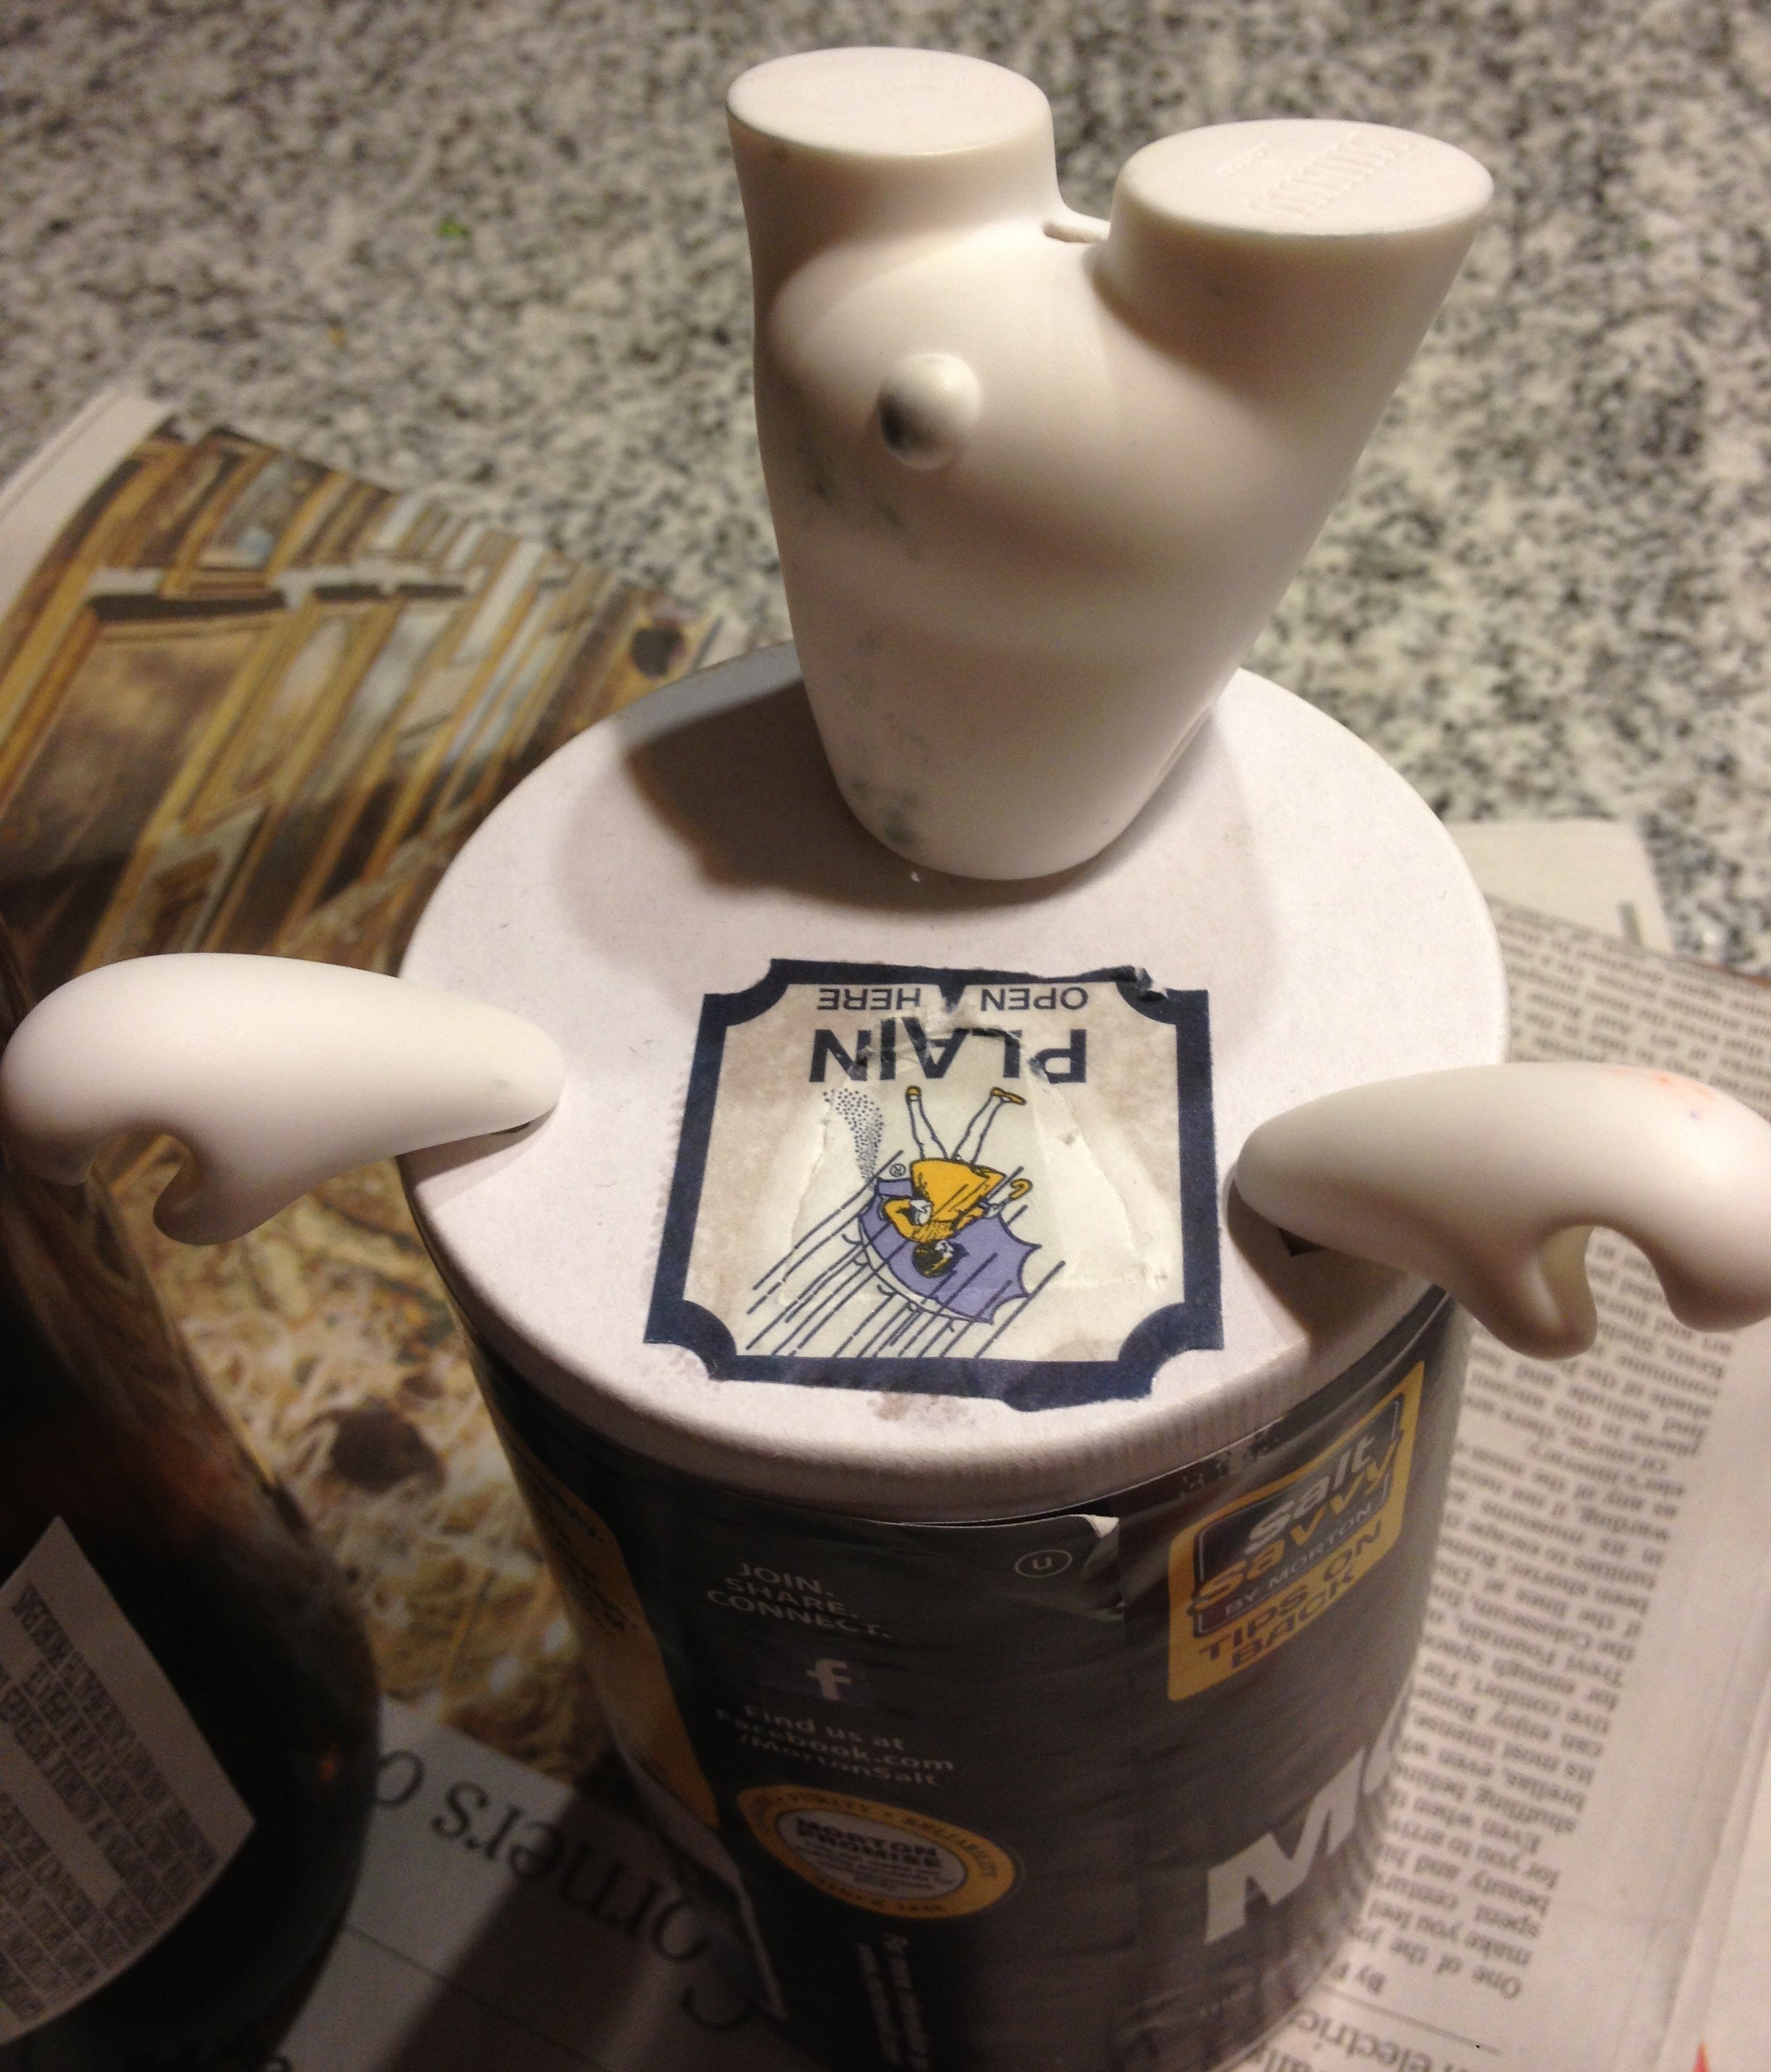
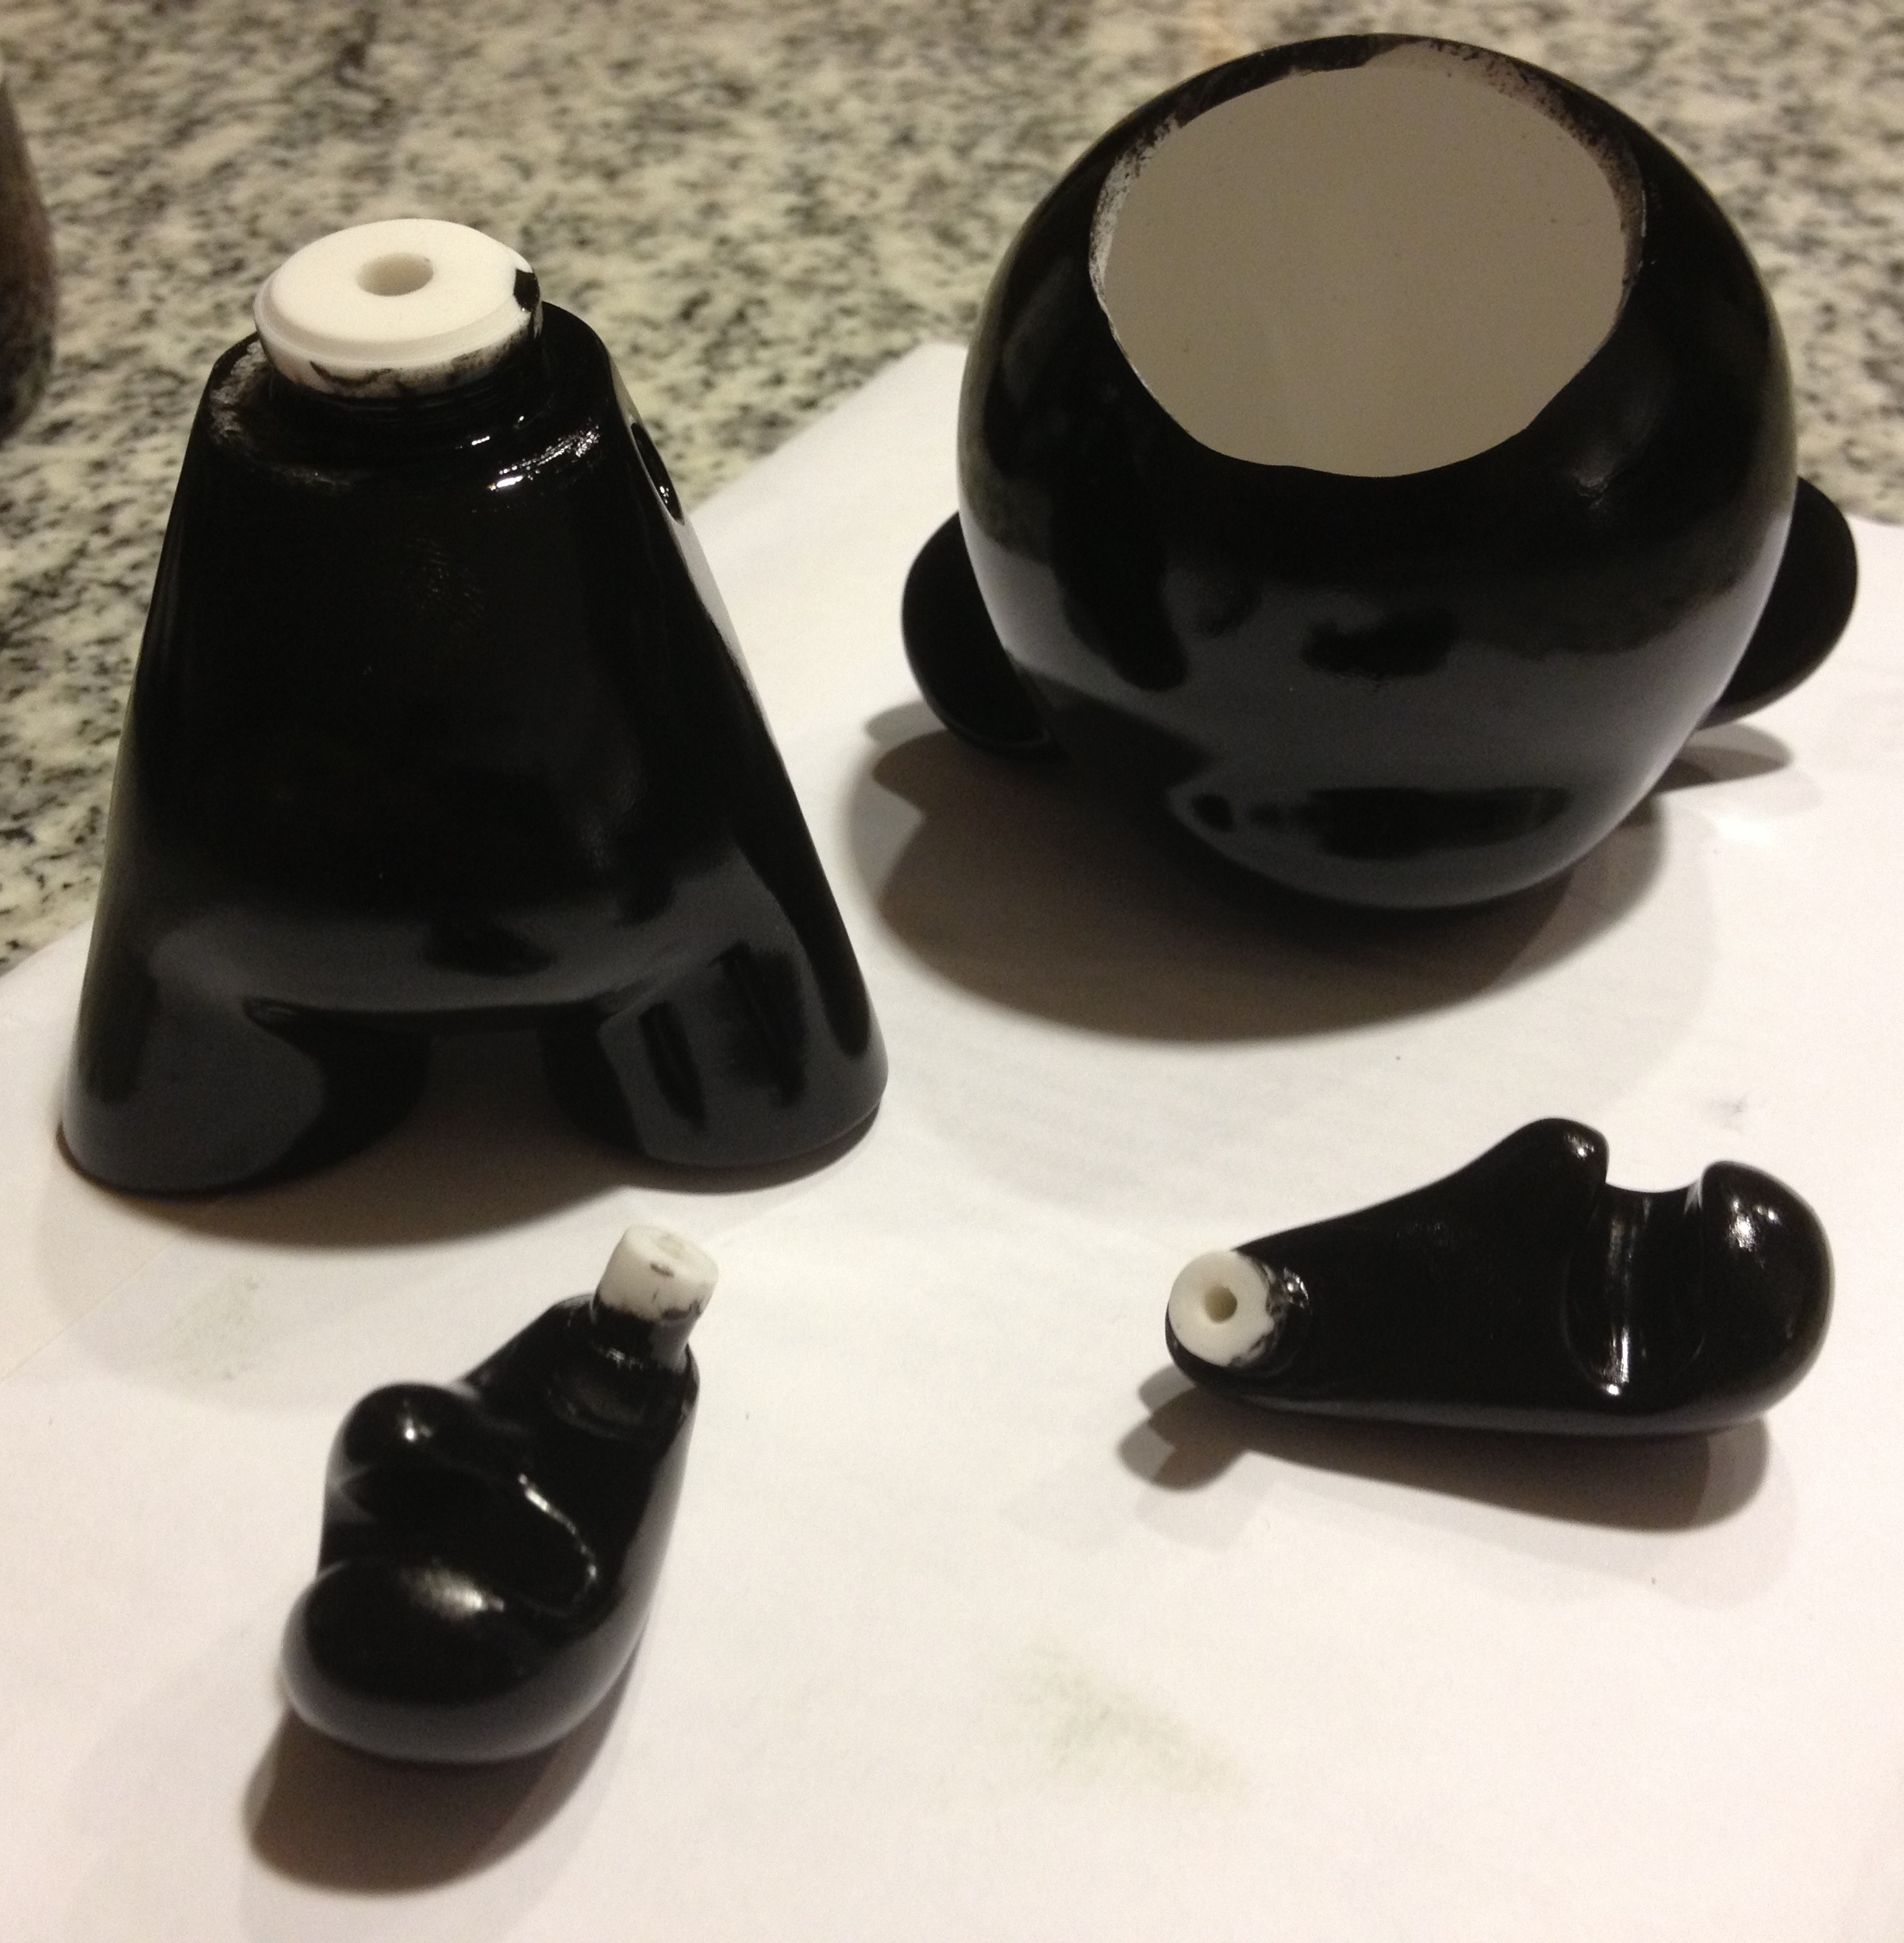
To make things easier, mount all of the vinyl parts on a styrofoam cup or something similar (I used a bottle and empty salt container) to spray paint. Take everything outside and give them a couple of nice, even coats. I gave the Altoids tin (which will be the housing for the amp) a coat as well, but it’s up to you.
Step 4: Get your electronics set up
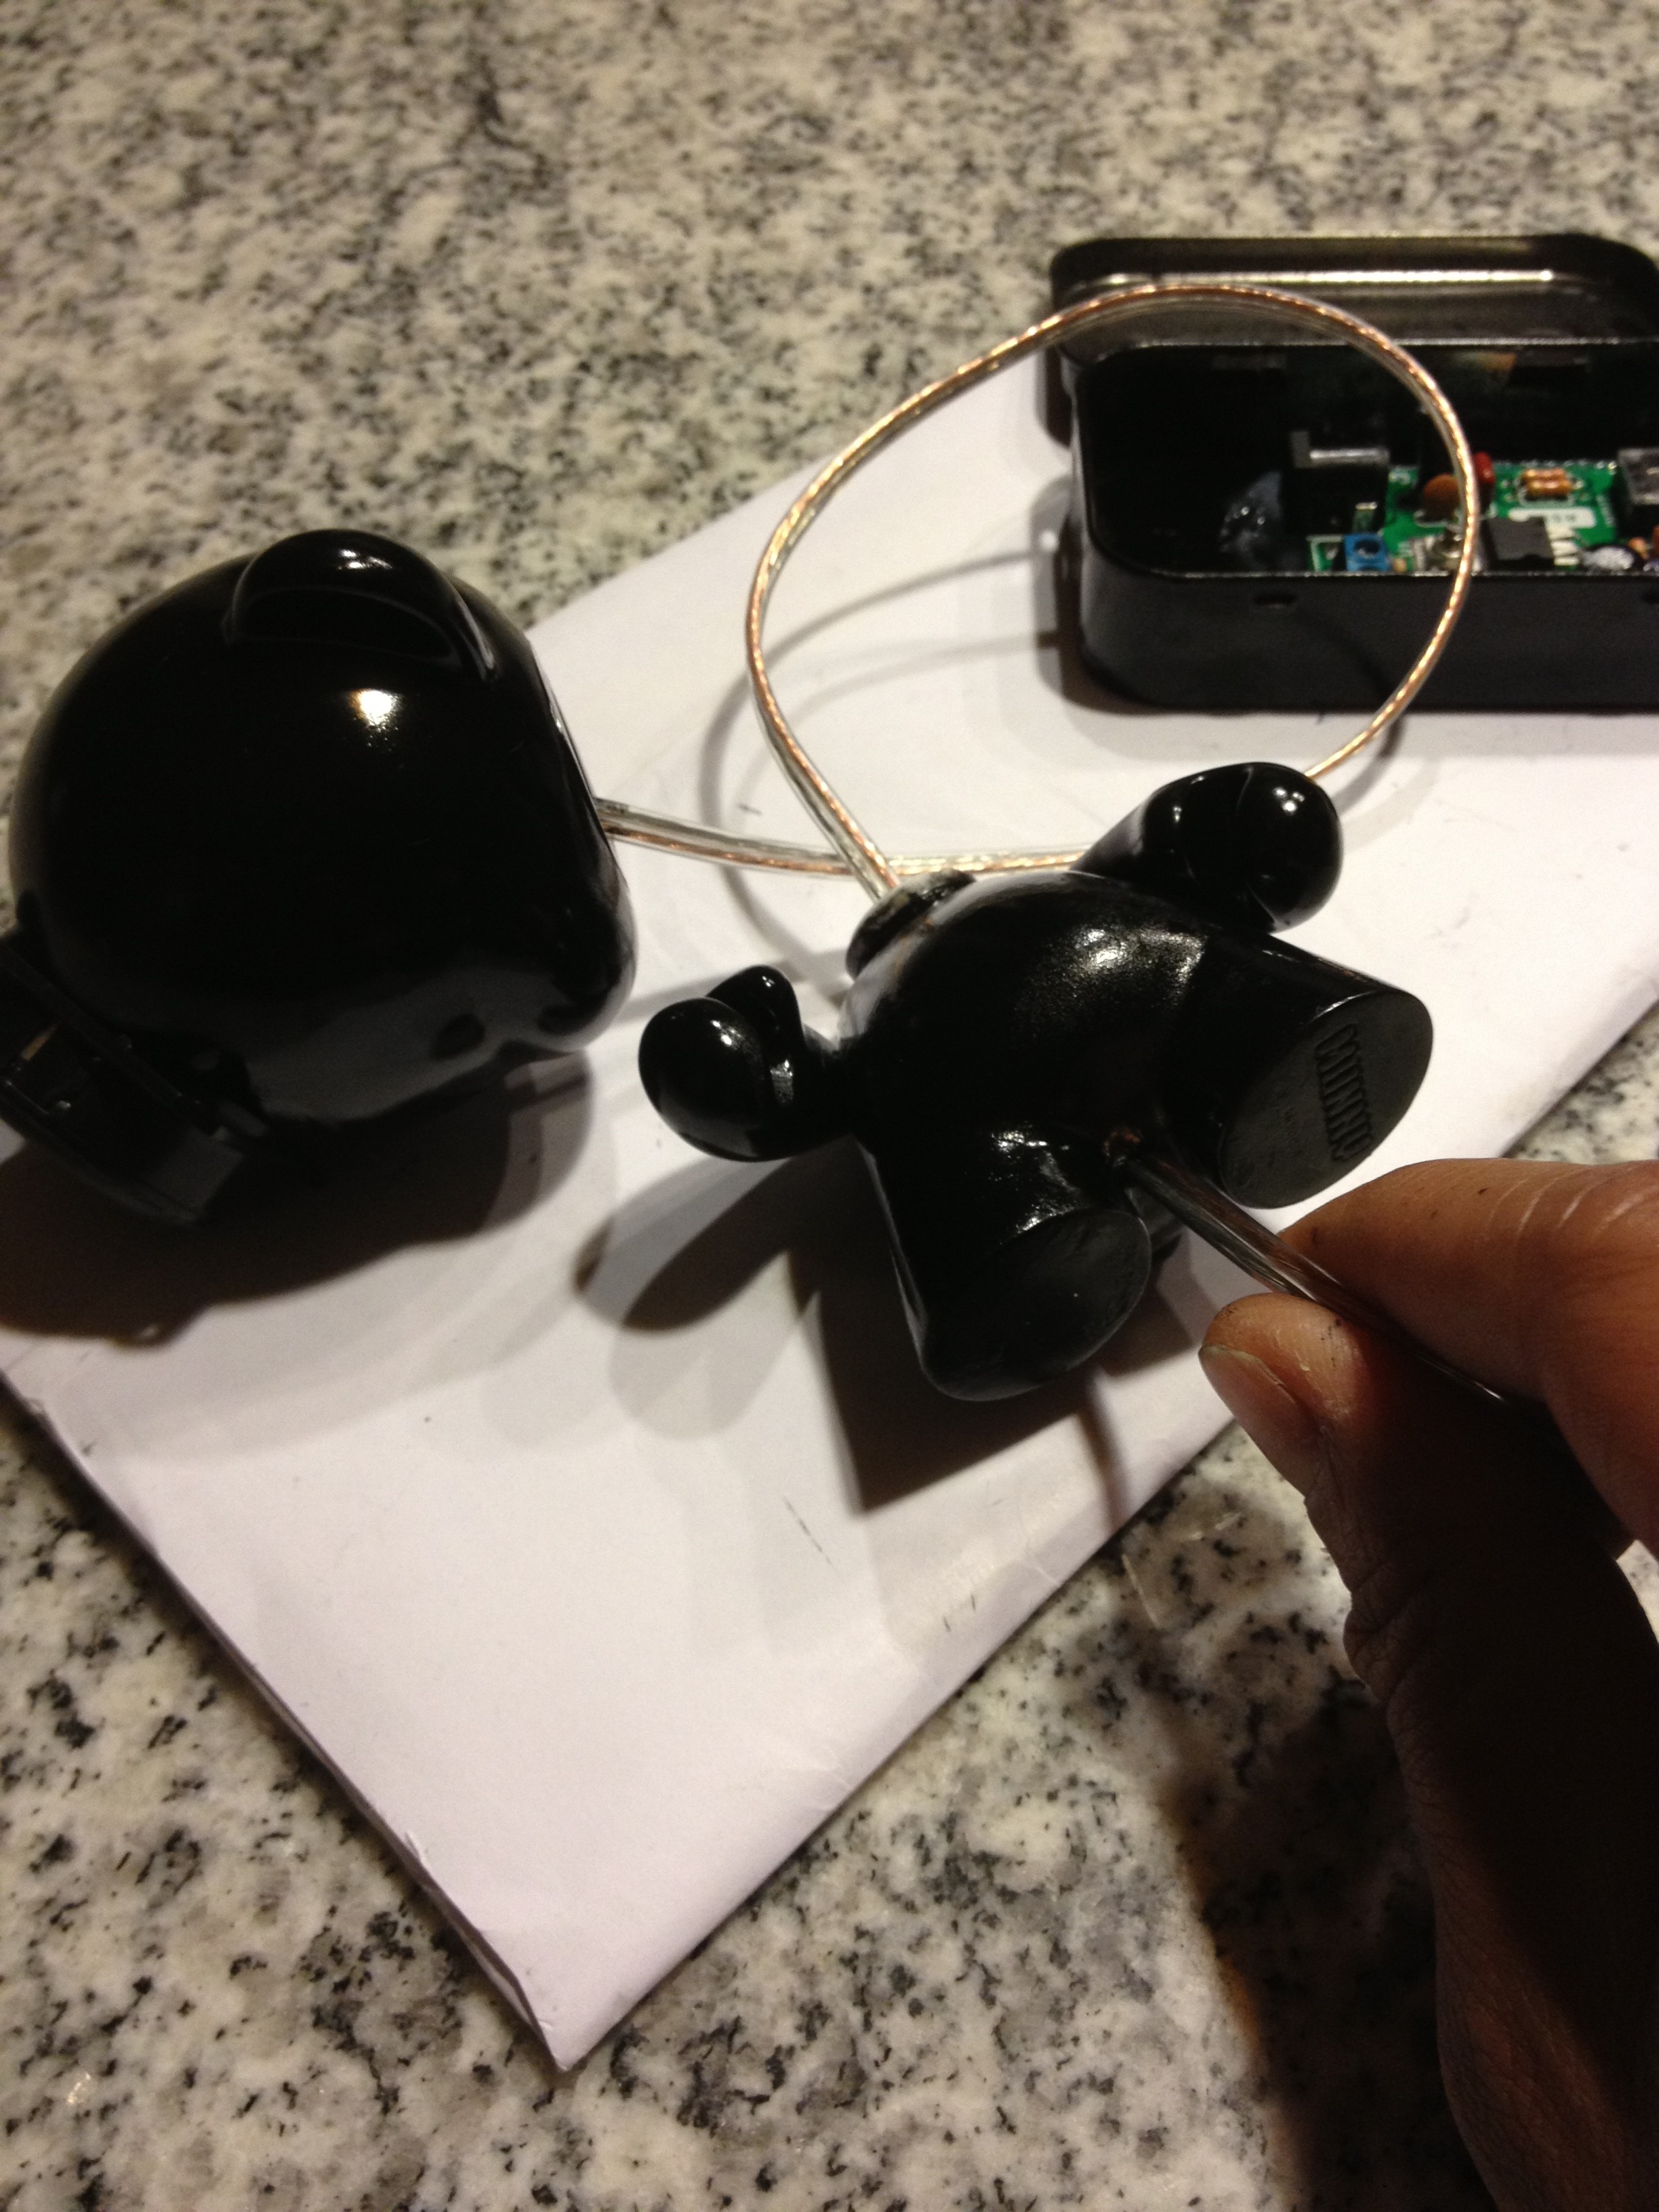
Now’s the time to make sure all of your electronic components are ready to go. Solder wires onto your speaker terminals and put together the amp components. I won’t list all of the steps here, but if you are using the kit I mentioned above, it comes with a great set of assembly instructions.
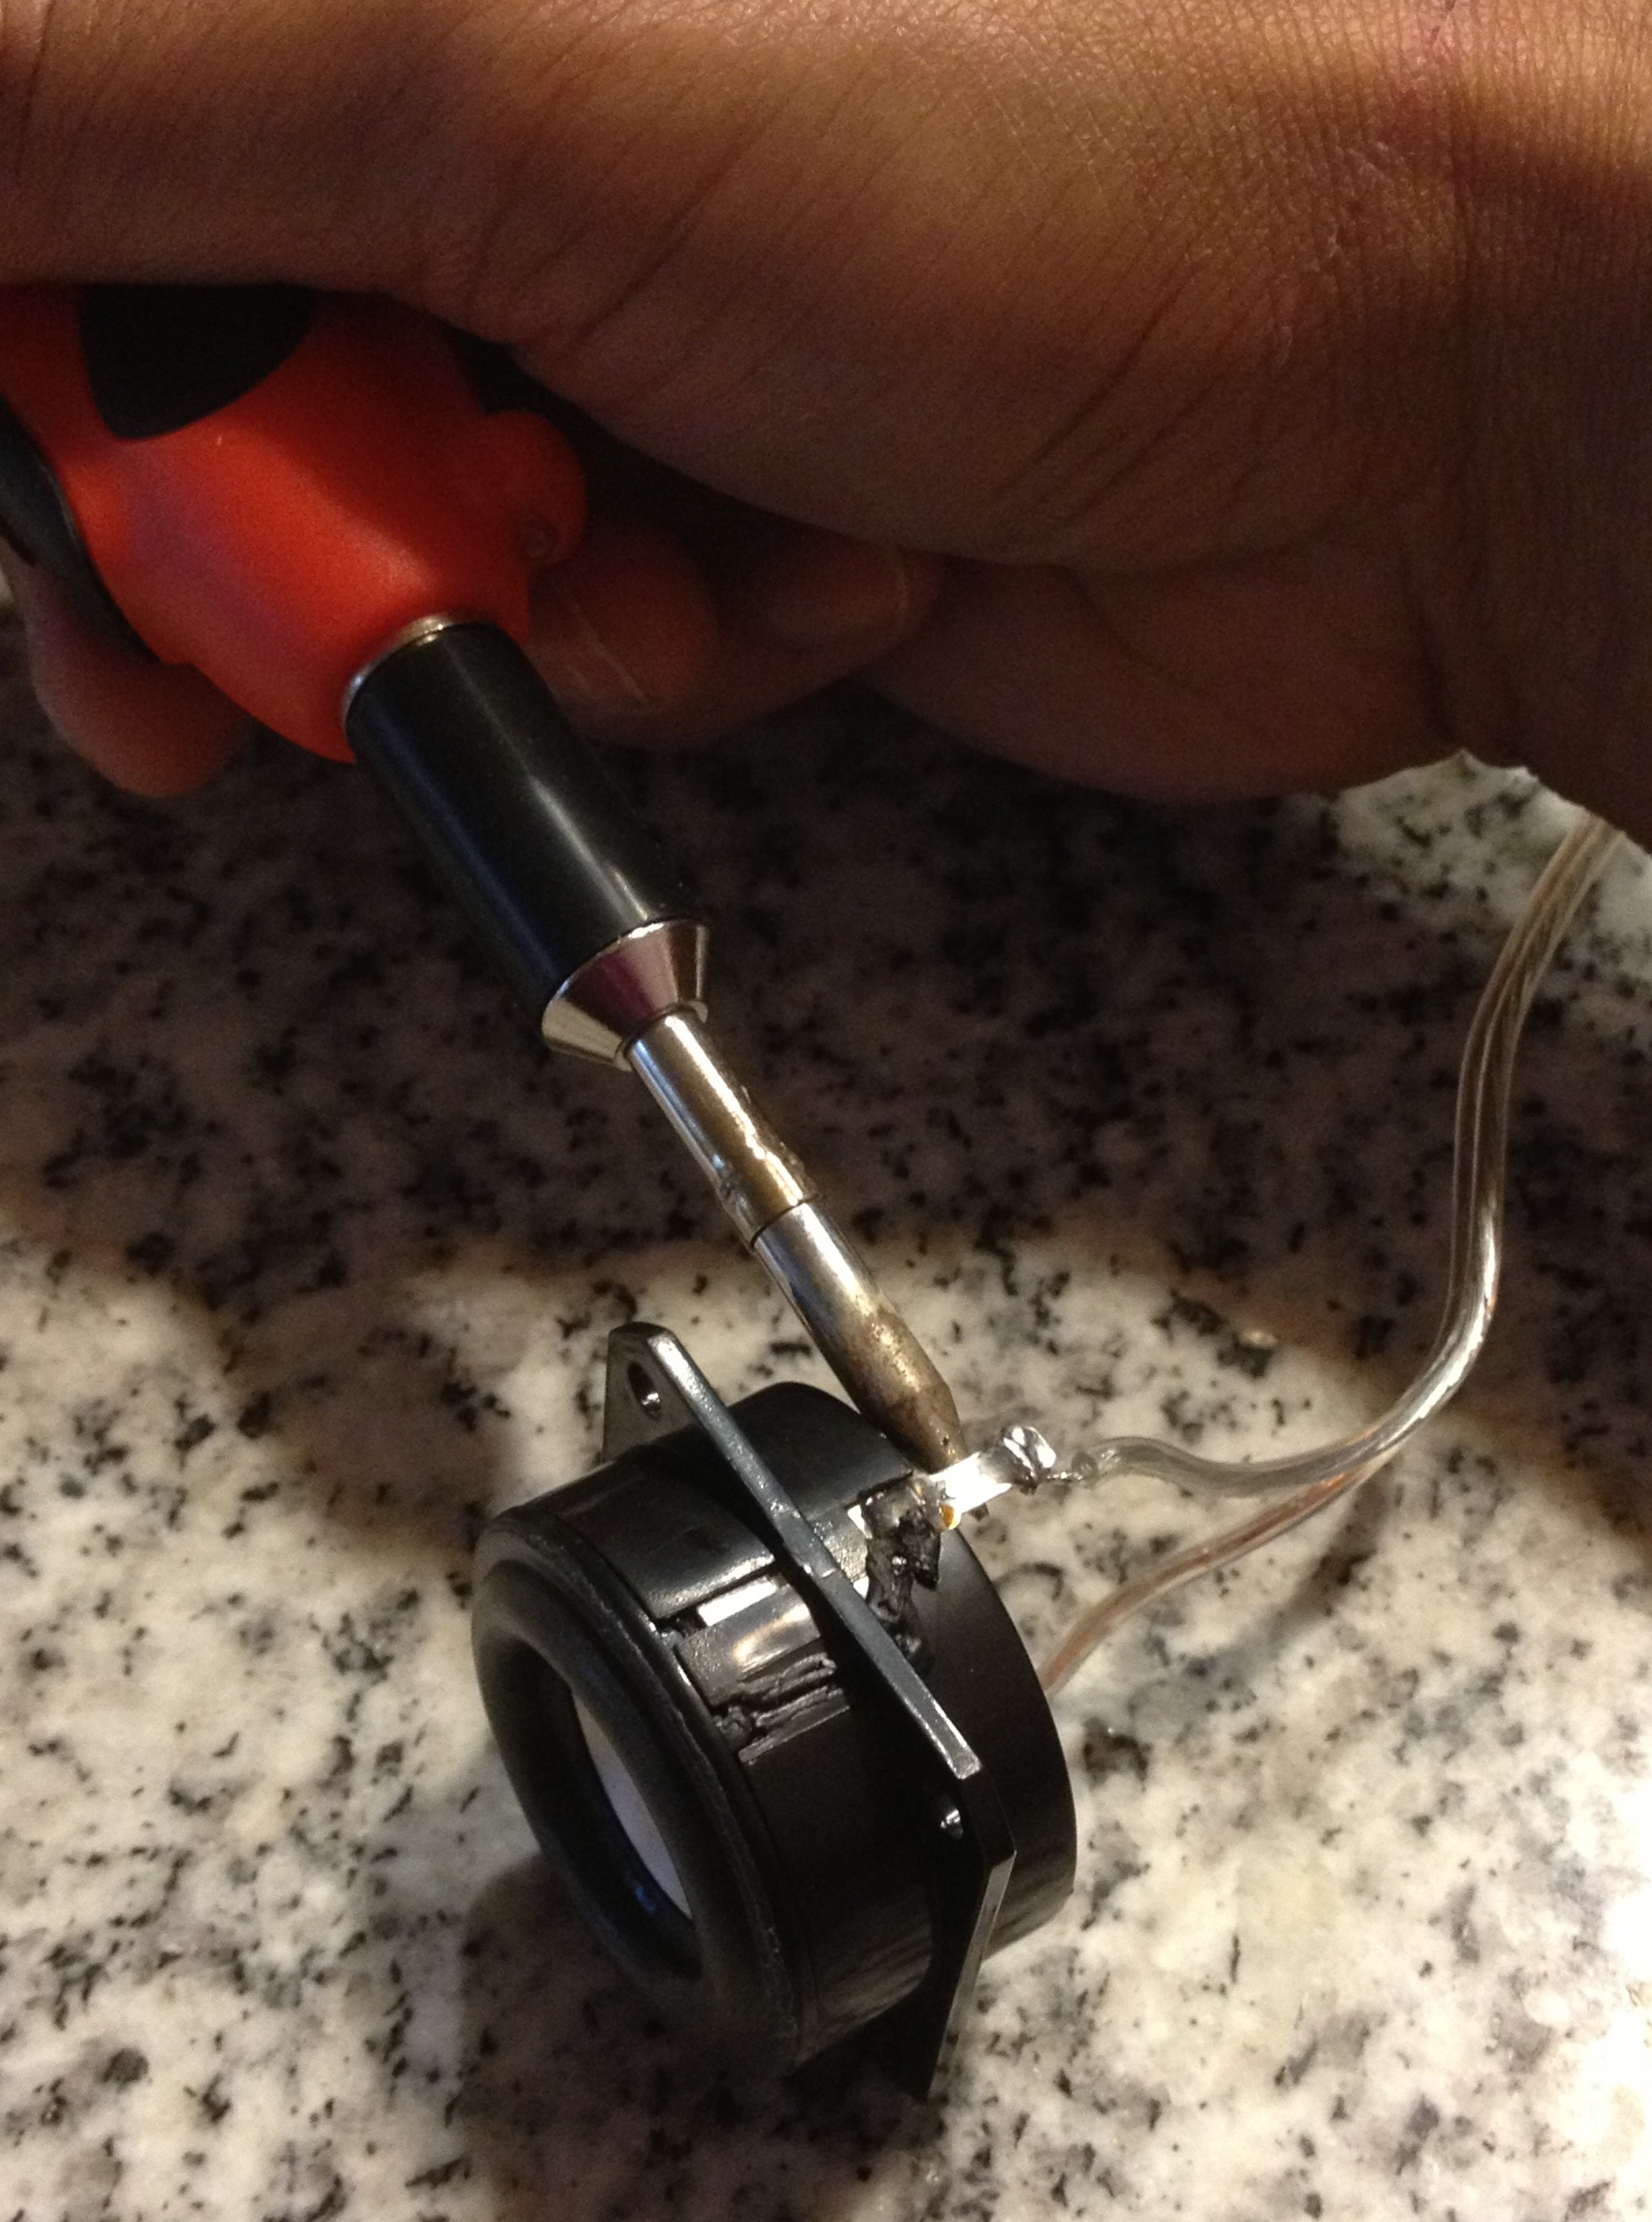
Soldering wire to the speaker terminals

The assembled amp kit
Step 5: Assemble the Munny speaker
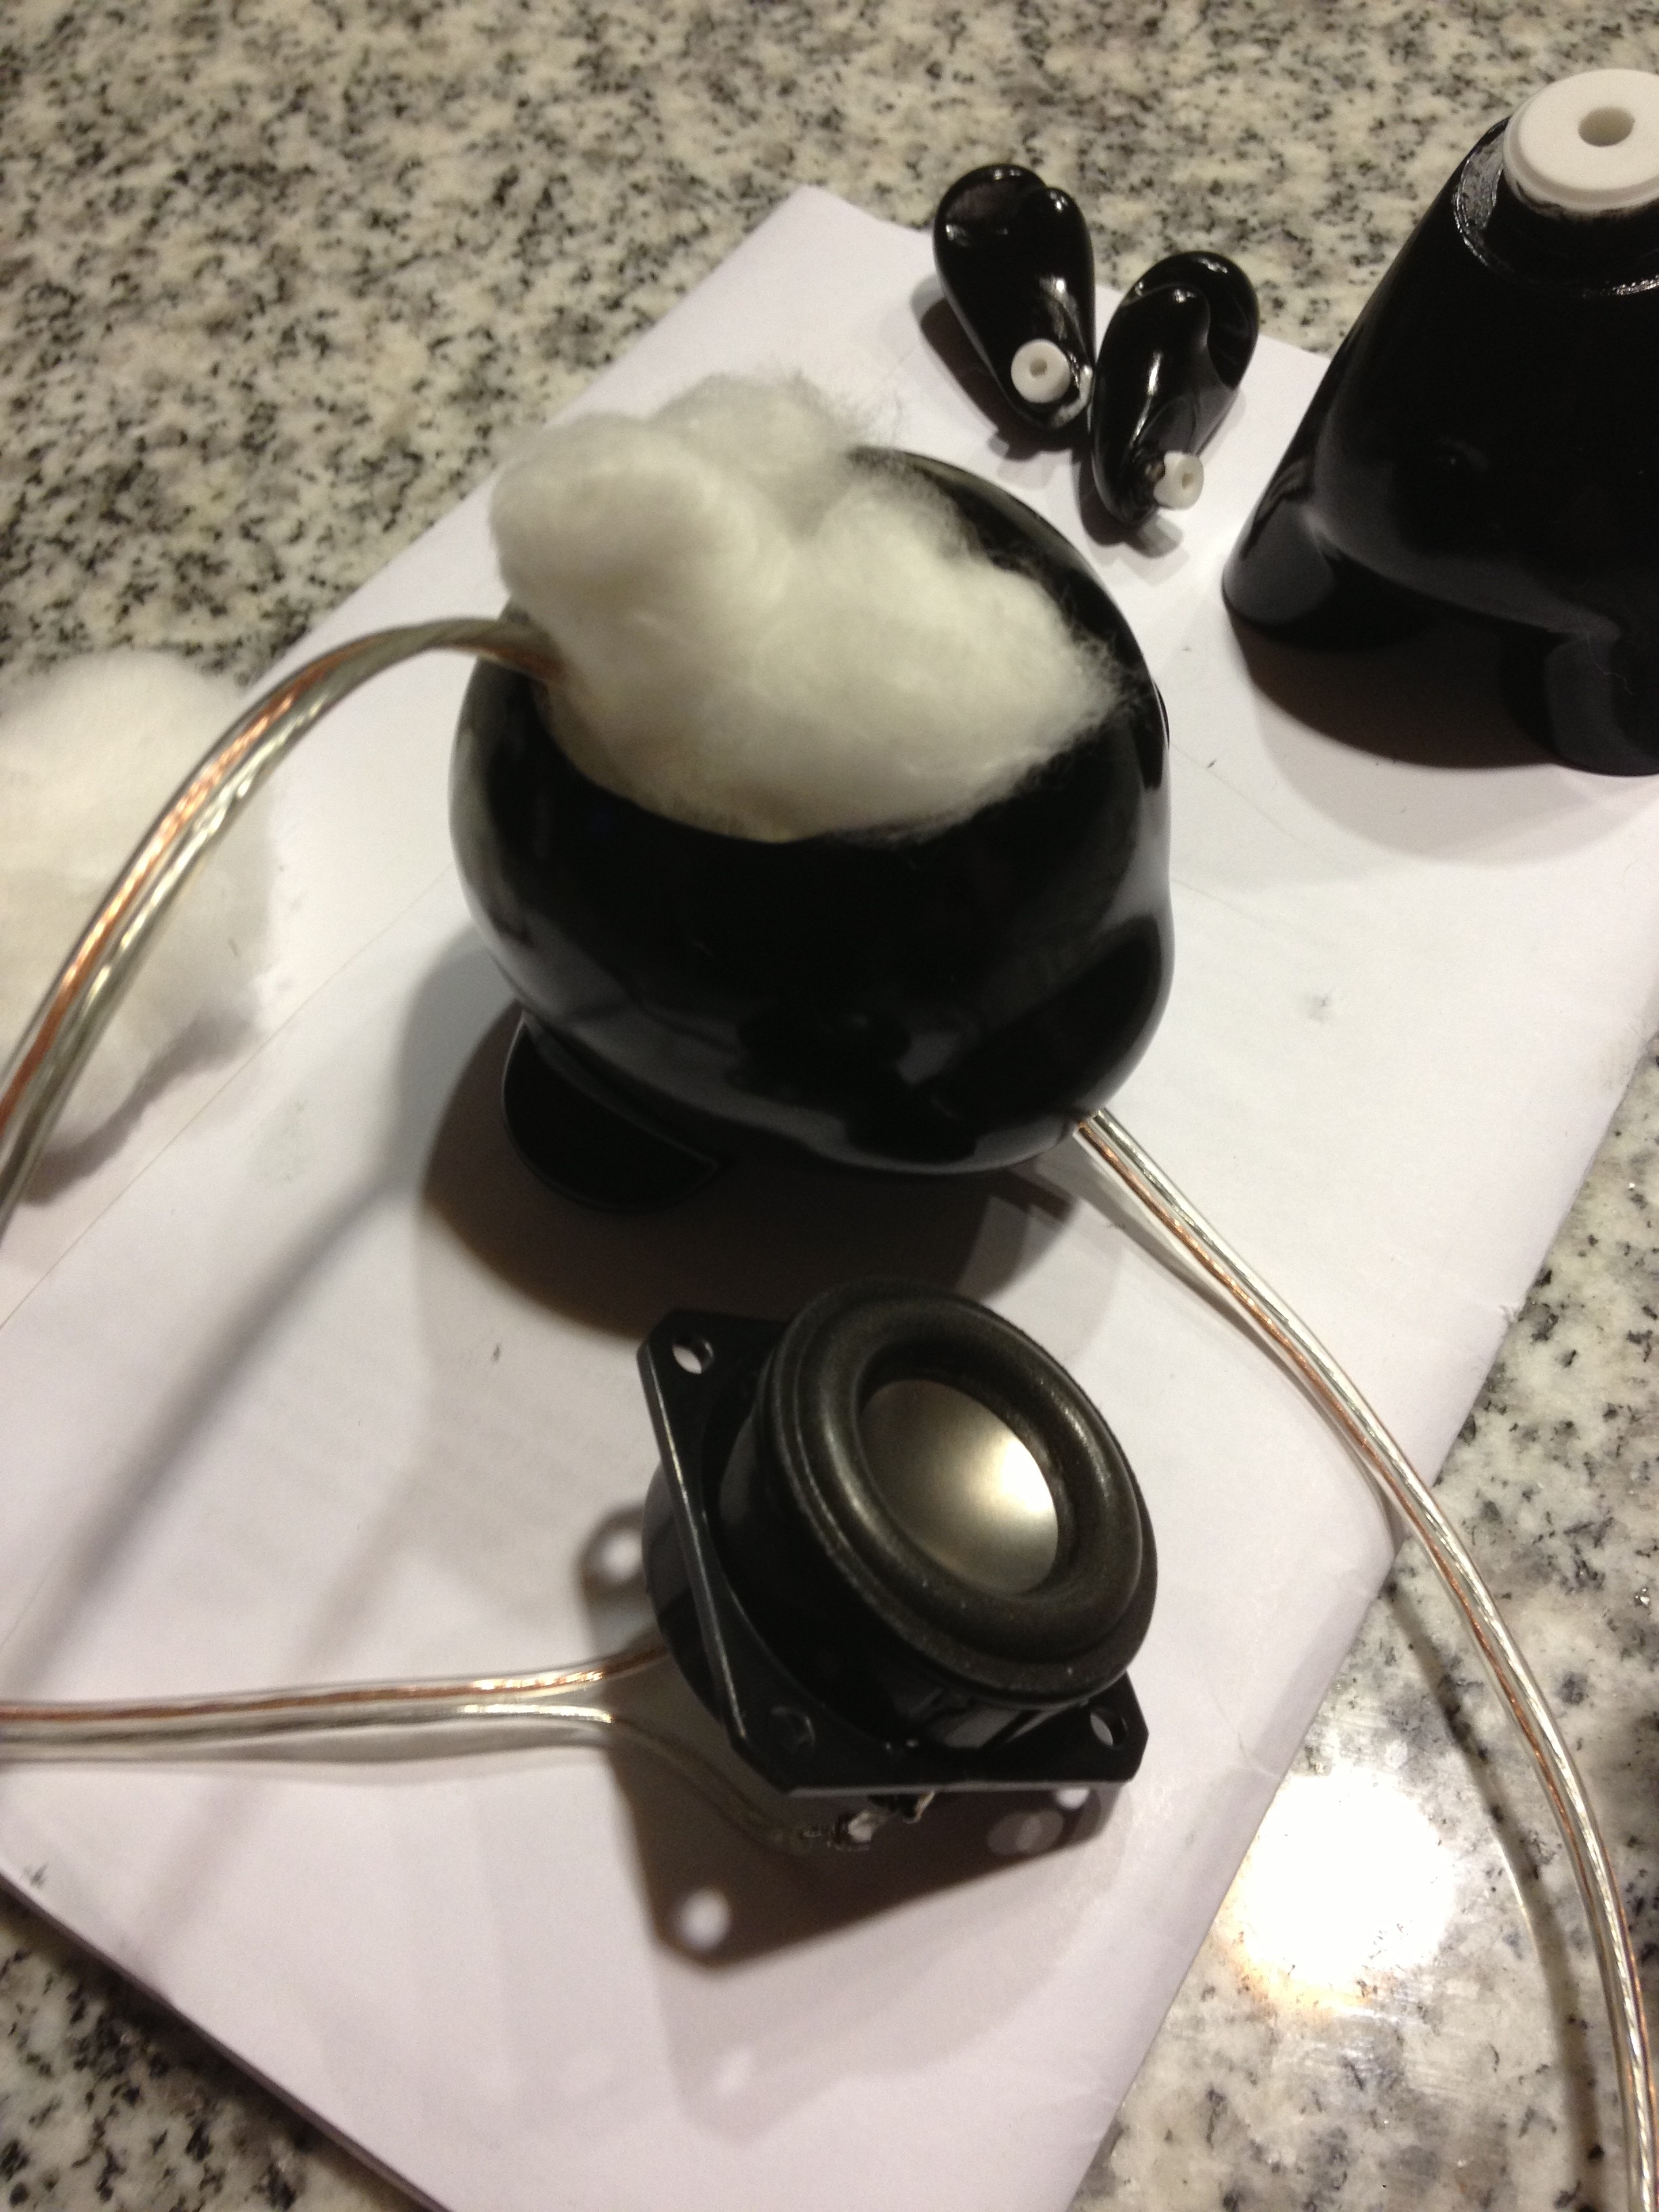
Thread the speaker wire through the bottom of the figure’s head, into the hole at the body’s neck, then out through the hole you drilled at the bottom of the body. Fill the head cavity with batting and then pop the speaker into the hole.
Now put all of the parts to your figure back together:
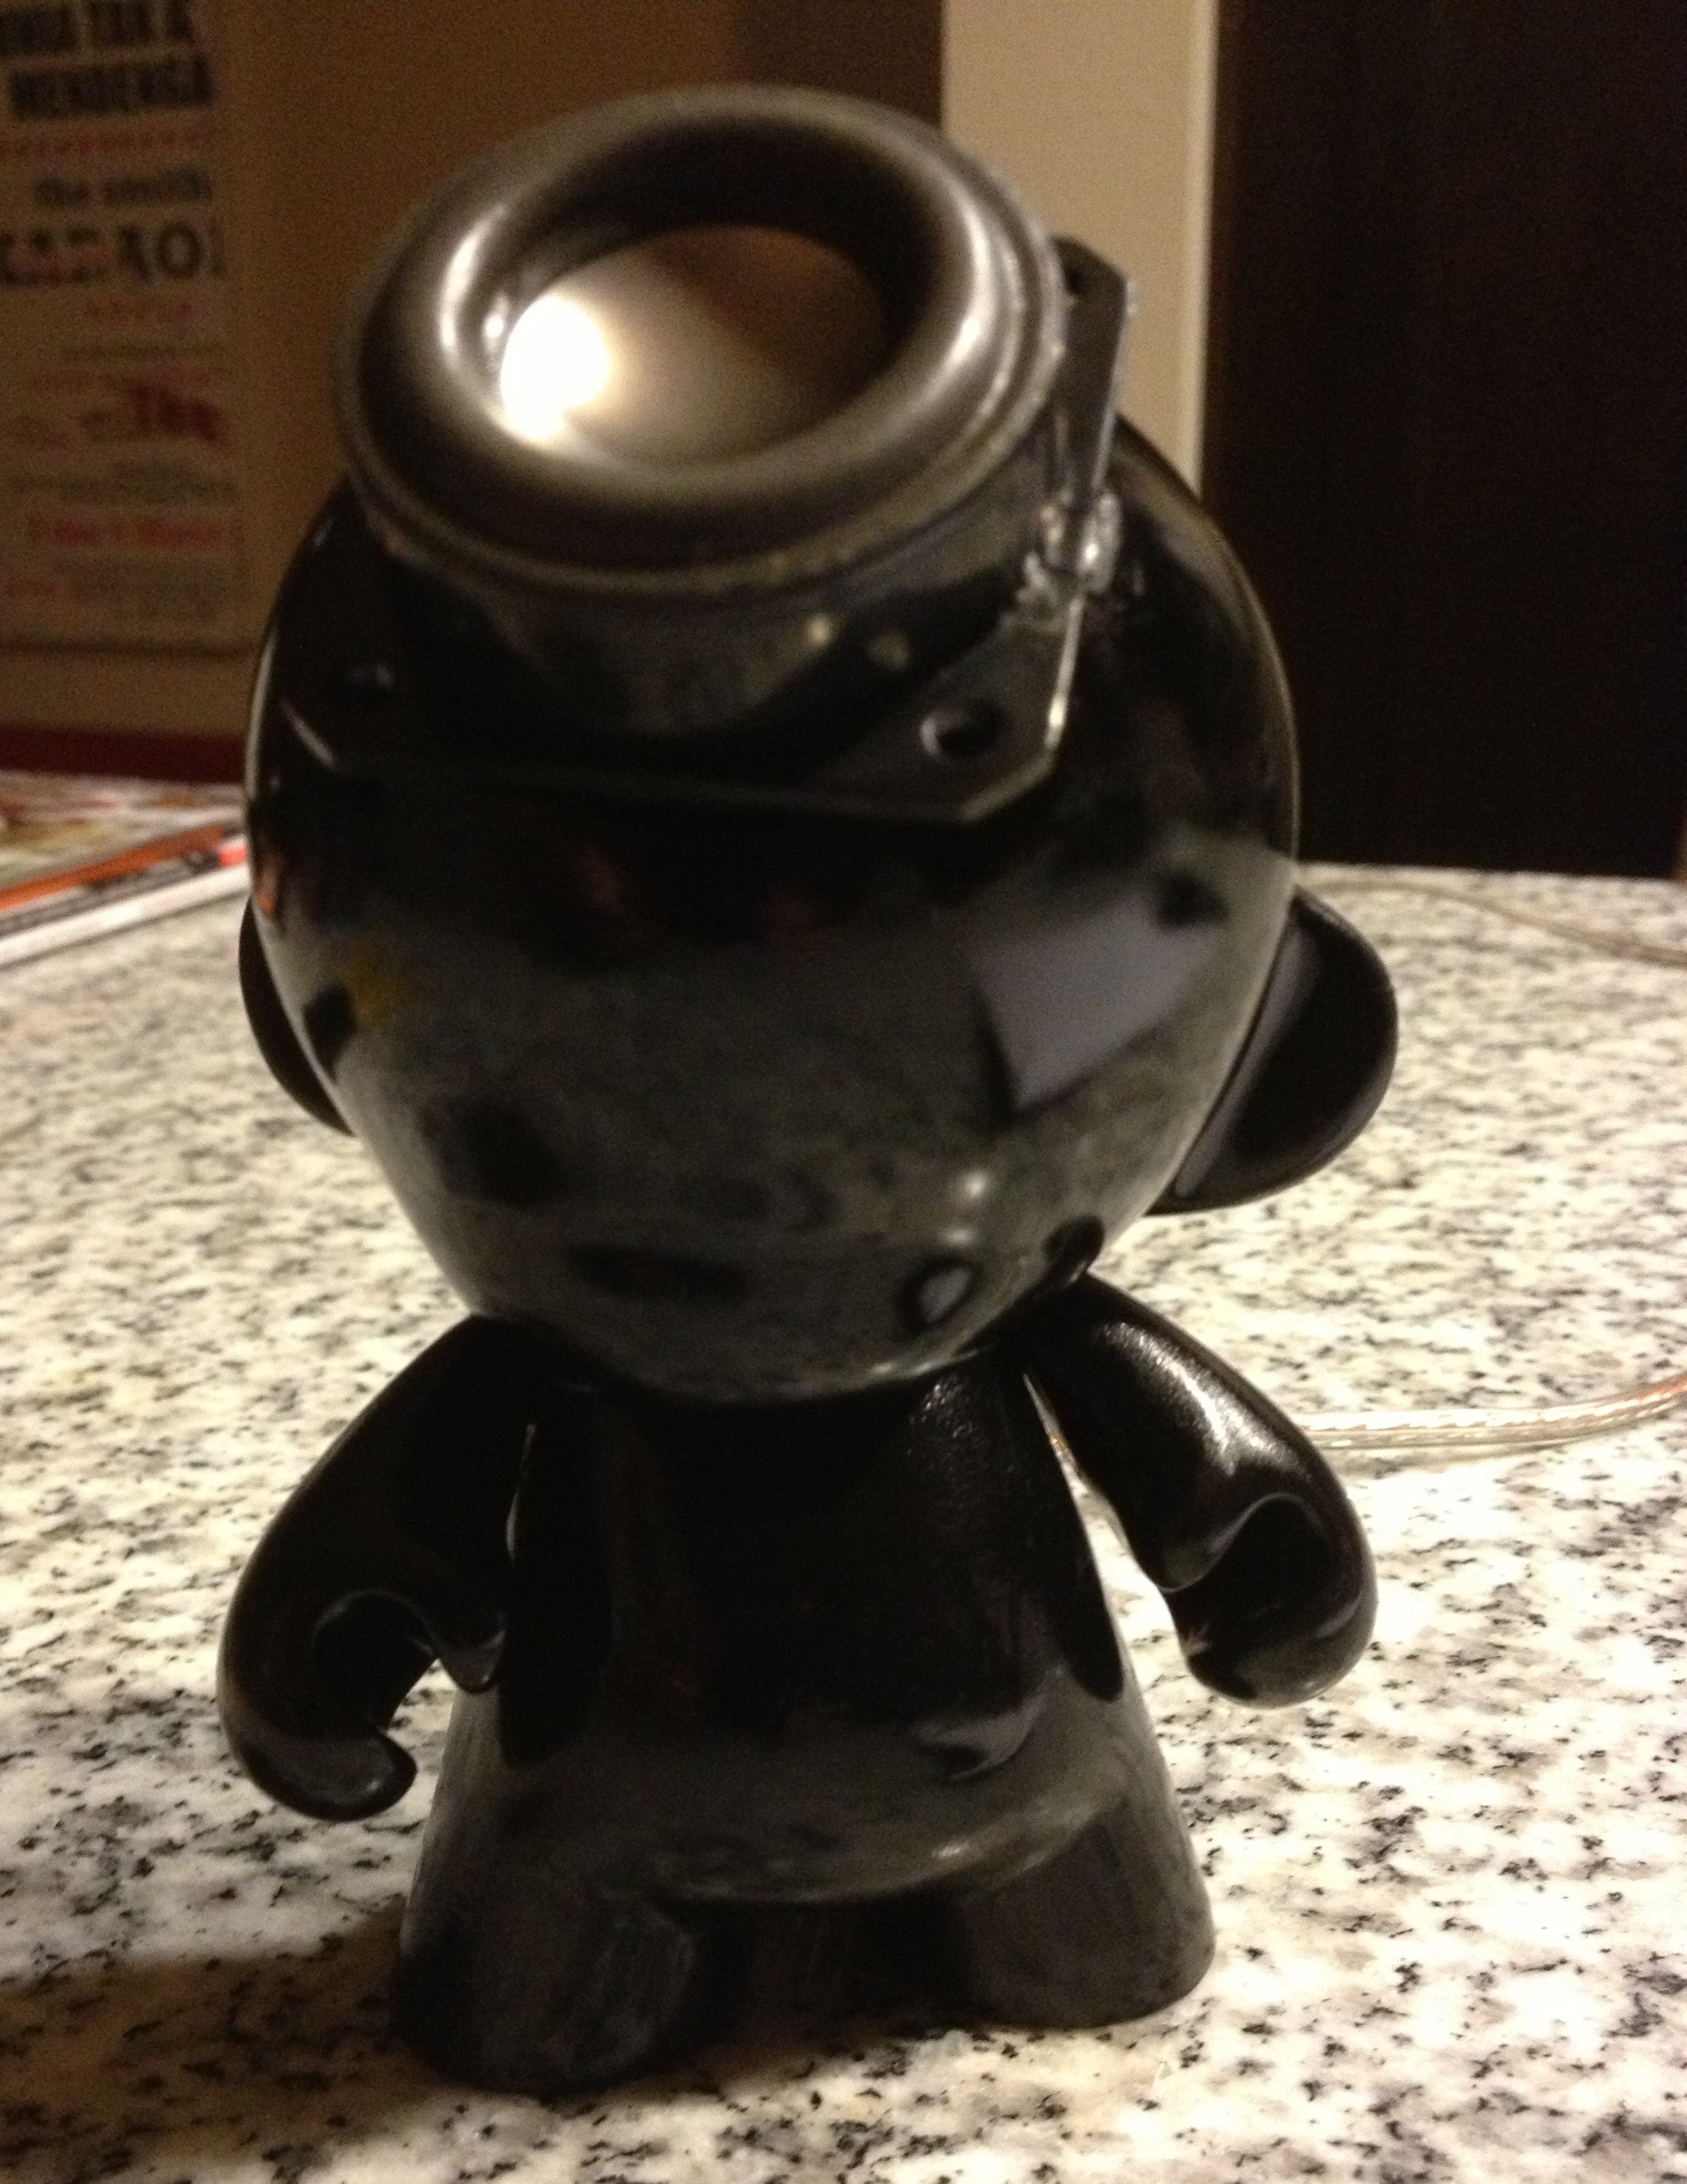
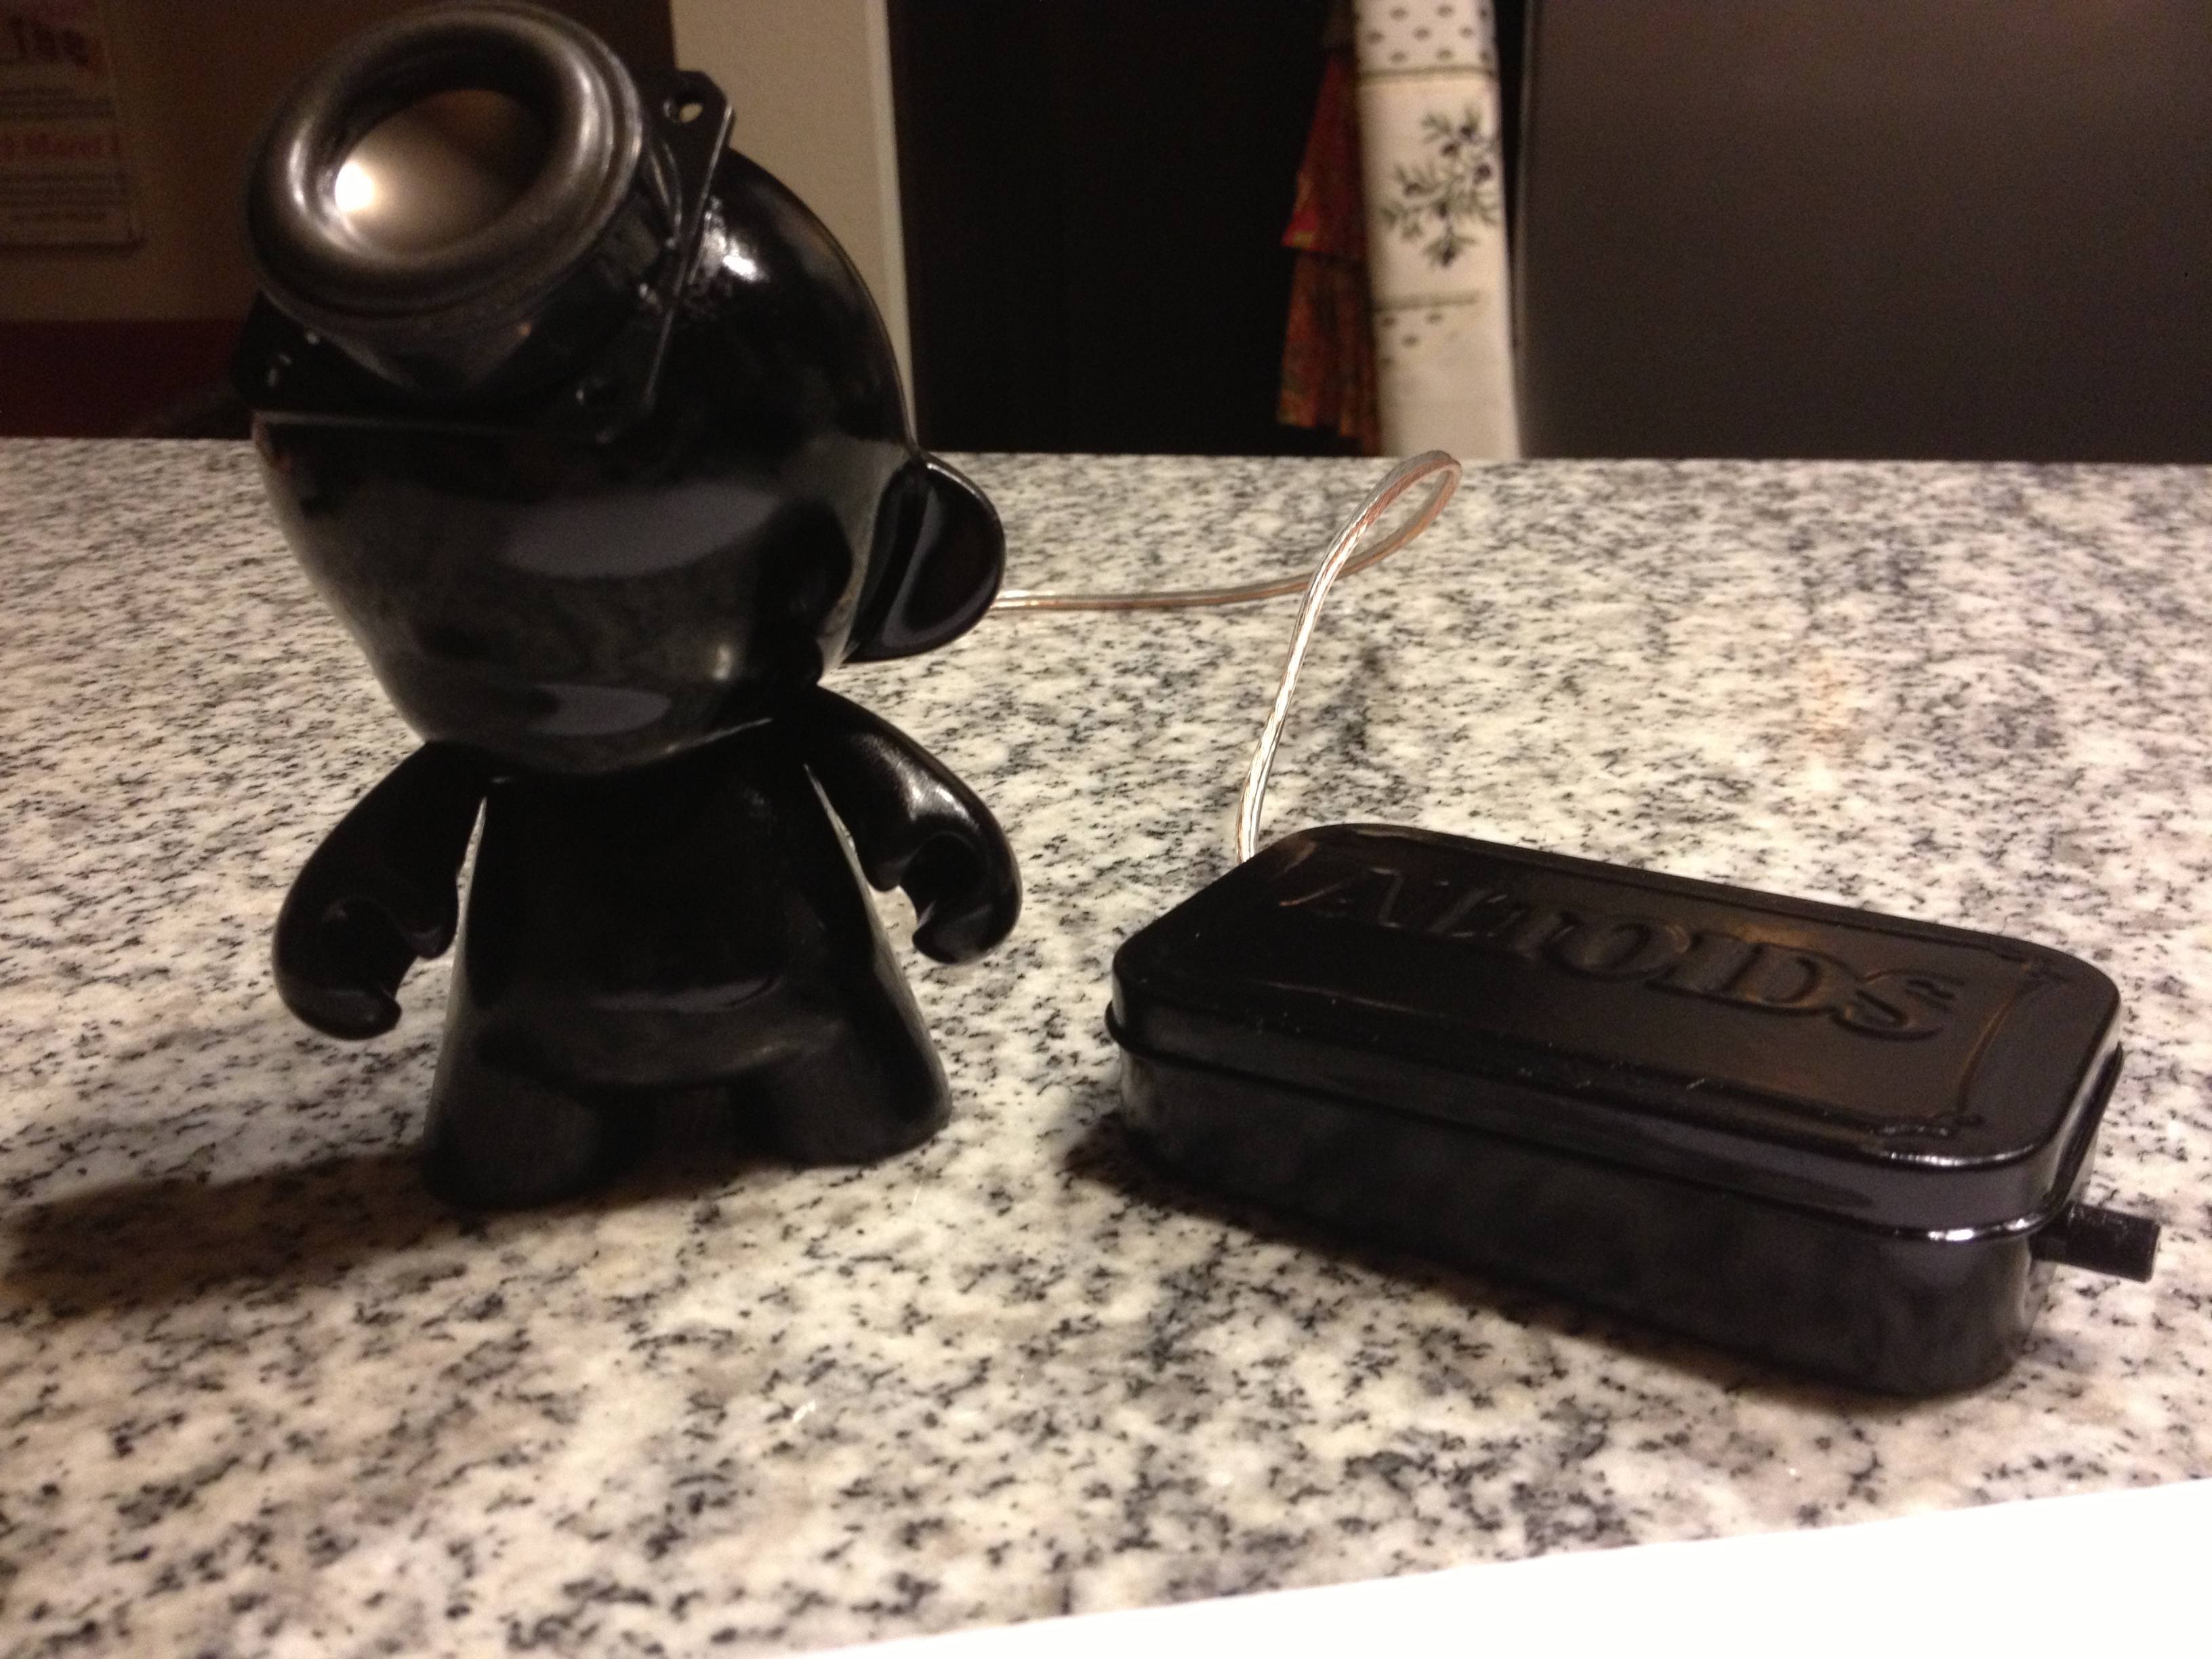
The finished Munny speaker
Step 6: Assemble the amp
Use the hole punch to make holes in the Altoids tin to accommodate the volume knob and input jacks for the amp kit. Mount the circuit board in place with the silicone caulk.
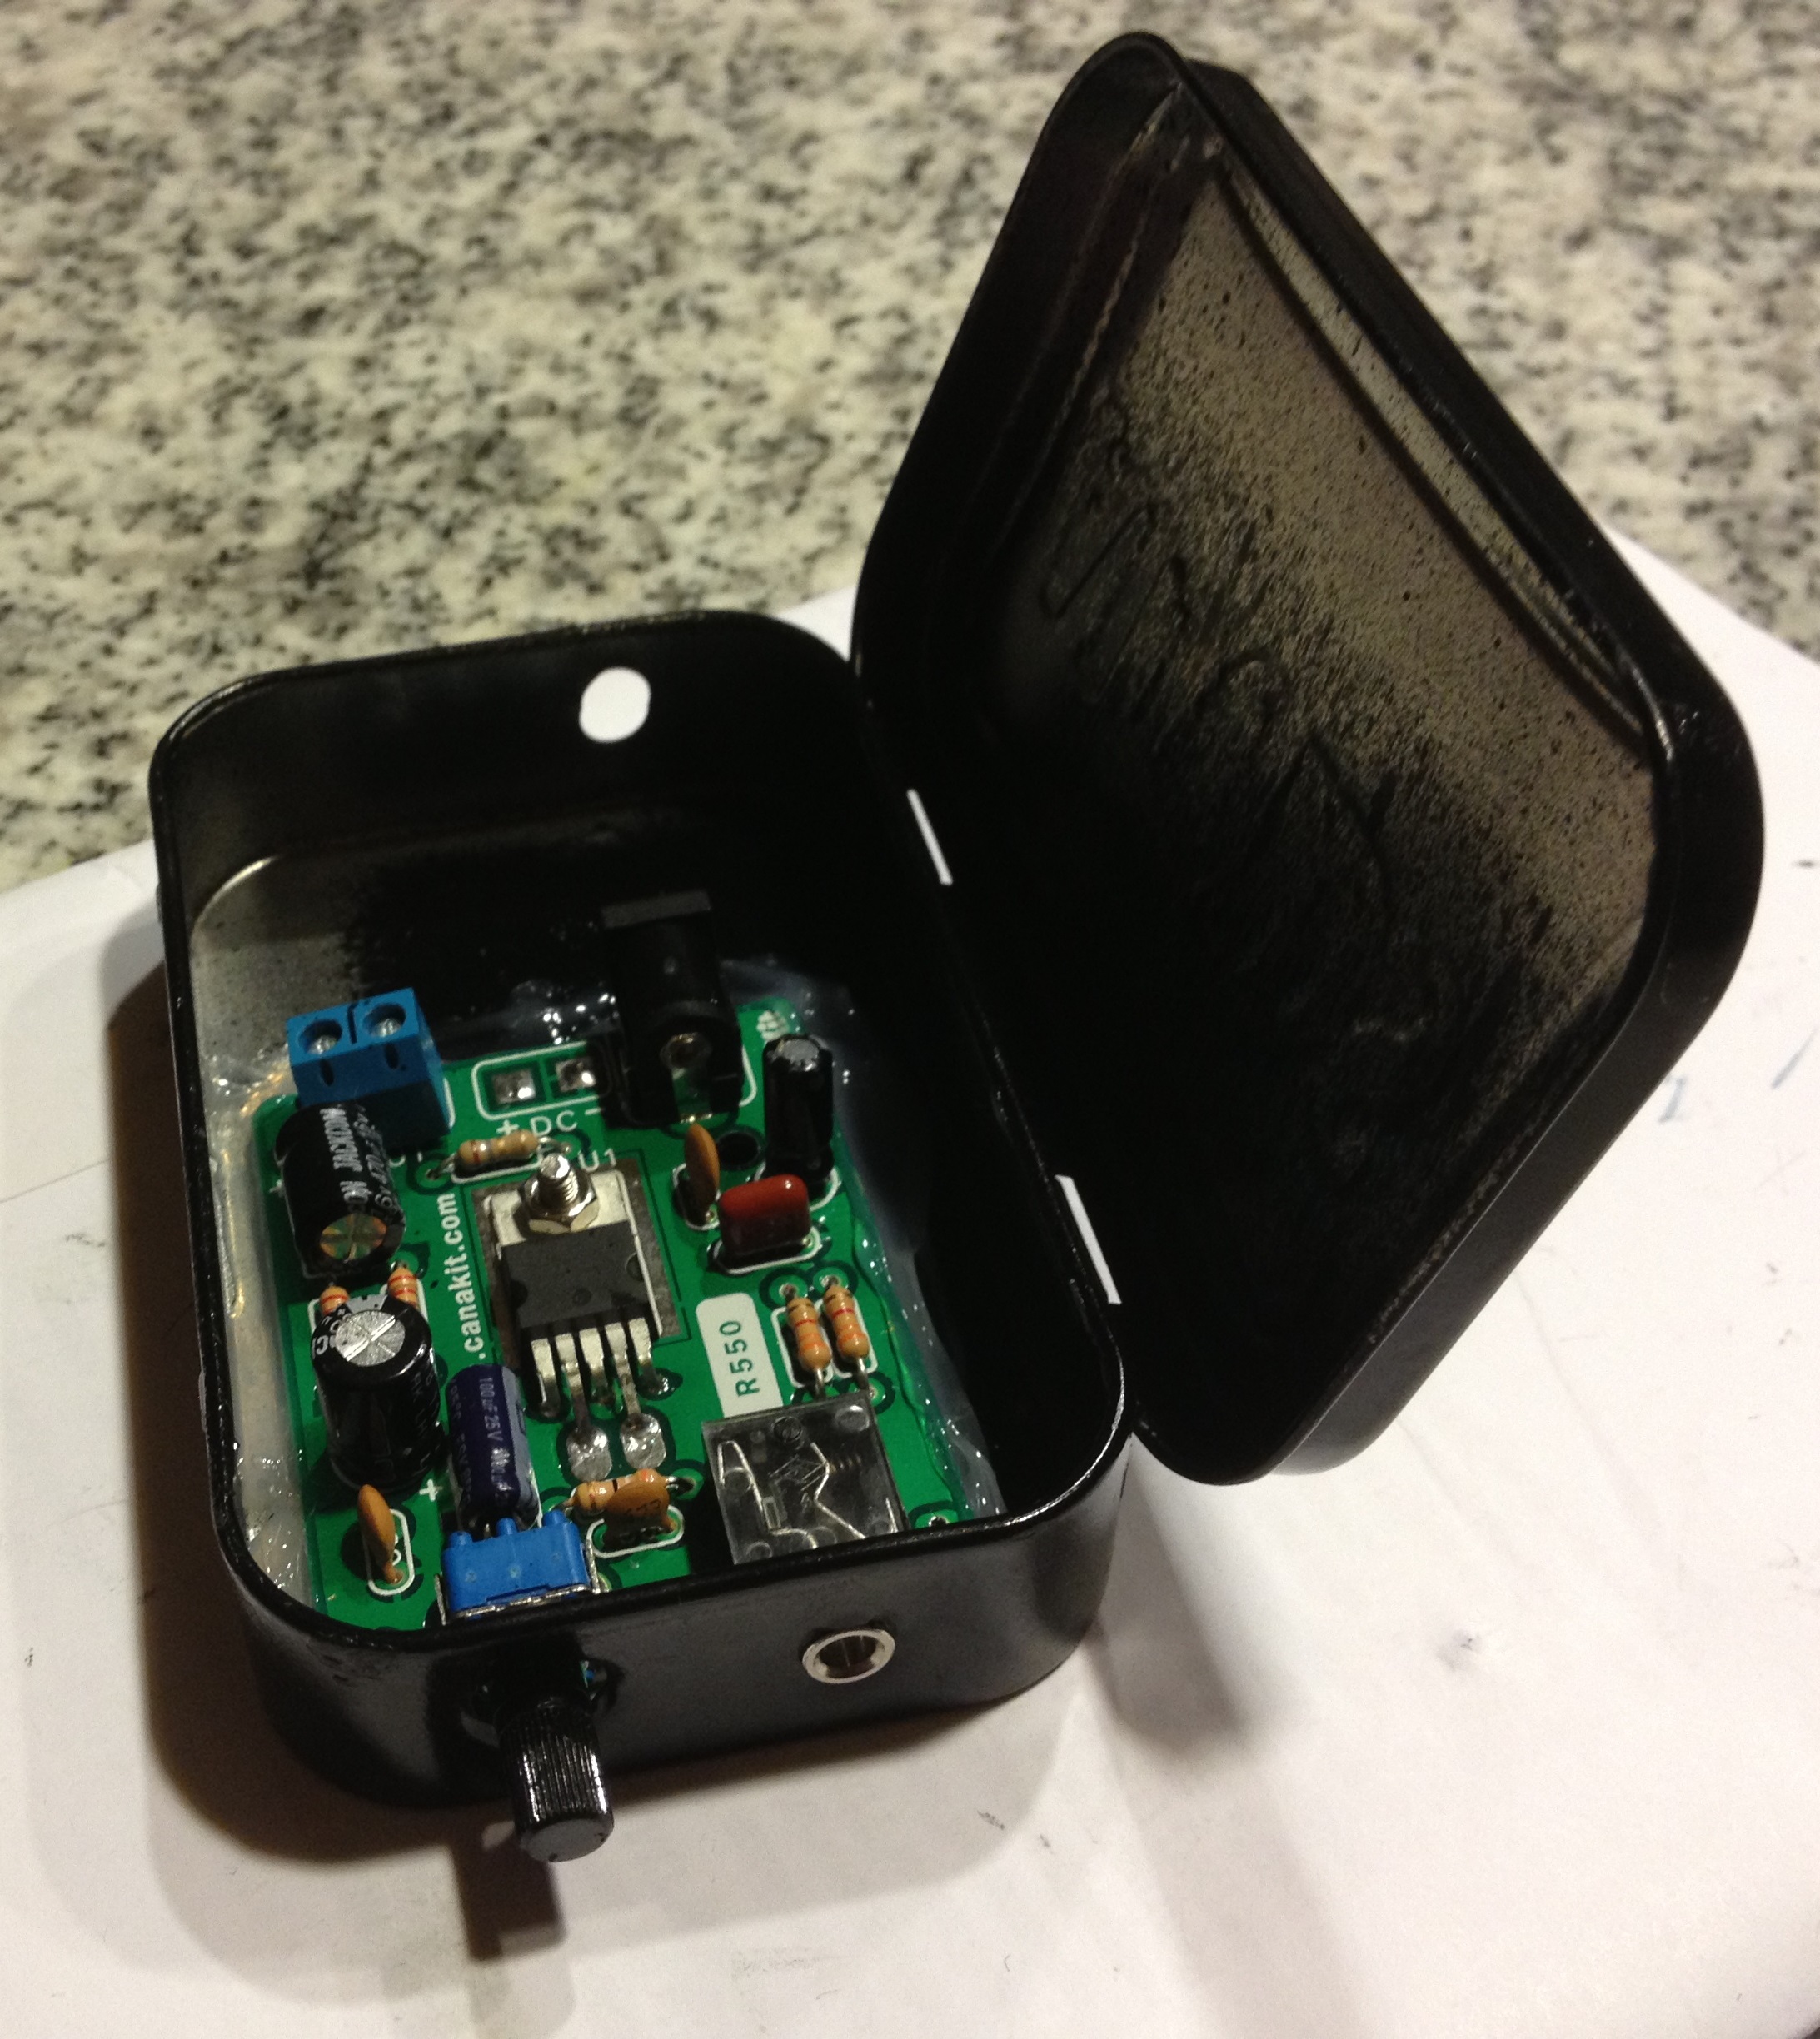
Assembled amp with access to volume knob, audio input, and adapter
Step 7: Plug everything in
Plug the amp into the power adapter, insert the speaker wires into the appropriate terminals, and the audio cable into the input jack. Plug the other end of the audio cable into your MP3 player or other device, adjust the volume of the amp, and crank out some tunes–the sound is actually pretty impressive!
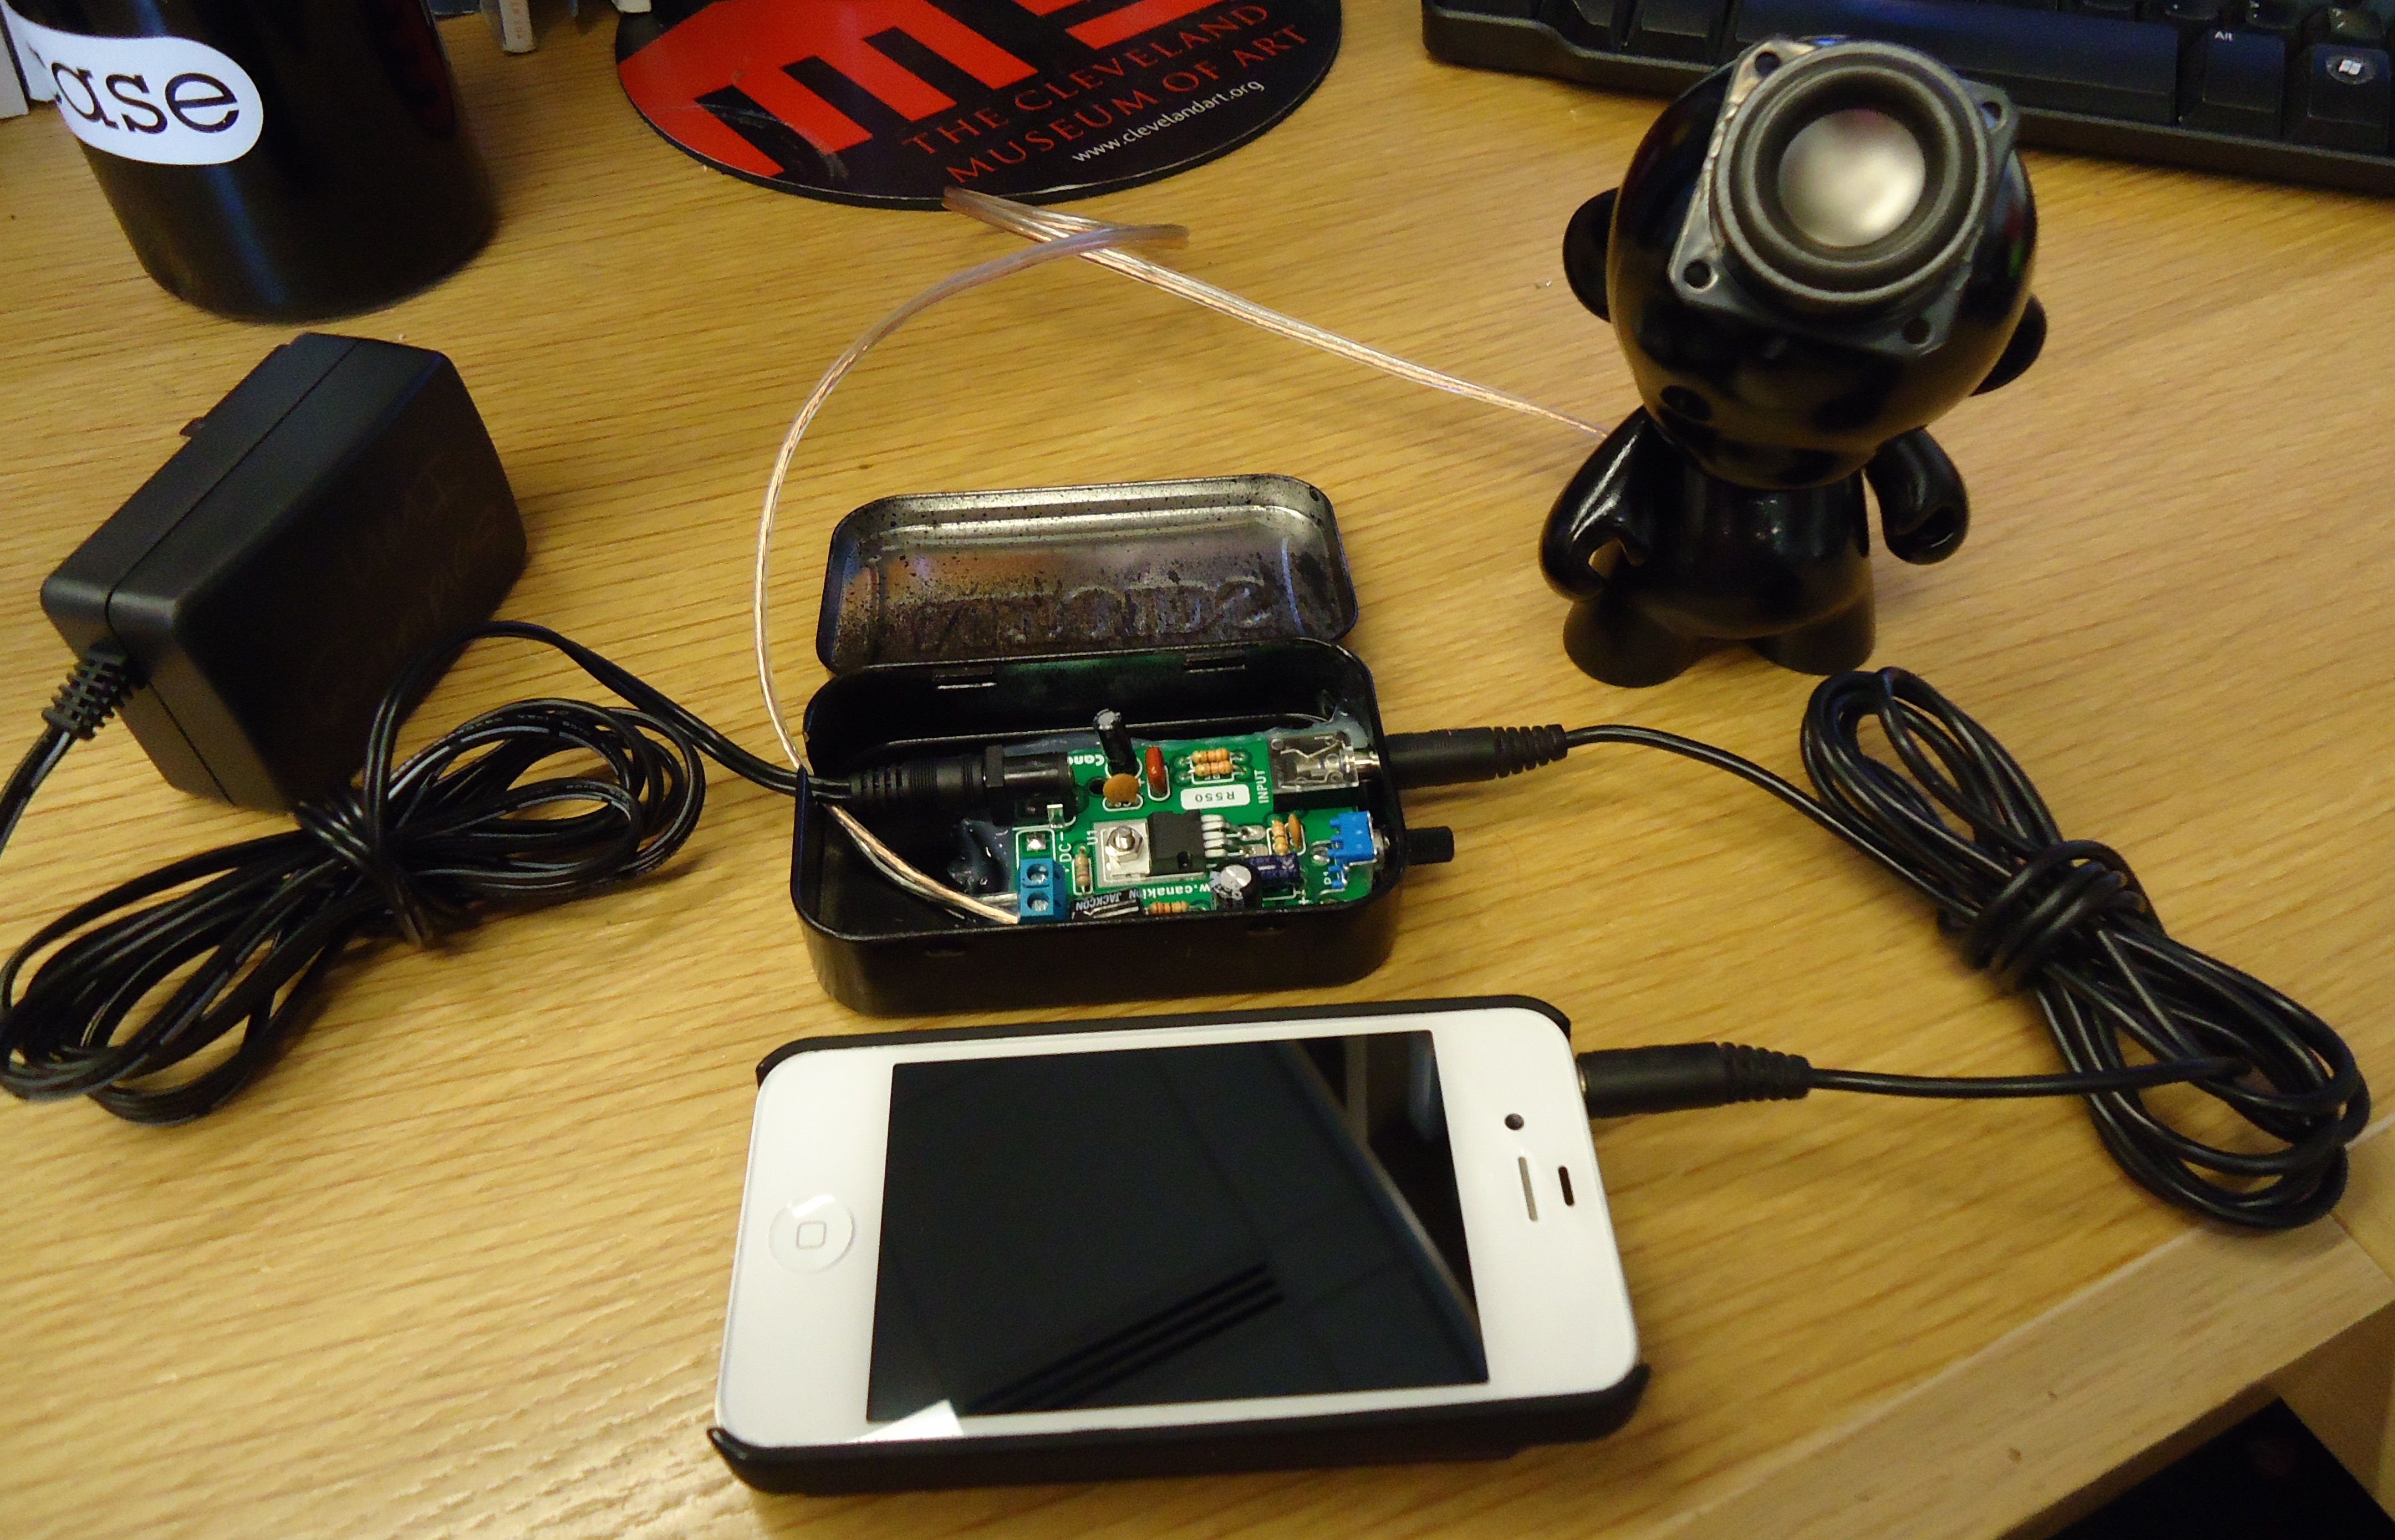
There are multiple ways you can adapt this project, based on the components you have available. For instance, you could power the amp using a 9V battery instead of an adapter. If you come up with any mods or Munny projects of your own, feel free to email me your pics!
JC Bigornia
C3 Program Coordinator