Posts Tagged 'drawing'

How the Florals Bloomed in “Flores Mexicanas”

Jaclyn Le and graphic installers place environmental wall graphics in Flores Mexicanas: Women in Modern Mexican Art.

My name is Jaclyn Le and I am the Senior Graphic Designer at the Dallas Museum of Art. My primary role here is to design the identity, graphics, and environmental graphic design of each special exhibition and permanent collection gallery, in both English and Spanish. Working closely with the Design and Interpretation team, the Exhibitions team, and each of our curators, my goal is to make sure the identities, graphics, and environmental design of each exhibition are aligned to the curator’s vision, and that they showcase the works and information in the best way possible.

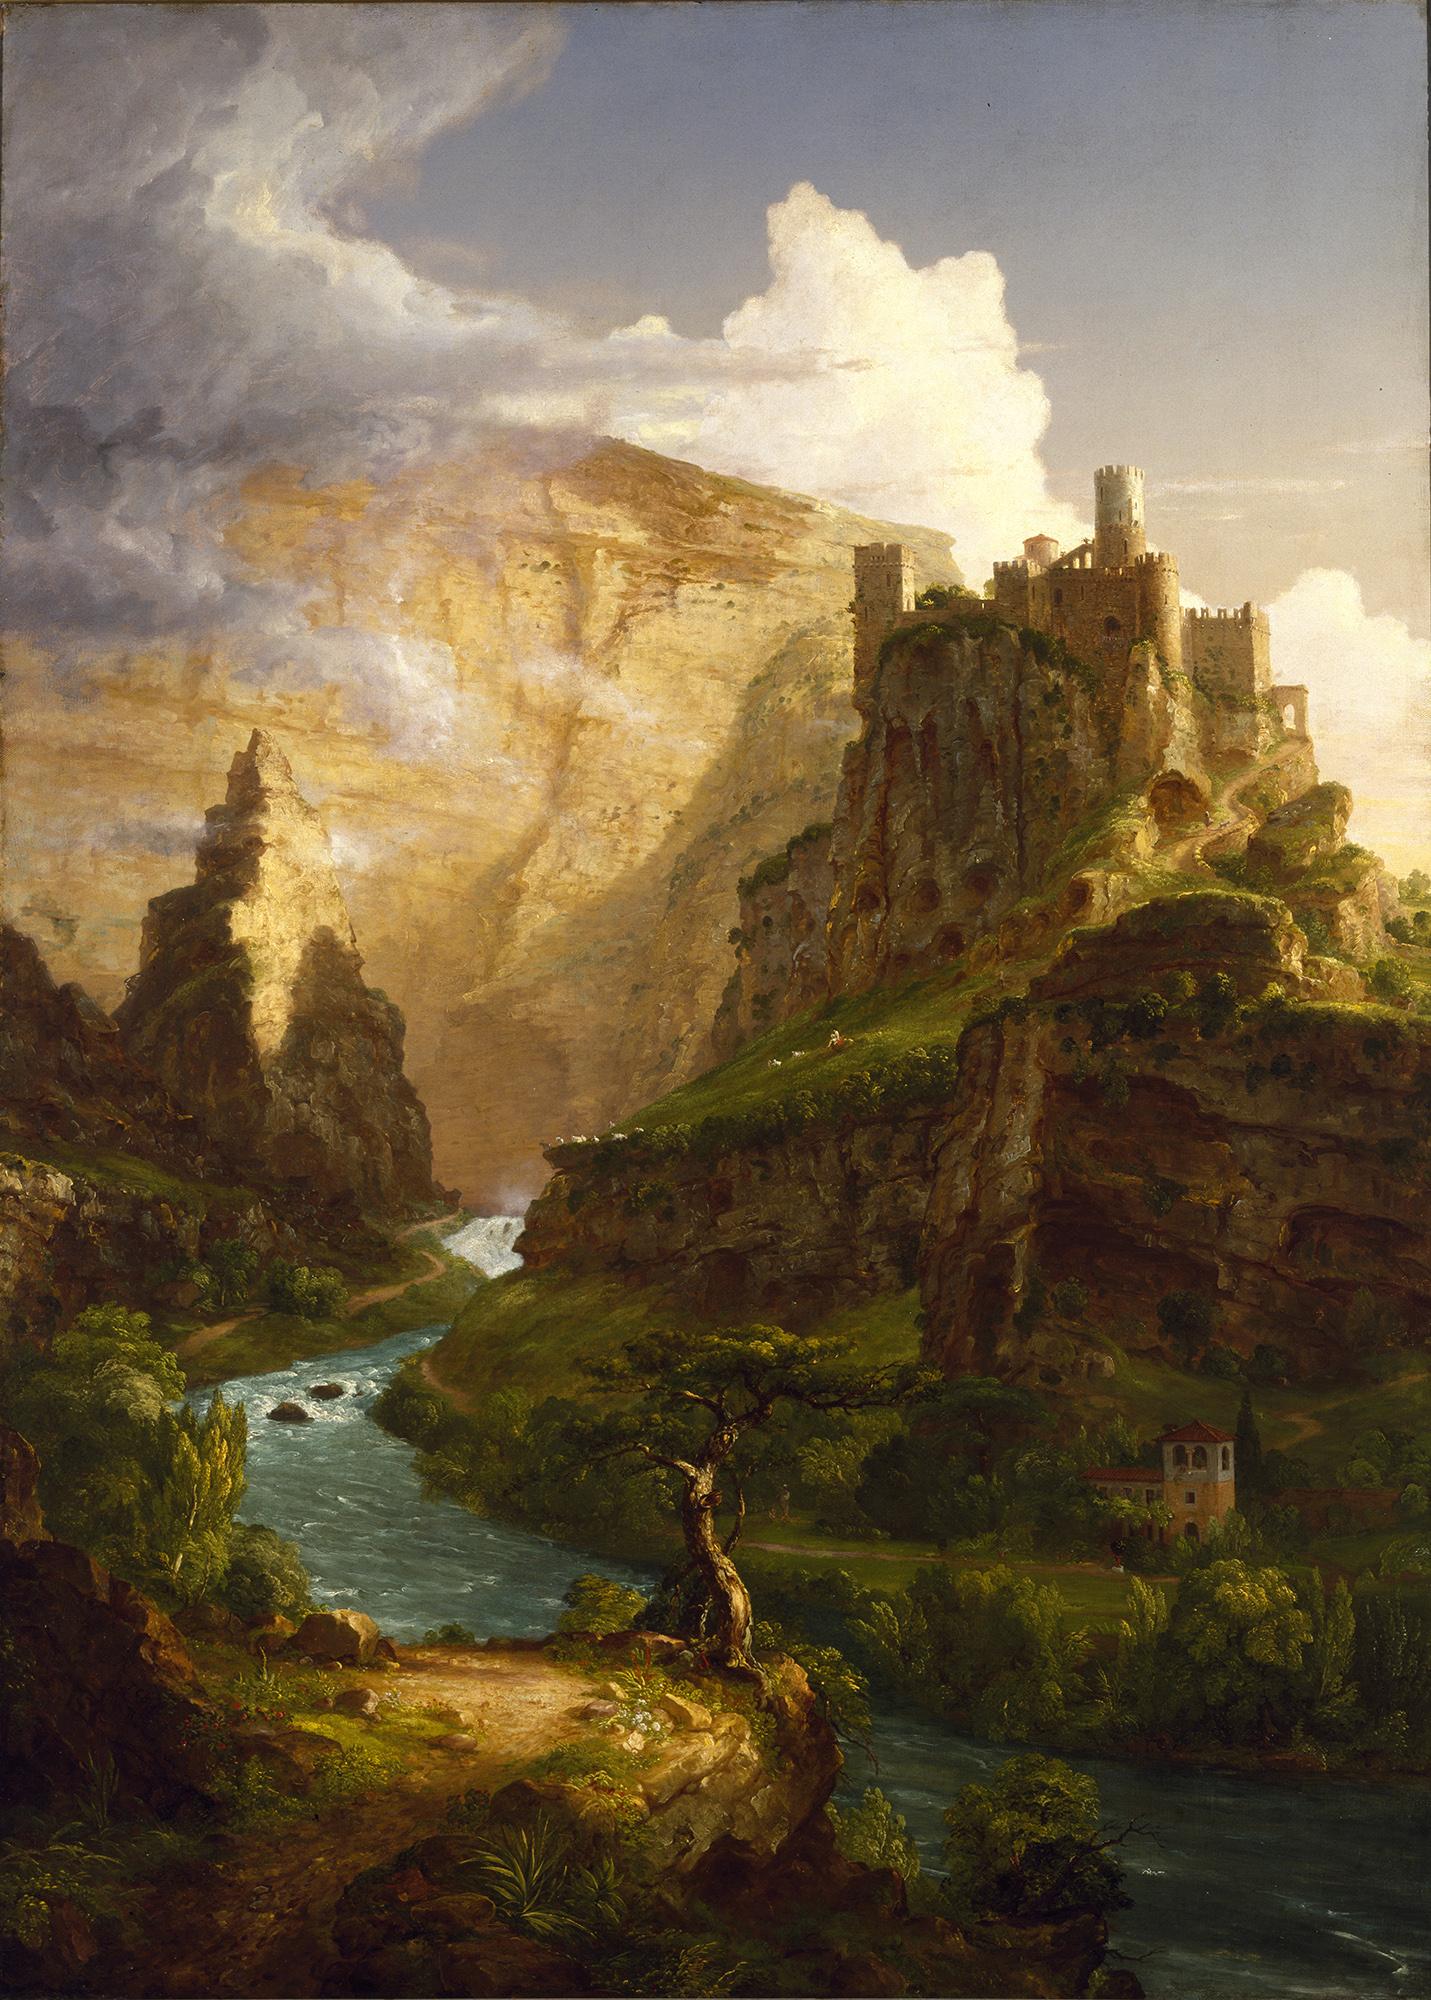
I was extremely excited to work on the design for the exhibition Flores Mexicanas: Women in Modern Mexican Art, curated by Mark Castro, The Jorge Baldor Curator of Latin American Art. We wanted the design to feel approachable, elegant, and vibrant. The typography is a pairing of a bold style seen in Mexican prints from the early decades of the 20th century, paired with a fuller, more feminine typeface.

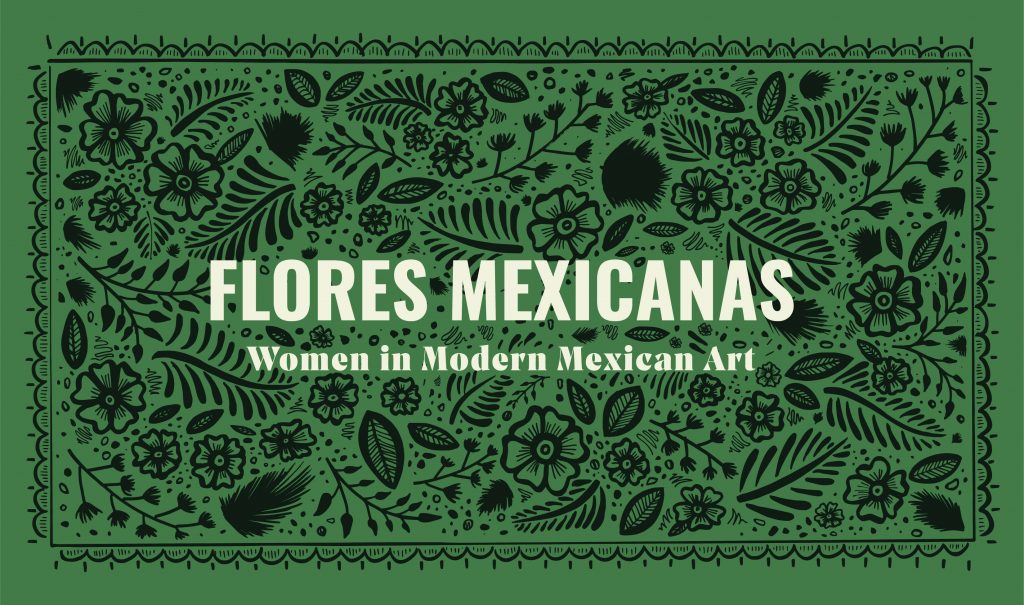
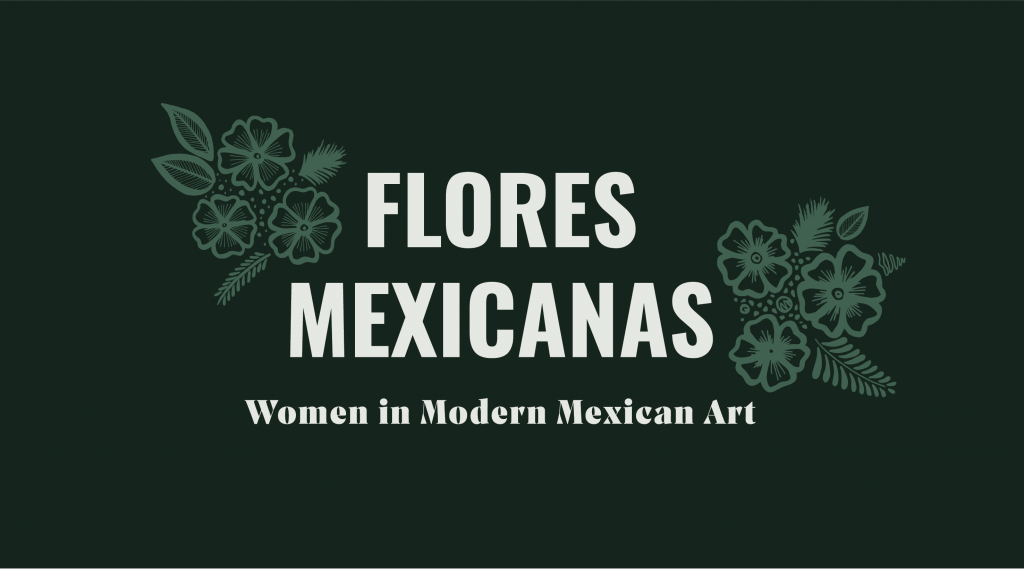
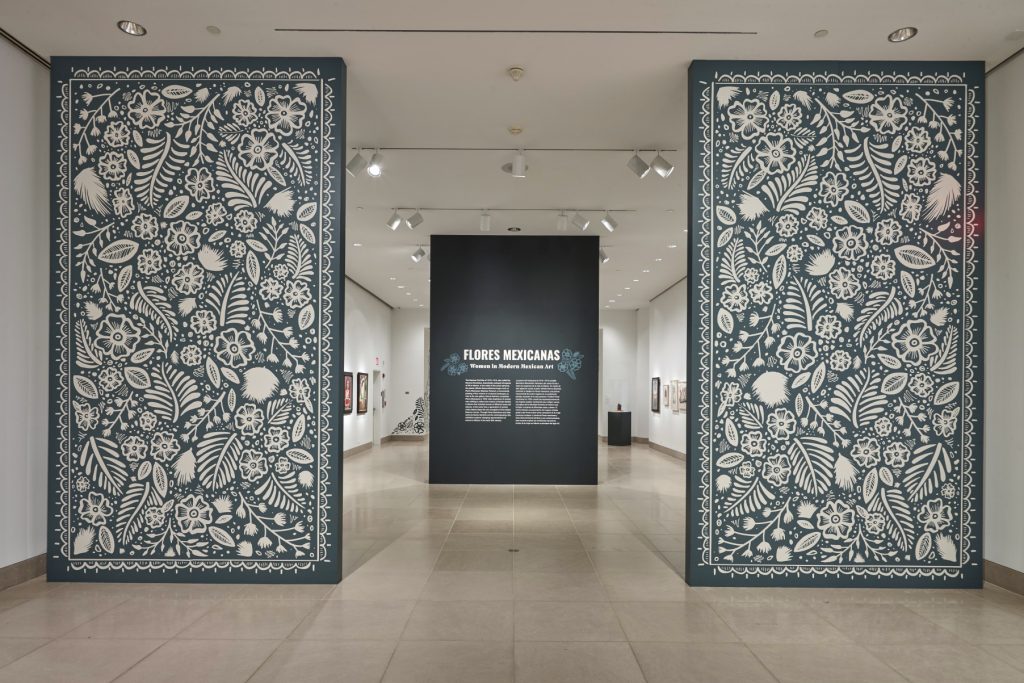
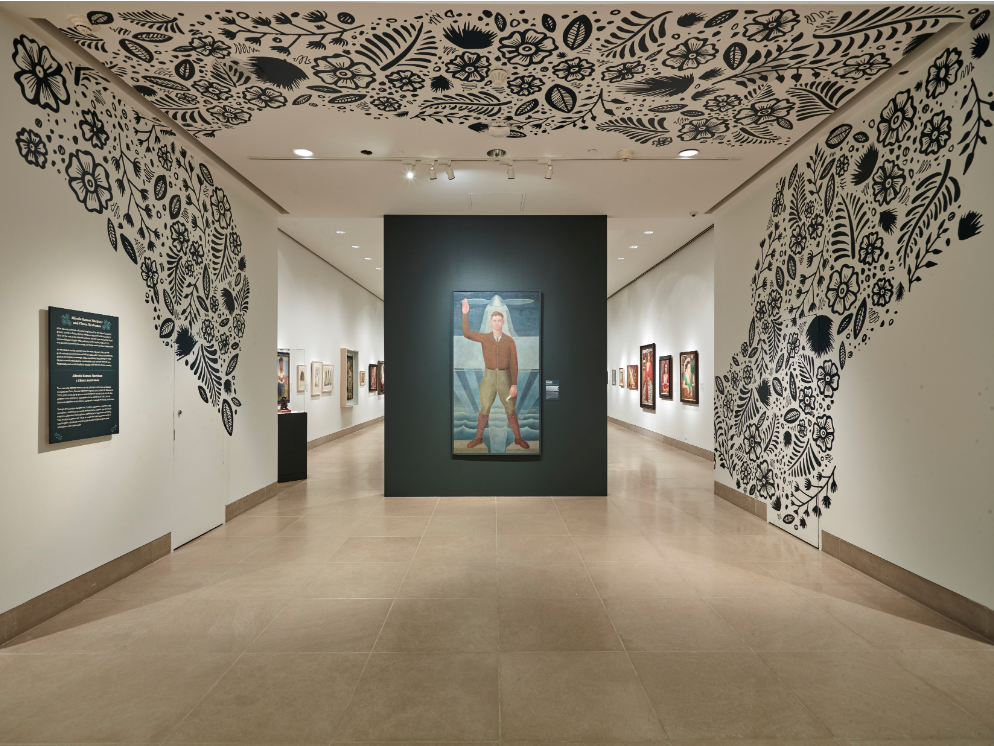
The hand-drawn floral pattern was inspired by Mexican lacquer ware from Olinalá. Our director, Agustín Arteaga, lent me a wonderful book full of different styles to look at, and I developed a monochromatic floral pattern illustrating common motifs I saw throughout the book. This floral pattern flanks both walls of the entrance to the exhibition, and weaves its way up and over the ceiling in the space right before the monumental painting Flores Mexicanas by Alfredo Ramos Martínez.

How to draw your own floral set as seen in Flores Mexicanas: Women in Modern Mexican Art.

You can watch this video tutorial to create your own floral set. Use any marker or drawing tool you have to create this. Here, I am using a Crayola Superfine tip marker.

1. Start by plotting three dots that will be the center of your flowers. You want to plot them with enough space in between—a triangle shape would be perfect for this.

2. Draw a ring around each of the three dots. These will be the bases of the flowers to draw petals around.

3. Start drawing the petals around each ring. I have 5-6 petals per flower here. It’s okay if they are not all equal in size—it will look better this way in the end!

4. Once all the petals of your three flowers are complete, draw 2-3 lines coming from the center ring to about halfway across each petal. This will give your flowers more depth and interest.

5. In the negative spaces between your three completed flowers, draw a few slightly curved lines. These will be the stems of your leaves. I have drawn 4 here.

6. Starting with the longest curved stem line, create a teardrop shape around the stem center. You can make these as wide or narrow as you’d like. Draw diagonal lines out from it to create the lines in the leaves. Do this for the other curved line stems from step 5, but save one of the stems for a fuller palm leaf drawing (in the next step).

7. For the palm leaf, create simple leaves by drawing small curved strokes of lines, starting from the top of the stem and working your way to the base. These curved leaf lines will gradually get bigger and bigger with each stroke, as you make your way to the base.

8. Complete your floral set by dropping in dots or circles in the spaces between the three flowers and leaves. Show us your creation by taking a picture and tagging #DMAatHome!

Jaclyn Le is the Senior Graphic Designer at the Dallas Museum of Art.

From the Journal of an Intern

As my fellow McDermott Interns and I wrap up our time here at the DMA, I wanted to share some memories I illustrated in my journal throughout the internship. Whether a silly quote from a child I was teaching, an inspiring phrase to help keep me on track, or a page highlighting the story of one of our Meaningful Moments participants, these journal pages show a small glimpse of all the incredible experiences I’ve had here at the DMA over the past 9 months. The time sure has flown by fast, but documenting these tidbits will definitely help the memories last a lifetime.

Until next time Dallas!

Grace Diepenbrock
McDermott Intern for Family and Access Teaching

Friday Photos: #inktober

Some of you might have noticed the #inktober hashtag popping up on your Insta feed recently. Inktober is an incredible project for artists and illustrators that occurs every year for the month of October. The creators set prompts for each day of the month, then artists create an original drawing using ink as the primary medium. It’s a great way to discover new ways of working and new artists to follow, and super fun to see how people from across the world respond to the theme of the day.

In honor of #inktober2016, this is my response to today’s prompt, big. I decided to do a sketch of one of the biggest pieces of art I could think of at the Museum: Ellsworth Kelly’s sculpture, Untitled.

This sculpture is outside in our sculpture garden, surrounded by trees and beautiful water features. It’s a gorgeous place to sit and sketch, read, or just relax in the fresh fall weather!

Image result for inktober 2016 themes

Reinforce your own positive drawing habits by participating with the remaining prompts this month. And if you’re a teen–or know a teen–interested in learning more about outdoor observational drawing, register for our Teen Workshop on the subject this Saturday!

Grace Diepenbrock
McDermott Intern for Family and Access Teaching

Beyond the Coloring Book

Coloring Book 1

Adult coloring books are all the rage right now, and the perfect relaxing activity to take a break from your spreadsheets at work, the laundry piling up at home, or that never-ending to do list. If you don’t really want to share your coloring books with the kids, here are some creative, easy ideas that go beyond the coloring book.

Coloring Book 3

Graph Paper Drawing
A couple years ago, one of the few things on my nephew’s Christmas wish list was graph paper. He was genuinely thrilled to open up a gridded white board, and got to work right away creating all kinds of designs. If a blank piece of paper is too overwhelming for your child, graph paper drawing is a great alternative. The preprinted lines and shapes provide just enough structure while still allowing for open-ended expression. You can download and print your own graph paper in all kinds of designs, from regular squares to triangles, circles, hexagons, and more, here.

Coloring Book 4

Scribble Drawings
Scribble drawings are still one of my very favorite ways to doodle. Simply scribble a line (or two or MANY) on your paper and then fill in the spaces with color for a fun abstract design. Or, step back, take a closer look at your doodle and see if any images materialize. Can you see a face? A tail? Fill in the appropriate spaces to finish out what your imagination sees in the lines.

Coloring Book 5

Back and Forth Drawings
Turn coloring time into together time by playing simple drawing games together. Tangle Art & Drawing Games for Kids has tons of creative ideas. We tried “Horizon Drawings” here in the office. I drew a wacky horizon line on a piece of paper, then handed it off to Jennifer, who turned it into these delightfully kooky characters. Can’t you just imagine the story that is happening here?

Surreal Drawings
Surreal drawings are another imagination-builder. Start off with an everyday object—clip pictures from recycled magazines or print images from the internet. Challenge your child to transform that object into something new by drawing. Characters are an easy place to begin—a carrot turns into a basketball player, an egg beater becomes a charming friend.

Coloring Book 8

Pokemon Go Unplugged
When it’s time to unplug and disconnect, your kids can still burn off their Pokemon Go steam with a little old-fashioned drawing. Have everyone in the family invent and draw their own Pokemon Go character and hide it somewhere in the house or yard. Call “ready, set, go” and race to see who can collect the most characters.

For more great drawing ideas, check out these links:

Fun drawing games at The Artful Parent

All kinds of drawing prompts from TinkerLab

Drawing game using household objects from Craftwhack

And ten more drawing games from Craftwhack

Happy coloring!

Leah Hanson
Manager of Family and Early Learning Programs

Friday Photos: Fun in the Sun!

Dallas had a *very* short break from stormy weather this week, just in time for our Homeschool Class for Families. After exploring landscape paintings by Frederic Church and Thomas Cole in the galleries, the class went outside to create their own scenic drawings en plein air (in the open air), using the Dallas Arts District as their backdrop!

What type of landscape masterpiece can you create using your own backyard as inspiration?

Danielle Schulz
Teaching Specialist

Late Night Sketching Party

This call goes out to all of you who like to put a pencil to paper and draw! We invite you to join us during Late Night this Friday night, May 15, from 7:00 – 10:00 pm for an African Art Sketching Party. Artist Ellen Soderquist will host, guiding you in the process of sketching your favorite African artworks in the DMA’s collection. All ages and skills levels are welcome, and all materials will be provided.

If you leave your sketch with us (pretty please!), it will be included in a public exhibition this summer. That’s right, your work will be on view in the DMA! Visitors’ sketches of African art will be displayed during July and August on temporary construction walls built near the DMA’s African Gallery, which will close to the public in June for a reinstallation project. While the real artworks will not be on view for a few months, we look forward to sharing your sketches with the public this summer. Seeing things through the eyes of another can often enrich our own view of the world.

See you Friday at the Sketching Party!

Nicole Stutzman Forbes
Director of Education

Your Inner Edward Hopper

Hopper Drawing: A Painter’s Process show us in exciting detail the creative process of painter Edward Hopper. We see him working out the shapes and angles of spaces and subjects that interested him—subjects and spaces that would become the focal points of his famous paintings. When you visit the exhibition, look for little differences in his drawings and paintings, as Hopper often tweaked the composition’s point-of-view, added or eliminated figures, and used creative license to make visual departures from reality.

As you meander through his preparatory sketches and drawings, consider testing out your own creative process. Pick up a pencil and a clipboard at the exhibition’s entrance and sketch what you see: it could be an interesting corner, a Museum visitor in a fabulous hat, or a tree in Klyde Warren Park. Then, on the back of the page, channel your inner Edward Hopper and combine your observations into a composition that incorporates some of your imagination. As Edward Hopper once said, “no amount of skillful invention can replace the essential element of imagination.”

Check out the artistic process of other DMA visitors!

This slideshow requires JavaScript.

Andrea Severin Goins is the interpretation specialist at the DMA

Draw like Edward Hopper!

Hopper Drawing: A Painter’s Process, currently on view at the DMA, is the first exhibition to explore the drawings of American artist Edward Hopper. Hopper is most well-known for his paintings. In fact, Hopper’s paintings inspired some Alfred Hitchcock films! It’s not as widely known that Hopper was great with a pencil or pen and paper, and he often sketched to work out themes that interested him. Many of these themes later became the subjects of his celebrated paintings.

Hopper did not draw strictly from reality. The artist explained that he worked both “from the fact” and by “improvising,” or working from his imagination. Though he worked from visual observation, he would tweak elements of his composition. Perhaps he would remove a lamppost, add a figure, or slightly change the angle of perspective.

In this exhibition, you can learn about Hopper’s process not only by observing his drawings, but also by trying it out yourself. After entering Hopper Drawing, pick up a pencil and a clipboard from the wall in the first gallery. Be inspired by Hopper’s sketches around you and draw your own surroundings. This could be people, things, or the interiors or exteriors of buildings. Then, combine your observational sketches into one composition that incorporates elements from reality and your imagination, in the same way Hopper worked out compositions for his paintings through sketching.

We look forward to seeing what you create!

clipboards

Andrea Severin Goins
Interpretation Specialist


Teaching for Creativity: One Continuous Line of Creativity

One goal for the Teaching for Creativity series is to present the voice of other educators who can share insights and approaches to teaching that nurture creative behavior.  Meet Lorraine Gachelin, Artistic Director at the Dallas International School and participant during the DMA’s 2011 Summer Seminar.  Lorraine shares with us a drawing exercise that supports the development of risk-taking, freedom, and creative flow in her middle and high school students.

I have the pleasure of working with Middle and High School students.  They display a great deal of energy and enthusiasm when working on creative projects and studying art history.  Curious, analytical, and structured, they follow instructions and stay within their guidelines.  The challenge arises when I ask them to spend time sketching in their journals.  “What should I draw? How large or small?  Which tool must I use?”  “A free drawing”, I respond, “What is on your mind today?  What would you like to express?”

My biggest thrill as an artist and teacher is to offer my students the opportunity to be risk-takers in their art.  I want them to open up their minds, take a pen to paper, and doodle with a cause.  Go with the subconscious flow!  Let the pen move around with one continuous line until an image appears.  No planning, no analysis, no critical thinking.  Just pure creative freedom and finally, allow an image to spring forth.

One continuous line drawing by teacher

Sounds strange?  Not really, it just requires an open mind and a little practice.  A ballpoint pen is a great tool because it can’t be erased and the pressure can be varied.  The paper can be any size – try to use the maximum space available.  Constraints are minimal but important:  no reference photos and the pen may not leave the paper as this drawing will be created with one continuous line.  The first few minutes of drawing should be very free.  Consider it a warm-up.  I don’t even look at my paper during this time.  Once the pen touches the paper, allow the line to move around as if it is listening to music.  After a minute, my eyes are on my paper and I watch the line continue to flow and build.  Shapes may begin to appear where the lines cross with textures implied.  Patterns and values slowly emerge forming an image in a very organic and natural state.

One continuous line drawing by student

A talented sixth-grade student was intrigued by this approach to drawing.  Without question, judgment or any preset expectations of what would result, he quietly sat at his desk and drew for 15 minutes.  A flower and butterfly appeared with much energy and grace, all too well symbolizing the metamorphosis that had just taken place in his artwork.  It’s all in the continuum of the flow.

Many thanks to Lorraine for contributing to this blog and for being such a wonderful collaborator in the pursuit of creativity!

What creative experiences are happening in your learning environment?  Share your ideas with us and spark the dialogue.

Nicole Stutzman
Director of Teaching Programs and Partnerships


Archives

Flickr Photo Stream

Categories