Archive for the 'How It’s Made' Category

Behind the Scenes: Bosco Sodi

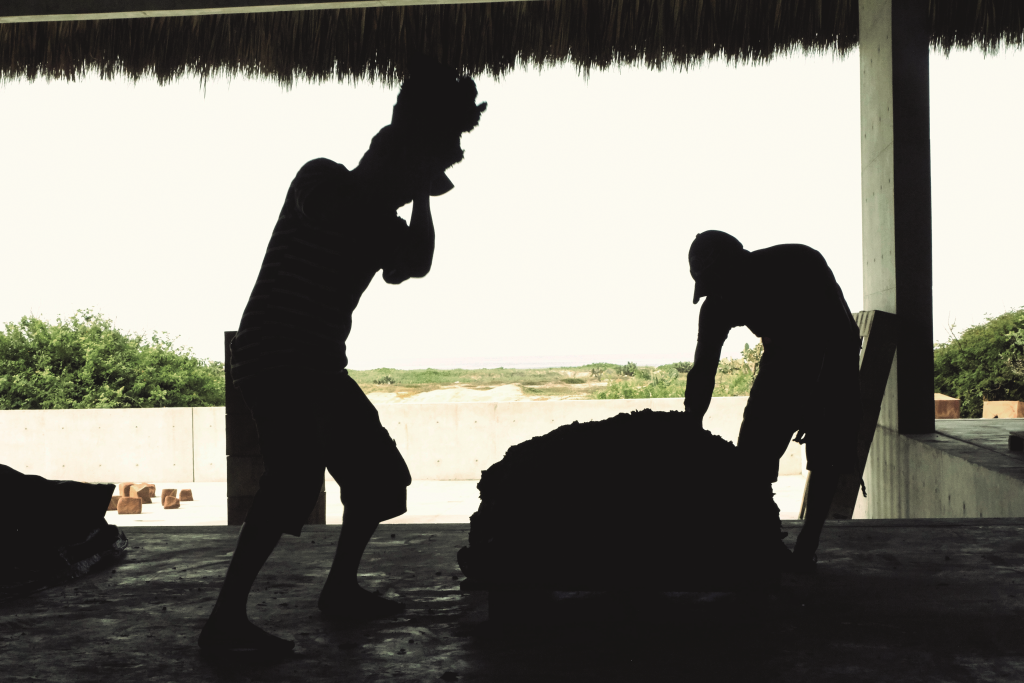
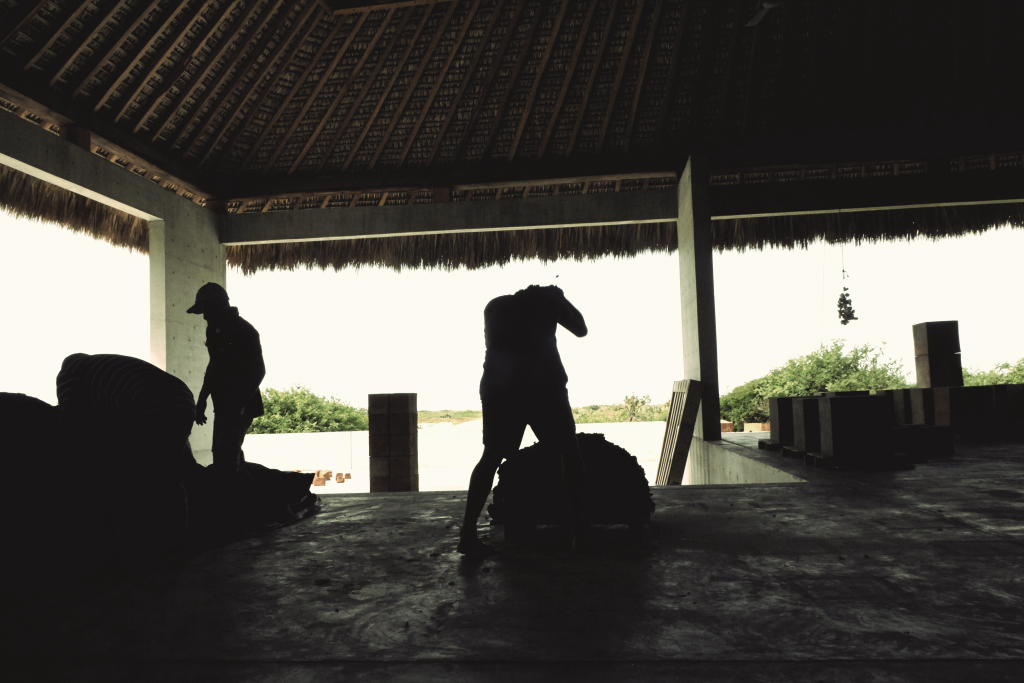
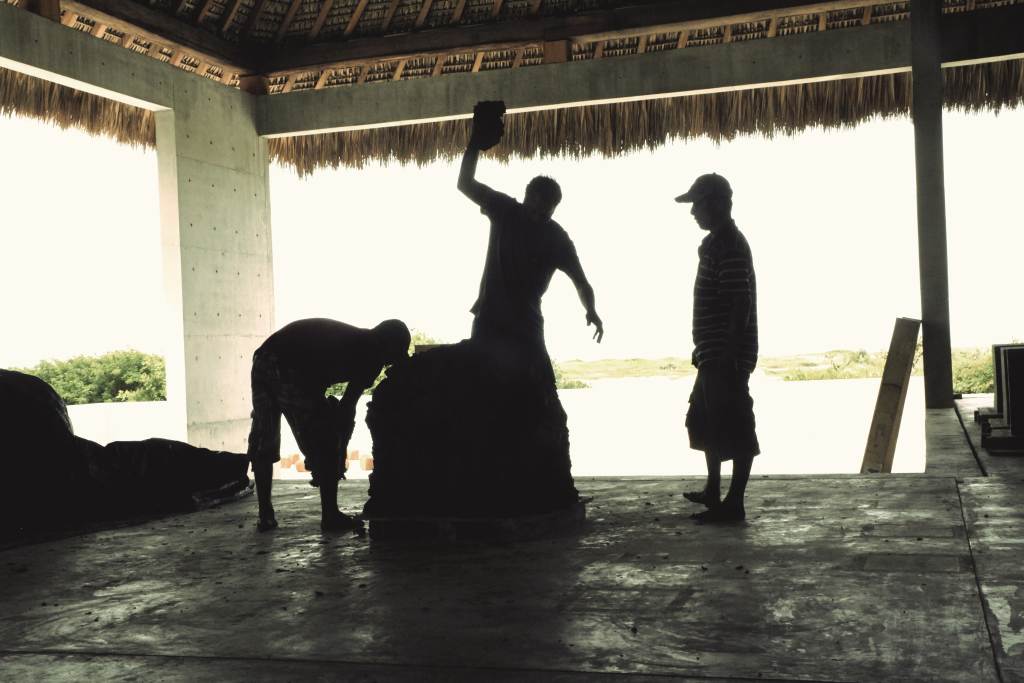
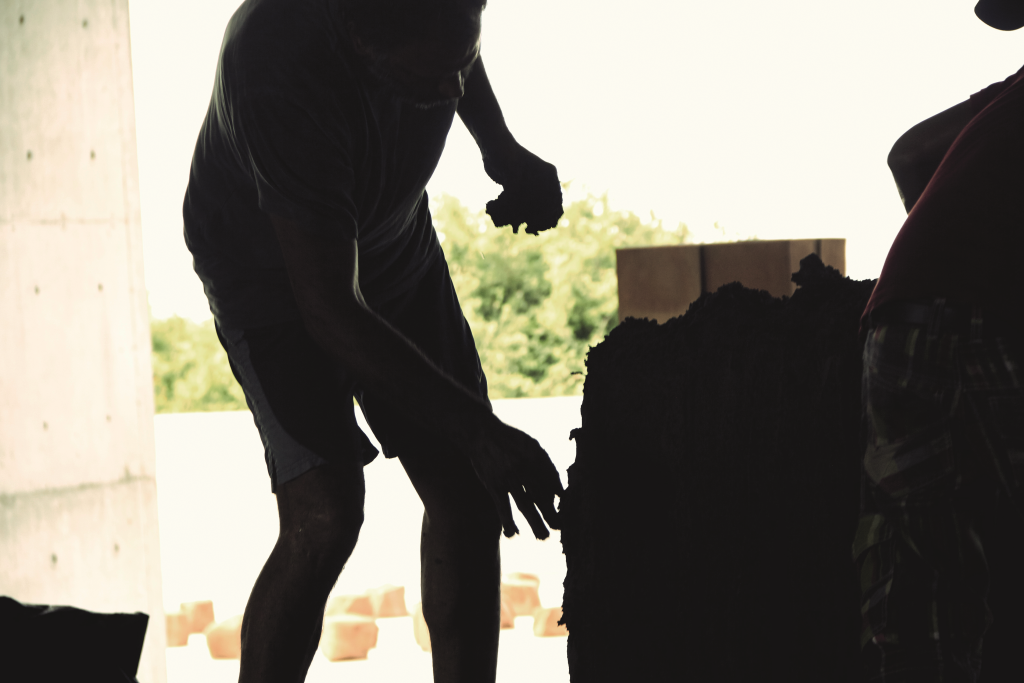
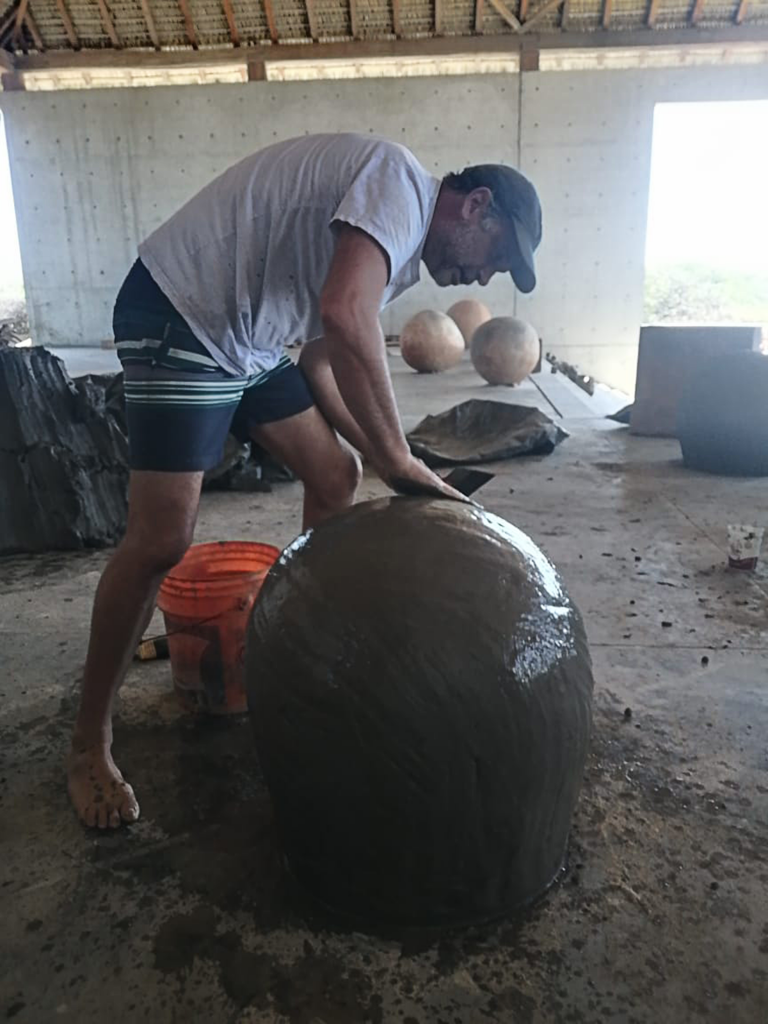
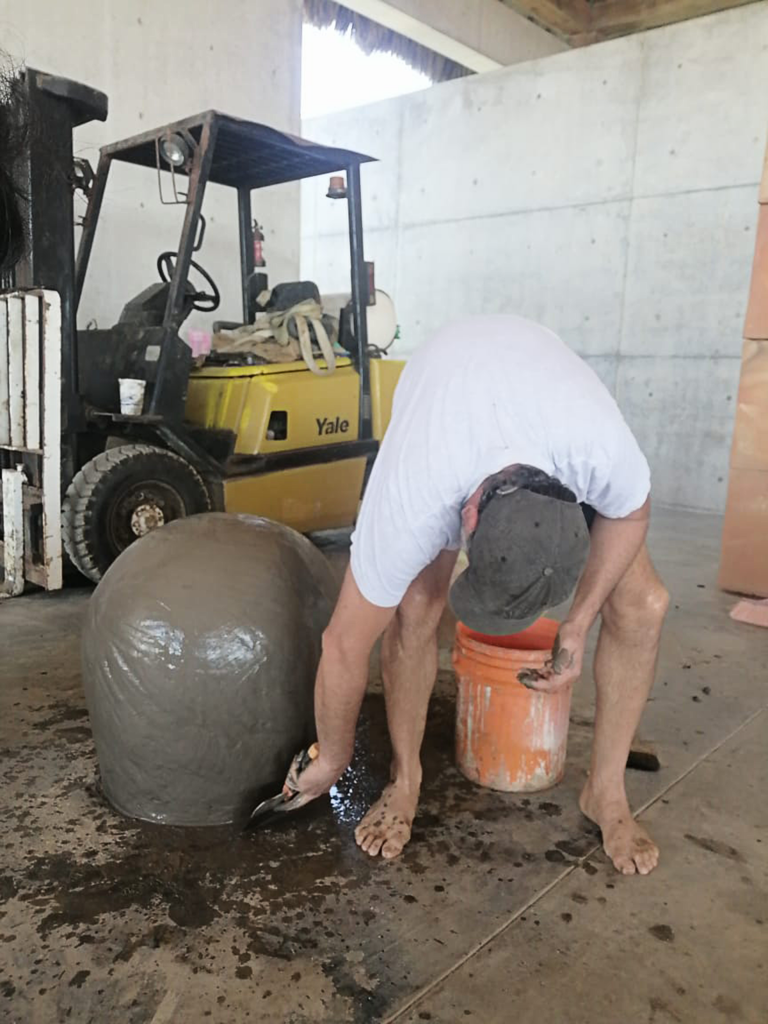
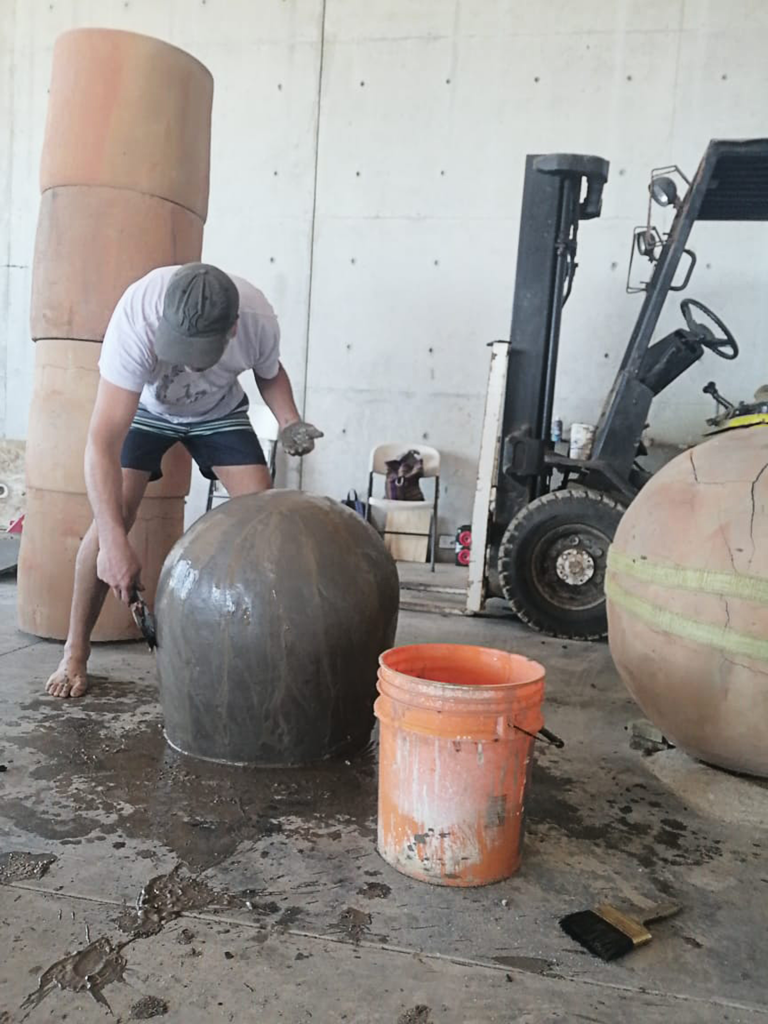
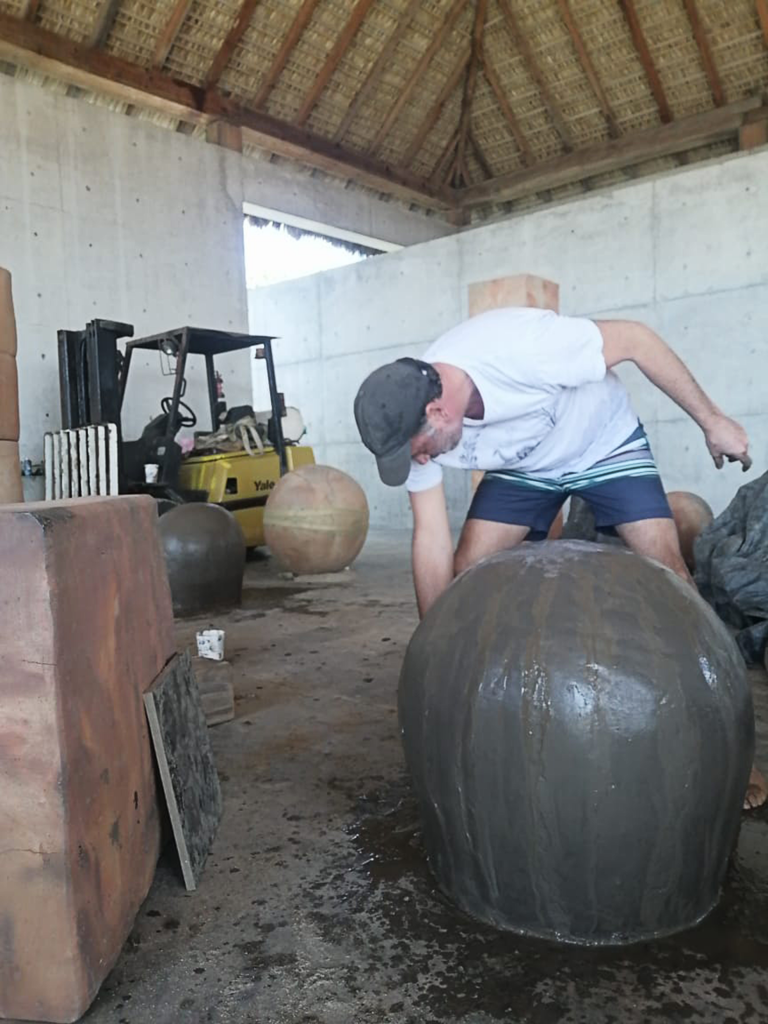
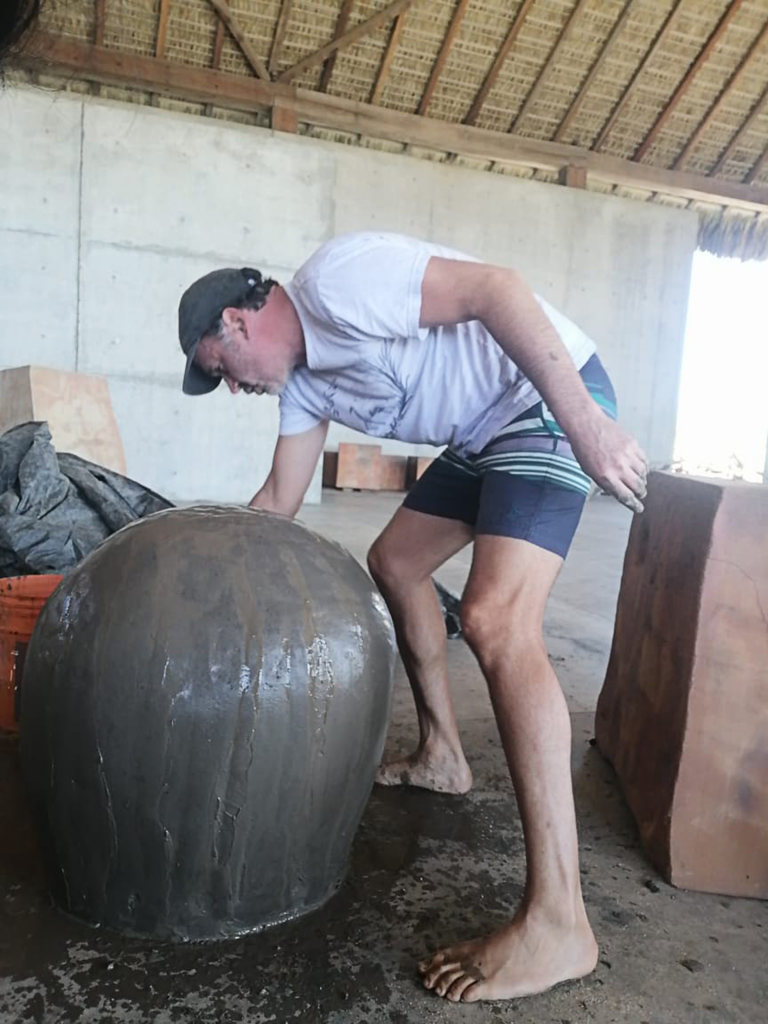
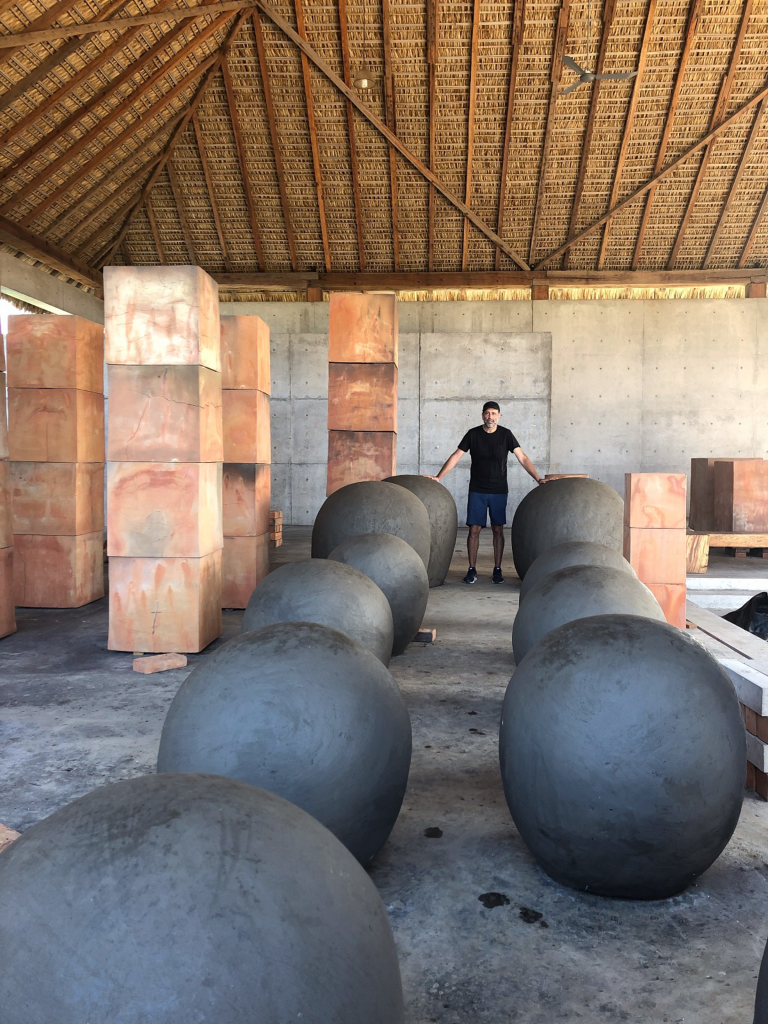
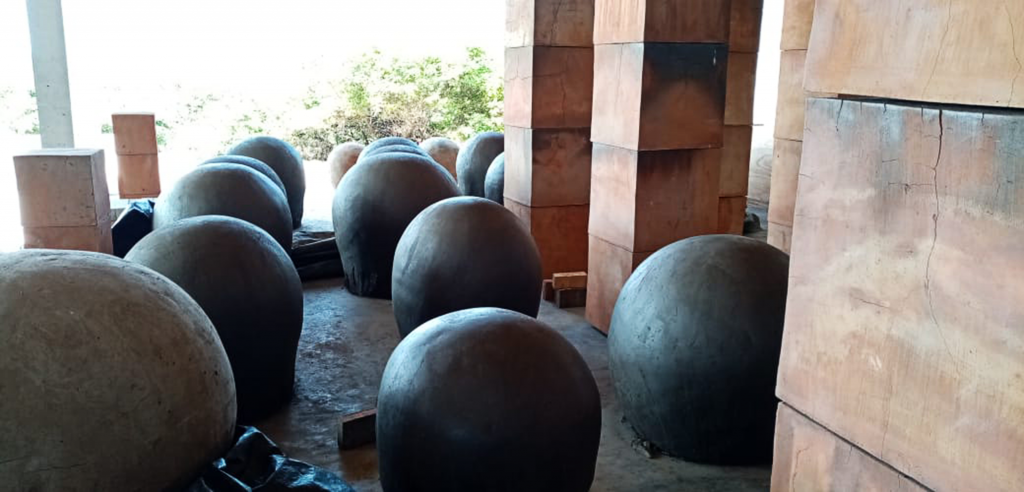
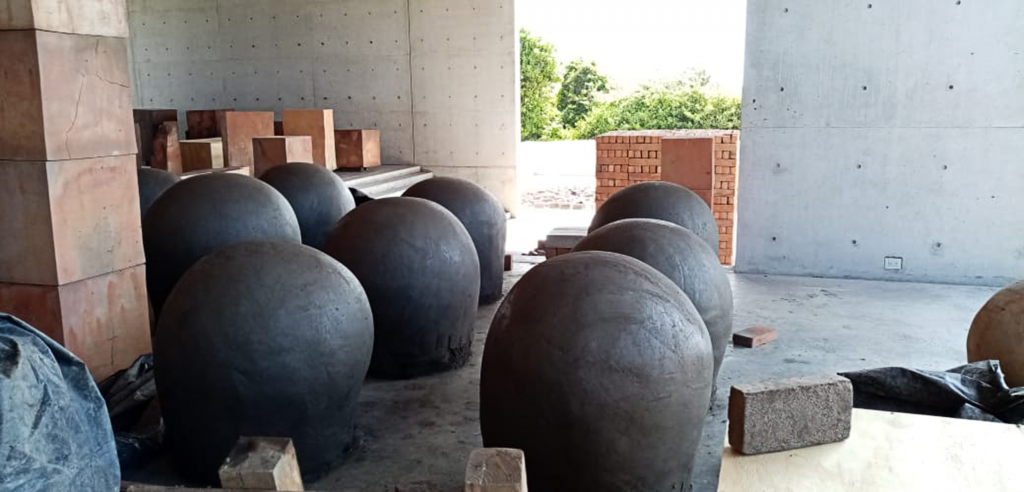
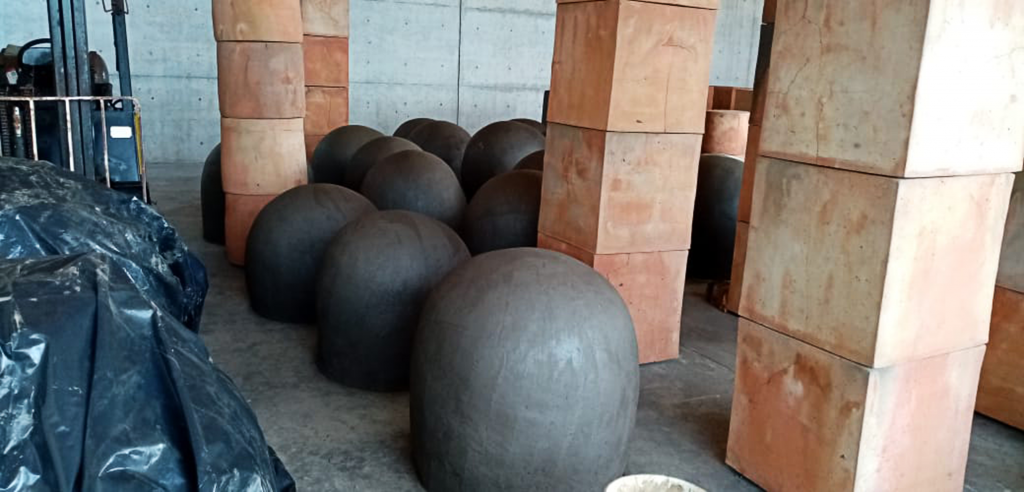
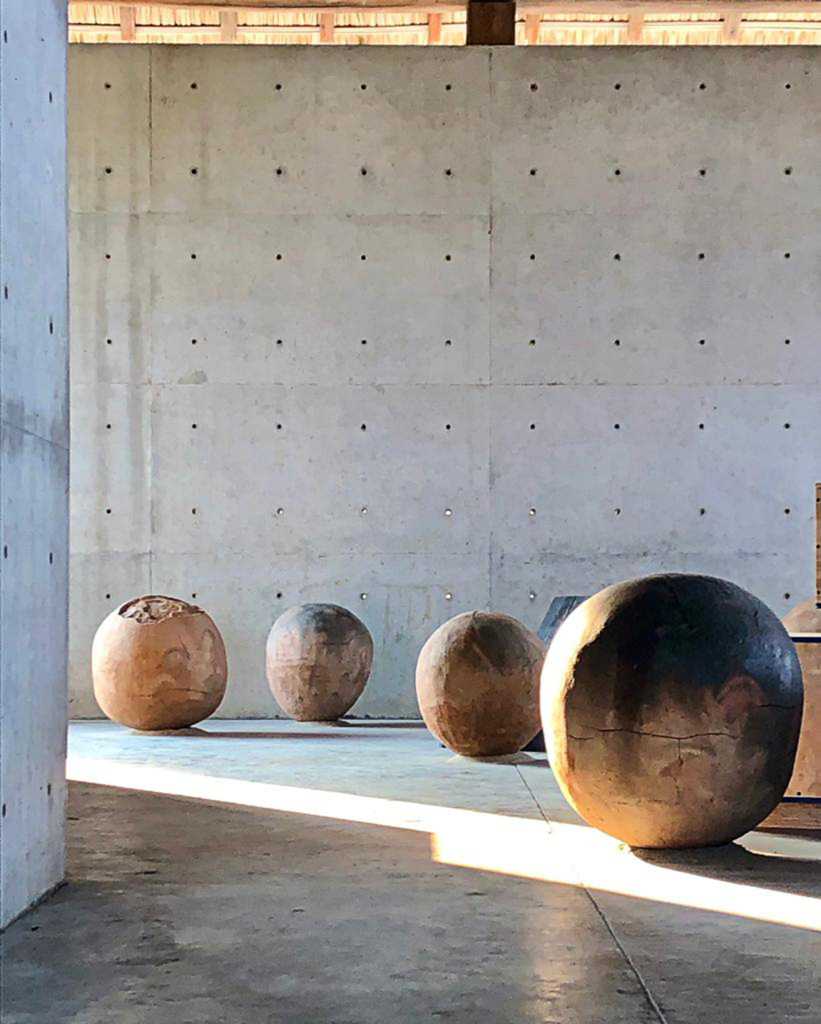
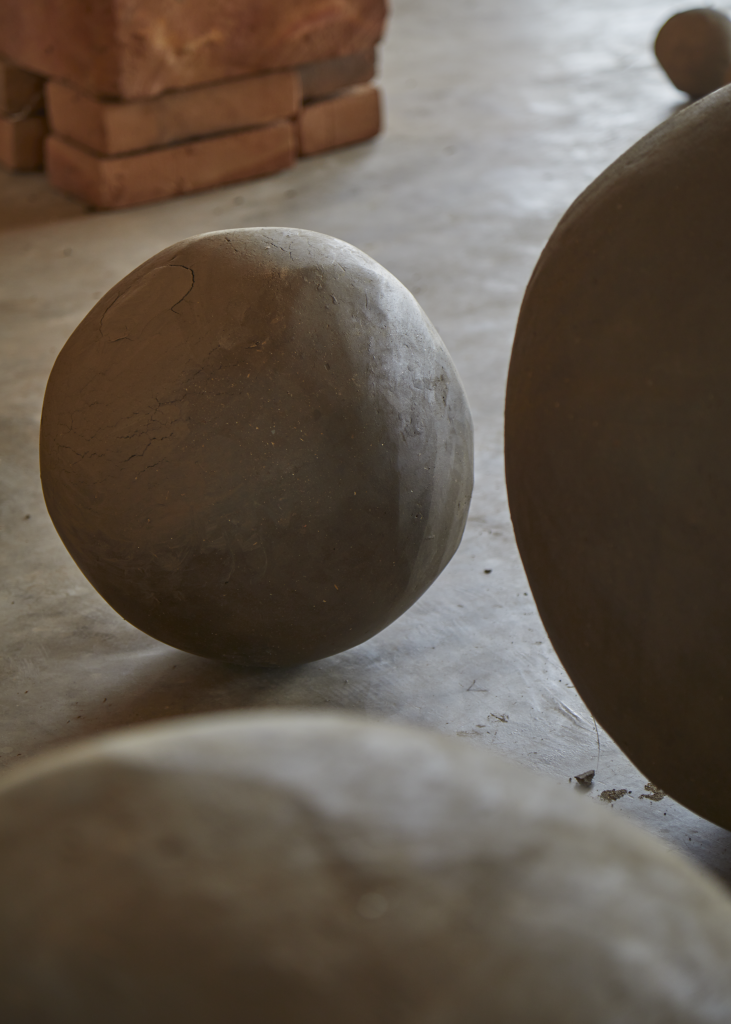
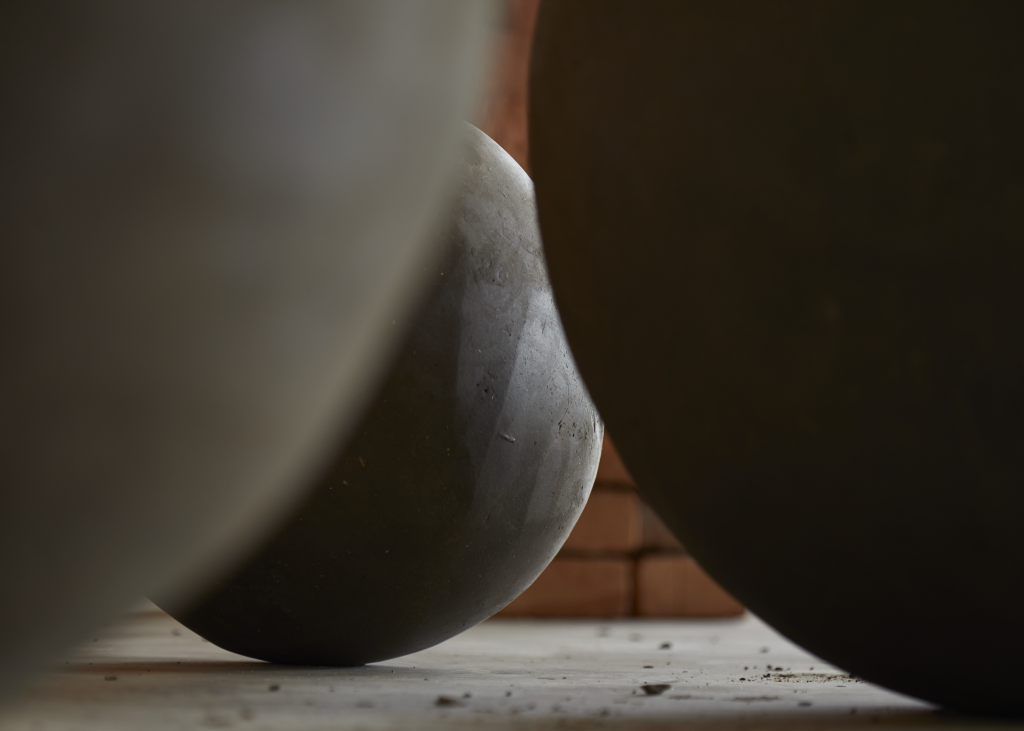
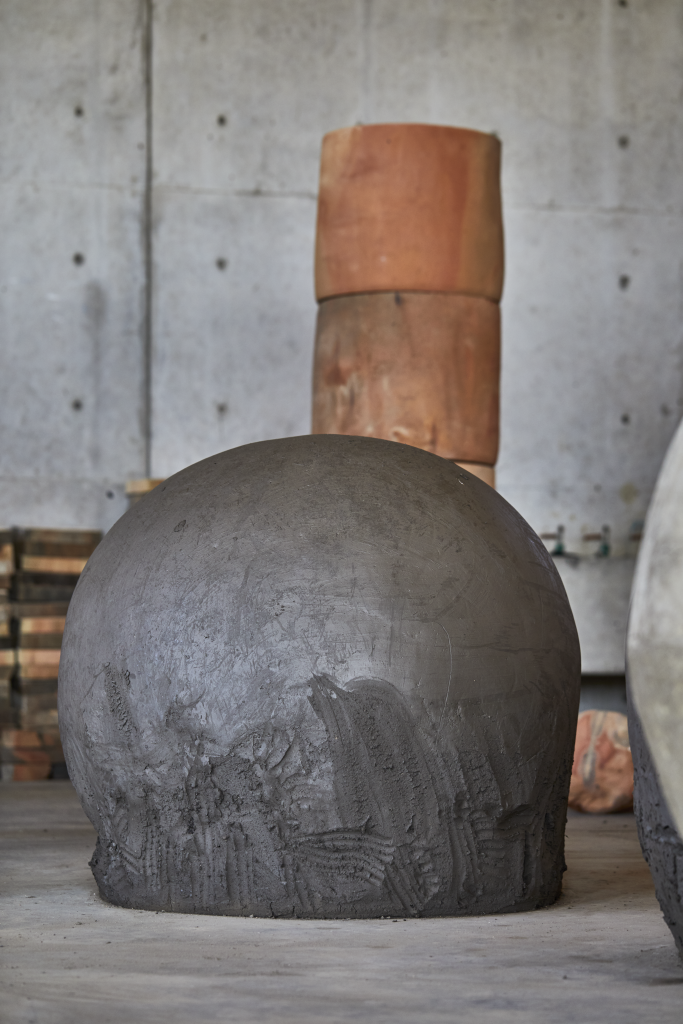
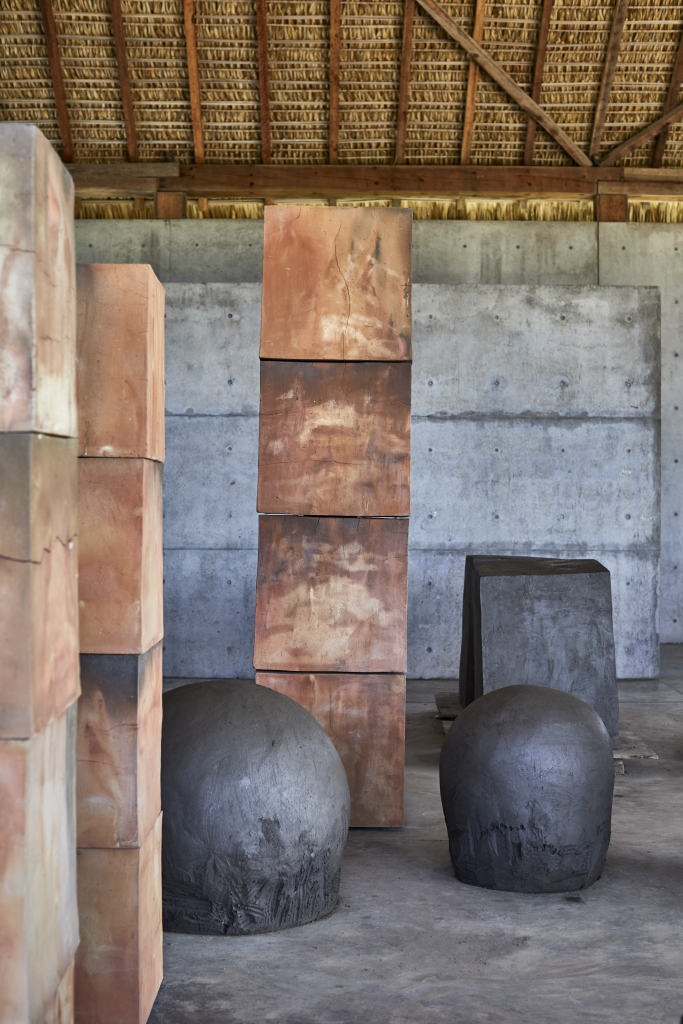
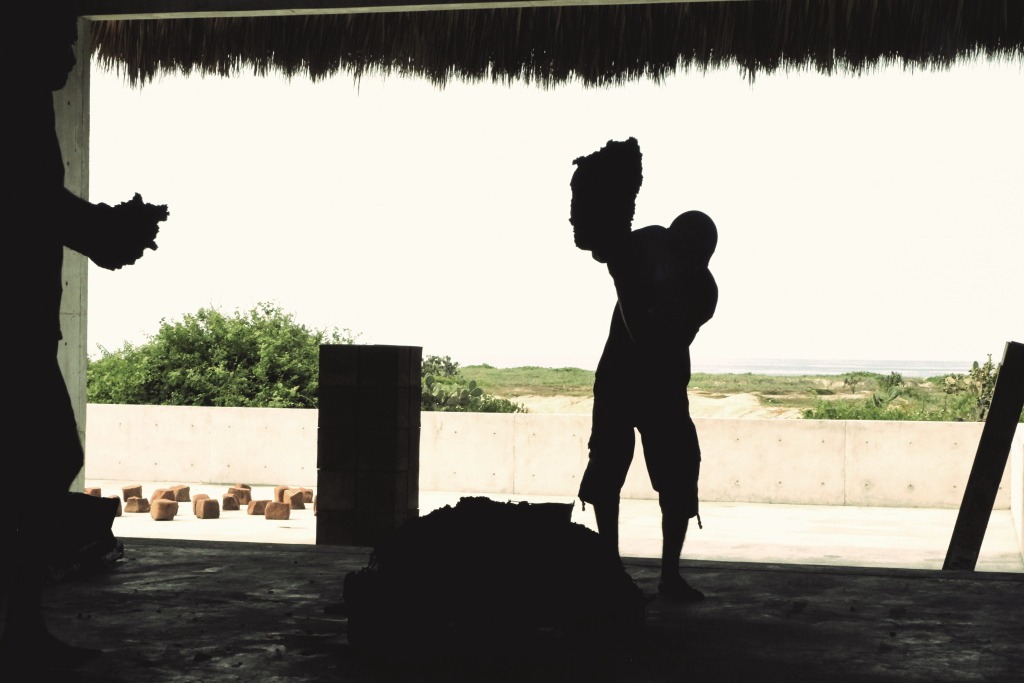
Opening September 14, 2021, Bosco Sodi: La fuerza del destino will feature approximately 30 outdoor sculptures by the artist in the DMA’s Sculpture Garden. Created from clay sourced at Sodi’s studio in Oaxaca, dried in the sun, and fired in a traditional brick kiln, the resulting surfaces bear the beautiful scars of their process. Take a behind-the-scenes look at the artist creating his work.

Preparing the clay to sculpt:

Creating the clay spheres:

Drying the clay spheres:

Courtesy: Studio Bosco Sodi, Photographer Sergio Lopez.

Printmaking: A Process

Modern technology makes creating multiples easy. With a click of a button, we can print full-color images and entire articles of text in seconds. Making copies wasn’t always so quick and simple—entire books were scribed by hand, and artists and their studios would labor over multiple versions of a painting or sculpture for their clientele.

Today’s electronic printers can trace their origins to the early printmaking innovators in East Asia. In China, engraved blocks of wood were used to create copies of written text as early as the 8th century. Korean printmakers took woodblock printing a step further by creating the earliest form of metal movable type in the early 13th century, nearly two centuries before Gutenberg brought movable type to Europe.

While printmaking facilitated a wider distribution of text and knowledge, how did it impact artwork and images? Innovations in the 17th century gave artists the ability to create multicolored prints on a single sheet. Engravers would create multiple carved blocks for a design, with each block carrying a different color. Previously, an outline had been printed in one color, and artists would hand paint in the rest of the design.

Utagawa Hiroshige, Hara: Mount Fuji in the Morning, 1834, woodblock print, Dallas Museum of Art, gift of Mr. and Mrs. Stanley Marcus, 1984.202.14

The addition of multiple blocks in the printing process meant that artists and publishers could speed up production, to the great benefit of everyday people. In Japan, Utagawa Hiroshige produced a series of 53 prints representing the stops along the Tokaido Road, which linked Edo and Tokyo. Hiroshige’s series was extremely popular; it was printed thousands of times and sold as a souvenir or keepsake for display in homes, indicating that prints were priced cheaply enough to make them accessible to travelers for purchase.

After spending time with Japanese woodblock prints, it’s easy to understand their popularity. In Hiroshige’s Tokaido Road series, as well as later works created by Hiroshi Yoshida, prints transport the viewer to new places and captured with spectacular detail and color how people interacted with their environments .

Hiroshi Yoshida, A Glimpse of Ueno Park, 1935, polychrome woodblock print, Dallas Museum of Art, the Abram C. Joseph and Ruth F. Ring Collection, gift of Miss Ruth F. Ring, 1985.44

Curious about what it takes to make a print? While woodblock printing does require some special equipment, you can get a taste of the process using everyday materials you might already have at home. Here’s what you need:

  • 1–2 flat sheets of styrofoam, cut from a take-out container or paper plate 
  • Scissors or exacto knife  
  • Flat paintbrush 
  • Watercolor or acrylic paint 
  • Cup of water 
  • Rag or small towel  
  • A large metal spoon  
  • Watercolor paper 

1. Cut a design out of the styrofoam sheet using a pair of scissors or an exacto knife. The styrofoam will act as a stamp that will carry the color to the paper.  

2. Using paint and paintbrush, apply a thin layer of color to the styrofoam. It’s helpful to thin the paint down slightly with water so the layer is even.  

3. With the rag, dampen the watercolor paper slightly. This will help the paper receive the color from the paint.  

4. Place your styrofoam sheet paint-side down onto the watercolor paper, like a stamp. Use the metal spoon to press down on the paper.  

5. Gently peel the styrofoam away from the paper to reveal your design.  

6. Wipe off the leftover paint from the styrofoam and reapply color to print another edition of your print! Each print will look different, but that’s also a part of the process that’s lost when we turn over the work to machines. When something is handmade, there will always be a degree of human error that reveals the presence of an artist behind the artwork.  

Jessica Thompson-Castillo is the Manager of Teen Programs at the DMA.

How the Florals Bloomed in “Flores Mexicanas”

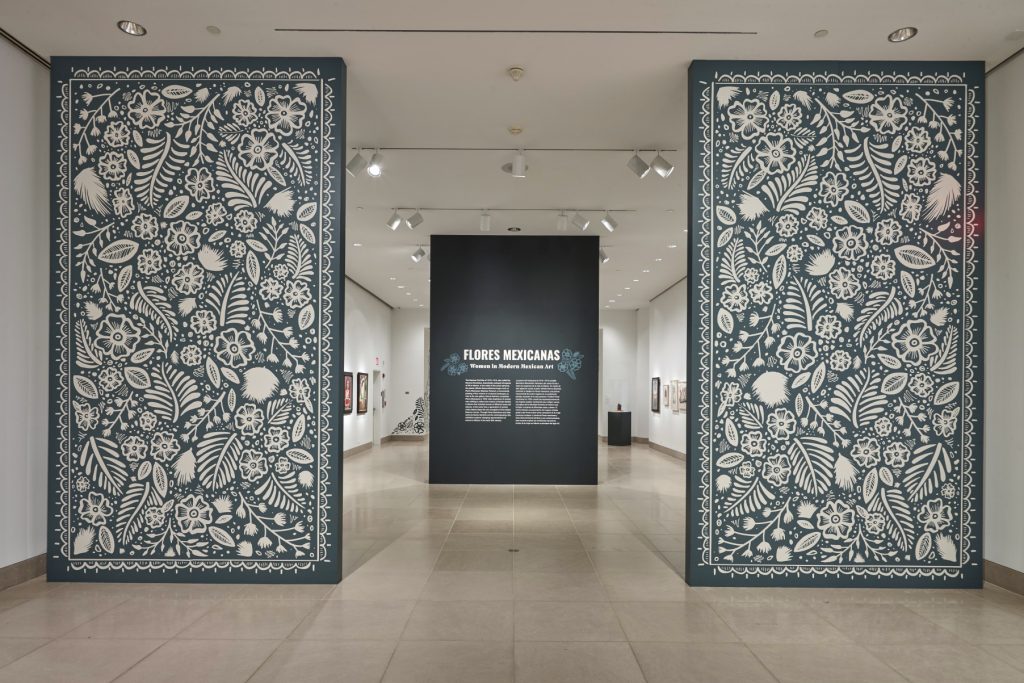
Jaclyn Le and graphic installers place environmental wall graphics in Flores Mexicanas: Women in Modern Mexican Art.

My name is Jaclyn Le and I am the Senior Graphic Designer at the Dallas Museum of Art. My primary role here is to design the identity, graphics, and environmental graphic design of each special exhibition and permanent collection gallery, in both English and Spanish. Working closely with the Design and Interpretation team, the Exhibitions team, and each of our curators, my goal is to make sure the identities, graphics, and environmental design of each exhibition are aligned to the curator’s vision, and that they showcase the works and information in the best way possible.

I was extremely excited to work on the design for the exhibition Flores Mexicanas: Women in Modern Mexican Art, curated by Mark Castro, The Jorge Baldor Curator of Latin American Art. We wanted the design to feel approachable, elegant, and vibrant. The typography is a pairing of a bold style seen in Mexican prints from the early decades of the 20th century, paired with a fuller, more feminine typeface.

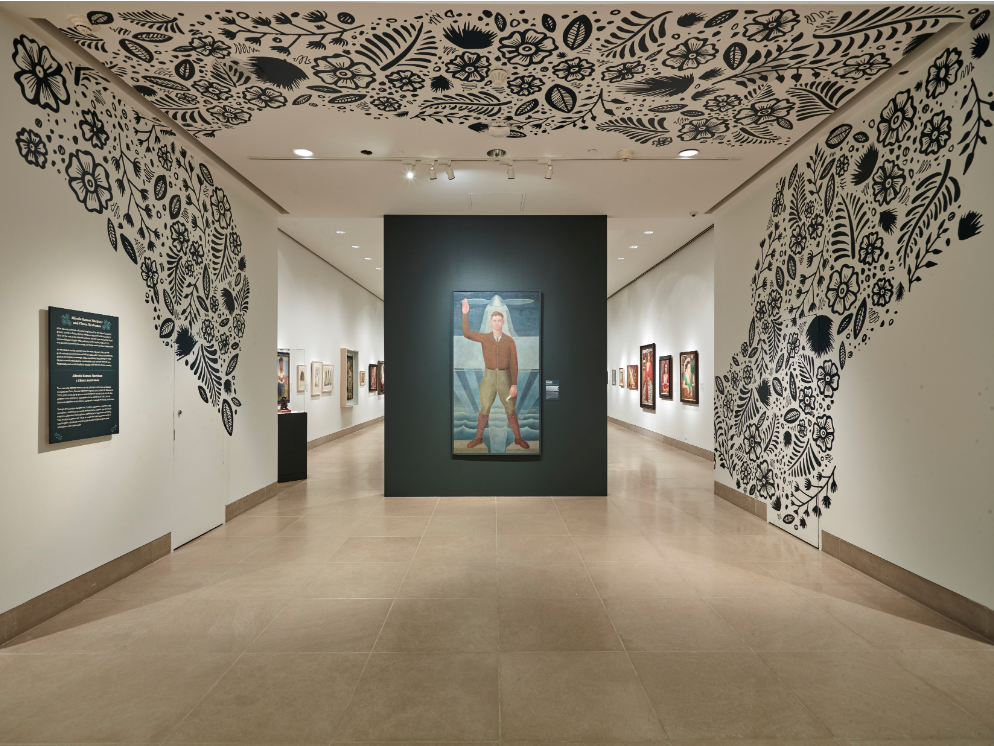
The hand-drawn floral pattern was inspired by Mexican lacquer ware from Olinalá. Our director, Agustín Arteaga, lent me a wonderful book full of different styles to look at, and I developed a monochromatic floral pattern illustrating common motifs I saw throughout the book. This floral pattern flanks both walls of the entrance to the exhibition, and weaves its way up and over the ceiling in the space right before the monumental painting Flores Mexicanas by Alfredo Ramos Martínez.

How to draw your own floral set as seen in Flores Mexicanas: Women in Modern Mexican Art.

You can watch this video tutorial to create your own floral set. Use any marker or drawing tool you have to create this. Here, I am using a Crayola Superfine tip marker.

1. Start by plotting three dots that will be the center of your flowers. You want to plot them with enough space in between—a triangle shape would be perfect for this.

2. Draw a ring around each of the three dots. These will be the bases of the flowers to draw petals around.

3. Start drawing the petals around each ring. I have 5-6 petals per flower here. It’s okay if they are not all equal in size—it will look better this way in the end!

4. Once all the petals of your three flowers are complete, draw 2-3 lines coming from the center ring to about halfway across each petal. This will give your flowers more depth and interest.

5. In the negative spaces between your three completed flowers, draw a few slightly curved lines. These will be the stems of your leaves. I have drawn 4 here.

6. Starting with the longest curved stem line, create a teardrop shape around the stem center. You can make these as wide or narrow as you’d like. Draw diagonal lines out from it to create the lines in the leaves. Do this for the other curved line stems from step 5, but save one of the stems for a fuller palm leaf drawing (in the next step).

7. For the palm leaf, create simple leaves by drawing small curved strokes of lines, starting from the top of the stem and working your way to the base. These curved leaf lines will gradually get bigger and bigger with each stroke, as you make your way to the base.

8. Complete your floral set by dropping in dots or circles in the spaces between the three flowers and leaves. Show us your creation by taking a picture and tagging #DMAatHome!

Jaclyn Le is the Senior Graphic Designer at the Dallas Museum of Art.

Patches with a Purpose

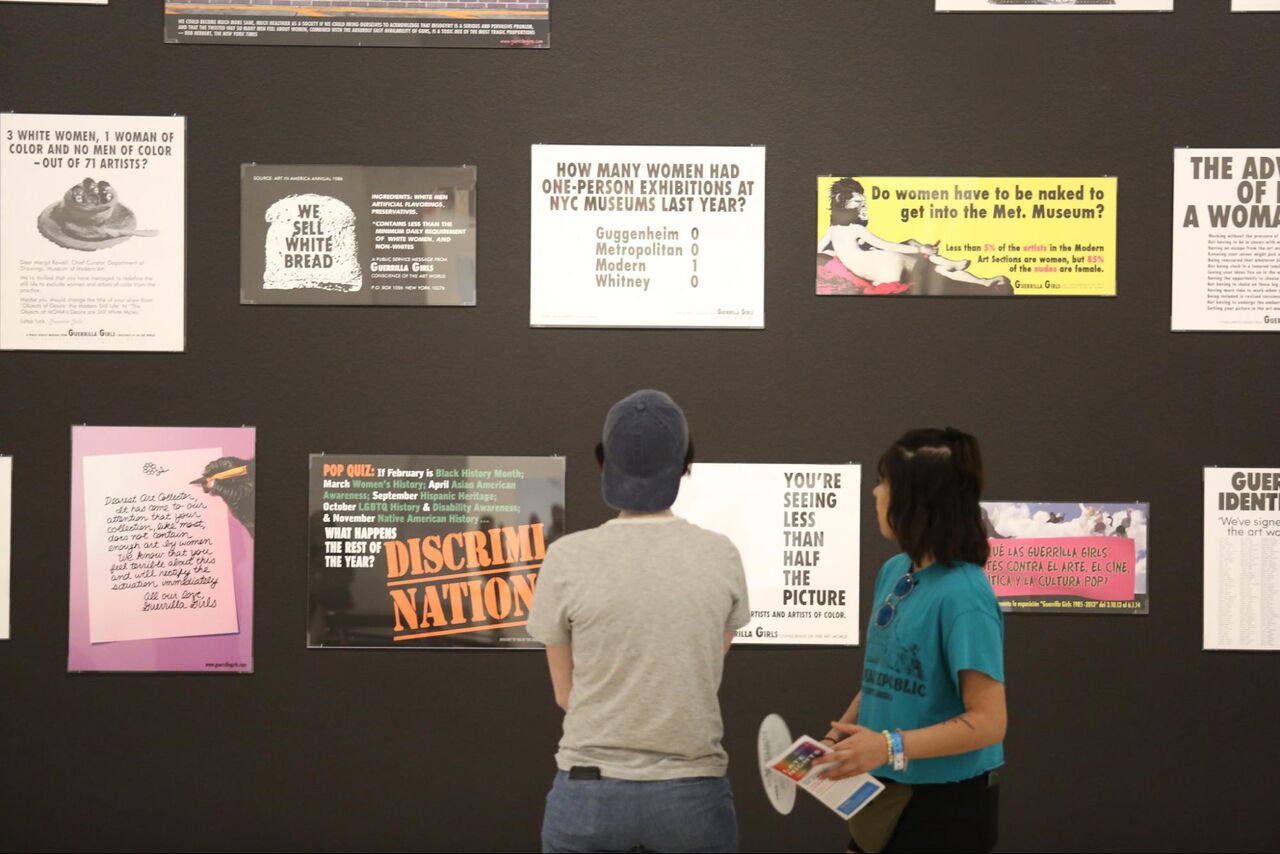
The Guerrilla Girls exhibition is in its final week on view at the DMA. For the last few months, the posters, books, and videos in the gallery have prompted a lot of questions, including the often overheard “What’s the deal with the gorilla masks?”

MzZCjLlg

The Guerrilla Girls are an anonymous collective of women artists who draw attention to sexism and racism in the art world. To borrow their words, without women and people of color represented in the art world “you’re seeing less than half the picture.” Using bold protest art and guerrilla-style marketing techniques (hence their name and use of gorilla masks, as a play on words), they demonstrate how images are a powerful way to send messages to others.

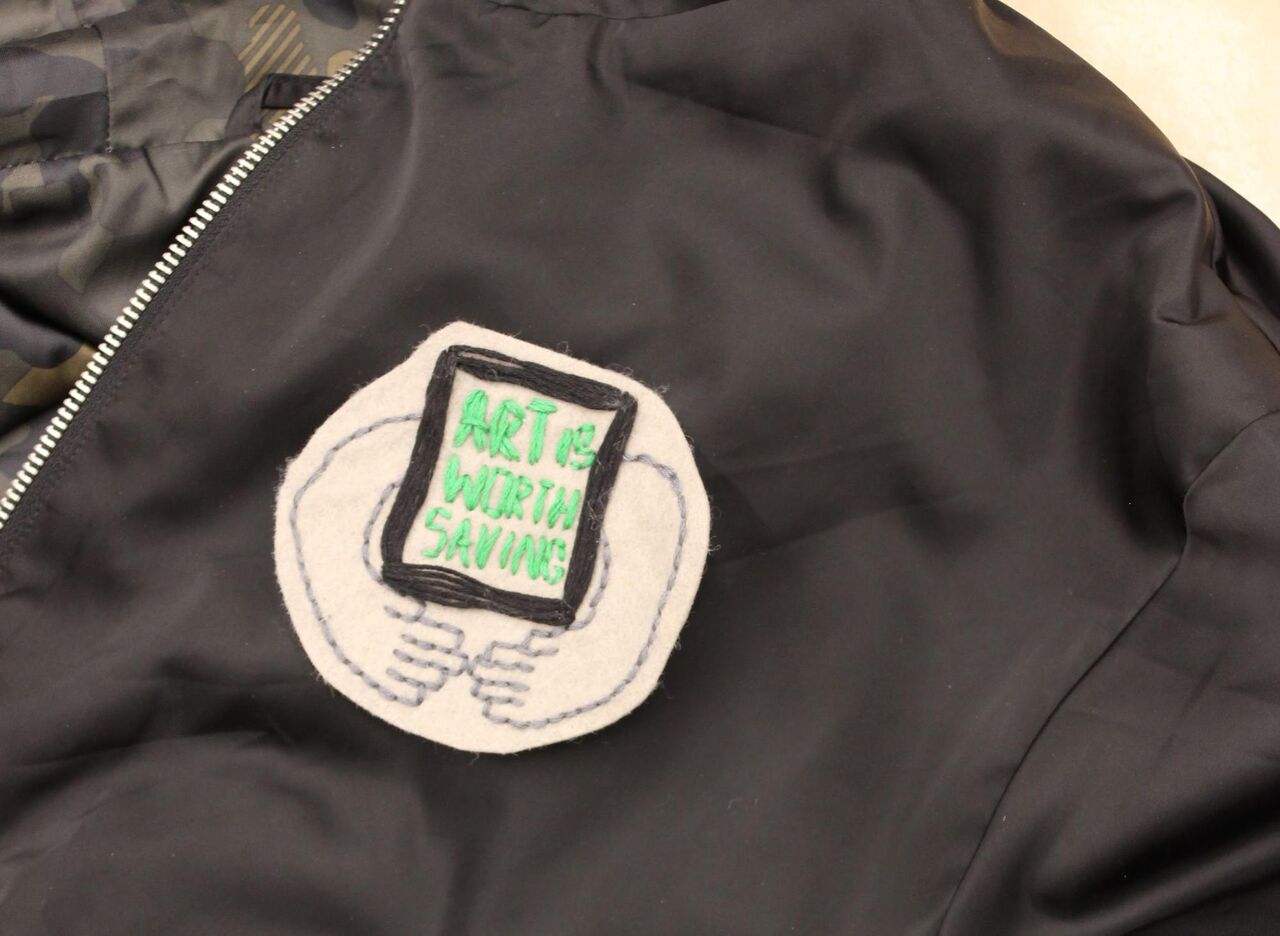
Consider what is important to you. When you think about those things, is there an image or symbol that comes to mind? Taking inspiration from the Guerrilla Girls, here’s a way to broadcast that idea or cause through a DIY iron-on patch.

Materials Needed
Felt or fabric
Embroidery floss
Embroidery hoop
Tapestry needle
Scissors
HeatnBond iron-on adhesive sheet
Iron
Threader (optional)

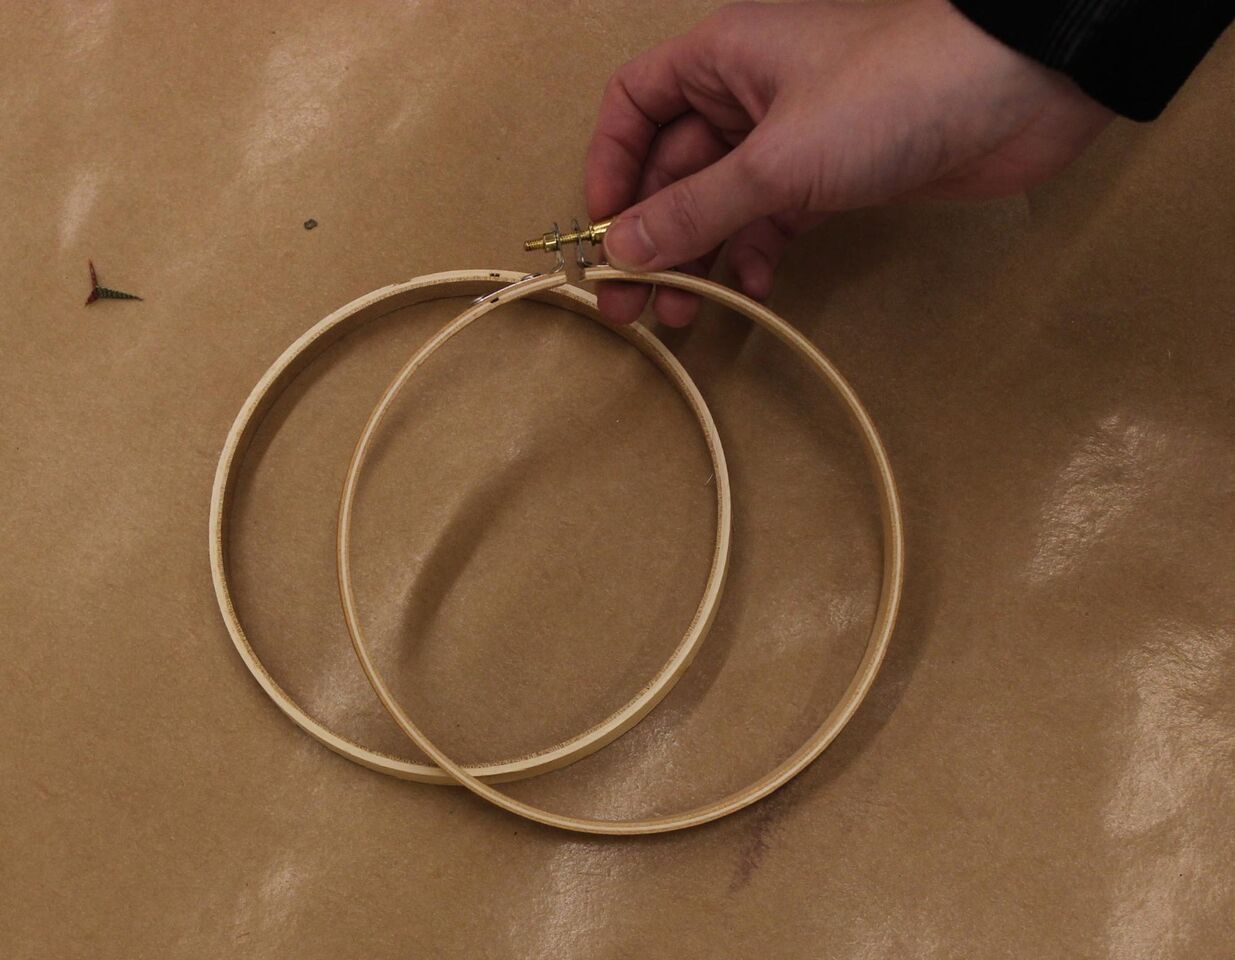
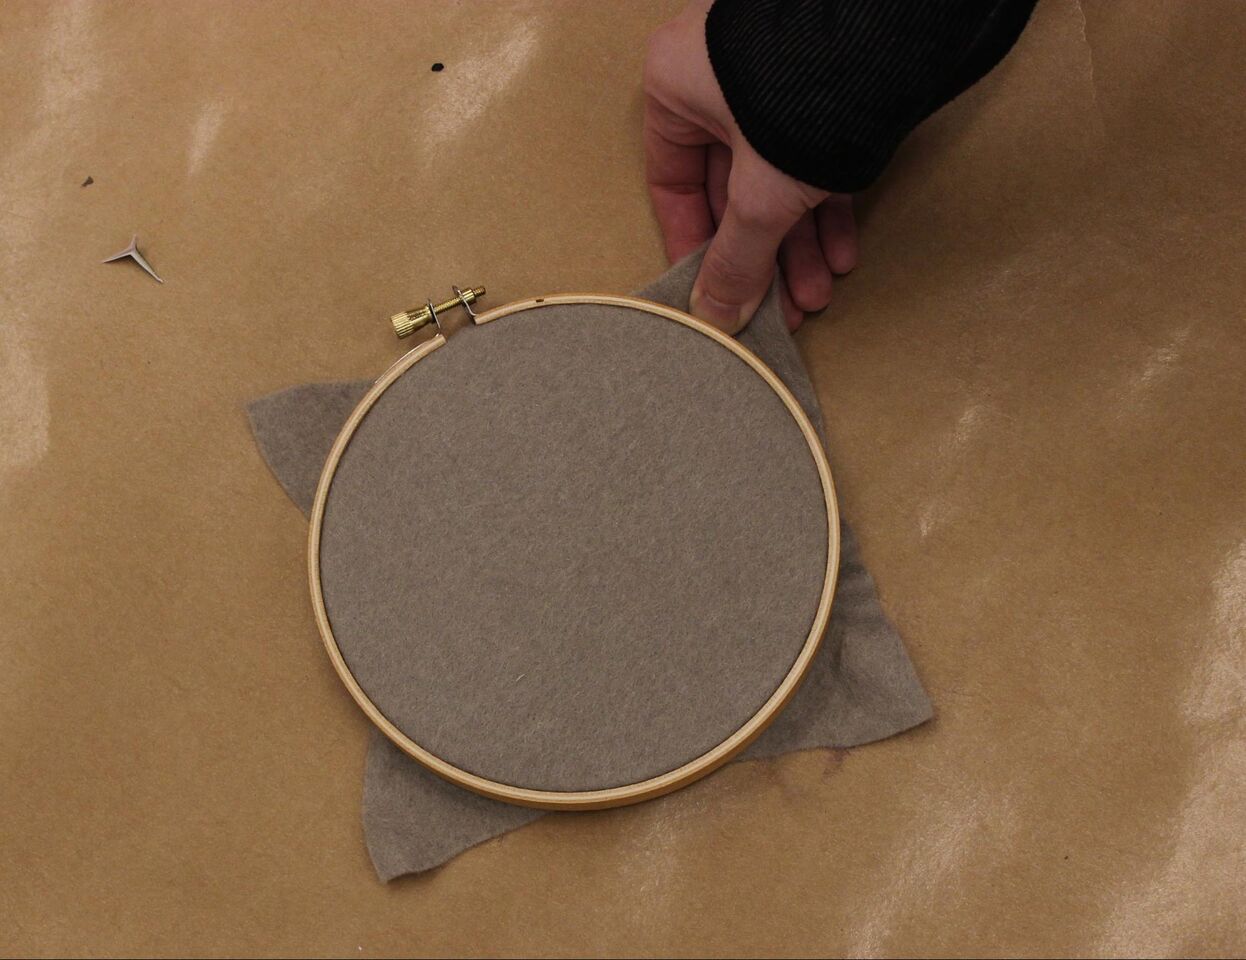
Using the screw at the top, loosen and separate the two rings of your embroidery hoop. Load the embroidery hoop with the felt or fabric of your choice, placing the fabric on top of the smaller ring and closing the larger ring around it to hold the fabric in place.

Tip: The hoop stretches the fabric tight to create tension. If the fabric sags in the middle, pull the edges before tightening the hoop screw all the way.

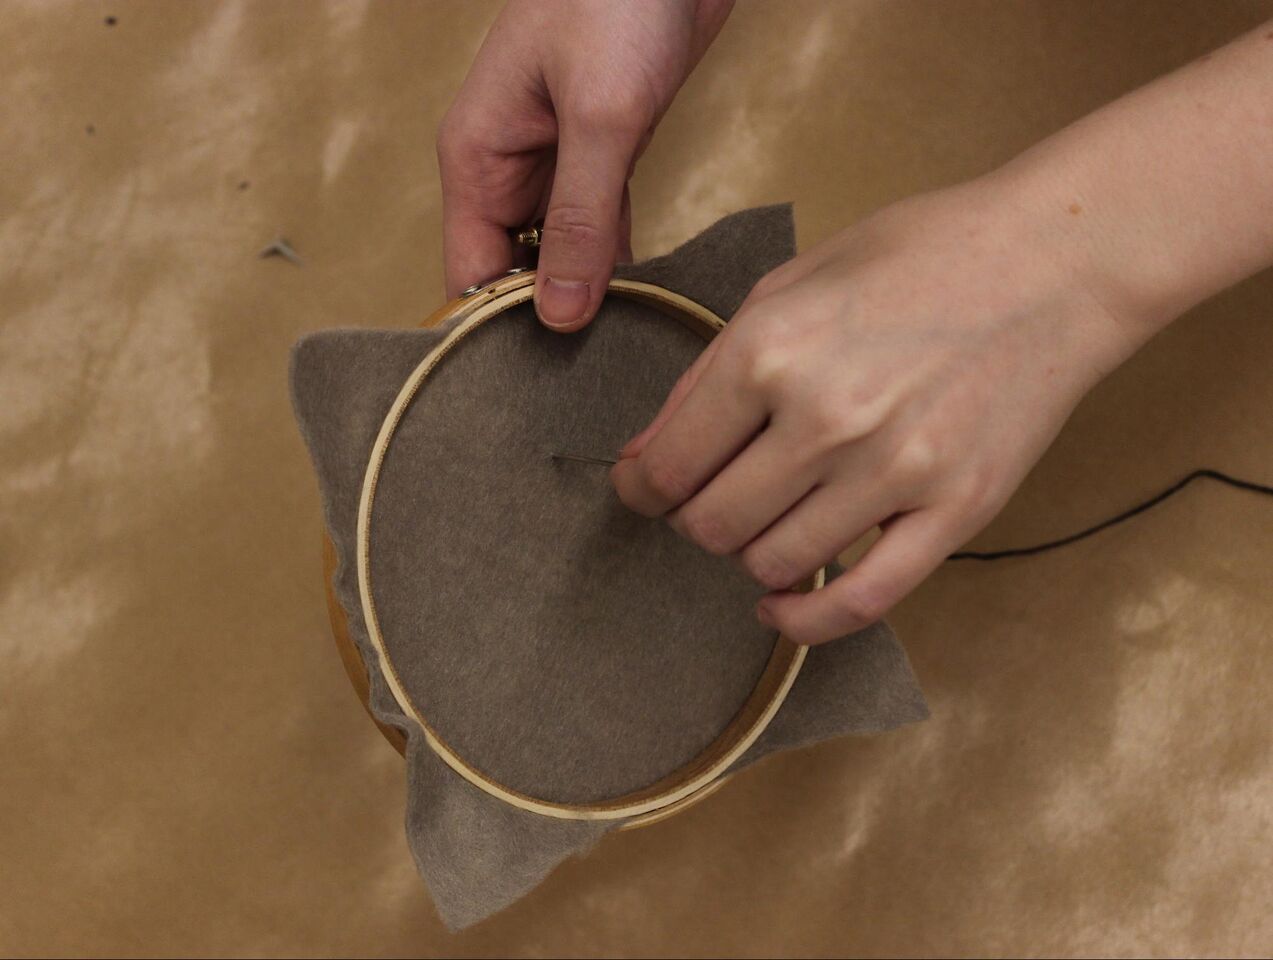
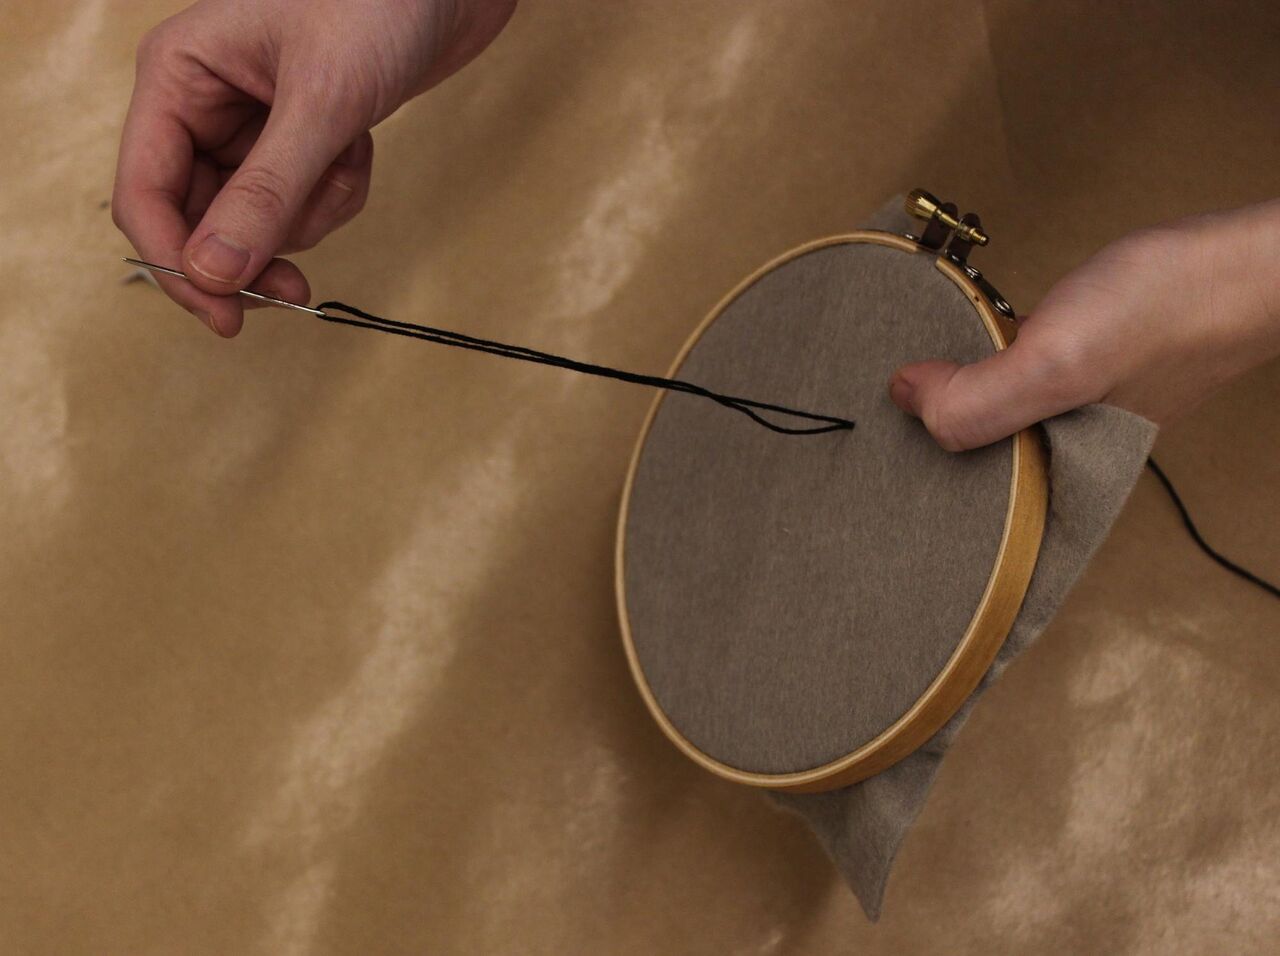
Thread your needle with the first color of embroidery floss, tying off one end. Start your design from the back side of the hoop, pulling the needle straight through the fabric. Create the first stitch by pulling the needle straight back down through the fabric. When you’d like to switch colors, simply tie the floss off on the back and repeat the process.

Tip: Keeping the needle straight and avoiding pulling hard keeps the stitches even and fabric wrinkle-free. Knowing how to sew makes embroidery pretty intuitive, but different kinds of stitches create different textures and effects. DMC Embroidery has great resources for those looking to learn new techniques.  

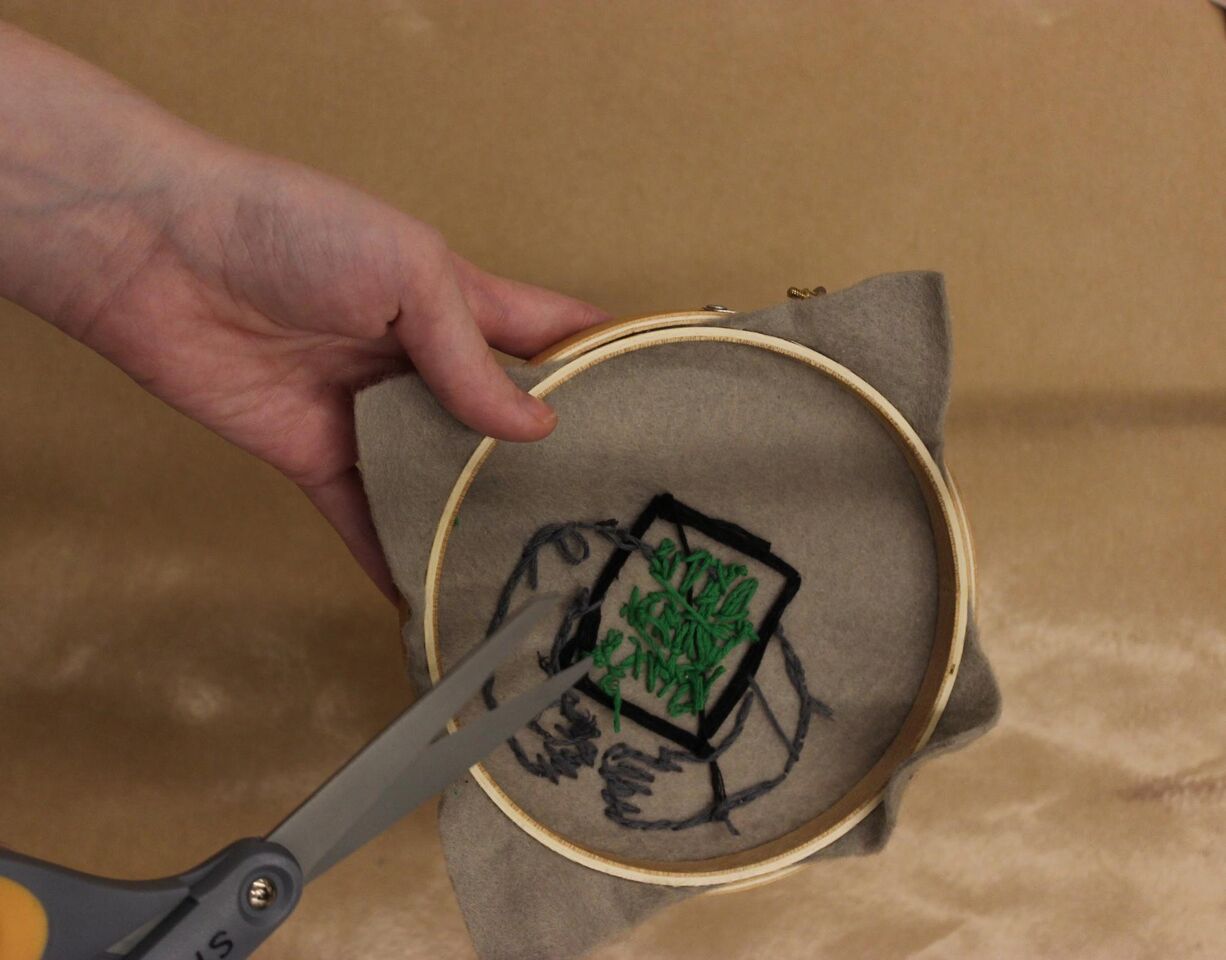
Once you finish your design, make sure all the thread is tied off on the back, and any loose threads are trimmed.

Rm64yqnQ

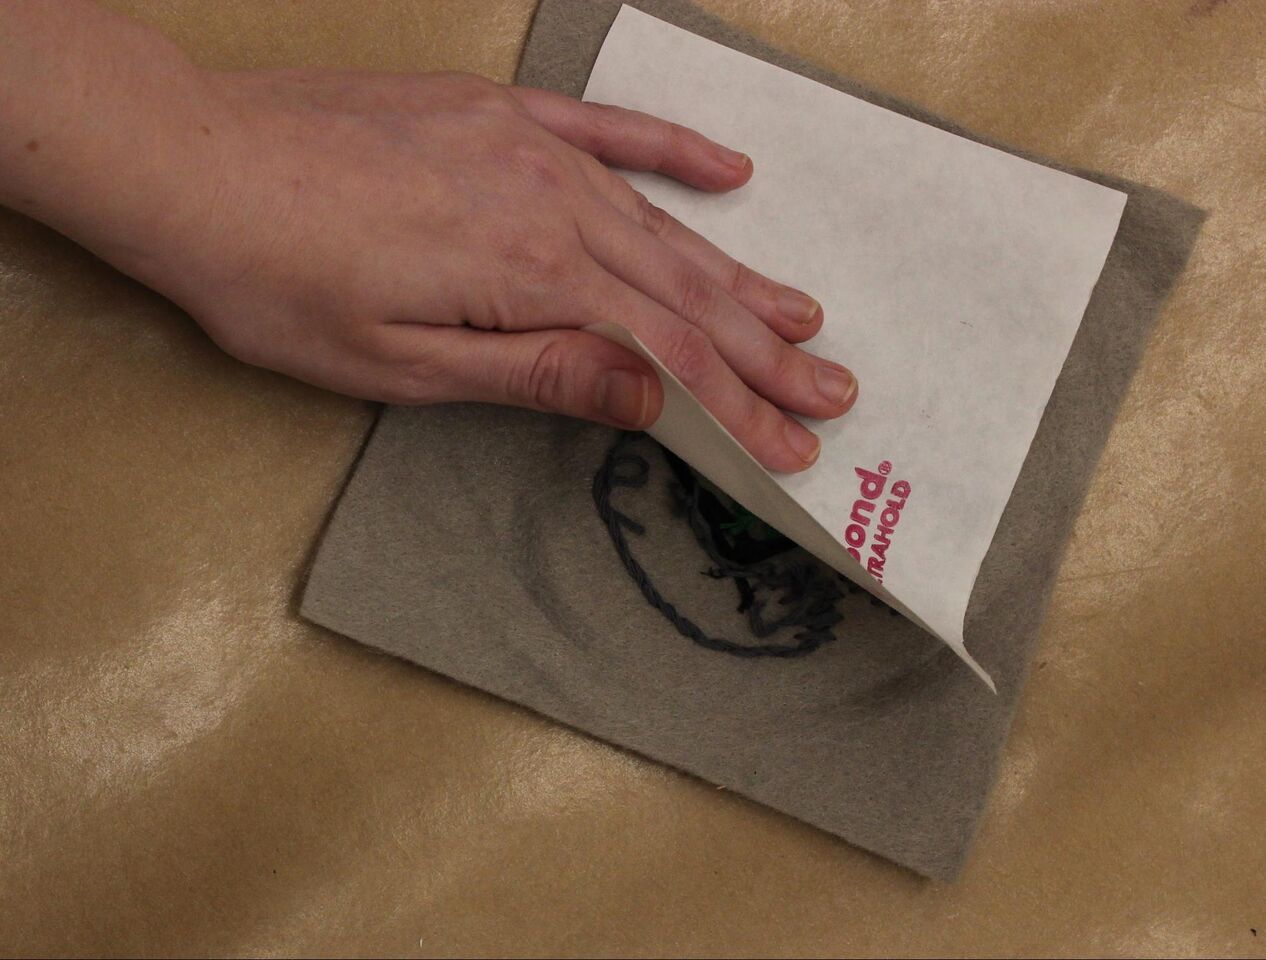
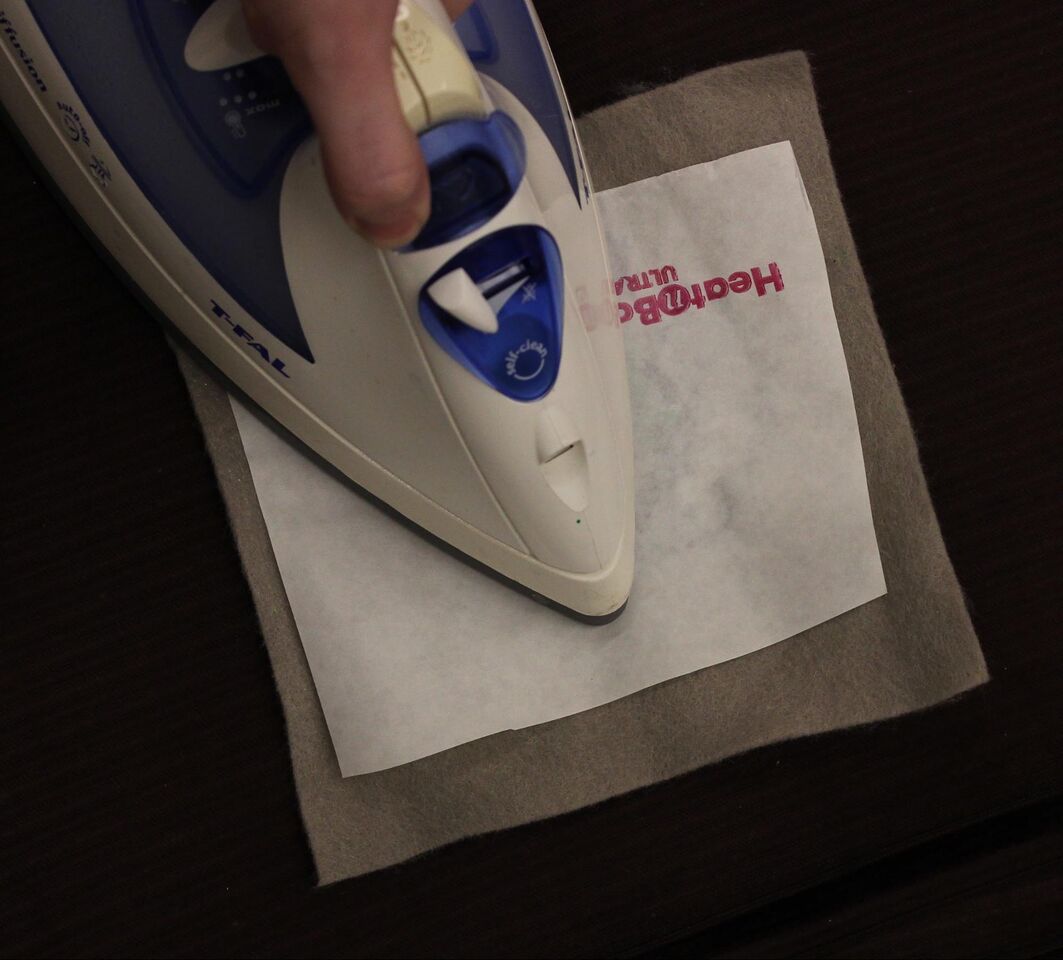
HeatnBond adhesive sheets will make the design into a patch. HeatnBond is two sided, with a shiny, textured plastic side and a paper side. Cut a piece of HeatnBond large enough to cover the design and place it on the backside of the fabric, with the paper side of the HeatnBond facing up. Pass an iron set on medium heat over the HeatnBond for approximately 30 seconds, ensuring that the iron passes over the edges and corners of the adhesive. Make sure that the HeatnBond is completely adhered to the fabric; no corners or edges should lift.

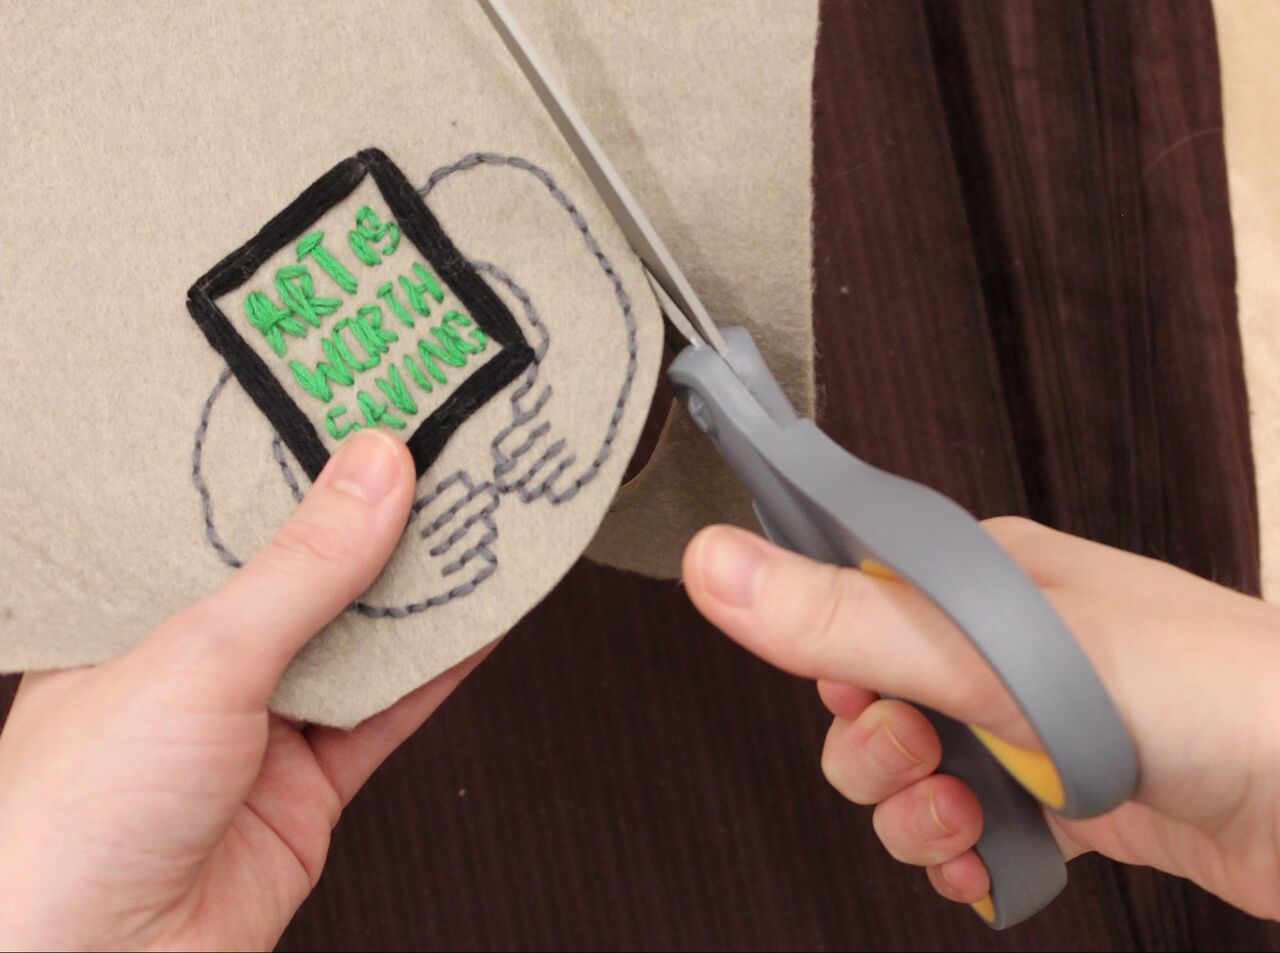
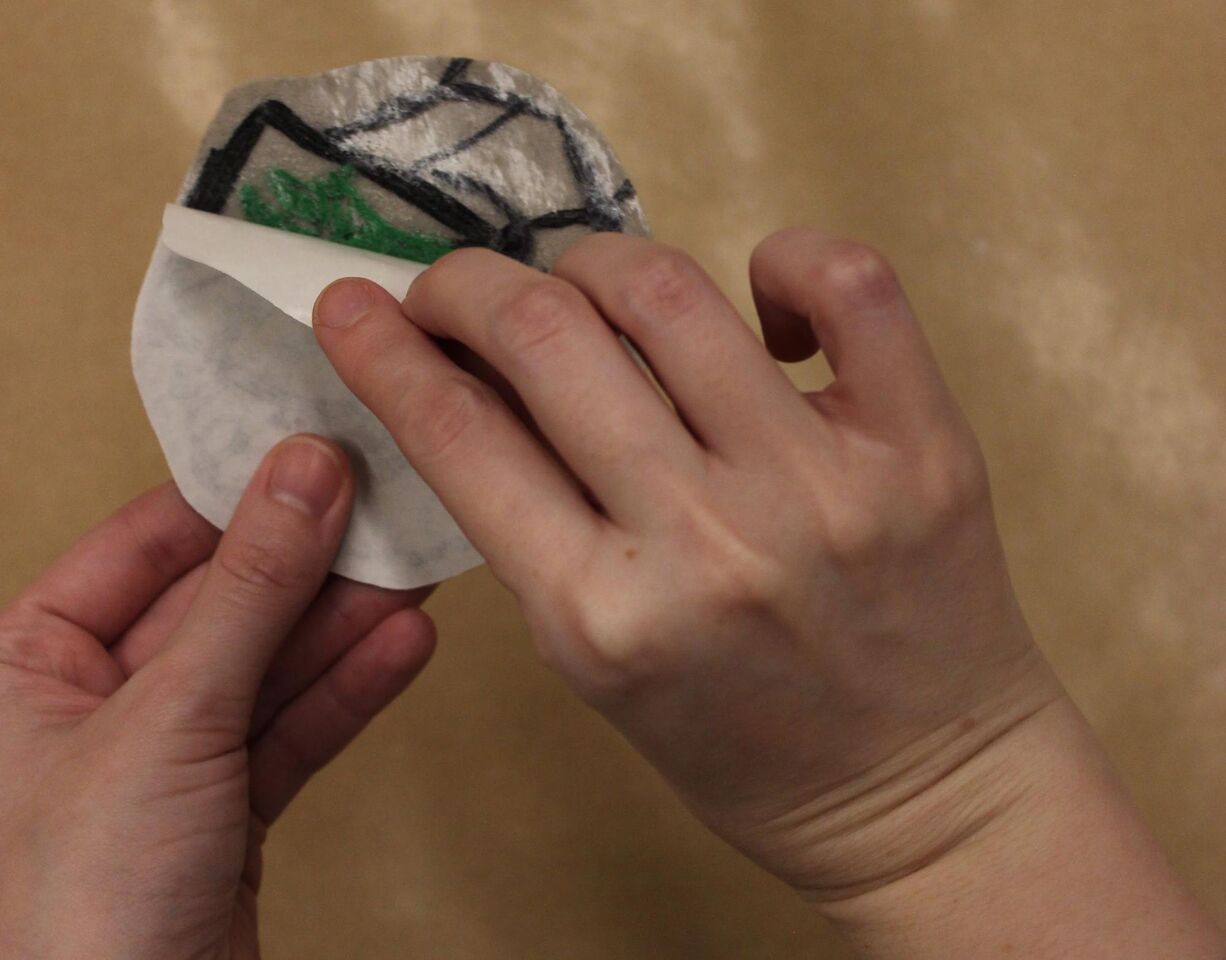
Once the fabric has cooled, use scissors to trim around the design. The HeatnBond seals the fabric, so no hemming is needed. After the design is cut to size, remove the paper backing from the back of the design. Underneath, the plastic should be smooth and shiny. Now the patch can be ironed onto another piece of fabric, like a jacket or backpack.

Be sure to visit The Guerrilla Girls before it closes on September 30. If you liked this project, join us at our upcoming workshops for families, teens, and adults to get your make on.

Jessica Thompson is the Manager of Teen Programs at the DMA.

How It's Made: Sacred Bronzes of India

When you enter the Southeastern Asian galleries located on the third floor of the Museum, an instant calm envelops you.  The gallery is full of stone and bronze figures choreographed in slow and quiet poses.  It’s almost like stumbling upon a yoga class, where each figure is in a tranquil pose and reaching for spiritual awareness. 

Image of the Southeastern Asian Galleries at the Dallas Museum of Art

I am most drawn to the bronze sculptures of the collection, and I’d like to share how they were made.  As with most metal sculptures throughout history, the sacred bronzes of India were made with the ancient technique of the lost-wax process.  The lost-wax process served as an integral part of the Hindu religion during the Chola dynasty, which reigned between the ninth and thirteenth centuries, due to the desire for portable images of deities.

These bronze figures were created for worship and were housed in stone temples.  Oftentimes, they were removed from the temples for use in ceremonies, acting as processional gods to the people of India.  Our very own Shiva Nataraja is a perfect example of a processional bronze.   For more information on how these bronze objects were used in ceremonies, read Hannah’s blog post on Thursday.

Shiva Nataraja, Dallas Museum of Art

Shiva Nataraja, India, c. 1100, Dallas Museum of Art, gift of Mrs. Eugene McDermott, the Hamon Charitable Foundation, and an anonymous donor in honor of David T. Owsley, with additional funding from The Cecil and Ida Green Foundation and the Cecil and Ida Green Acquisition Fund

Lost-wax Process

The lost-wax process is a technique that seems to be as old as time.  It’s estimated that the earliest work created in this technique dates back to around 3500 B.C. in modern day Pakistan, and it is a common application for sculptors today.  One of the oldest works we have in the Museum dates back to 2000 B.C. and can be found in Silk Road installation on the third floor. 

The process begins with “prepared wax,” a mixture of hard beeswax and resin.  The sculptor gently heats the wax to create a malleable material for molding.  After an area of the object is finished, it is dipped into a cold basin of water to harden the wax.  This alternation of heating and cooling continues until the entire figure is assembled.   The sculptor will then go back and add details with wooden tools to finalize the figure. 

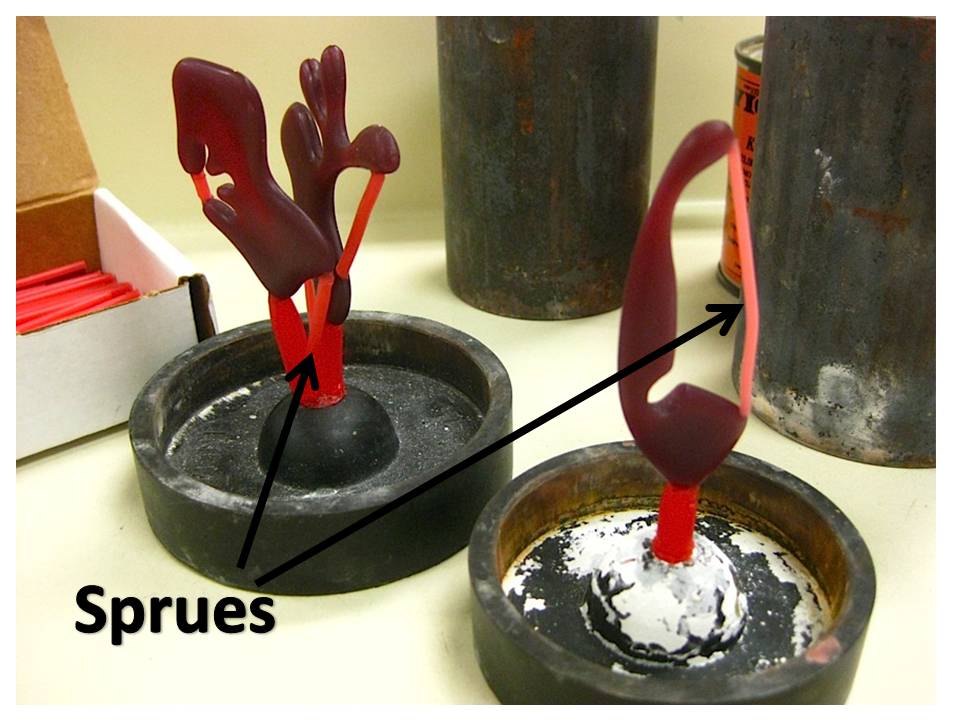
Once the object is ready for the mold, sprues (which are tubular forms of wax that allows liquid metal to flow from one end to another) are applied to the figure to ensure that the molten metal will reach all parts of the figure.  The sculptor then meticulously applies several layers of clay to build up a mold, leaving a small hole to allow for the burn-out process.  When the clay is bone-dry, the mold is fired to harden the clay and to burn-out the wax.  This method allows the wax to flow out, leaving a hollowed clay mold. 

Next, metalworkers melt a mixture of copper, lead, and tin (and in some cases, gold and silver too) in a crucible and then carefully pour the molten metal into the same hole the wax was released from.  Metal cools relatively fast, so if you have a large object, you have to make sure you have enough melted metal!  Once the metal is cooled, the clay shell is broken and the sculpture is revealed.  Every bronze sculpture is unique, as the clay molds cannot be reused.  To complete the work, the sculptor must cut off the sprues and sand the surface smooth, readying the object for the final application of polishing and wax.

Diagram of molds, courtesy of www.lost-waxprocess.com

I encourage you to stop by the Museum and observe these sacred bronzes of India.  You might find yourself appreciating the tranquil rhythm and balance of these forms, as well as how they were made!

Best regards,

Loryn Leonard
Coordinator of Museum Visits

How it's Made: Japanese Lacquer

Next time you visit the Dallas Museum of Art, make sure you stop by our Japanese collection.  You can find the Japanese gallery on the third floor in the Arts of Africa, Asia, and Pacific Island galleries.  In the center of the gallery, you will find three exquisite examples of Japanese lacquer.  In fact, one of my favorite works in our collection is a Japanese lacquered Chest of drawers.

History of Japanese Lacquer

According to Monsieur Gonse, a French connoisseur and art critic, “Japanese lacquered objects are the most perfect works of art that have ever issued from the hands of man.”

The art of lacquer actually came to Japan from China around the 6th century A.D.  Originally connected with Buddhism, early lacquer adorned the walls of Buddhist temples.  As the medium became more popular, lacquer objects became more utilitarian and were primarily used as everyday objects.  Individuals who commissioned such decorative objects had to be patient with the time commitment involved, for it could take months to even years to complete a lacquered object.

What makes Japanese lacquer special?

In order to appreciate the true value of Japanese lacquer, it’s important to understand how lacquer objects are made.

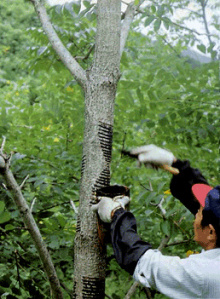
Lacquer comes from the sap of the lacquer tree, Rhus vernicifera,and is known as

Extracting lacquer from the Rhus vernicifera tree

urushi.  Most lacquer forms begin with a wooden foundation, a special wood called Hinoki, a species of Japanese cypress.  Before the layering of the lacquer begins, the lacquer artist wraps the wooden object in a silk or hempen cloth saturated with a mixture of lacquer and rice flour called nori urushi.  Then, a layer of powdered earthenware mixed with lacquer is applied over the cloth and sanded smooth.   This method is applied with finer grades of powder until an even layer is produced.

After the foundation layers are smoothed, the object is ready for the refined lacquer. The refined lacquer is blackened by iron and applied carefully in layers.  Because the lacquer takes a long time to dry and needs high humidity for hardening, the object is placed in a “wet box” for three to four days before the next coat is applied.  After the object is removed from the “wet box”, it is carefully smoothed and polished with magnolia charcoal.  This is repeated about thirty to eighty more times until the final coat is applied.  After the last coat has dried, the object is finger polished with deer’s horn ashes and oil.

Fun Fact: Because the humidity in Japan is so high, the three lacquered objects here at the DMA are placed in humidity controlled cases.

This precise artform requires a huge amount of skill and patience.  If one were to apply thirty coats of lacquer and wait four days in between each layer, it would take up to 120 days to complete the lacquer portion of the object.  This is not including any special techniques such as inlay or other carving methods.  Altogether, it could take half a year to complete a lacquer object!  How long do you think it took to create this Lacquered wood saddle?

Next time you’re at the Museum, come by and see some of the finest hand-made objects in our collection.  Once you see these beautifully-crafted objects in person, they are bound to become your favorites!

Over and out,

Loryn Leonard
Coordinator of Museum Visits

Resources:

  • Mody, N.H.N., “Japanese Lacquer,” Monumenta Nipponica, Vol. 3, No. 1 (Jan., 1940), pp. 291-294
  • Weintraub, Steven, Kanya Tsujimoto, and Sadae Y. Walters, “Urushi and Conservation: The Use of Japanese Lacquer in the Restoration of Japanese Art,” Ars Orientalis, Vol. 11 (1979), pp.39-62

How it's Made: Etruscan Jewelry

Welcome to the introductory blog of the “How it’s Made” series.  In this series, I aim to shed some light on the technical methods of how objects in our collection were created and to gather a greater appreciation for art-making in general. 

Coming from a metalsmithing background, I wanted to start this series with precious  metal objects.  I selected Etruscan jewelry because I have such admiration for how beautifully designed and how well-crafted these metal objects are.  While studying metalsmithing at the University of North Texas, I had the opportunity to learn several of the same techniques the Etruscans used, but with the convenience of modern tools and technology.
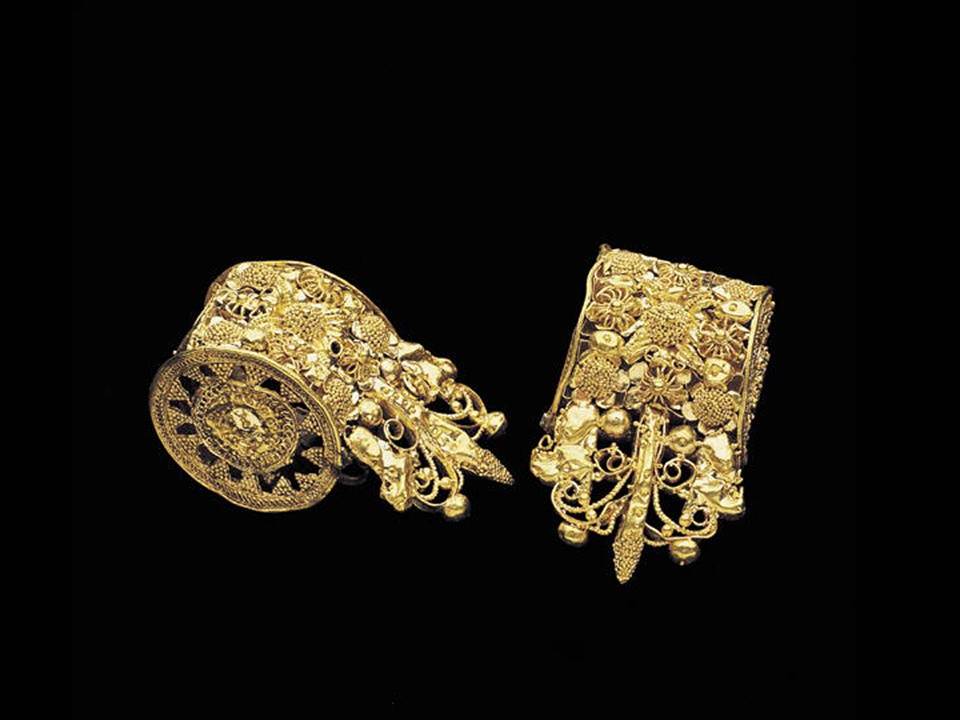
Pair of "a bauletto" type earrings, Etruscan, 6th-early 5th centuries B.C., Museum League Purchase Funds, The Eugene and Margaret McDermott Art Fund, Inc., and Cecil H. and Ida M. Green in honor of Virginia Lucas Nick

Who were the Etruscans?

Early inhabitants of Italy, the Etruscans settled in the northern region of Rome in the late eighth century B.C., and can trace their heritage by name in modern-day Tuscany.  The Etruscans succeeded the Villanovan culture, a civilization that established early foreign trade and was adept in creating bronze jewelry. The influx of Greek colonization in Italy aided in the transition from Villanovan to Etruscan culture, which thrived until Roman imperialism succeeded around 200 B.C.
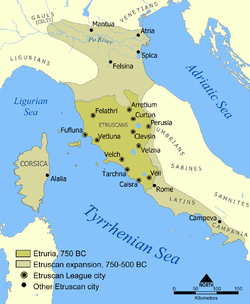
 

Etruscan territory

What Makes Etruscan Jewelry Interesting?

Today, it’s no mystery why jewelers love to use gold.  Gold is a very easy metal to work with; it’s malleable (which means it’s easy to shape and form), there is less clean up after soldering, and it doesn’t tarnish over time.  So, why is Etruscan gold so amazing?  This ancient civilization manipulated metals and implemented tedious applications without the modern convenience of a torch and other fancy tools is pretty incredible.  It amazes me that such delicate pieces could be fused together by controlling an open flame instead of a pressure-controlled torch. 

Take granulation, for example.  Granulation derives from the Latin word granum, meaning “grain,” and it describes the method of fusing small granules to a base.  This ancient technique is a hallmark of Etruscan jewelry and requires a lot of meticulous preparation. 
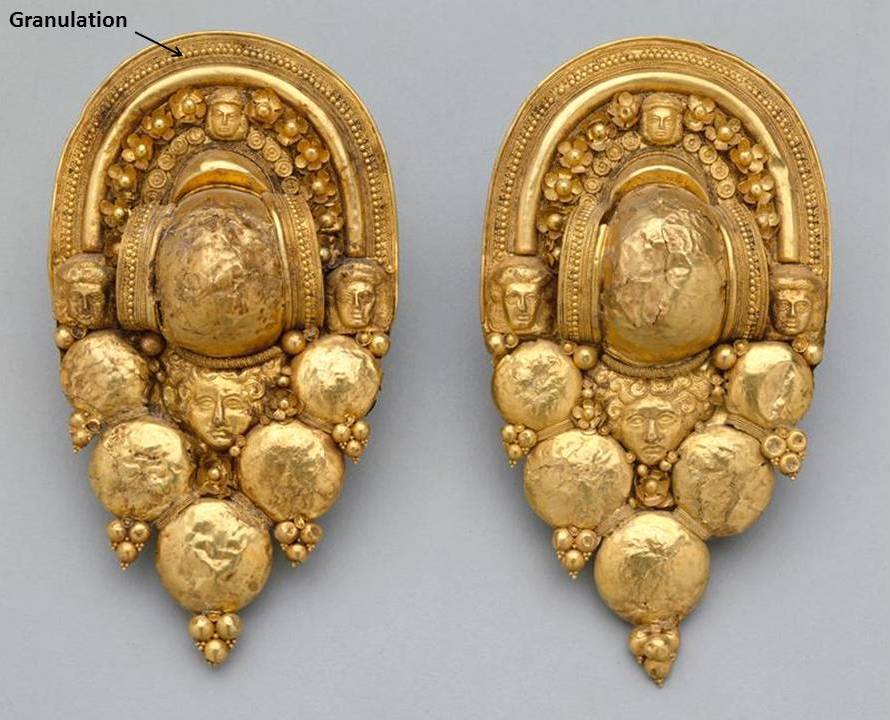
Pair of Funerary Earrings, Etruscan, 4th-3rd Century B.C., gift of Mr. and Mrs. Cecil H. Green

In order to make the granules, Etruscans would place gold dust or very small clippings of metal into a crucible.  In order to keep the granules from clumping together and melting into one giant granule, they placed layers of charcoal between the clippings, and then heated them to their melting point.  At that point, the metal dust or clipping will roll itself into a little ball and create a granule.
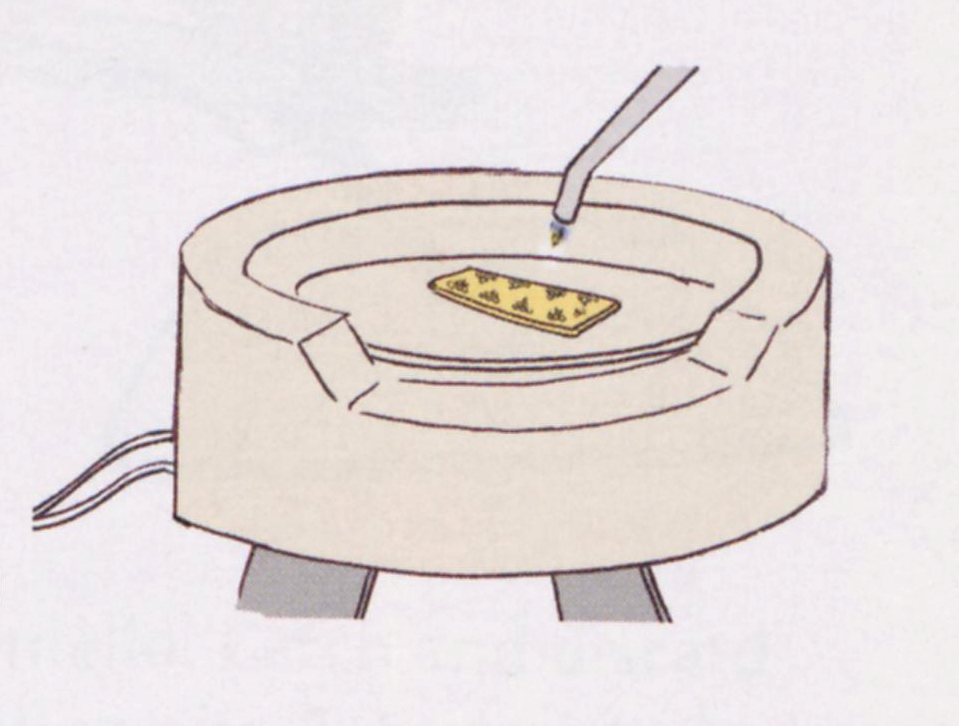
Modern granulation technique, courtesy of "The Complete Metalsmith" by Tim McCreight

Modern granulation technique, courtesy of "The Complete Metalsmith" by Tim McCreight

Once you have your tiny granules, you have to then position them and fuse them to a base.  Today, metalsmiths use ready-made flux and solder to join granules on a base.  According to Jochem Wolters in his essay “The Ancient Craft of Granulation: A Re-Assessment of Established Concepts,” adhesive non-metallic solders such as the gem chrysokolla (which literally translates to “gold glue”) or any other copper-bearing compounds were the solder of choice for the Etruscans. 
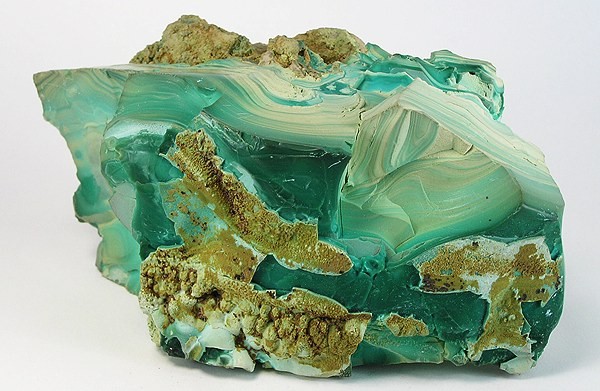
Chrysokolla, a gem used for non-metallic solder

If you’ve never soldered before, and you’re having a hard time visualizing this, think of a peanut butter sandwich.  You have two surfaces that need to be fused together.  Think of the base and the granule as the two slices of bread, and the solder as the peanut butter; without it, the two surfaces cannot fuse.  Once you have your solder and granules in place, you place your object over an open charcoal fire and heat it evenly.  Amazing!

It’s important to note that the Etruscans didn’t reinvent the wheel in terms of metalsmithing techniques, for many of the methods they are recognized for (such as granulation, filigree, chasing, and repoussé) were borrowed from neighboring cultures.  The true reason Etruscan jewelry stands out is because of the ancient metalsmiths’ technical skill and amazing ability to manipulate gold with precision.  I can attest that even with modern tools, it is difficult to execute many of the techniques that were used in the 6th and 7th centuries B.C. 

I hope you find Etruscan jewelry as riveting as I do, and if you have any questions about other works from our collection, please feel free to post your questions in the comments area. 

Happy making,

Loryn Leonard
Coordinator of Museum Visits

Resources:

  • Barbara Deppert-Lippitz, Ancient Gold Jewelry at the Dallas Museum of Art, (Washington: University of Washington 1996), 31-57. 
  • Tim McCreight, The Complete Metalsmith: Professional Edition, (Davis Publications: February 2004).
  • Jochem Wolters,”The Ancient Craft of Granulation: A Re-Assessment of Established Concepts,” Gold Bulletin, Vol. 14, Number 3, 119-129. 
Archives

Flickr Photo Stream

Categories