Archive for the 'Creativity' Category


John Hernandez in C3

DSC_9752crop

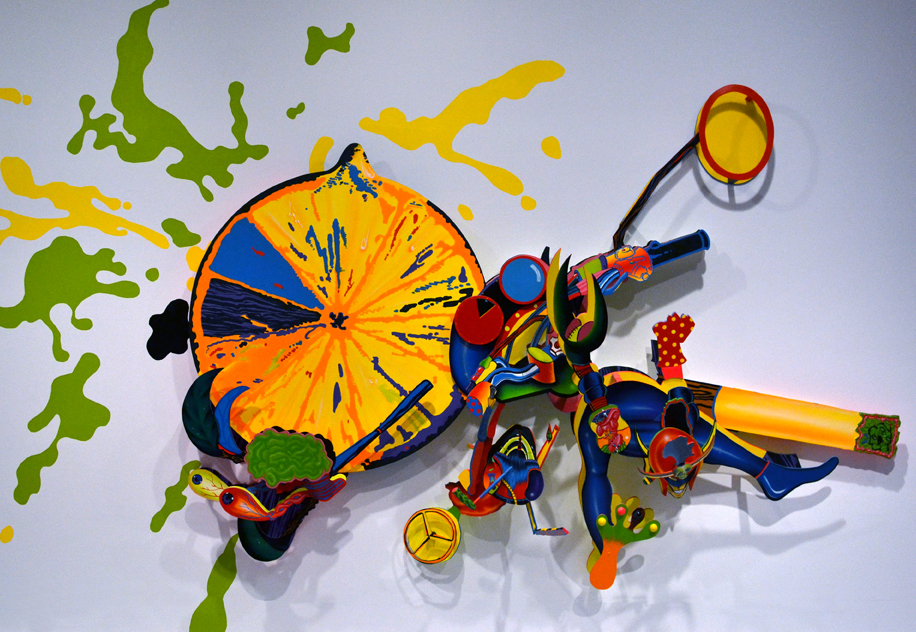
Have you stopped by the Center for Creative Connections lately?  If the answer is no, then add it to your “to do” list because you won’t want to miss this exciting new work of art in the entryway.  John Hernandez’s bright and energetic piece, HI-C Avenger was recently installed along with an interactive component.

First, a little background on the art and artist.  John Hernandez is a San Antonio based artist who has ties to the North Texas region.  Hernandez received his MFA from the University of North Texas where he studied under Vernon Fisher.  Can you see the influence Fisher might have had on his student?

“When you have a teacher like Vernon Fisher and his paintings are like black and white… I just wanted to go to the extreme, I started doing these wild colors,” Hernandez said during an interview with David Rubin.

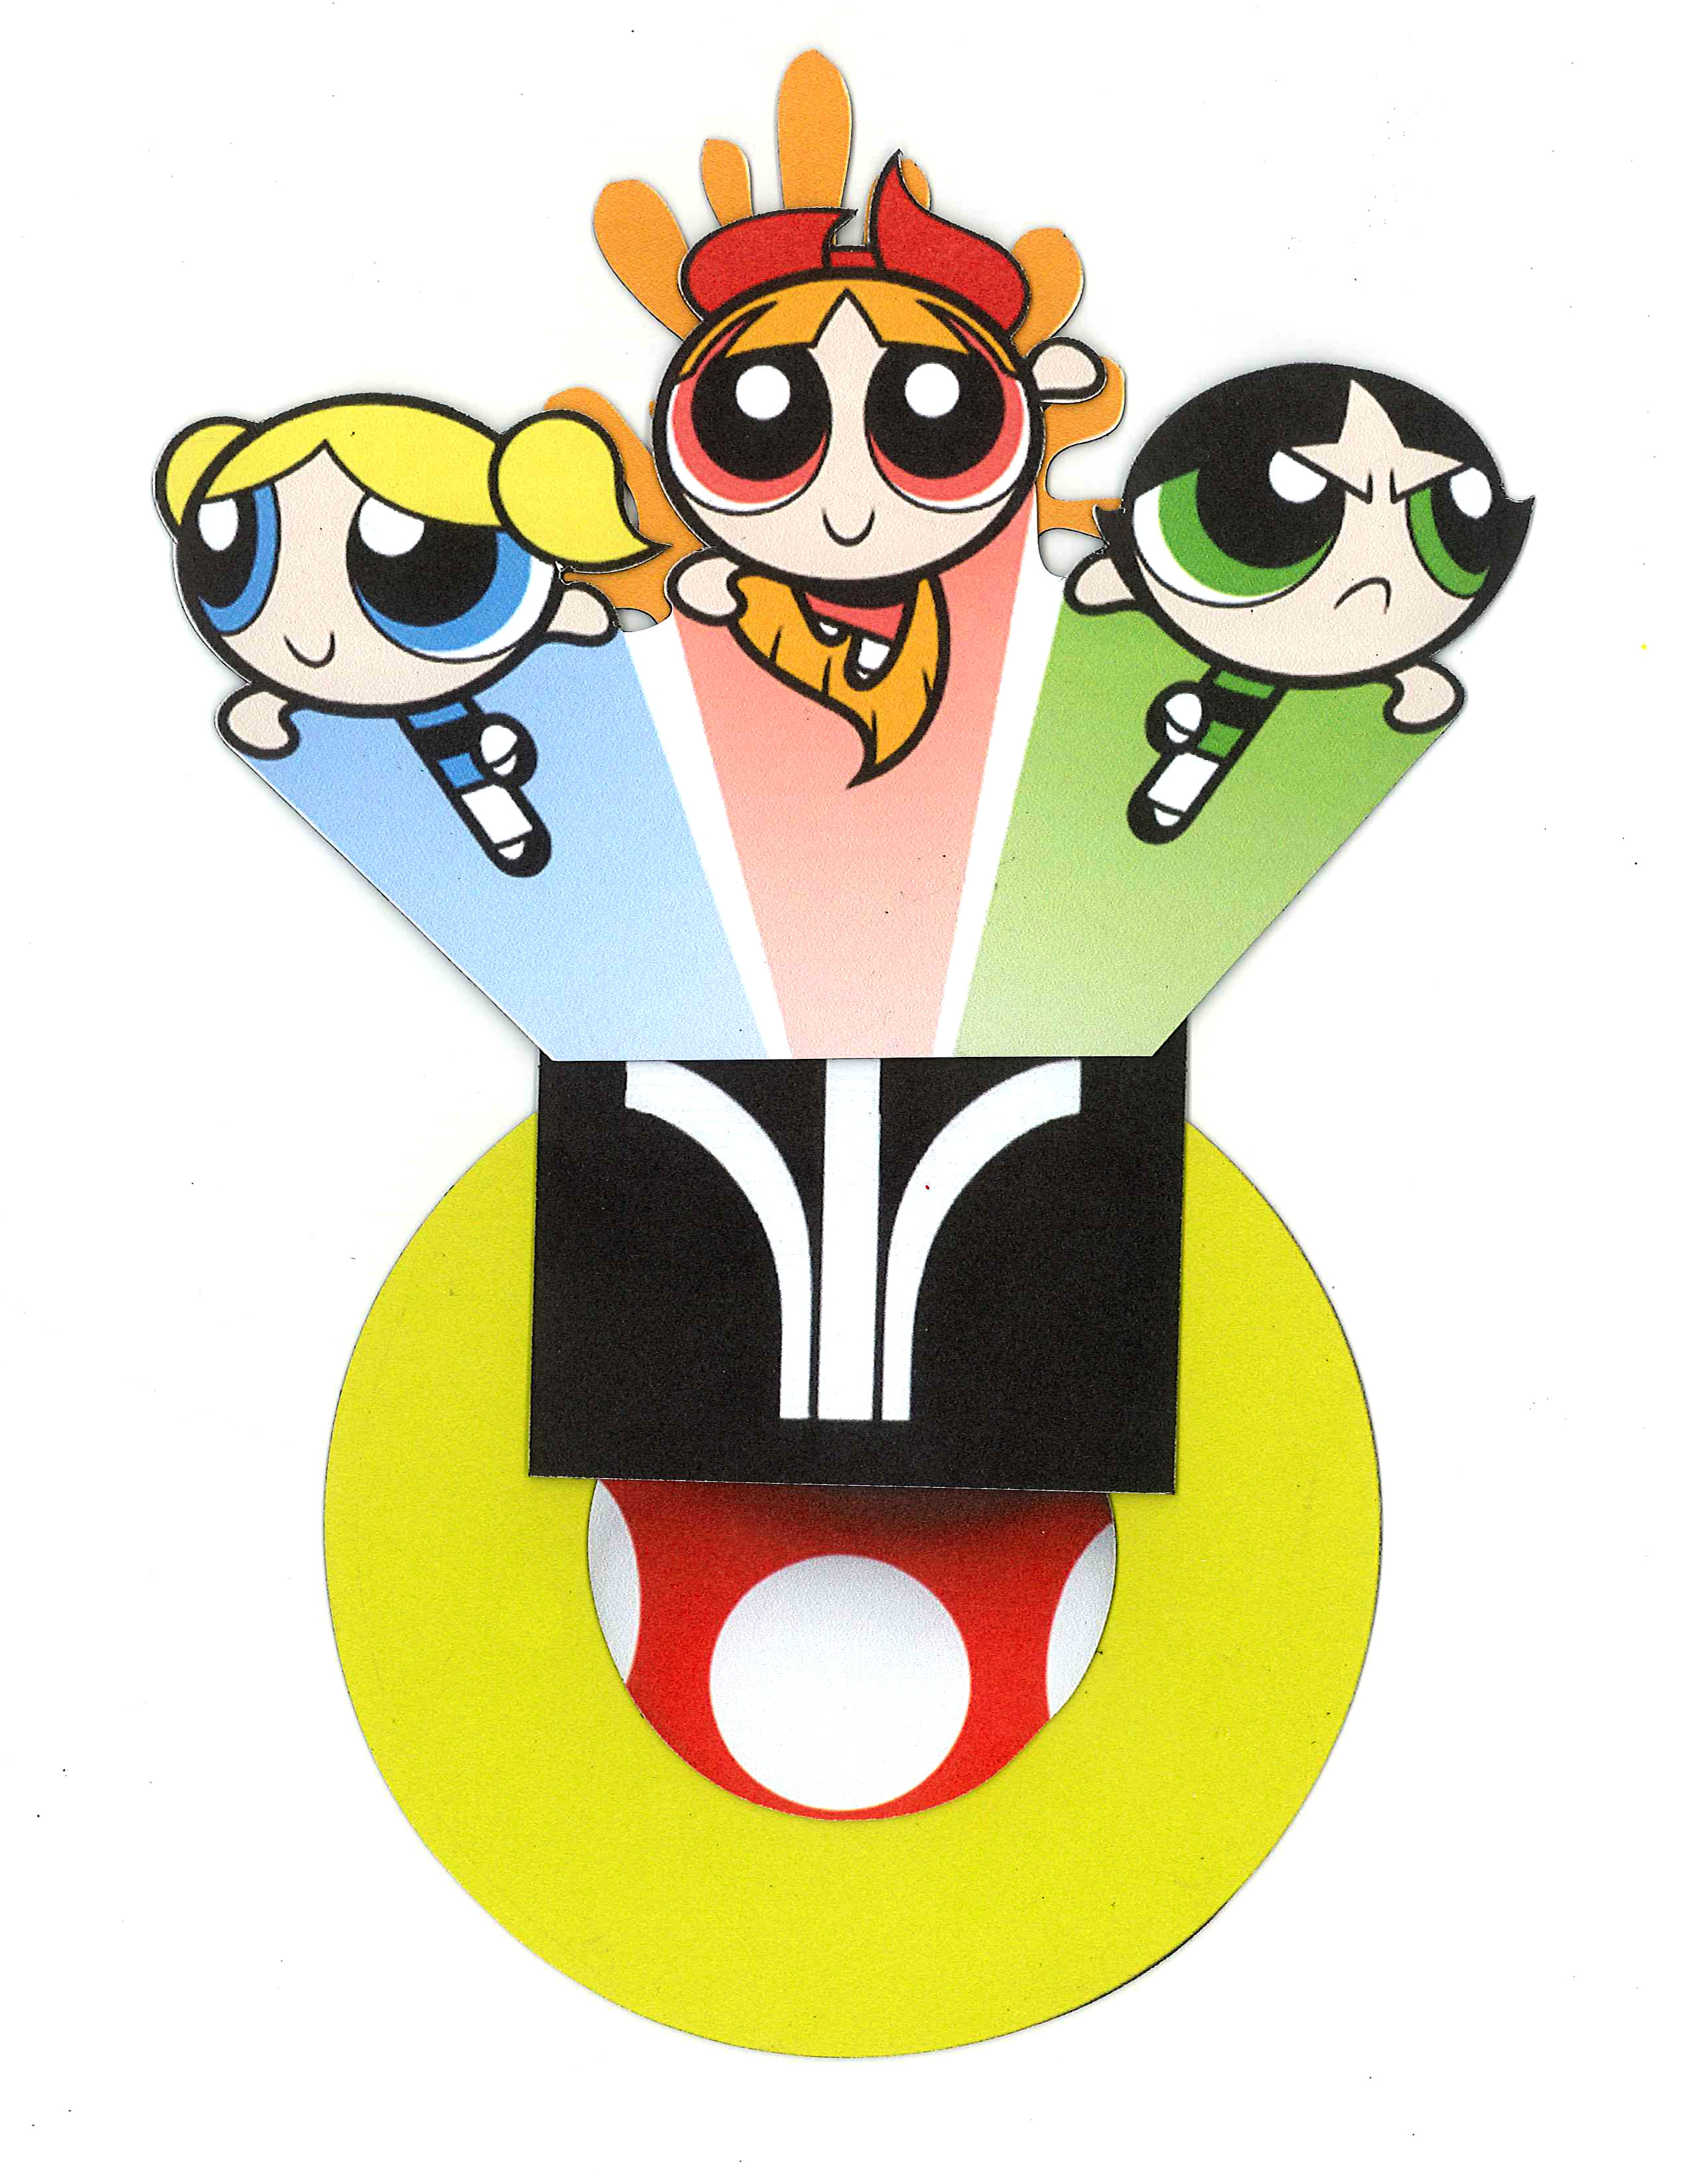
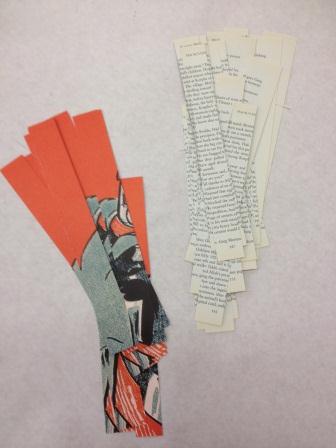
Hernandez references a wide array of influences ranging from popular culture (movies, comics, toys, and commercials) to biology and nature (plants, animals, and body parts).  He describes his process as both spontaneous and deliberate as he morphs appropriated images together to form a collage and then builds a three dimensional model to figure out the structure.  What references can you find in HI-C Avenger?

C3_Installation_11_2012_003_edit copy

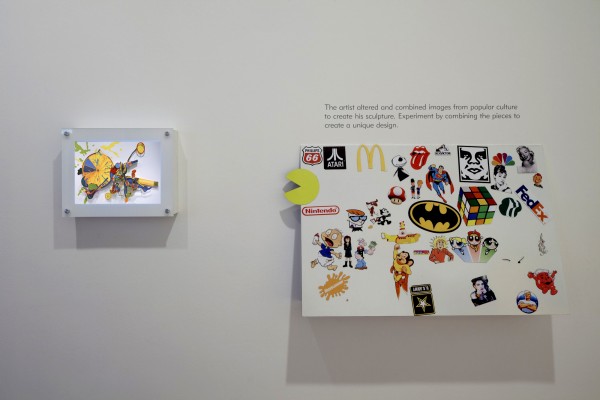
The interactive component that we have designed to supplement this work of art is two-fold.  There is a short video that plays clips and still images of some of the direct references that inspired HI-C Avenger.  Alongside this is a magnetic board filled with pop culture icons from the past and present.  Visitors can arrange the magnets, layering and combining them to create their own Hernandez-inspired creation.

Come by, see the new work, and play a while!

HernandezSample1 HernandezSample2 HernandezSample3

Also, mark your calendars for these upcoming opportunities to participate in a workshop led by John Hernandez:

Thursday, January 17, 6:30-8:30 p.m.,
Join guest artist John Hernandez as he takes us beyond collage into a mutated experience in reality. Hear about Hernandez’s work, while constructing a unique morphed creation of your own.

Late Night Creations with artist John Hernandez
6:30 p.m., 7:45 p.m., and 9:00 p.m., Art Studio, Center for Creative Connections (C3)
Join us for a special workshop with guest artist John Hernandez.  John will talk about his creative process and then guide participants in constructing sculptures using toys and other found objects.

Jessica Fuentes
C3 Gallery Coordinator

Make Your Own Festive Holiday Ornaments!

Winter has always been my favorite season—it brings back cozy memories of home and the holidays. Growing up in Ohio, I loved how decorated homes would transform our neighborhood into a bright, festive place. Set against a background of snow, it was like a living Norman Rockwell painting.

To help rekindle that holiday spirit, here is a simple and fun way for you and your family to create ornaments together out of recycled materials from around your home!

Materials:
• Paper (patterned or construction paper, old drawings, book pages, posters, etc.)
• Scissors
• Hole puncher
• Ribbon, string, or yarn
• Stapler and staples
• Rotary trimmer or paper cutter (optional)

Instructions:
1. Using your rotary trimmer, cut the paper into strips; they can be any size you like as long as all the strips are the same (for reference, I used 1”x8” strips). If you don’t have a rotary trimmer cut the strips by hand using your scissors.

Materials

2. Stack an odd number of strips on top of each other—I find that seven to nine work best.
3. Find the top of the middle strip and stagger the rest of the strips stacked on top of and underneath it to create a pyramid shape. Staple the stack together to secure it.

Stacking

Stapling

4. Repeat the process at the other end of the ornament. The strips of paper will fan out, leaving you with a spire-like shape.

Bottom

Finished

5. To hang your ornament, punch a hole at one end and string a ribbon through it.

Punching Holes

Try using different colors combinations when you stack your strips of paper. Also, increasing or decreasing the distance that you stagger the strips will change the shape of your ornament. Experiment with different supplies to further embellish your ornaments such as glitter, paper edgers, or shape punches!

Group shot

Hanging

Have fun creating and have a happy holiday season!

JC Bigornia
C3 Program Coordinator

canvas: a blank slate of possibilities

Welcome to Canvas! We are so excited to announce that we are merging the DMA’s family blog with the DMA’s educator blog – what better way to canvass new ideas on a blank canvas? Whether you are a teacher, parent, grandparent, artist, or just all around fan of the DMA, we hope that this newly merged blog will quench your thirst for knowledge and creativity. From week to week, we will have posts highlighting fun things to do at the Museum, studio insights, interdisciplinary ideas, and inspirations from works of art in our galleries.

Canvas now features even more DMA authors! Check out the author page to meet some of our new writers. Staff from the Center for Creative Connections (C3) will post monthly with details about visitor interactions in C3, cool teen programs, artist workshops for adults, and gallery insights. Interpretation staff will share exciting ways that visitors are connecting with works of art and all of the ways that interpretation merges with audiences of all ages. Staff who work closely with families will share ways to connect kids to art, nifty art activities for kids, and artsy ways to make connections to holidays, kid-friendly books, and even the weather! But don’t worry, you’ll still find all of the creative and resourceful ideas geared towards students and teachers that this blog has always had (including a monthly art recipe from our resident baker, Sarah).

We hope that by joining forces, Education Staff here at the DMA can bring you even more ways to celebrate the power of art!

Amanda Blake
Head of Family, Access, and School Experiences

The Man with the Top Hat

In preparation for the upcoming exhibition Posters of Paris: Toulouse-Lautrec and His Contemporaries, the Center for Creative Connections staff has been prototyping a new interactive art-making activity.  Inspired by poster-making at the Denver Art Museum, we are including a hands-on poster-making space in the exhibition.  Our current prototype activity has a limited array of characters which our visitors can choose and combine to create their own poster; but as you can see, creativity still flourishes.  Though each of these three posters below uses the man with the top hat in a similar placement in the composition, the context in which he is placed is quite different.

On the left is an 8-year-old boy’s romantic combination of the man with the top hat (with a slender cigarette) and Jane Avril.  In the middle, a young man has replaced that slender cigarette with a hefty cigar.  All of the romance is gone with the shadowy figures in the background looking on as the man with the top hat strangles a poor rooster.  Pictured on the right is a collaborative piece created by a group of women from the Art Institute of Fort Worth.  Each woman took a turn adding to the composition in what ended up as a playful hodge-podge.

Swing by the Dallas Museum of Art from October 14 – January 20 to see Posters of Paris and create your own poster!  What will you do with the man with the top hat?

Jessica Nelson
C3 Gallery Coordinator

Friday Photos: Summer Seminar 2012

Last Friday marked the end of Summer Seminar 2012: Teaching for Creativity, a week-long, immersive workshop for teachers of all grades and subjects to explore ways to foster creative thinking skills in their students. As a relatively fresh DMA employee, this Summer Seminar was my first. I was joined by eight educators from near and far (from Texas to Nebraska to Monterrey, Mexico!). Participants spent the week with the Museum’s resident creativity expert, Dr. Magdalena Grohman, engaging in group and independent creativity exercises, exploring creativity through art in the galleries, discussing current scholarship on creativity, and developing lesson plans to be tested in their classrooms next school year.

Thank you to this year’s participants for your insight, enthusiasm, and open-minds. Check out some of the photos from our idea-filled week.

[slideshow]

Andrea V. Severin
Coordinator of Teaching Programs

Art is for Families

Do you remember family visits to museums as a kid?  Picking favorite artworks together, seeing something completely perplexing/absolutely beautiful, or learning (maybe the hard way) that you can’t touch the art?

My colleague, C3 Gallery Specialist Jessica Nelson, is dedicating her master’s thesis research capturing such experiences.  Last week, Jessica forwarded me a link to her more-than-excellent blog Art is for Families.  The blog documents her Art Education master’s thesis project, for which Jessica is embarking on a series of wonder-full museum adventures with her six-year-old daughter, Julia.  Jessica’s research focuses on family learning in museums: specifically, how museum-produced self-guided materials help families have meaningful experiences with artworks.  She is also interested in inter-generational collaborative research and art-making as a vehicle for storytelling.

Together, Jessica and Julia will visit six museums in the metroplex, making use of available self-guided materials, and documenting their journeys in a variety of media. The two are equal collaborators: Julia and Jessica make art together, collect stories, take separate photos of their experiences, and throughout, have a dialogue about their process.

So far, Julia and Jessica have visited the Modern Art Museum of Fort Worth and the Amon Carter Museum of American Art—taking advantage of the Modern’s self-guided sketchbook, Ten Pages and the Carter’s Postcard Tour.  Below are just a few of many pictures of their visits and resulting projects: [slideshow]

Julia twirled through my office last week, just in time for me to take the adorable mother-daughter photo above for this post.  Julia, we cannot wait to see more of your art and read (and read and read) more of your stories about museums.  Jessica, what an amazing project!  We look forward to learning from your research.

To have a self-guided family adventure at the DMA, ask for one of our four bite-sized Self-Guided tours at the Visitor Services desk, or print them at home.  And for more family-focused art-making and art-exploring ideas, visit We Art Family! The DMA Family Blog.

Amy Copeland
Coordinator of Go van Gogh Outreach

Keep Your Kids Writing This Summer!

Keep your kids writing this summer with the Texas Book Festival Fiction Writing Contest for Teens presented by Read to Lead!

The Texas Book Festival is hosting its 11th annual fiction writing contest to encourage and reward creative writing in Texas schools. This year, the theme is Out of the Blue, and cash prizes and Texas Book Festival participation will be awarded to the winners. Stories will be judged by Texas writers, some of whom have presented their work at the annual Festival.

Judges will look for excellence in use of dialogue, imagery, character development, setting, plot, conflict and resolution. Submitted entries will be considered in three divisions: grades 7-8, grades 9-10, and grades 11-12. Authors will enter the division for which they were a student during the 2011-12 academic year. The contest is free to enter, and entries must be submitted online by July 27, 2012.

To view the 2011 winning entries, visit our web site.

Texas Book Festival Fiction Writing Contest Winners 2011

Hannah Norman
Texas Book Festival Director of Operations

2012 Summer Seminar for Teachers

2011 Summer Seminar Participants

Imagine yourself among a group of educators — spirited, inspiring, trusting, supportive, and innovative — all focused on creativity and the nurturing of students. Now imagine this group immersed in the creative environment and resources of the Dallas Museum of Art for one full week.  This is the Summer Seminar experience for teachers at the DMA, and we’ll be hosting the 2012 Seminar June 11-15.  We invite you to join us!

Teaching for Creativity reached beyond my expectations by exploring how to consider attitudes, ideas, and associations I may have discarded or not considered before this class.  – 2011 participant

Designed for teachers of all grade levels and subjects, Summer Seminar: Teaching for Creativity explores education and creativity through experiences in the DMA’s galleries and Center for Creative Connections. The course references creativity from a variety of perspectives, and participants engage in readings about creativity from various authors, including Robert Sternberg, Michele and Robert Root-Bernstein, and Mihaly Csikszentmihalyi. Through conversations and workshops centered on creative attitudes and thinking, the Seminar supports teaching skills and approaches that foster imagination, curiosity, an open mind, and a natural drive for creating in students. UT Dallas professor Magdalena Grohman and DMA staff lead workshops and gallery experiences.  Participants reflect on and further develop their own creativity, as well as focus on how to teach for creativity.

I will use the tools in order to push myself further with my projects, rather than staying in [a] comfort zone.  – 2011 participant

This definitely helped me tap into more creative thinking. The exercises and activities were very helpful.  – 2011 participant

2011 Summer Seminar gallery experience

Throughout the Seminar, the DMA galleries serve as a kind of laboratory space, in which we consider the creative process and relate creative thinking techniques to specific works of art. In-depth experiences with art cultivate our abilities to observe, envision, express, explore, engage, and understand  in the arts and other disciplines. Through these experiences, we may become more persistent, flexible thinkers, better problem explorers and problem solvers—overall, more creative beings.

Unlike most professional development, the focus is not on ‘making a better teacher’ but on providing good teachers with better tools to bring out the best in their students.      – 2011 participant

The one-week Summer Seminar experience serves as a catalyst for an extended relationship between participating educators and the DMA as we continue the dialogue about education and creativity throughout the academic year.  This blog is one venue for the continued dialogue — view posts from a series titled Teaching for Creativity to learn more and hear about the creative journeys of several educators in the classroom.  The blog post this Thursday will feature 2011 Summer Seminar participant, Lorraine Gachelin.

Registration for the 2012 Summer Seminar: Teaching for Creativity is currently open. For more information, please contact Andrea Severin at aseverin@DallasMuseumofArt.org.

Nicole Stutzman
Director of Teaching Programs and Partnerships

Art-filled Memories

Have you ever stopped to think about that moment when you decided to make art an important part of your life? I bet for some people the spark was ignited by a single educator, or perhaps a single project that they created in their young lives. My fellow bloggers and I sat down and thought about what art related experiences we remember from our past. I wanted to post them here as nice reminder to all educators that the experiences you are creating are not only influential to your students now, but will likely become a memorable project that they will carry with them for the rest of their lives!

One of my most memorable projects was making a miniature haunted house in fouth grade art class. We partnered up and used whatever materials we could find (within the art room, of course). I remember that half the fun was creating a “script” in our minds of what would happen to the person once they set foot into our shoebox-sized house. Once we were finished making bloody walls and cobwebbed hallways, the storytelling element really kicked in. Describing the “horrors” to our fellow classmates was one of the best Halloween art activities that I can remember!

Here are some childhood memories from the Teaching Programs staff:

“The best art teacher I ever had was my high school ceramics teacher Mr. Block.  Mr. Block was a huge inspiration to me and one of the main reasons I studied art in college.  The most memorable project was when our class participated in the Dallas Empty Bowls Event.  Empty Bowls is a program designed to help end hunger by bringing local artists and restaurants together.  When you go to an event, you buy a hand-made bowl, and then you get all the food you want!  The best part is that all the proceeds go to the North Texas Food Bank.  Our entire class made bowls for this event, and I still have the bowl that I purchased over ten years ago.  This project showed me that creating art can be fun and expressive, but it can also be for a good cause.” – Loryn

“The childhood art activity that stands out to me the most is an upside-down painting a la Georg Baselitz. I was probably in second or third grade and attending art camp at the Modern Art Museum of Fort Worth (in the Museum’s old building), and we had explored/discussed Baselitz’s Elke (1976).  I used to place all my stuffed animals on their heads because I thought they looked better that way, so I was thrilled when I my art camp assignment was to paint my dog upside down! I remember how proud I was of my finished product and of my new knowledge of the artist Baselitz.” – Andrea

Elke, Georg Bazelitz, 1976, Collection of the Modern Art Museum of Fort Worth, Museum purchase, The Friends of Art Endowment Fund

“My favorite kind of activities in school didn’t have too many directions. I always had the most fun when I got to use my imagination and make it up as I go. My most memorable project was in elementary school, when we were given clay tiles to decorate however we wanted. I decided to paint myself yelling to my mom what I thought at the time was a sassy yet sweet sentiment, “Wake up, I love you!” (imagine ‘wake up’ being said like hellooo or duh). I had some pretty sweet shoes back in the day, and on that particular day I just happened to be wearing my platform sneakers. The six-inch rubber heels were carved with flower designs that I decided to press along the edges of the tile, printing the pattern onto the clay. I remember feeling really proud of coming up with an unconventional idea for decorating my tile.” – Hannah

“In the fourth grade, I had to make a large display for one of the fifty states.  My state was Hawaii, and my greatest artistic achievement was making a diorama of Waikiki Beach using sand (from my backyard sandbox) and Dep hair gel.  The gel was electric blue (it was 1989), and it was the perfect color for the waves of Waikiki.” – Shannon

Shannon's creation (note the surfer catching a serious hair gel wave!)

“One of my favorite art projects was a papier mâché penguin I made in high school.  I loved the process of creating the form with wadded up newspaper, tape, and cardboard.  I also loved the messiness of applying the wet papier mâché strips to create the exterior of the sculpture.  As I finished with several coats of paints, I decided to give my penguin green eyes, disregarding the possibility (and fact) that penguins do not actually have green eyes.  I eventually gave the penguin sculpture to my older sister; it now lives in her garage.” – Melissa

A great BIG thank you to all of the hard-working educators out there for helping us construct our creative memories!

Jessica Kennedy
McDermott Intern for Gallery Teaching

Touring Totes Tutorial

Last month, Melissa and I made touring tote bags for Hannah and Jessica to thank them for all of their hard work thus far as our interns.  I also made a bag for Loryn, who probably spends more time than anyone touring in the galleries.  Melissa and I both sew, so we set aside an evening to whip up the tote bags for everyone.  Of course, after we saw the finished products, we wanted to make them for ourselves, too!

Below is a tutorial to make your own DMA Teaching Programs touring tote bag.  I have included photographs for many of the steps — sometimes it’s easier to follow the photos than the words on a sewing tutorial.

Materials needed:

  • 1/2 yard of fabric for the bag exterior
  • 1/2 yard of fabric for the lining
  • 1 yard of fusible interfacing
  • 1 1/2 yards of webbing (for the straps)
  • Basic sewing supplies (sewing machine, thread, pins, and a hand-stitching needle)

Step One: Cut two rectangles measuring 22 inches by 17 inches from your exterior fabric AND from your lining fabric.  You’ll also need to cut two 22 x 17 rectangles from your fusible interfacing.

Step Two: Iron the fusible interfacing to the wrong side of your lining fabric.  This will give your tote bag some stability and make it sturdy for carrying paper, pencils, books, etc.

Step Three: With the right sides facing each other, pin your two exterior panels together along the side seams and along the bottom.  You’ll leave the top open.  Stitch together using a 1/2 inch seam allowance.

Step Four: Repeat step three with your lining fabric.  However, you will need to leave a five or six inch gap in the middle of your lining — this will allow you to turn your bag right-side-out at the end.  (I like to use red pins on either side of my gap as a visual reminder to stop my sewing and leave a space.)

Step Five: On your bag exterior, measure and mark a line on each side seam three inches from the bottom of the bag; this will help you square the corners of the tote.  Put your hand inside the bag and pull the corner out, turning it into a triangle.  Stitch a horizontal line across the triangle where you made your pen mark.  After you’re done, cut the triangle off to eliminate any bulk from your corners (be sure not to cut too close to the seam).  You’ll follow this step on each of the bottom corners of the exterior and lining of your bag.

This is how the bottom of your bag will look once you box the corners

Step Six: It’s time to attach your straps to the bag.  Take your 1 1/2 yards of webbing and cut it in half, leaving your 3/4 yard for each strap.  Find the center point of your exterior bag.  Mark two lines four inches on either side of that center point and pin your handles in place.  You’ll want to pin the handle to the right side of your lining fabric.

Step Seven:  Make sure your exterior fabric is facing right-side in.  Turn your lining fabric right-side out and insert into the exterior tote pocket.  Be sure that your side seams are matched up.  Pin both pieces together all the way around (make sure you include the handles in your pinning).  Using a 1/2 inch seam allowance, stitch all the way around your bag.  I recommend going back and sewing a second time over your handles–this will help reinforce the handles and keep them from pulling out of the tote.

Step Eight: Find the hole that you left in your lining fabric.  This is how you’re going to turn your bag right-side out.  Pull the entire bag, including the handles, through that gap.

Step Nine: Tuck your lining fabric into the exterior of the tote bag.  You’ll want to be sure that your corners are nice and square, too.  Once everything is in place, you might decide that you want to topstitch your tote to give it a finished look.

Step Ten: Use a needle and thread to stitch the hole in the bottom of your tote bag closed.  Once that’s finished, you’re ready to go.

Here we are with our finished touring totes.  They’re sew cute!

Shannon Karol
Manager of Docent Programs and Gallery Teaching


Archives

Categories