Posts Tagged 'Dallas Museum of Art'


Words with Friends (and owls, mohels, etc.)

For the exhibition Never Enough: Recent Acquisitions of Contemporary Art, New York-based artist Darren Bader visited Dallas to help us realize a unique work recently purchased by the DMA. Bader is known for his innovative and unconventional use of materials that push the boundaries of sculpture and activates environments with unexpected pairings and phenomenological experiences.

20140220_DarrenBader_AG_28

For example, in the 2012 exhibition Darren Bader: Images at MoMA PS1, the artist presented a room filled with a newly upholstered couch and several live housecats, all of which were available for adoption by museum visitors. Elsewhere the artist installed a selection of vegetables, each on its own wooden pedestal, that was made into salad for gallery visitors by a museum staffer twice a week. While these works all had a social dimension, for the artist these elements are understood to be sculpture of one form or another, albeit in the most expansive definition of the word.

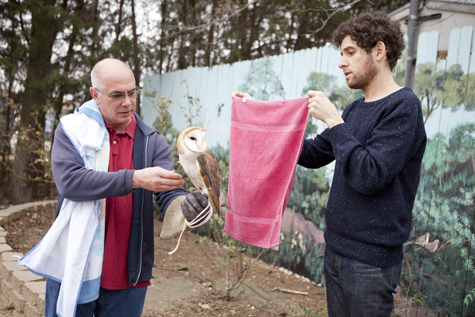
Bader’s work also frequently employs double-entendres and wordplay, as is readily apparent in the series of rhyming couplets that make up the recent acquisition at the DMA, and which is now on view: obi and/with SCOBY; oak with/and smoke; owl and/with towel; oar with/and store; oil with/and mohel; oat and/with note; orc with/and fork. Generally, when a museum purchases a work it has a set physical form, but in this case the work itself consists solely of the words listed in the title above and the conceptual potential for realizing these couplings. These absurd combinations can be realized in physical space (e.g., placing a rowing oar in the DMA store) or in the form of photographic or video documentation to be displayed in the galleries. Contractual agreements like this have a long history within the canon of conceptual art, including works by Marcel Duchamp, Yves Klein, Hans Haacke (with the aid of dealer Seth Siegelaub), and Andrea Fraser, among others.

As the curator for this exhibition, I was tasked with coordinating and/or sourcing the various elements needed to realize this work, including an obi and SCOBY, owl and towel, and even a mohel (more on that in a later blog post). In order to find an owl, we got in touch with Kathy Rogers from Roger’s Wildlife Rescue down in Hutchins, Texas.

20140220_DarrenBader_AG_21

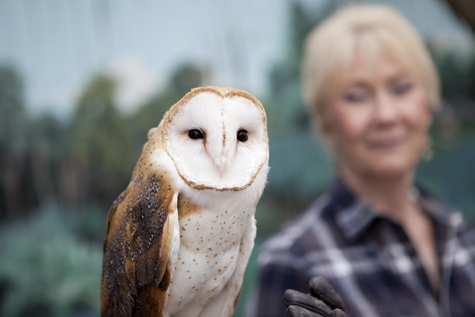
Kathy and her team run an amazing facility that rescues, rehabilitates and houses hundreds of birds of all varieties. For our project, Kathy had three types of owls available—Barred, Barn and Screech—and ultimately we decided to go with Forest, the Barn Owl. Forest was born in captivity, so he is very comfortable around humans and was more than happy to be filmed by the DMA’s crew.

20140220_DarrenBader_AG_7

20140220_DarrenBader_AG_13

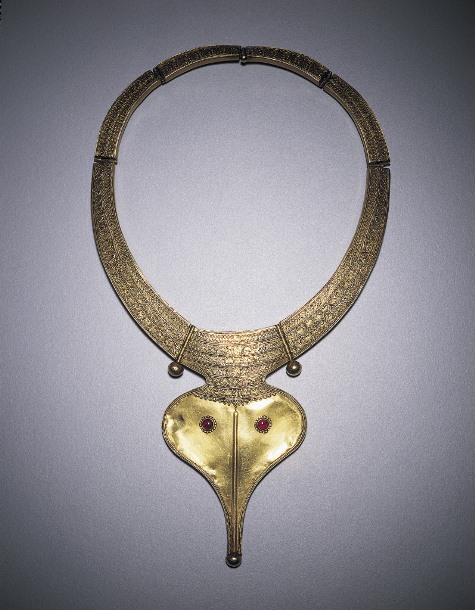
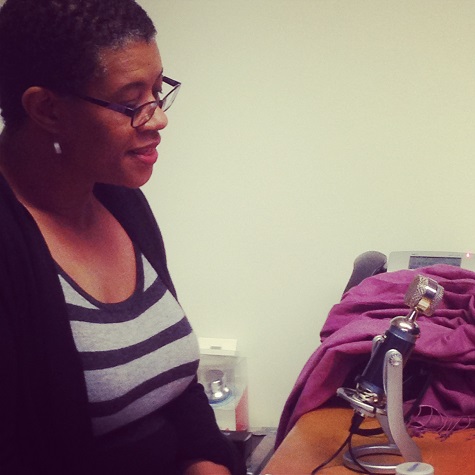
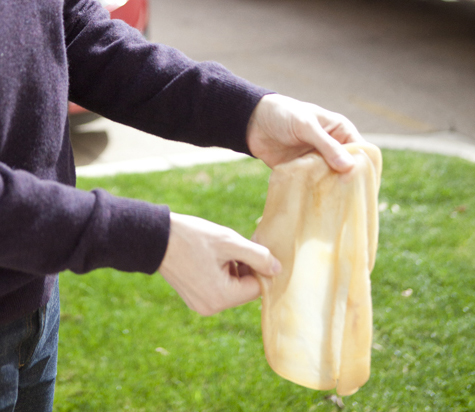
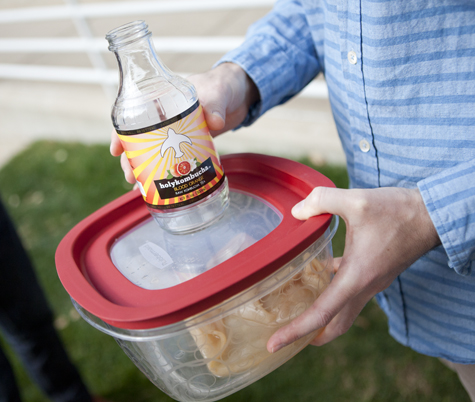
Next we had to find a SCOBY (Symbiotic Colony of Bacteria and Yeast) to go along with the obi (a traditional Japanese sash used with a kimono) we purchased from eBay. Lucky for us, the wonderful people at Holy Kombucha in Fort Worth were more than willing to provide us with a grade-A large SCOBY. While the SCOBY itself is naturally slimy and smelly, it is probiotic, and when used in kombucha it makes for a very tasty health drink; however, in order to exhibit the SCOBY our Objects Conservator dried it in an oven for several hours until it became a tissue-paper thin wafer.

20140220_DarrenBader_AG_26 20140220_DarrenBader_AG_30

For those that are curious, the SCOBY will be on view in the Stoffel Gallery, along with video clips representing other pairings from the Bader piece scattered throughout the galleries (included in free general admission!). We have also staged two small interventions outside the gallery spaces that you might encounter on your next trip to the DMA. So if you find an oar in the DMA store, or oats in the DMA donation box, don’t be alarmed . . . it’s only art.

[youtube http://www.youtube.com/watch?v=uL845ud2rM0]

Gabriel Ritter is The Nancy and Tim Hanley Assistant Curator of Contemporary Art at the DMA.

What’s in a (middle) name?

In honor of Middle Name Pride Day, we took some time to explore artists in the DMA collection whose middle names were part of their identity and the stories behind them.

John Singleton Copley, Woodbury Langdon and Sarah Sherburne Langdon, 1767, oil on canvas, Dallas Museum of Art, The Eugene and Margaret McDermott Art Fund, Inc.

John Singleton Copley, Woodbury Langdon and Sarah Sherburne Langdon, 1767, oil on canvas, Dallas Museum of Art, The Eugene and Margaret McDermott Art Fund, Inc.

Following a long tradition that continues today, many artists’ middle names can be attributed to familial ties. John Singleton Copley’s middle name can be credited to his mother’s maiden name. She was from the County Clare, Ireland, but could trace her ancestors back to Lancashire, England. She was forced to take over her husband’s tobacco shop upon his death shortly after the family emigrated in the early 1700s.

John Wesley Jarvis, Portrait of a Man, c. 1815-1820, oil on canvas, Dallas Museum of Art, bequest of Mrs. Sheridan Thompson

John Wesley Jarvis, Portrait of a Man, c. 1815-1820, oil on canvas, Dallas Museum of Art, bequest of Mrs. Sheridan Thompson

John Wesley Jarvis was named for his uncle John Wesley, founder of the Methodist church. Jarvis was born in his uncle’s homeland of England, but his mariner father moved the family to Philadelphia in the artist’s early years. He eventually became one of the most renowned portrait painters in New York in the early 1800s but strayed from his namesake’s roots with his propensity for flamboyant fashion and alcohol.

Velma Davis Dozier, Rain Forest (pin), 1969, cast gold, Dallas Museum of Art, gift of Otis and Velma Dozier

Velma Davis Dozier, Rain Forest (pin), 1969, cast gold, Dallas Museum of Art, gift of Otis and Velma Dozier

Also following a tradition that continues today, several female artists in the DMA collection assumed their maiden name as their middle name after their marriages. Velma Davis was a Texas native who studies painting at SMU and then specialized in jewelry making and design while obtaining her master’s degree from Columbia University. She returned to Texas to cofound the Dallas School of Creative Arts in the 1930s, where she met her husband, painting teacher Otis Dozier.

Pompeo Girolamo Batoni, Portrait of a Man in a Blue Suit, 1760s, oil on canvas, Dallas Museum of Art, gift of Leon A. Harris, Jr.

Pompeo Girolamo Batoni, Portrait of a Man in a Blue Suit, 1760s, oil on canvas, Dallas Museum of Art, gift of Leon A. Harris, Jr.

Children in Italian families have long been named for saints for whom the parents have a special affinity, as was likely the case with Pompeo Girolamo (“Jerome”) Batoni. The artist clearly also held St. Jerome in high regard, having depicted him at least in three separate works: St. Jerome in the Wilderness, The Last Communion of St. Jerome, and in one of his most famous later paintings, The Marriage of St. Catherine with Sts. Jerome and Lucy. (It is worth noting that Catherine was the name of his first wife; Lucy, the name of his second.)

Henry Ossawa Tanner, Christ and His Mother Studying the Scriptures, c. 1909, oil on canvas, Dallas Museum of Art, Deaccession Funds

Henry Ossawa Tanner, Christ and His Mother Studying the Scriptures, c. 1909, oil on canvas, Dallas Museum of Art, Deaccession Funds

Henry Ossawa Tanner’s parents escaped a life of slavery via the Underground Railroad. Benjamin Tucker Tanner, who became an African Methodist Episcopal minister, and his wife Sarah, bestowed the middle name of “Ossawa” upon their son, after Osawatomie – the Kansas town where the infamous abolitionist John Brown launched his anti-slavery campaign.

Norman Bel Geddes and Walter Kidde Sales Co., "Soda King" syphon bottle, designed c. 1935, plastic and chrome, Dallas Museum of Art, gift of David T. Owsley

Norman Bel Geddes and Walter Kidde Sales Co., “Soda King” syphon bottle, designed c. 1935, plastic and chrome, Dallas Museum of Art, gift of David T. Owsley

American theatre and industrial designer Norman Melancton Geddes adopted the “Bel” middle name after marrying his wife, Helen Belle Schneider in 1916. The couple also passed on their incorporated name to their daughter, actress Barbara Bel Geddes.

Other artists who took pride in their middle name currently on view in the DMA galleries:
John White Alexander
Thomas Hart Benton
Abraham Hendricksz van Beyeren
Richard Parkes Bonington
Alfred Thompson Bricher
Edward Coley Burne-Jones
Frederic Edwin Church
Francis William Edmonds
Laurits Christian Eichner
Jean Alexandre Joseph Falguière
Francesco Salvator Fontebasso
Jesús Guerrero Galván
Charles Sumner Greene
Henry Mather Greene
Charles Webster Hawthorne
René Jules Lalique
John Hugh Le Sage
Pierre Nicolas Legrand
Guillaume Guillon Lethiere
Alfred Henry Maurer
Alfred Jacob Miller
John Nicholas Otar
Charles Willson Peale
Jean Baptiste Marie Pierre
Giulio Cesare Procaccini
William Tylee Ranney
John Gordon Rideout
Leon Polk Smith
Walter Dorwin Teague
Louis Comfort Tiffany
Jean François de Troy
Joseph Mallord William Turner
Karl Emmanuel Martin (Kem) Weber
Adolf Ulric Wertmüller

Reagan Lynette Duplisea is the associate registrar, exhibitions, at the DMA

Having a Ball During DMA Spring Break

What do March Madness and the DMA have in common? If you are thinking that both are in Dallas, you are correct! This year’s NCAA Men’s Basketball Final Four and Championship games will be played right here in North Texas. But wait, there is SO much more! Here at the DMA we are celebrating Art Madness, our own version of the beloved tournament. DMA Friends picked an artsy Sweet Sixteen that you don’t need a ticket to enjoy, and we are now down to the Elite Eight. Works of art from the Museum’s collection are competing for your vote to determine which artwork is the ultimate champion. If you haven’t voted yet, it’s not too late to get in on the game.

Since basketball is on the brain here, it seemed only fitting that we spend our spring break elevating our game, and we’ve planned an action-packed week of Art Madness family fun for everyone! Enjoy story time in the galleries, family tours, art-making in the studio, family competitions and more all week long in our art and basketball mash-up. We will even have a real piece of the NCAA here at the Museum! Be sure to score a look at the NCAA Championship trophy in the Center for Creative Connections, on view March 11-16.

Can’t get enough of the Madness? Then take an overtime for fun and join us for a Family Block Party on March 14, when we’ll stay open until 9:00 p.m. Families can sketch in the galleries, take a tour of the Art Madness competitors, do some yoga in the galleries, enjoy a puppet show, design trading cards in the studio and more. Everyone will be a winner!

But don’t take our word for it. We asked a family of museum (and sports) experts to walk us through the spring break starting line-up.

b-ball storytime

Little B-ball enjoyed story time in the galleries, hearing favorite stories and looking at one of the Art Madness competitors.

b-ball tote

The entire family used the hands-on activities and games in the Art to Go Family Tote to explore color in some of their favorite paintings.

b-ball challenge

With art supplies, a healthy dose of imagination and their competitive streak, the B-ball family worked as a team to design a jersey for their Art Madness MVP in the daily Championship Challenge.

b-ball yoga 2

Mama B-ball thought yoga was very relaxing and loved finding peaceful inspiration in the art around her. (Little B-ball wasn’t quite as meditative.)

b-ball ventriloquist

Daddy B-ball couldn’t help but laugh at ventriloquist Nancy Worcester’s hilarious show in the Horchow Auditorium.

Their final conclusion: “Visiting the DMA is a slam dunk!”

Our analysis? Art + Basketball = A surefire hit for the entire family. We hope to see you here March 11-16!

Amanda Blake is the head of family, access, and school experiences at the DMA.
Leah Hanson is the manager of early learning programs at the DMA.

DMA Red Carpet

When I was younger, I loved watching the Oscars. I stayed up late to watch to the very end, and the next day I talked about the awards and speeches and dresses with my classmates. I no longer have the stamina to watch the entire program (it’s sad, I know). But I always look forward to seeing everyone’s wardrobe, whether I catch them live on the Red Carpet or on the Internet the next day. Below are some fabulous dresses and spectacular accessories from the DMA’s collection, in honor of last night’s beautiful women.

Melissa Gonzales is the C3 gallery manager at the DMA.

Close to Chuck Close: A DMA DIY

After attending the Philip Glass and Tim Fein concert at the Winspear Opera House this past Monday night, I was excited to discover that the DMA’s collection includes a lithograph of the composer, completed by his long-time friend Chuck Close. Close is known for his innovative approaches to representing the human face. All of his works explore this theme, depicting his subjects, generally friends and family members, in intimate, large-scale portraits of their shoulders and head. His portraits begin as photographs, which he then carefully transfers to a canvas. Close has experimented with various techniques and materials, including finger-painting, graphite, conté-crayon, pastel, oil and watercolor.

Chuck Close, Phil/Fingerprint, 1981, lithograph, Dallas Museum of Art, Mr. and Mrs. Jake L. Hamon Fund

Chuck Close, Phil/Fingerprint, 1981, lithograph, Dallas Museum of Art, Mr. and Mrs. Jake L. Hamon Fund, (c) Chuck Close

Over the course of their four-decade-long relationship, Phil has been the subject of many of Close’s most iconic works; in fact, his image has been used more than any other subject. According to an article published by W magazine in 2007, Close estimates that he has repurposed a 1968 photograph of Glass “150 times or something.” Glass returned the favor in 2005, unveiling a striking and beautiful composition entitled “A Musical Portrait of Chuck Close,” intended to encapsulate the artist’s persona and work. The DMA’s Close work is a 50’’ by 38’’ lithograph of a fingerprint Close completed in 1981. I have always admired Chuck Close’s work, and I recently began to explore my own talents for photorealism. I decided to experiment with Close’s gridwork series, having read that Close used this approach “to break things down into a manageable and solvable problem.” For me, as an amateur artist, this statement provided the confidence I needed to begin my project. Follow my progress below to create your own Close-inspired work.

Step 1: Choose a photograph
As mentioned, all of Close’s portraits depict only the subject’s shoulders and head. This tight cropping helps to focus the piece and also encourages closer consideration of the subject’s individual features. I chose the photograph below for my image.
1

Step 2: Crop your image
While this project works best with an up-close photograph, do not hesitate to crop or enlarge an existing photograph. Since I knew this artwork would be given as a gift, I chose an image with two subjects, rather than one. After cropping, however, my photograph becomes a manageable project.
2

Step 3: Divide your image into a grid
Measure the length of your photograph. You want to make sure that the length and width of the photograph is evenly divisible by the size of each unit. For instance, my photograph is 14.5 cm by 10.5 cm so I chose to use 1/2 cm as my base unit. Use a ruler to divide your photograph into units of equal size. I recommend using a pencil so that you can correct a line if need be; graphite also shows up better than other mediums on glossy photograph paper.

Hint: The larger you make your squares, the less time your project will take. Larger squares will make for a more abstract image and smaller will create a more precise, accurate image.
3

Step 4: Transfer your grid to your canvas or paper
To determine the size of your project, first decide on the size of your new base unit. For my project, I transferred the 1/2 cm units from my photograph to 1 cm on my drawing paper. In total, my final project will be approximately 8.5 by 11 inches. Be sure to consider your dimensions carefully, especially if you plan to frame your final composition.
4

Step 4: Start your drawing!
I used colored pencil and drawing paper for my project. These materials are easy and user-friendly. If you are familiar with another medium, feel free to use it. After all, Chuck Close likes to experiment, too!

When selecting your colors, you can opt for accuracy or choose a unique theme or palette of your own. This decision may also affect the style of your portrait. You can use the lines to help you create an accurate, photorealistic transfer of your photograph; or you can use a more interpretive, abstract coloration (see Phil above). I chose the latter process. For this process, color each square as an individual unit, independent of the units around it. Don’t worry, it will all add up in the end!

It is easiest to begin in a corner and then work your way up, row by row. You may also want to start with something easy, like the shoulders or clothes before attempting to work on the face. Be patient. You do not want to rush and accidently transfer the wrong section of your photograph. If you get lost, count your square units to get you back on track.
5

Step 5: Don’t give up
Depending on the number of squares in your artwork, this may be a long process. My picture took me about 16 hours to complete. If you are frustrated, step away and come back to your work tomorrow.

This activity can also be simplified for children. You can choose a simpler subject and/or divide the paper into larger squares. Either way, it is a good way to encourage “close-looking” and practice experimenting with colors.

Step 6: Step back, appreciate your work, and put a frame on it
Great work! I hope you enjoyed this project. If you made an artwork of your own or used this activity in your classroom, please share your creations with us below! Also, if you have suggestions on how we can improve this project, we would value your feedback.

Hint: Adding a frame or border to your artwork can really enhance the overall effect!

6

Hayley Prihoda is the McDermott Education Intern, Gallery and Community Teaching, at the DMA.

Creating Connections with Writer Shay Youngblood

John Thomas Biggers, Starry Crown, 1987, acrylic and mixed media on Masonite, Dallas Museum of Art, Museum League Purchase Fund

John Thomas Biggers, Starry Crown, 1987, acrylic and mixed media on Masonite, Dallas Museum of Art, Museum League Purchase Fund

I began research on John Biggers’ Starry Crown, which is on view in the DMA’s Center for Creative Connections (C3), in order to create interactive elements in the gallery for visitors. When I began, it was clear that the symbols and imagery in the painting hold a lot of information that needed to be unpacked. I found that one of the overriding themes in this piece, and other works by Biggers, is the transfer of knowledge by women across generations. The three figures depicted here reference important women in Biggers’ life, and the string that connects them alludes to the sharing of knowledge, traditions and family history through dialogue.

wheniwas

As an art educator, I found it important to help visitors connect with this work of art by considering their own similar experiences. I started by posting prompts like “When I was _____ (age), ______ (an important woman in your life) taught me _________.” The responses were inspiring, sweet and at times comical. These snippets were interesting, but what I really wanted was the great stories that these sentences only hinted at.

Late_ Night_04_19_2013_AG_72

For this, the Center for Creative Connections enlisted the help of DMA Writer-in-Residence Shay Youngblood. During Late Nights, Shay interviewed visitors about family traditions and lessons they learned from important women in their lives. We chose a handful of stories from the dozens collected, and then Shay reimagined them through the lens of a creative writer and presented them at the January 2014 Late Night. Visit DMA.mobi and enter stop number 125 to listen to our visitors’ stories.
Shay
ShayStarryCrown

Jessica Fuentes is the C3 gallery coordinator at the DMA.

Searching for Chanel at the DMA

When Wendy Reves donated a massive collection of over 1,400 objects to the DMA in 1985, it was already known that a few large furniture objects, like the dining table, originally belonged to Coco Chanel. Recently, we began a new quest to see what other objects might have belonged to Mlle Chanel that are currently in the DMA’s collection. To do so, we looked at old photographs from the 1930s and 40s, when the designer lived at Villa La Pausa, in southern France, and tried to match furniture in those photos to what we have today in the Reves Collection. When we found matches, we knew that the objects were left behind by Coco Chanel when she sold La Pausa to Emery and Wendy Reves in the early 1950s. Here are a few examples so you can go see for yourself.

The Entry:
entry

This chandelier was originally in Coco Chanel’s bedroom, hanging above her bed. Like most people who move, Mlle Chanel didn’t feel the need to take the light fixtures in her home with her. Wendy Reves, however, decided this could not stay in her new bedroom and moved it to the entryway of her home.

hanel’s Bedroom at La Pausa, with the chandelier now in the Reves entry and the desk at the right now serving as a buffet table in the Reves Dining Room.

Chanel’s bedroom at La Pausa, with the chandelier now in the Reves entry and the desk at the right, now serving as a buffet table in the Reves Dining Room

The Dining Room:
dining

This long table was originally used by Coco Chanel as a desk; however, Wendy decided that this could be useful in another way. She unfolded the leaves and moved it into her dining room to act as a buffet table.

The Grand Hall:
clock

Mlle Chanel had a set of two matching clocks, this one, which is now hanging in the Grand Hall, and another that hangs above the fireplace in the Reves Salon. When Wendy and Emery Reves moved in, they enjoyed these gold clocks and kept them in their original locations before donating them to the DMA.

Coco’s Great Hall, with the same sunburst clock on the wall.

Coco’s Great Hall, with the same sunburst clock on the wall.

The Library:
library

Possibly one of the coolest furniture items in the Reves Collection, this chair actually reclines using steel rods that come out of the handles. You can barely see them here, but pulling them out and pushing them in changes the recline of this chair. It is probably not as comfortable as our plush recliners today, but it was still the prototype. This early version of the recliner was originally in Mlle Chanel’s bedroom.

The Reclining Chair in the Library, shown with the rods pulled out

The reclining chair in the Library, shown with the rods pulled out

The Bedroom:
mirror

Originally in Mlle Chanel’s bedroom at La Pausa, this mirror didn’t travel far when Wendy and Emery Reves moved. They opted to keep it in their own bedroom. Interestingly, this is the only item that belonged to Coco Chanel that is in the Reves Bedroom.

The other side of Coco’s bedroom features the mirror now in the bedroom of the Reves collection as well as the reclining chair now in the library.

The other side of Coco’s bedroom features the mirror now in the Reves Bedroom as well as the reclining chair now in the Library.

The Salon:
salon

Of the many items in this room that belonged to Coco Chanel, we think that this yellow couch might have originally been covered in a darker fabric and left behind when she sold La Pausa. Wendy liked the color yellow and recovered the couch to fit her tastes. We can see the similarity between them when comparing the side views.

Chanel’s Salon at La Pausa, with the same couch seen from the side.

Chanel’s Salon at La Pausa, with the same couch seen from the side

Michael Hartman is the McDermott Intern for European Art at the DMA.

Rauschenberg’s President

In honor of Presidents’ Day, we’re  highlighting the one who watches over the Atrium and greets visitors as they enter the Museum. President John F. Kennedy is featured in the DMA’s Robert Rauschenberg painting Skyway, along with other elements of American history in the 1960s.

Robert Rauschenberg, Skyway, 1964, oil and silkscreen on canvas, Dallas Museum of Art, The Roberta Coke Camp Fund, The 500, Inc., Mr. and Mrs. Mark Shepherd, Jr. and General Acquisitions Fund

Robert Rauschenberg, Skyway, 1964, oil and silkscreen on canvas, Dallas Museum of Art, The Roberta Coke Camp Fund, The 500, Inc., Mr. and Mrs. Mark Shepherd, Jr. and General Acquisitions Fund, (c) Rauschenberg Estate/Licensed by VAGA, New York, NY

Kimberly Daniell is the manager of communications and public affairs at the DMA.

Choosing Favorites

Young men voting for their favorite work in the exhibition "Portrait of America," September 30-November 5, 1945 (Photograph from the Studio of Wm. Langley)

Young men voting for their favorite work in the exhibition Portrait of America, September 30-November 5, 1945 (Photograph from the Studio of Wm. Langley)

In 1945 the Dallas Museum of Fine Arts was the seventh venue for the 150-painting traveling exhibition Portrait of America, sponsored by “Artists for Victory” and the Pepsi-Cola Company. The museum invited Dallasites to vote for their favorite work in the exhibition. The winner of the vote was Gladys Rockmore Davis’s Noel with Violin; she was awarded $100 by the manager of the local Pepsi-Cola Company bottling plant.

The DMA is once again asking you to pick your favorite, this time in the Museum’s first Art Madness tournament, inspired by the NCAA Championship game, which will take place in North Texas this April. DMA Friends are currently determining the Sweet Sixteen by participating in the DMA Friends Love a Work of Art activity. Once we have the 16 works determined in late February, the public can vote for their favorites online. Stay tuned for more information on how you can help pick the first DMA Art Madness Champion!

Hillary Bober is the digital archivist at the DMA.

Make This: Adventures in Casting

Jean Arp, "Star in a Dream (Astre en Reve)", 1958, Dallas Museum of Art, Foundation for the Arts Collection, gift of Mr. and Mrs. James H. Clark, (c) Artists Rights Society (ARS), New York/VG Bild-Kunst, Bonn

Jean Arp, Star in a Dream (Astre en Reve), 1958, Dallas Museum of Art, Foundation for the Arts Collection, gift of Mr. and Mrs. James H. Clark, (c) Artists Rights Society (ARS), New York/VG Bild-Kunst, Bonn

In talking with teens about what they’d like to do for upcoming classes, casting was a popular idea that I loved but had no idea how to execute. A metals casting class (see Star in a Dream, above) would be fantastic yet totally unfeasible, so I looked for alternative materials and methods that we could try. Over the past several months, I’ve been researching different techniques to meet the following needs: the project to be cost effective (i.e. cheap); the mold had to set within 45 minutes; the process had to be uncomplicated; and the results had to be pretty cool.

I finally settled on a pretty easy way of making silicone molds from inexpensive, household materials. There are many great online tutorials on how to do this, but I chose to adapt this one. Unfortunately, this silicone mold isn’t pourable, but it sets fast and is really easy to make. Alternatively, you could easily use a self-setting rubber medium like Sugru to make the mold if you’re not concerned about set time. I’m using Mod Melts as the casting material for this project to make things easier, but you could experiment with other things like resin, etc. As with any project, make sure your work area is well-ventilated and observe the safety precautions on the material labels.

What you need (this should yield 1-2 small, 2″-4″ castings):

  • Tube of 100% silicone caulk and caulk gun (VERY important that it’s 100% silicone)
  • Cornstarch
  • Latex gloves
  • Styrofoam cup
  • Disposable plastic tray
  • Non-stick cooking spray
  • Mod Melts and hot glue gun
  • A small object to mold (you could make your own using modelling clay, etc.) that will fit into the Styrofoam cup

IMG_1510

Step 1:

Don your gloves and pour a generous amount of cornstarch along the bottom of your plastic tray. Cut the tip off of the tube of caulk and load it into the caulk gun.

IMG_1511

Step 2:

Squeeze the entire tube of caulk into the tray full of cornstarch. Begin incorporating the cornstarch into the caulk until it starts to form a loose ball. I used two pieces of scrap cardboard to toss everything together until it became a paste, then used my hands. Add more cornstarch as needed. I ended up using about 12 oz. of cornstarch.

IMG_1512

IMG_1513

Step 3:

Continue kneading cornstarch into the silicone ball until it reaches a putty-like consistency and is no longer sticky to the touch.

IMG_1515

Step 4: 

Press the silicone firmly around your object to make your mold. For best results, use an object with a simple shape that doesn’t have a lot of holes where the silicone could get trapped. Press the mold with the object inside into the Styrofoam cup and leave it to set. (Notice that I’ve left a small hole at the top of the mold where I will pour in the Mod Melts.) I had enough material to cast my object and to make a small, secondary mold.

IMG_1516

IMG_1517

Step 5: 

Check the mold after about 45 minutes–if it has completely set, you should be able to slide it out of the cup. Gently remove the object, taking care not to tear the mold. (You may need to carefully cut the silicone to make a two-part mold in order to do this.) You can see in my bigger mold some sections where I ran into trouble with air bubbles. To avoid that next time, I will have to press more firmly into those sections and give my mold a little more time to set.

IMG_1520

IMG_1521

IMG_1522

IMG_1519

Step 6:

Spray the inside of your mold with non-stick spray (optional) and put it back in the Styrofoam cup. Heat your glue gun and load it with the Mod Podge Melts. For the sake of time, I will only cast the smaller mold that I made but I’ll post images of the larger cast on our Flickr page!

Step 7:

When hot, squeeze the Mod Melts into the mold. Once you’ve filled it, give the mold a gentle tap to help any air bubbles settle. Leave it to set.

Once your casting is cool, take it out of the mold. Your results may vary, but don’t worry–if the mold is still intact, you could reuse it to make another casting. And the nice thing about Mod Melts is that afterwards, you can paint your project or draw on it with Sharpie markers, etc.

IMG_1523

IMG_1524

If you know of an interested teen, have them check out our March Urban Armor workshop–we’ll be doing a similar activity but casting in plastic!

Make and be happy!

JC Bigornia
C3 Program Coordinator


Archives

Categories